Connecting a SharePoint Image Library to the Computer Vision API using Microsoft Flow
Cognitive Services allows users to access the power of the Microsoft Cloud in an adaptable, powerful way in order to increase productivity and functionality across their applications. The Computer Vision API is one such Cognitive Service that can analyze an image and return a text description of the image, the color scheme, and image tags along with other values. Microsoft Flow is a quick medium to connect existing SharePoint libraries to services such as the Computer Vision API.
This tutorial walks through the steps of connecting a SharePoint image library to a Microsoft Flow configured to reach out to the Computer Vision API and returns searchable image tags and a summary of the image based on analysis of the photo. Note that the following steps describe the process from the Modern View offered in SharePoint Online.
1. Create a SharePoint library by navigating to Site Contents > + New > Document Library
2. Give the library an easy to remember name such as Computer Vision Images.
3. Add two "single line of text" columns to the library labeled "Image Tags" and "Image Description" . At this stage, your library should look like the example below:
[caption id="attachment_35" align="alignnone" width="705"]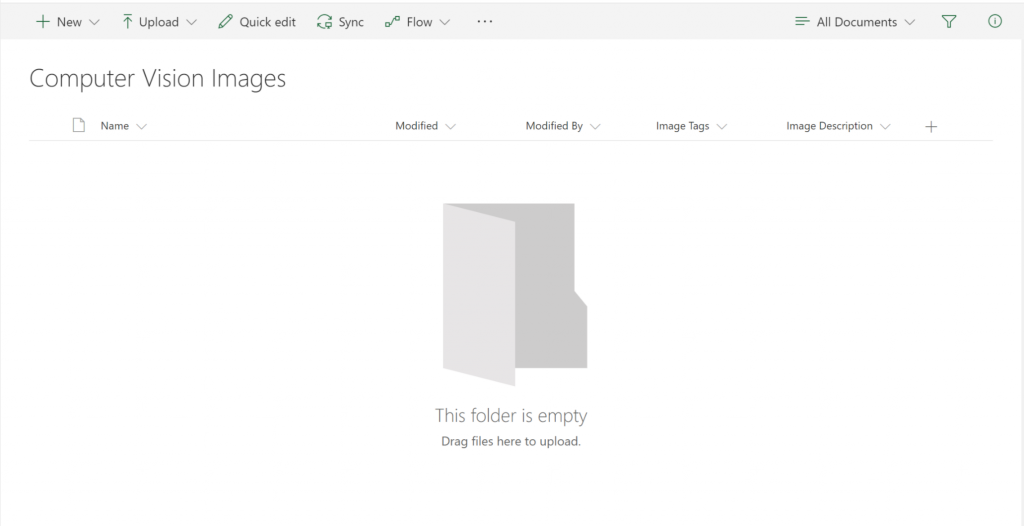 Document library with two custom columns[/caption]
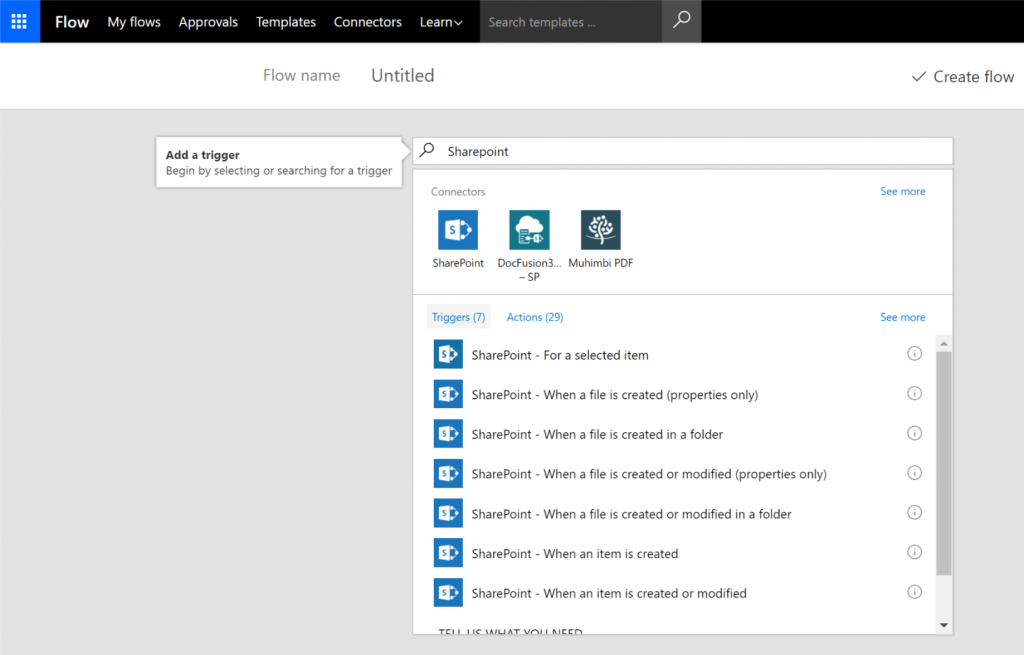
4. Click on the Flow dropdown and select Create a Flow.
On the sidebar, select Show More, then See More Templates and a new tab will open on the Microsoft Flow creation page.
Alternatively, you can navigate in a new tab to flow.microsoft.com and sign in with the same credentials as your SharePoint user who created the new library.
5. Choose Create a flow from blank.
6. In the "Search all connectors and triggers" search box, enter SharePoint then select When an item is created.
7. Give your Flow a name. Here we used SharePoint + Computer Vision.
8. Insert the SharePoint site URL and the name of your SharePoint library. Note that the second box asks for a List name, but we are providing our Library name and selecting "Use Custom Value" .
[caption id="attachment_55" align="alignnone" width="705"]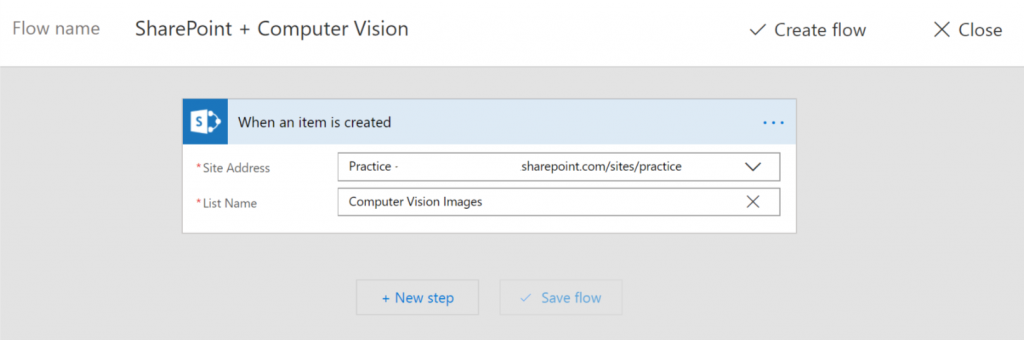 Choose when an item is created[/caption]
9. Add a step and select Initialize Variable. Set the variable to type string and name it ImageDescription. Do the same process for a variable named ImageTags.
[caption id="attachment_65" align="alignnone" width="705"]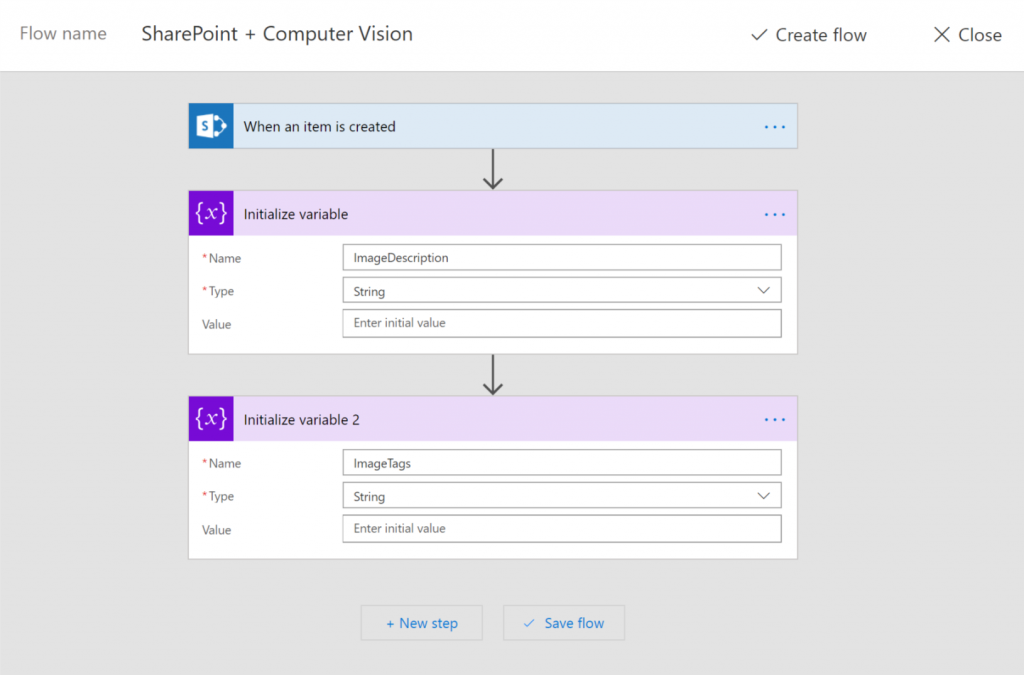 Initialize Variables[/caption]
10. Get File Content and choose Identifier from the Dynamic Content pop-up as the File Identifier.
[caption id="attachment_96" align="alignnone" width="704"]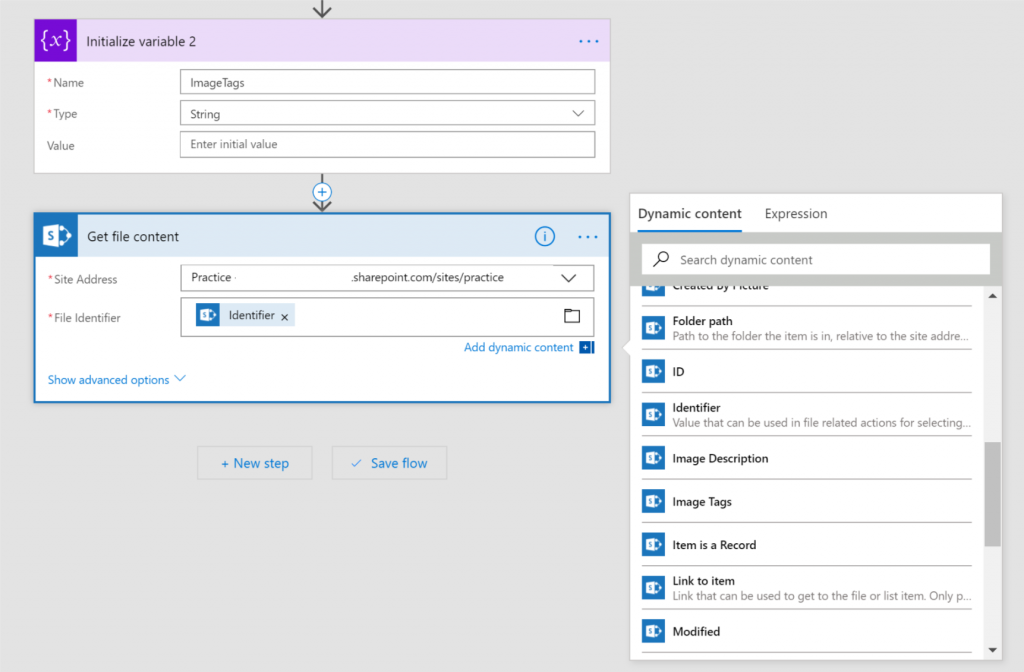 Get file content[/caption]
11. Computer Vision API - Analyze Image. Set the Image Source to Image Content and the Image Content to the dynamic option File Content. The first time you use the Computer Vision API connection, you will have to enter your subscription keys for Azure Cognitive Services. See this page with instructions for obtaining these keys.
[caption id="attachment_85" align="alignnone" width="707"]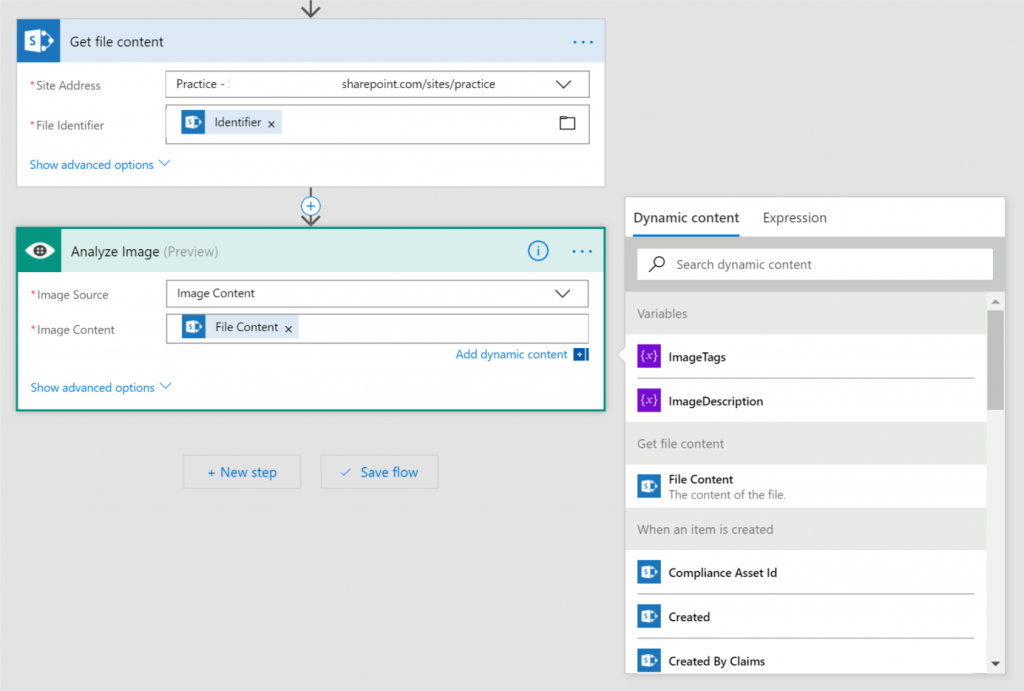 Computer Vision API[/caption]
12. Set Variable. Set the Name of the variable to ImageDescription and the Value to Caption Text under dynamic content. Flow will automatically set this to "Apply to each".
[caption id="attachment_105" align="alignnone" width="705"]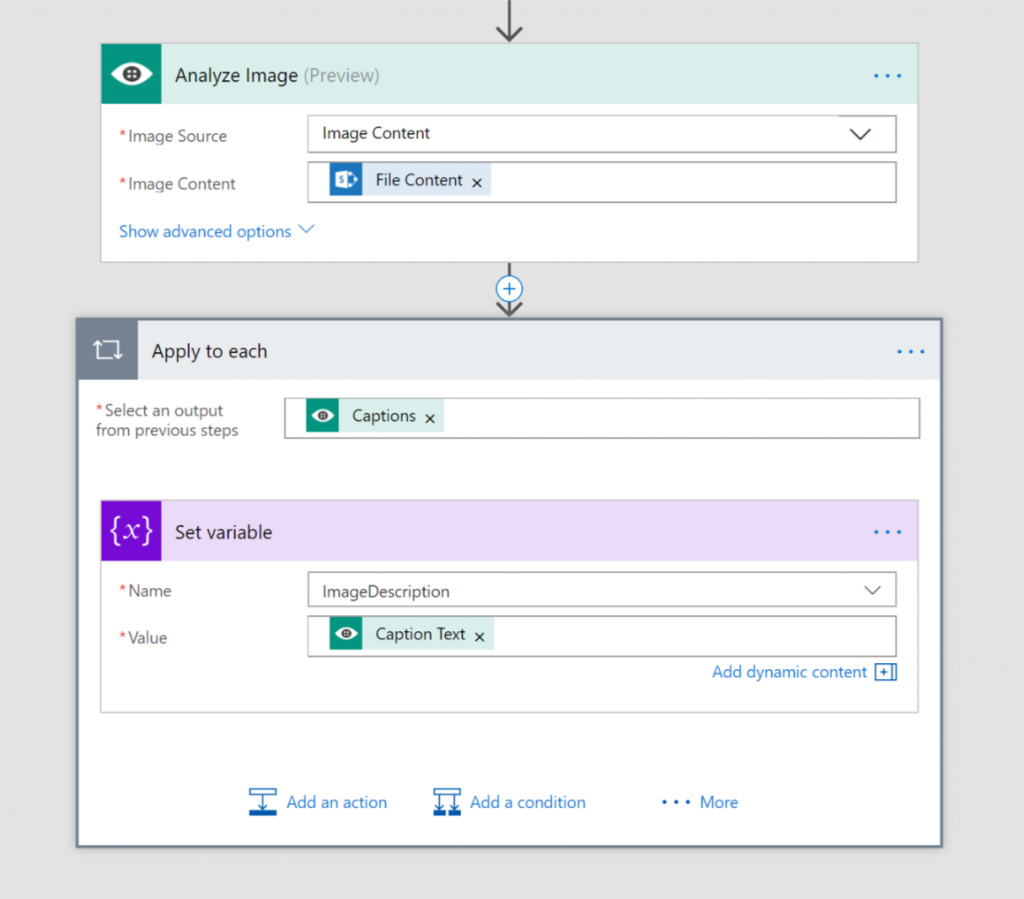 Set variable[/caption]
13. Set Variable. Set the Name of the variable to Image Tags and the Value to an Expression under dynamic content. The expression will convert the tags generated by the Computer Vision API into a string format that can be stored in SharePoint. The expression is as follows:
join(body('Analyze_Image')?['description']?['tags'],' ')
[caption id="attachment_115" align="alignnone" width="704"]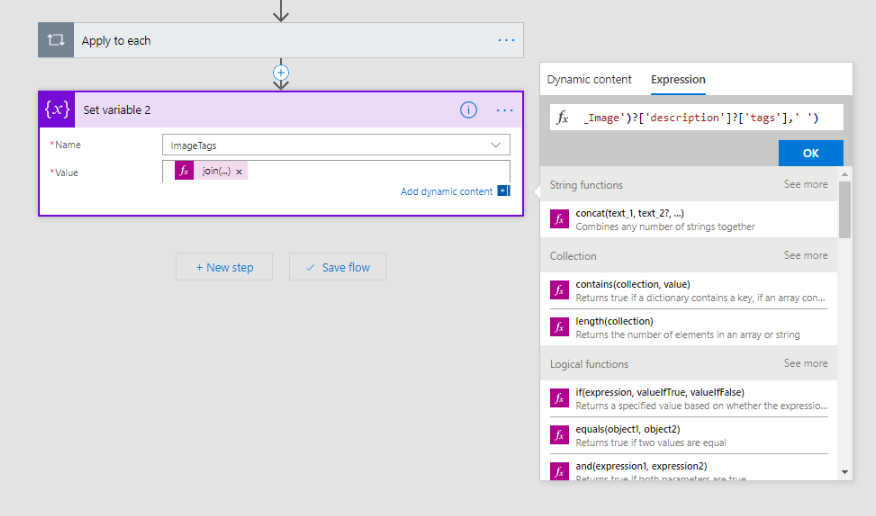 Set the ImageTags variable equal to an expression[/caption]
14. Update item. This step feeds your newly created variables into your SharePoint columns. Enter your Site Address and Library Name again. The Flow will render text boxes corresponding to the columns you have in your library. Match the variables to the proper columns.
[caption id="attachment_125" align="alignnone" width="699"]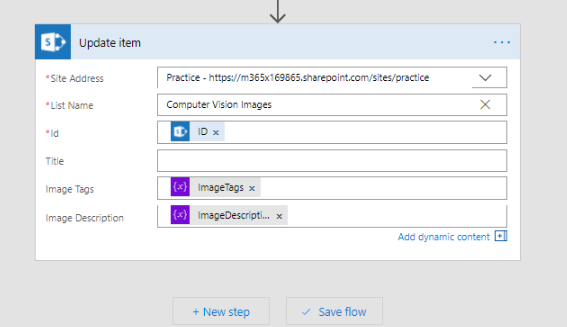 Update item[/caption]
15. Save Flow. Once you have completed the necessary steps on the Flow side, return to your SharePoint library and upload a few images to validate the configuration. The Flow will take about a minute to return values to the Image Description and Image Tags columns. Refresh your browser window to see the updates take effect.
[caption id="attachment_145" align="alignnone" width="704"]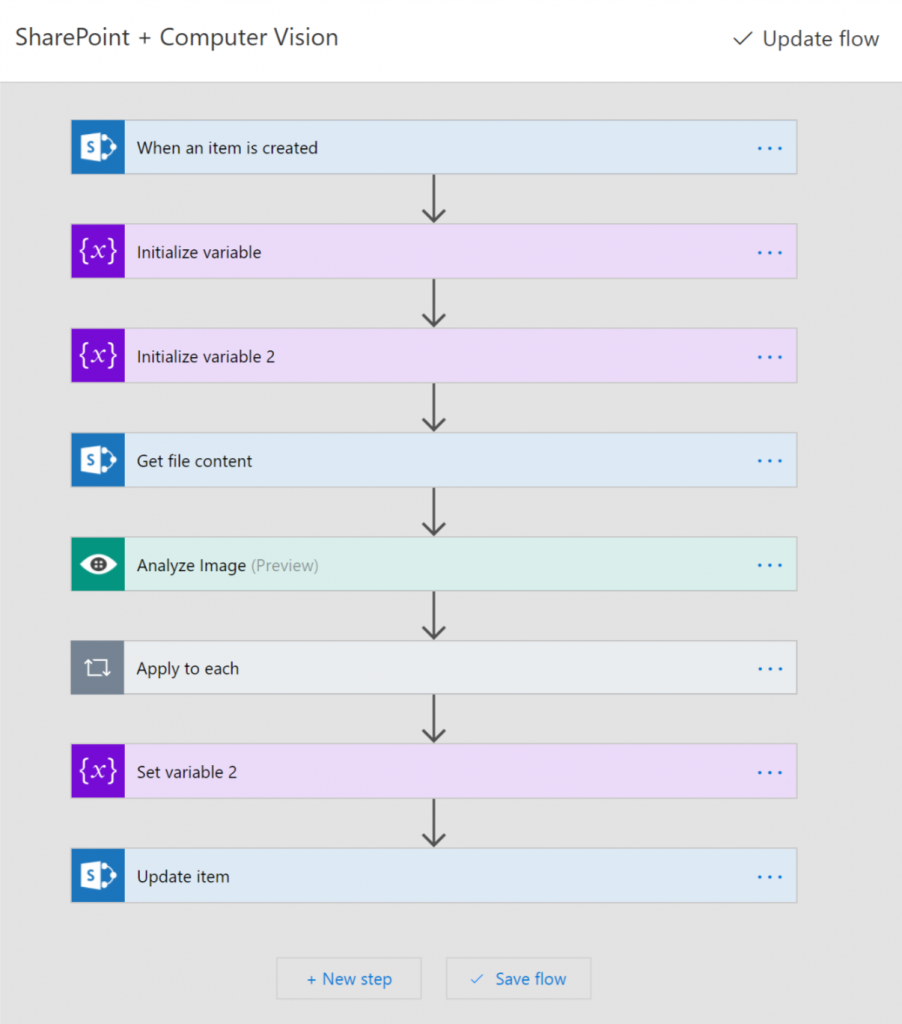 Overview of Flow steps[/caption]
[caption id="attachment_135" align="alignnone" width="706"]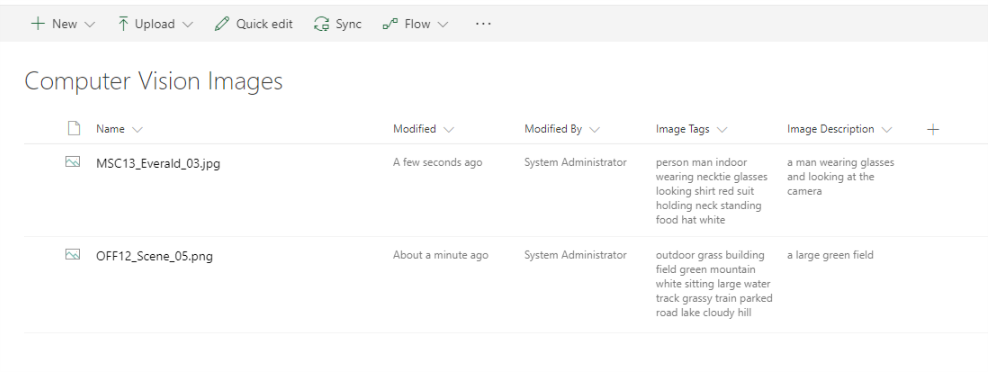 Images have description and tag values[/caption]
Special thanks to Thomas Molbach and Eric Dixon for contributing.