Role of PowerApps, Flow and Common Data Model in Dynamics 365
October 11,2016 was a significant day for Microsoft CRM and ERP customers as Microsoft unveiled to the world the new Dynamics 365 platform. We are delivering on our promise to "Empowering every person and every organization on the planet to achieve more". You can watch the launch video here .
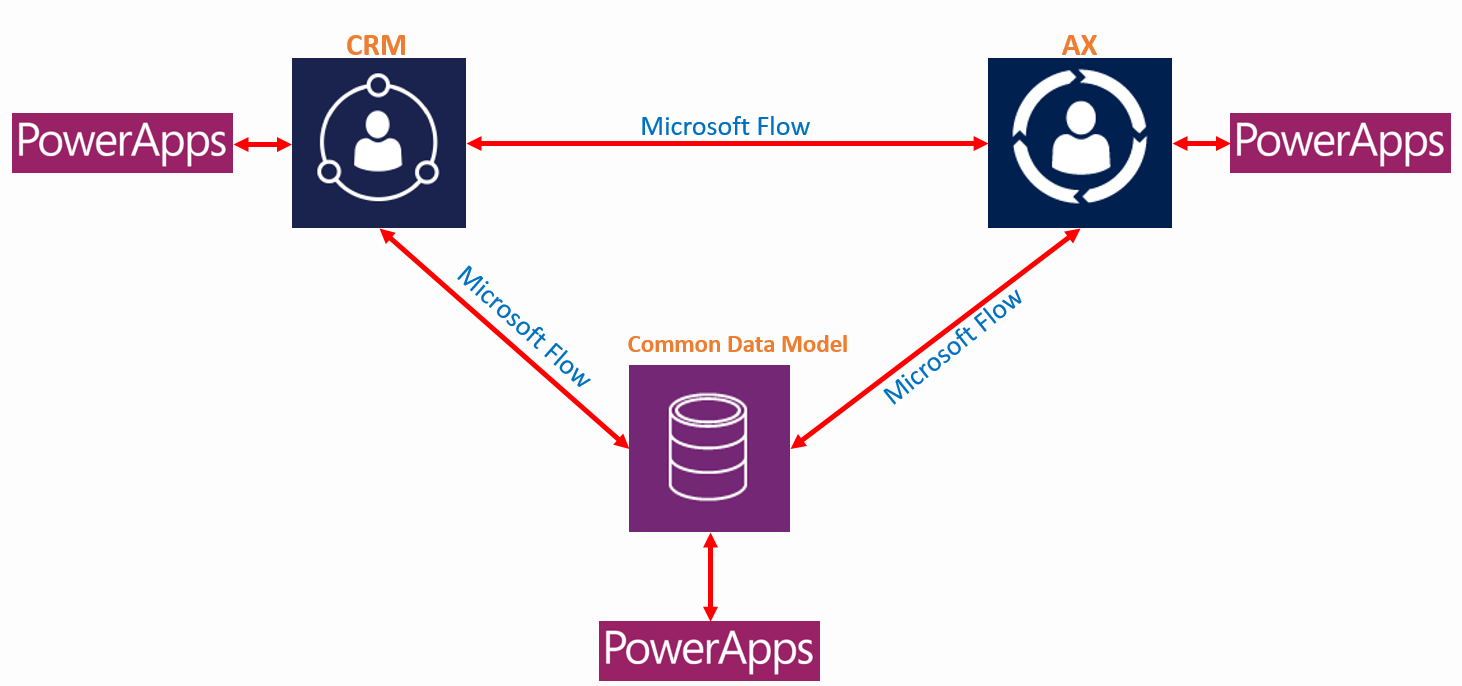
During the launch Microsoft Flow, Microsoft PowerApps and Common Data Model were discussed. This blog concentrates on leveraging these components in the context of Business Applications including CRM and ERP.
Microsoft Flow
Automating tasks is at the core of any CRM or ERP platform, but when the automation needs to happen between these applications usually technologists turns to built-in connectors / adapters, custom development. All of these solutions takes time, effort and most importantly significant investment. This is where Flow comes to the rescue. Let's take a scenario where we need to send Sales Orders from CRM to AX. (Note: This is not a representation of how Dynamics 365 will be deployed, rather it is a demonstration of Flow functionality )
- Login to flow.microsoft.com (Sign up using your Office 365 account).
- Create a new flow by clicking on the "Create from blank" button
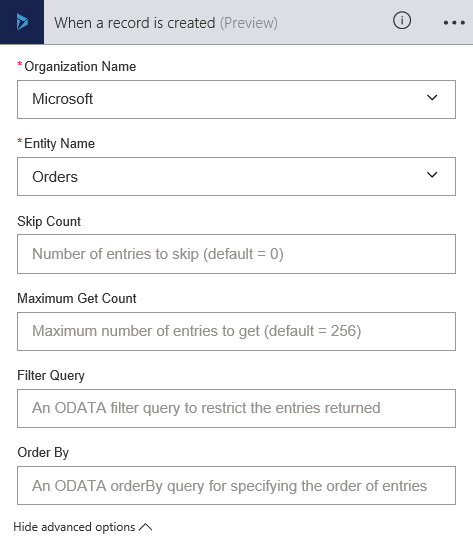
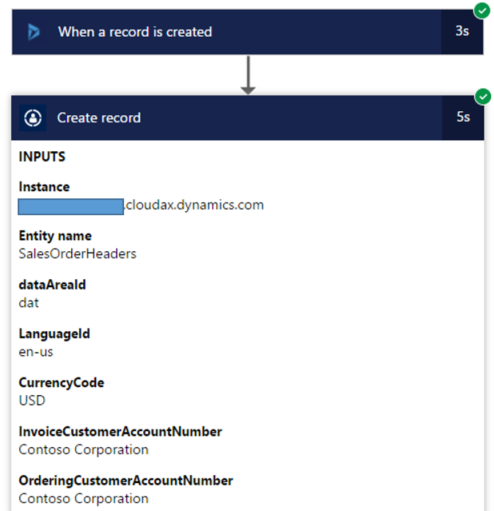
- Create the source flow, in this case our source is CRM. and the flow step below
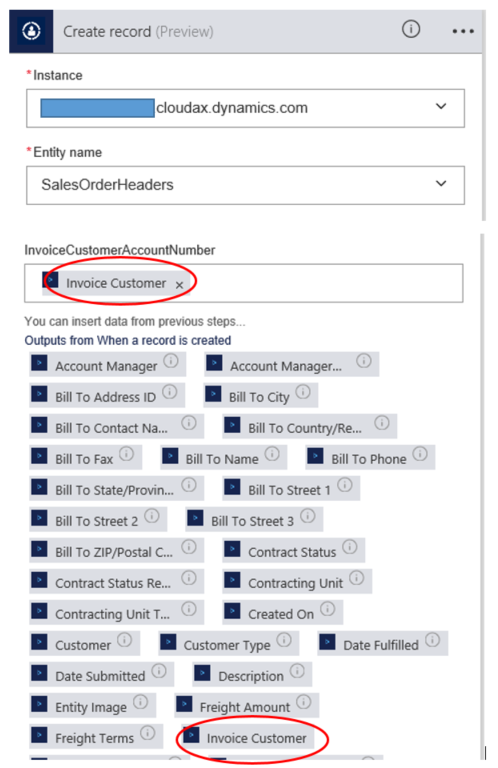
- Create a target flow, in this case our target in AX. The most important thing here is to understand all of the data elements from CRM (the step above) are now available to be passed to AX Sales Orders. Let's take a closer look at that. The Invoice Customer field is being passed from CRM Order to AX Sales Order Header.
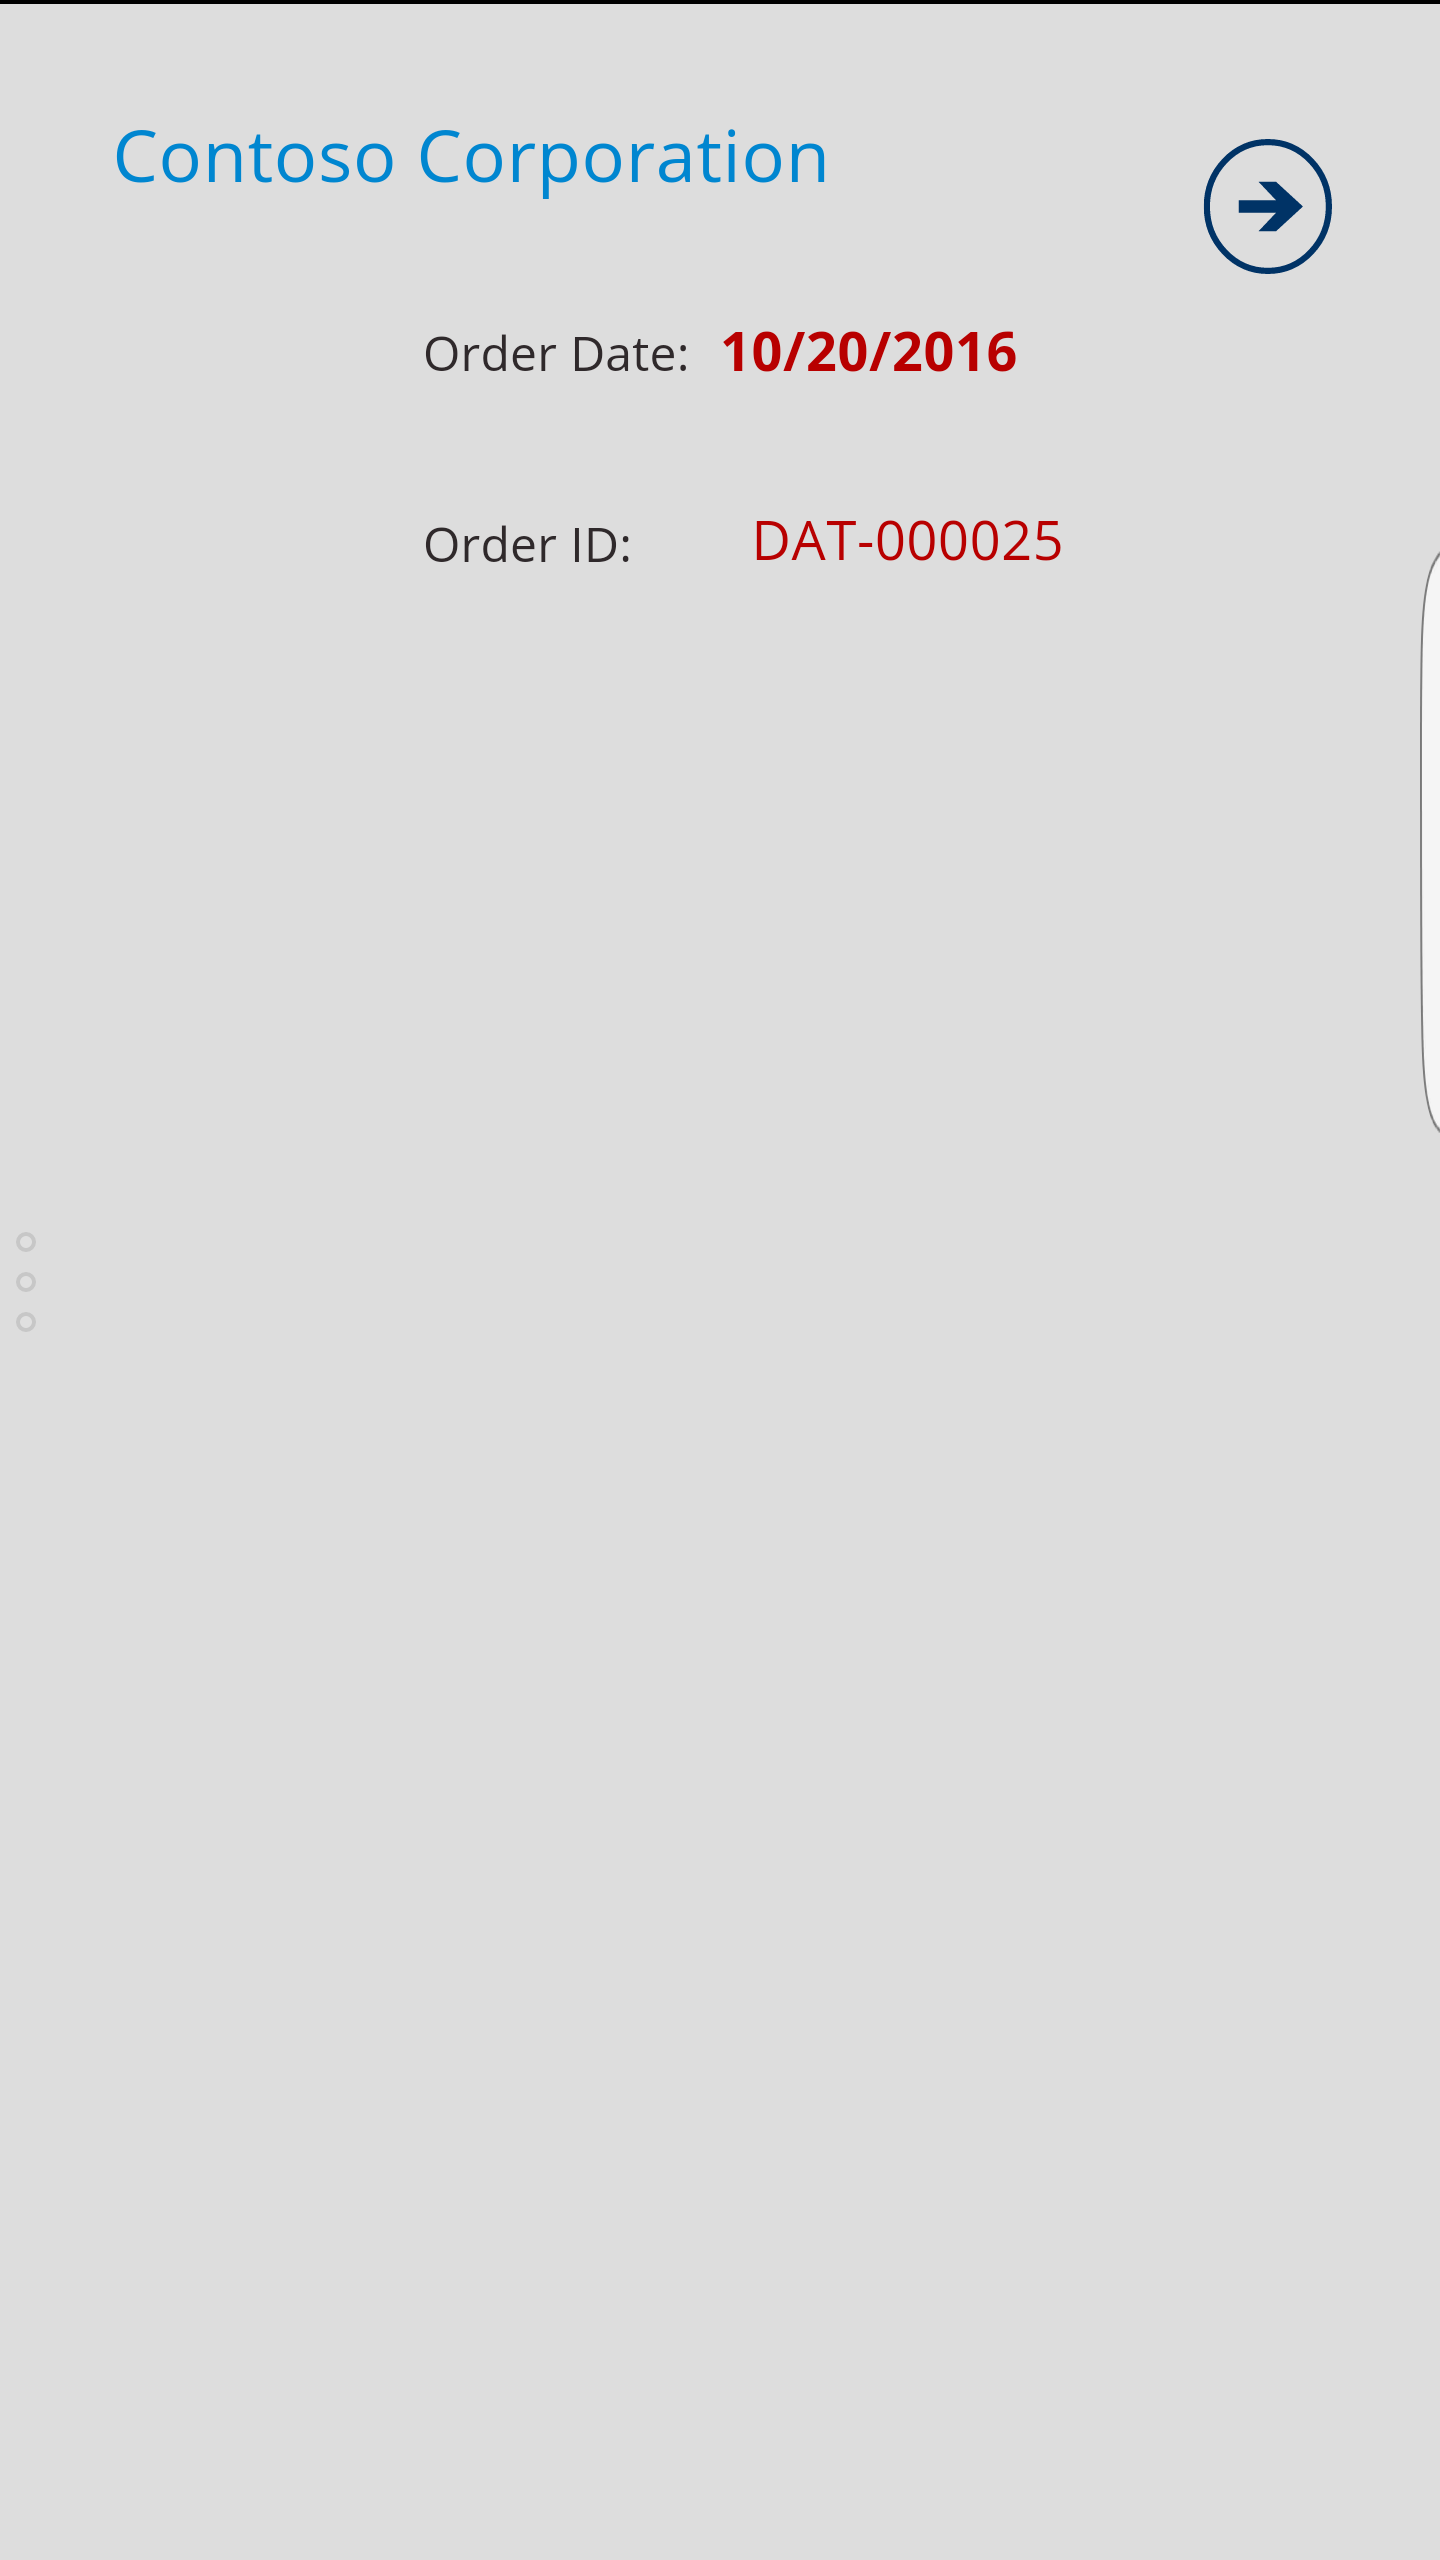
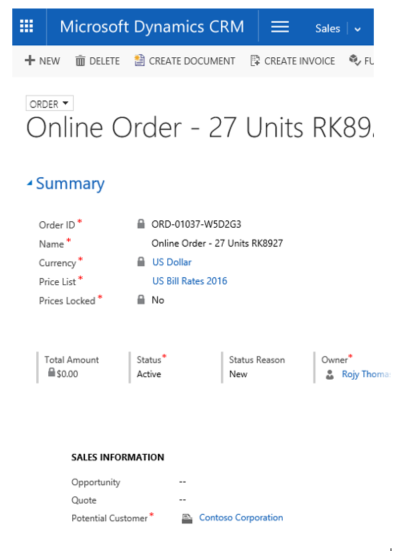
- Lets create a Sales Order in CRM as below
- As you save the order information within CRM within few minutes you can see it process your Flow from CRM to AX, drill down on the information button to see the flow of data.
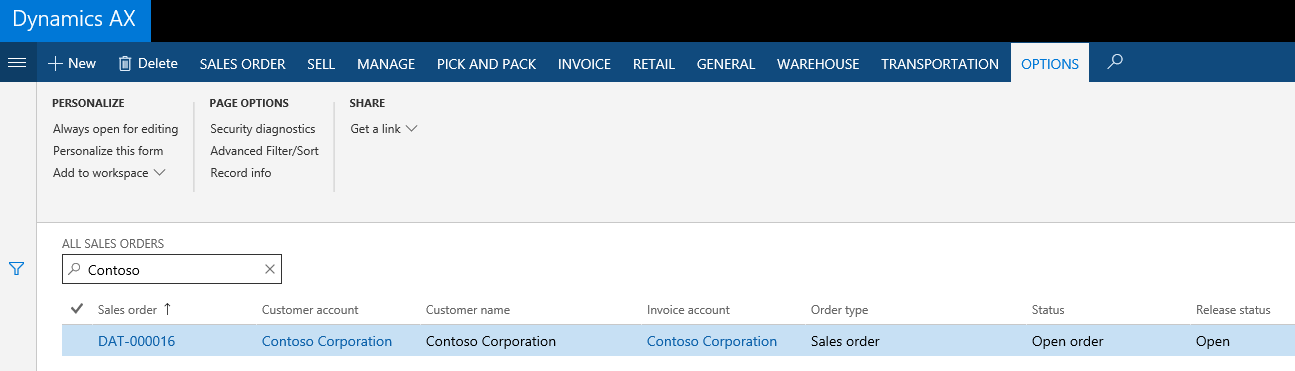
- Let's review this information now in Dynamics AX. As you can see all of the information is passed through the flow to Dynamics AX from CRM .
- Now let's take one step further and pass this information to the Common Data Model.
Common Data Model (CDM)
CDM provides standard business entities where customers can build application on top of these entities. The standard entities expect your data model to be somewhat closer to the out of the box CRM data model. In the example we will create a new Entity called "ERP Sales Orders"
- Login to https://web.powerapps.com (Sign up using your Office 365 accounts)
- Click on Connections click on "New Connections" and create a "Common Data Model" connection.
- Once the connections are set, you should see the Entities panel on the left navigation panel as below.

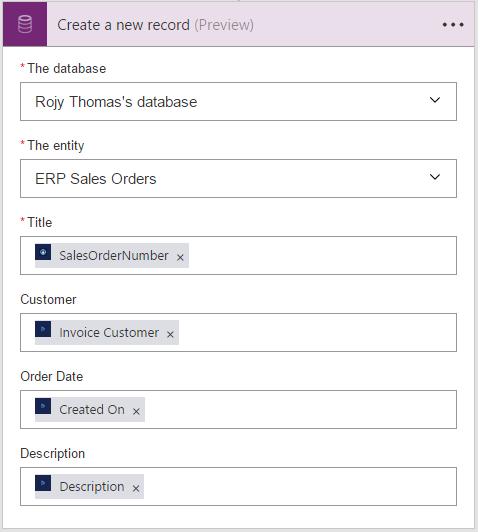
- Click on the "New Entity" button and create the entity fields as follows.

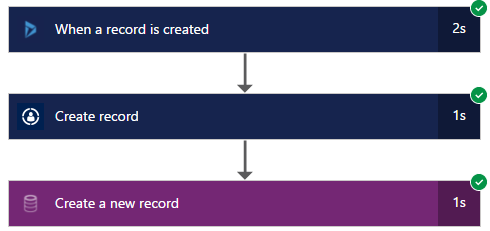
- Once the new entity is created, now its time for us to update the Flow that we built from CRM to AX to include CDM also. Add an additional Step to the flow to write the record to CDM.
- The overall Flow should look like below and an Order being created in CRM will be passed to AX and CDM.
- Now we are ready to create apps that leverage data directly from any of these three data stores. In the example below let's build a simple app that picks up the data from both CRM and CDM.
PowerApps
- Download the PowerApps App from https://www.microsoft.com/en-us/store/p/powerapps/9nblggh5z8f3
- Login using your Office 365 credentials.
- If necessary create your Connections by clicking on the left navigation to create connections to both CDM and CRM Online.
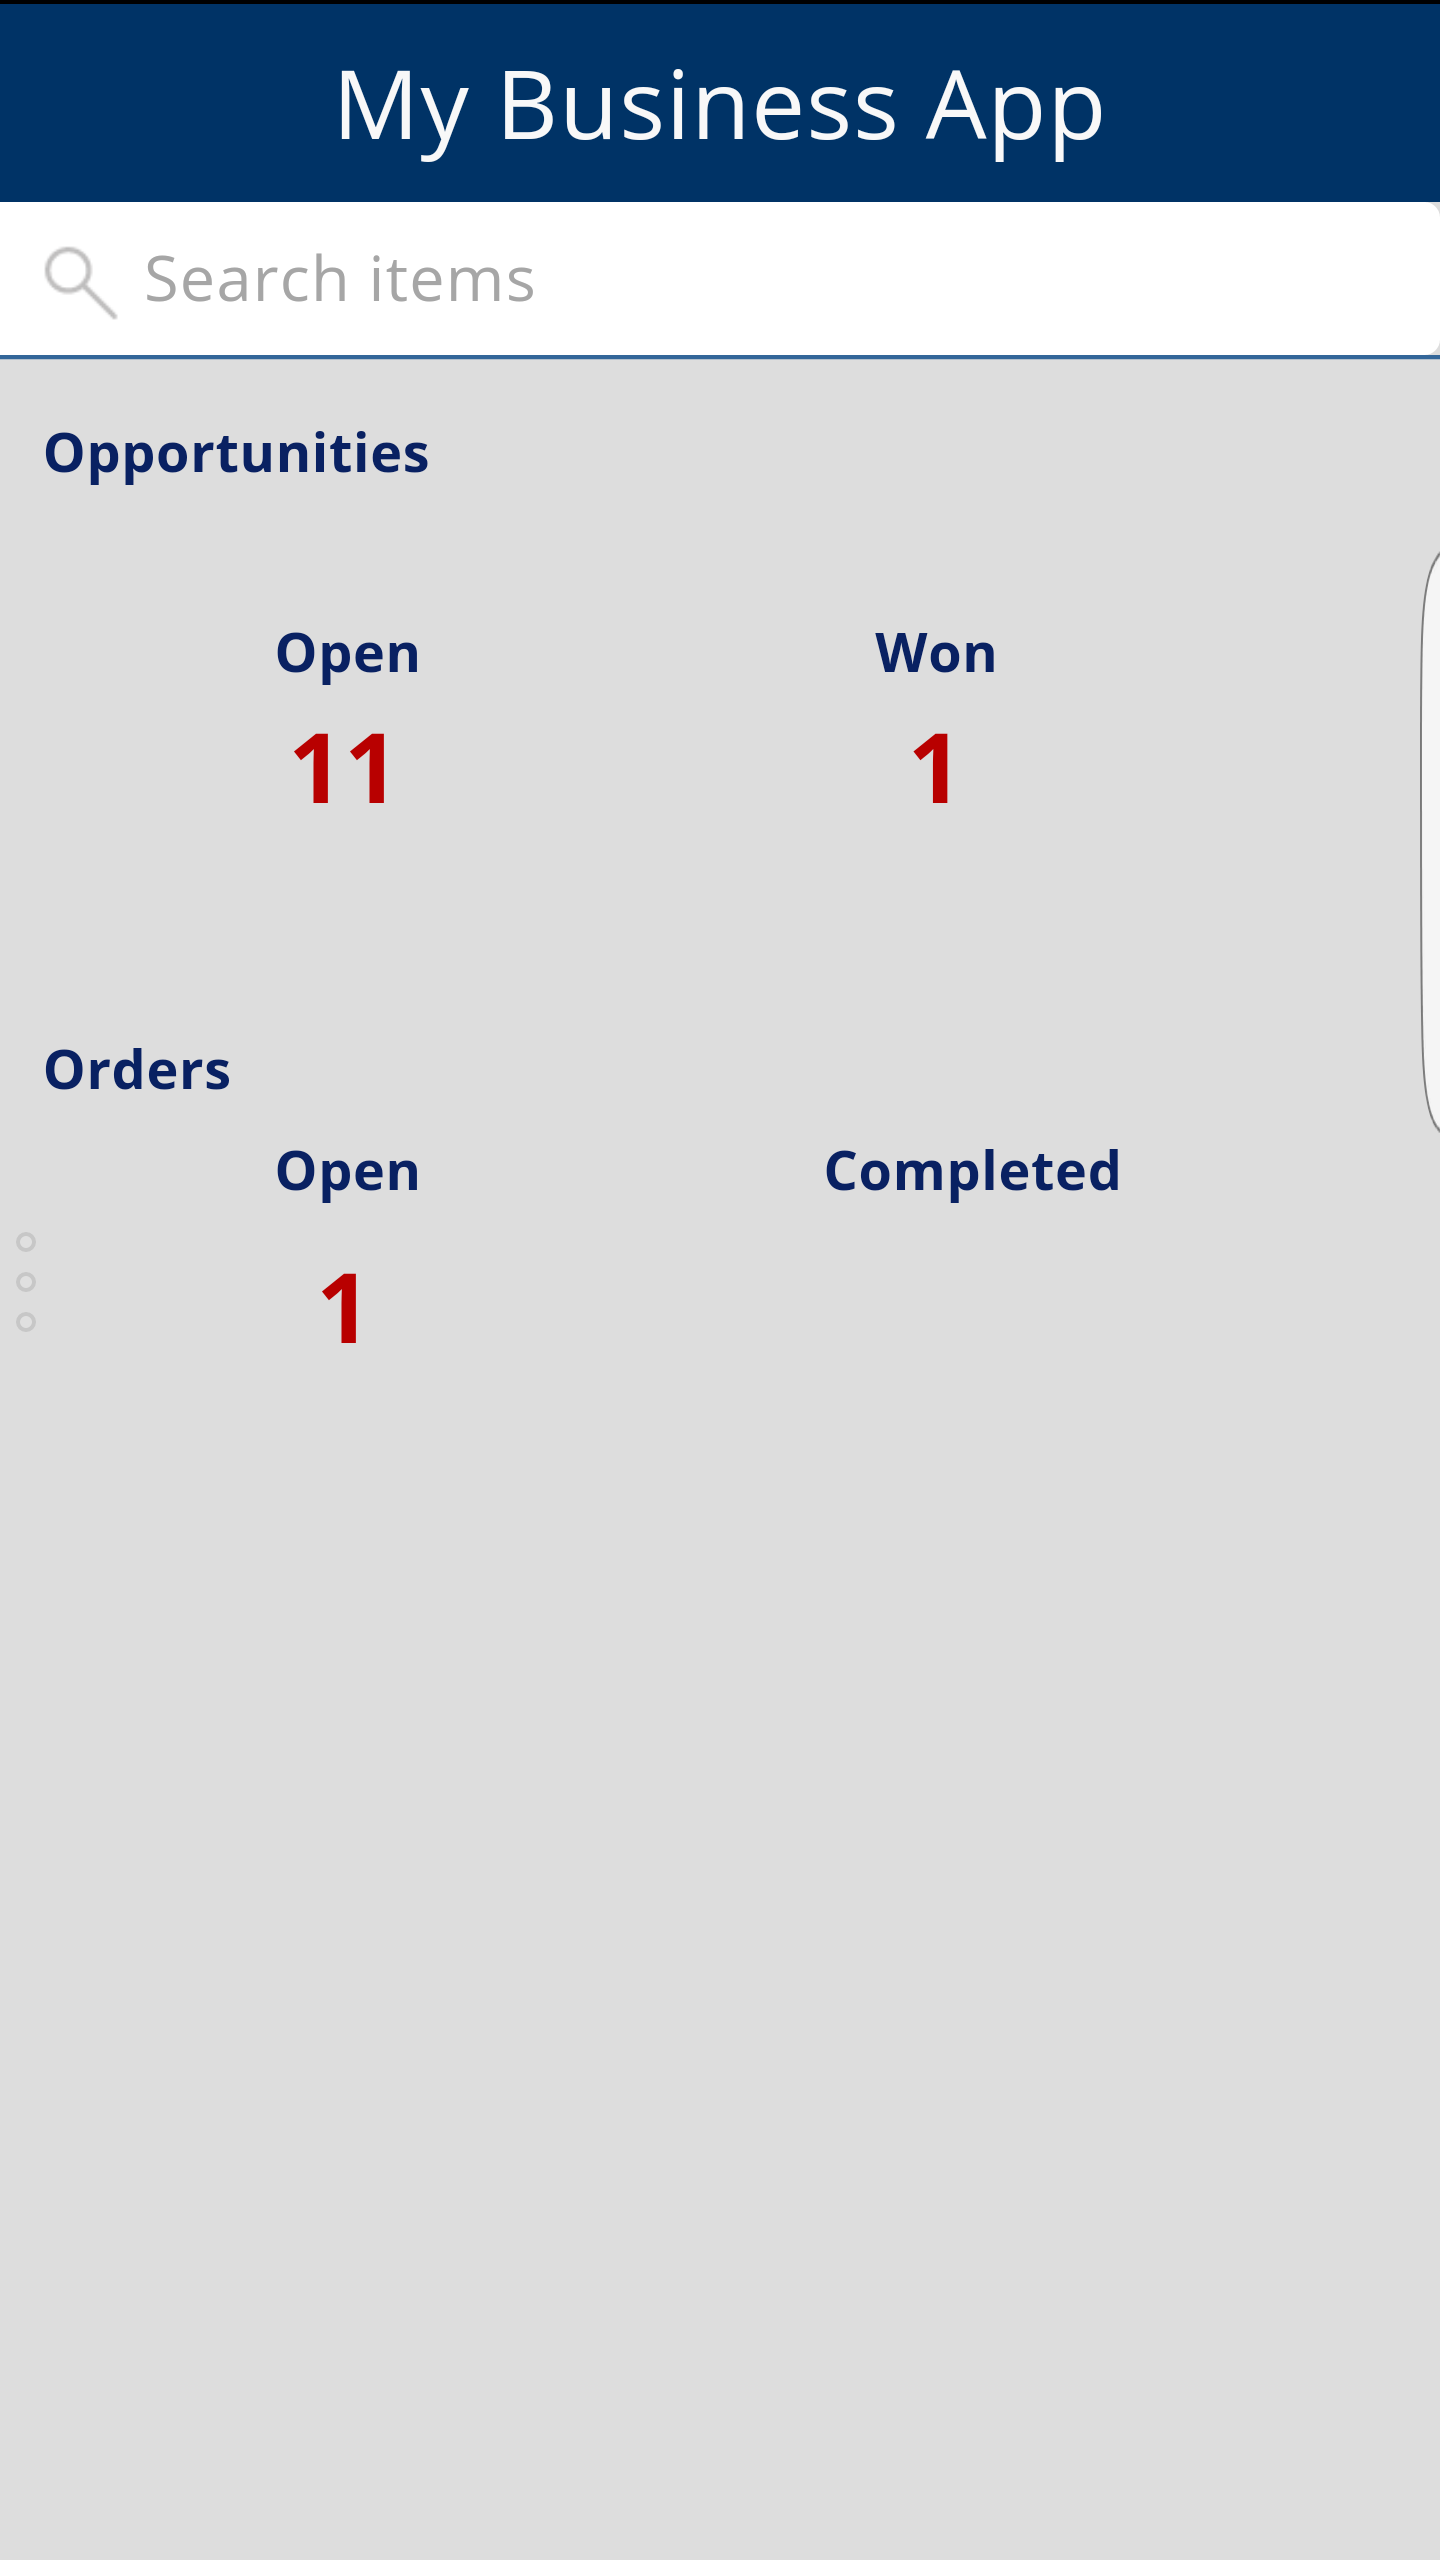
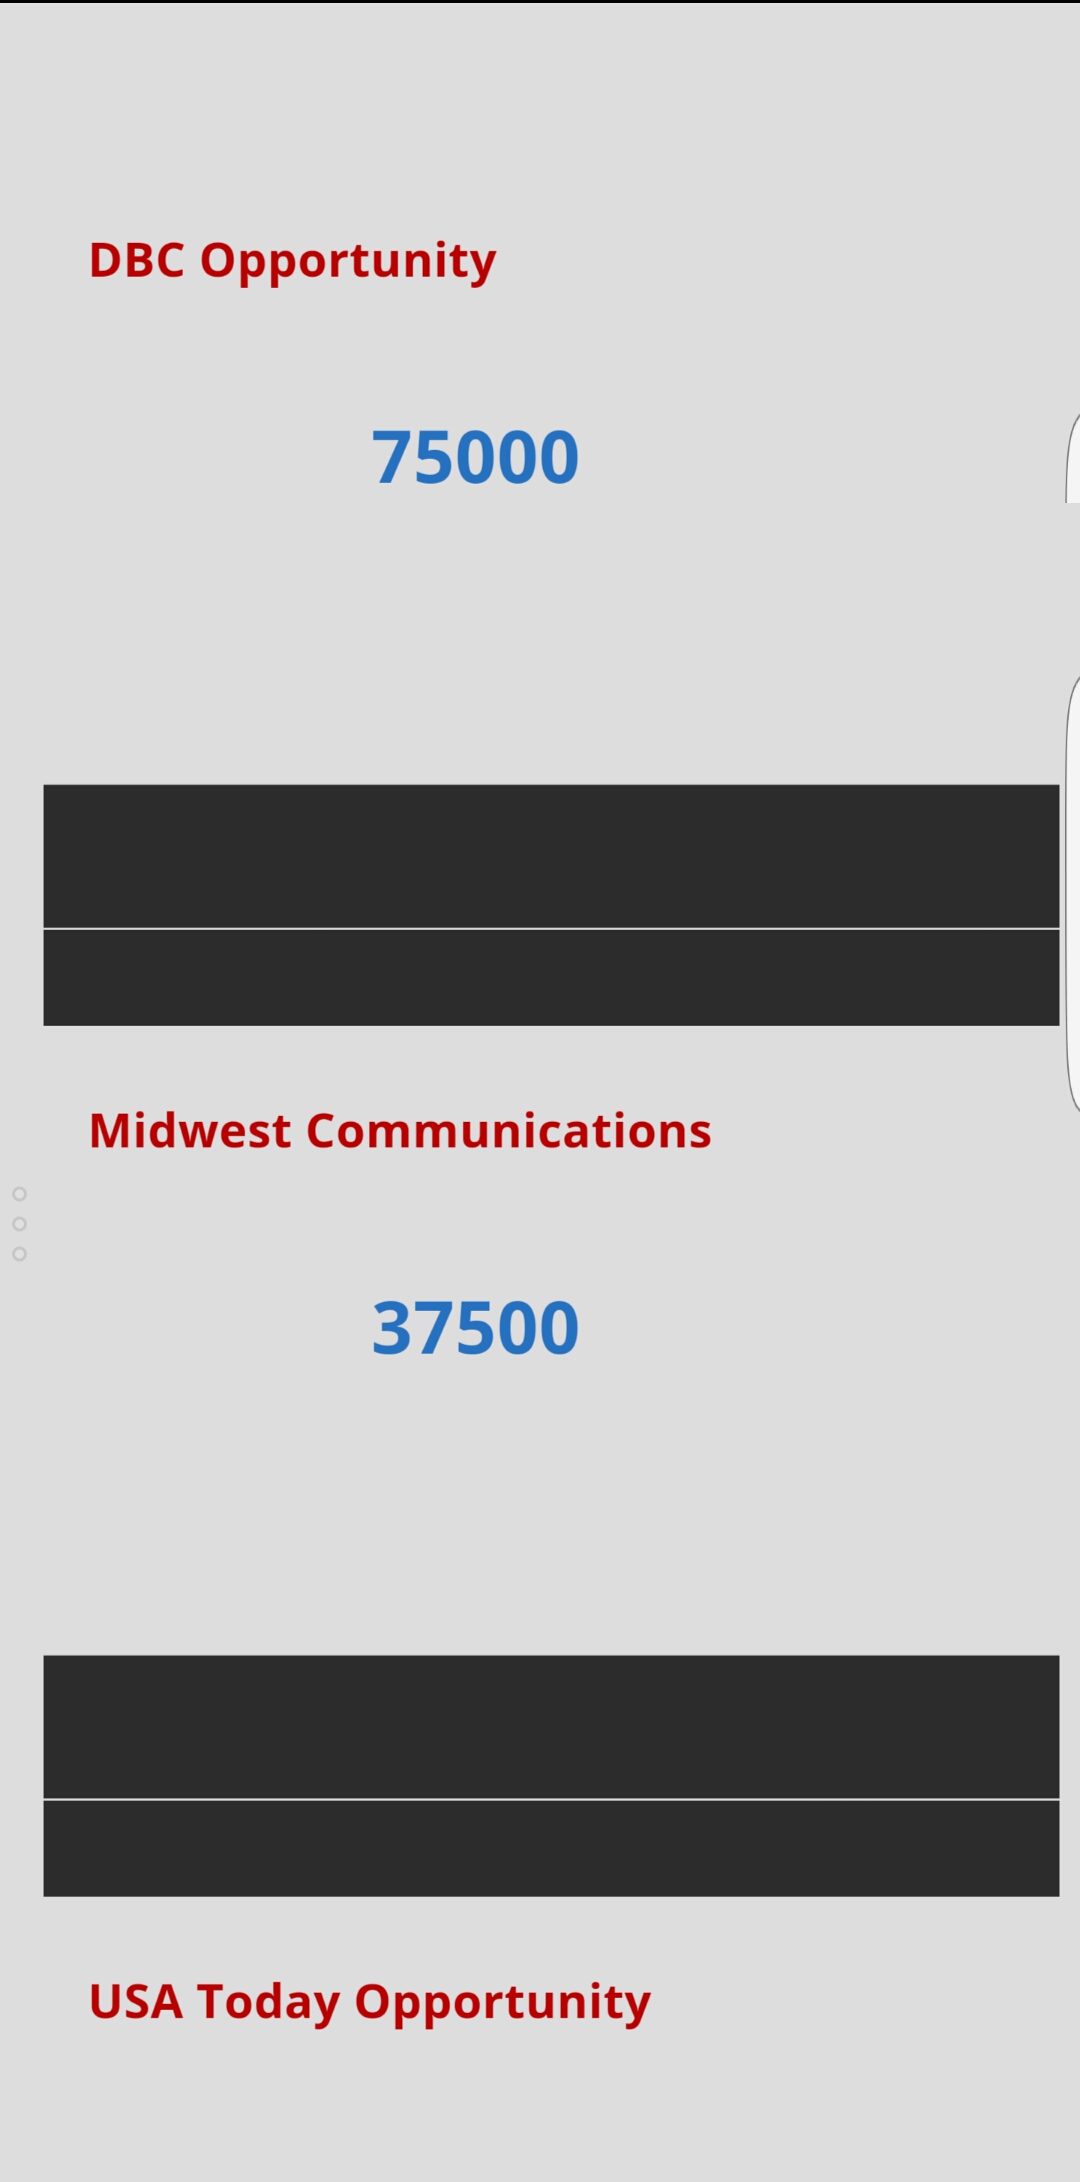
- I created 3 Screens for my app, the first one to show an overview the second one to display CRM Opportunity data directly from CRM Online and third screen from the CDM from the ERP Sales Orders entity we created earlier.
[caption id="attachment_525" align="alignnone" width="211"]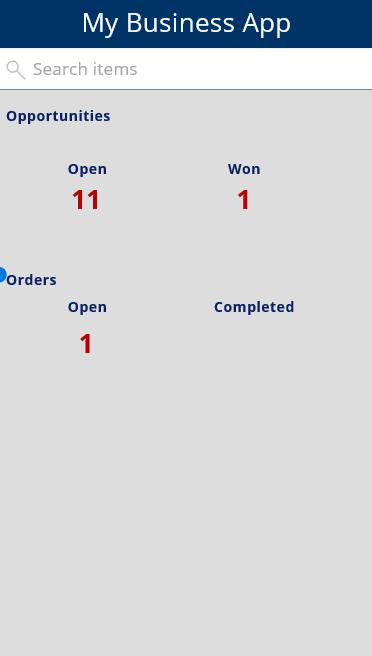 Landing Page[/caption] Landing Page[/caption] |
[caption id="attachment_535" align="alignnone" width="204"]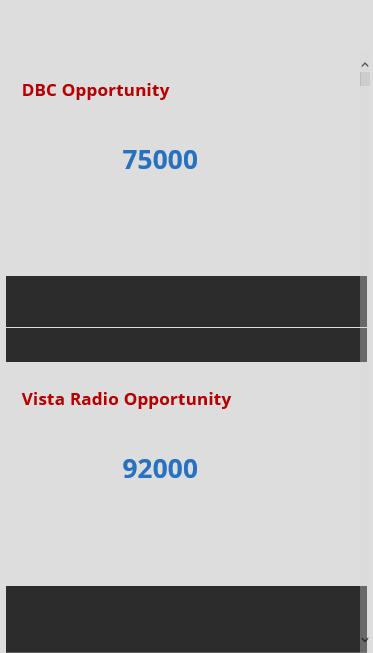 Screen 2[/caption] Screen 2[/caption] |
[caption id="attachment_545" align="alignnone" width="226"]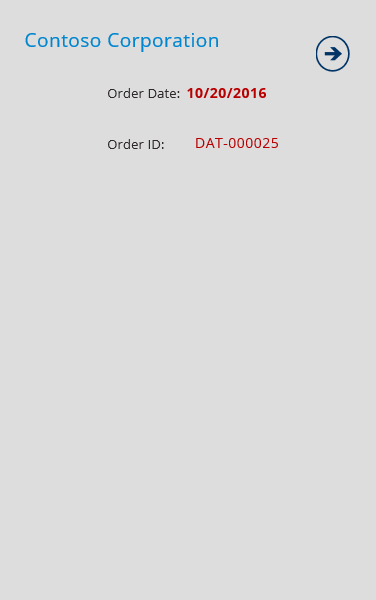 Screen 3[/caption] Screen 3[/caption] |
- Landing Page Properties
- They are Textboxes that have these controls. For example the Count of Open Opportunities are coming from the syntax
- Property Text: Text(CountIf(Filter(Opportunities, !IsBlank(name)), new_flowstatus="Open"))
- Property OnSelect: Navigate(Screen1,ScreenTransition.Fade)
- They are Textboxes that have these controls. For example the Count of Open Opportunities are coming from the syntax
- Screen 1 Properties
- Its a Vertical Gallery with data elements coming from the CRM Opportuntiy data connection.
- Screen 2 Properties
- Its a Vertical Gallery with data elements coming from the CDM ERP Sales Order entity data connection.
- Save the App to the Cloud.
- If you login to your PowerApp from any of the major application marketplaces you will see the application you published.
 __
__