Successful Skype for Business Meetings (Series – Module #6 Video Conferencing and Screensharing )
Back to the top level page
Video Only Conference.
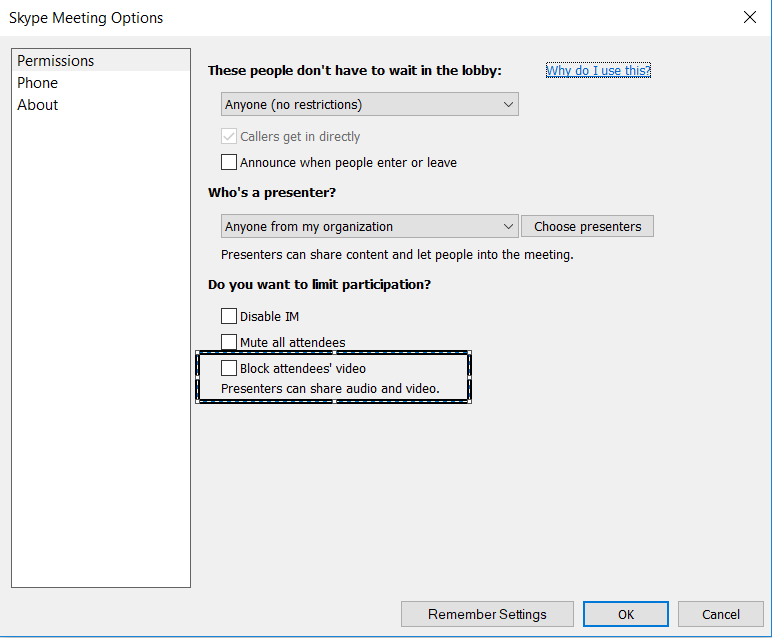
As I have previously stated, all SFBO (Skype for Business Online) conferences have all modalities/features/workloads (pick one) already baked into the meeting – no matter what the creation method. The type of conference you wish to have is simply a choice of using the features along with the meeting options selected. In the audio conferencing sections above, you saw a screen shot where video for attendees was disabled. You will need to make sure that is unchecked should you wish to allow video for attendee – presenters automatically can use video.
The join experience can vary a bit depending on the method in which you created the meeting.
If you are being pulled into a meeting that already has video enabled, the invite might look like this:
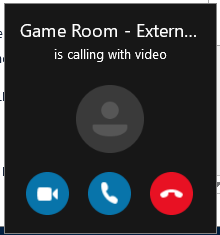
In which case you can answer with video by clicking the  icon, or by audio without video, by clicking the
  icon.
icon.
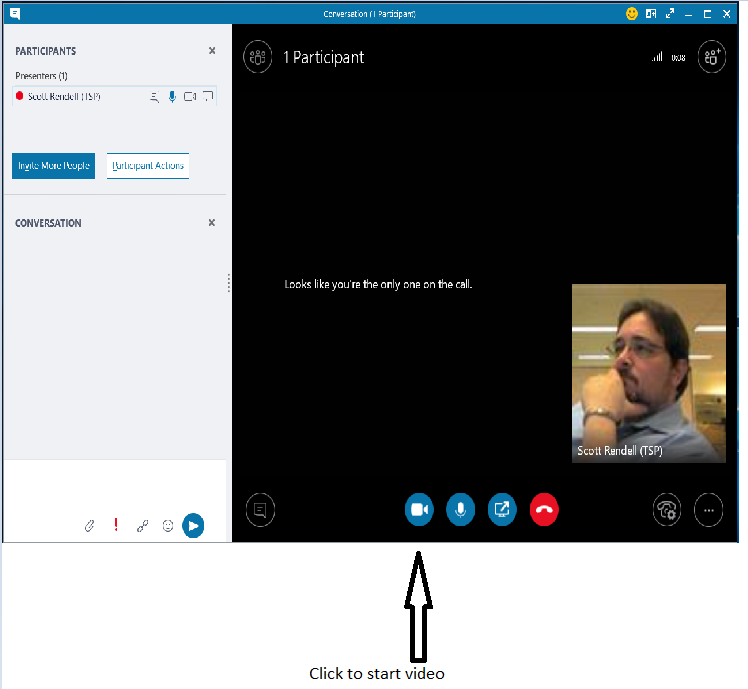
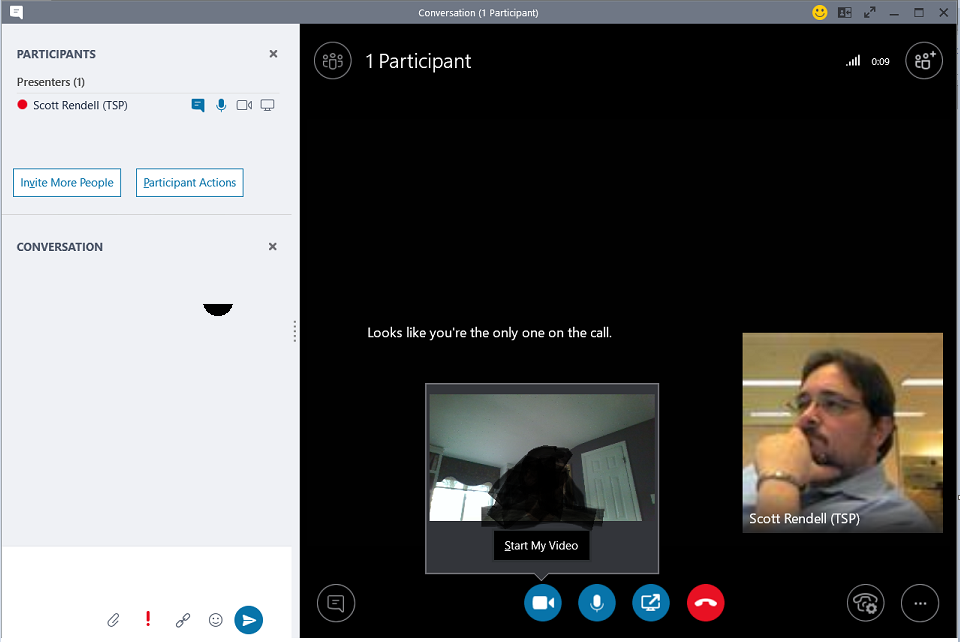
Should you have joined via an email invite, it is up to you to start your video if you choose. As an added bonus, when you click the icon, you will see a preview of your video – you are not yet broadcasting video. This is just a preview so that you can check your surroundings, your hair, make sure nothing is in your teeth etc., prior to broadcasting your video. Once you click the “start my video” area, video broadcast starts.
Once video has started (assuming others have video on as well) you will see your video plus 5 others video stream in what is called the “standing row”.
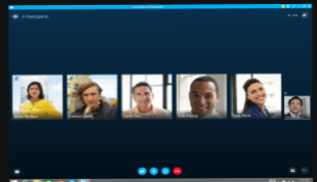
Other presenter/attendees will have smaller, non-active video, icons below the standing row This is called the “sitting row”. If no content is being resented then this is the default display. You will notice that your video is to the right of the standing row.
There are a few options that presenters have at this point.
- The ability to pin participants to the standing row rather than having it switch based on who is talking. This happens at the client level. Each client can customize their standing row. Simply right click a participant’s video/icon and then click the pin option.
- The ability to “lock the video spotlight” by right clicking a single participant and selecting that option thus enlarging that video stream for the entire meeting. This happens at the meeting level and changes all participants client to “lock” onto the single video stream. You must be a Presenter in order to lock users video.
One final Skype for Business Video layout is when someone on the call is using video from a Polycom “round table” device or CX-5500. This is a 360 degree camera system meant for small conference rooms. It has the ability to display a panoramic view within the Skype for Business client. With 5 cameras, it will switch to the camera closest to the active speaker as well as show the panoramic display as the graphic below shows.
Many people I work with have now begun to use video in their meetings, I personally will turn on video for most of my meetings, especially peer to peer. I find that it requires me to be more focused on the meeting as others can see if I am engaged in the meeting or doing other things. This truly helps keep the meetings focused.
Enjoy your video only conference.
Web (Video) Conference Screen Sharing.
When using the SFBO client to join a meeting, you technically are joining a “Web Conference” since SFBO is cloud based and you are going over the “web” to join it. Again, all SFBO meetings have all modalities/features/workloads (pick one) already baked into the meeting – no matter what the creation method.
In this scenario, our meeting has IM and screen sharing. We could easily add audio or video by clicking the corresponding icon.

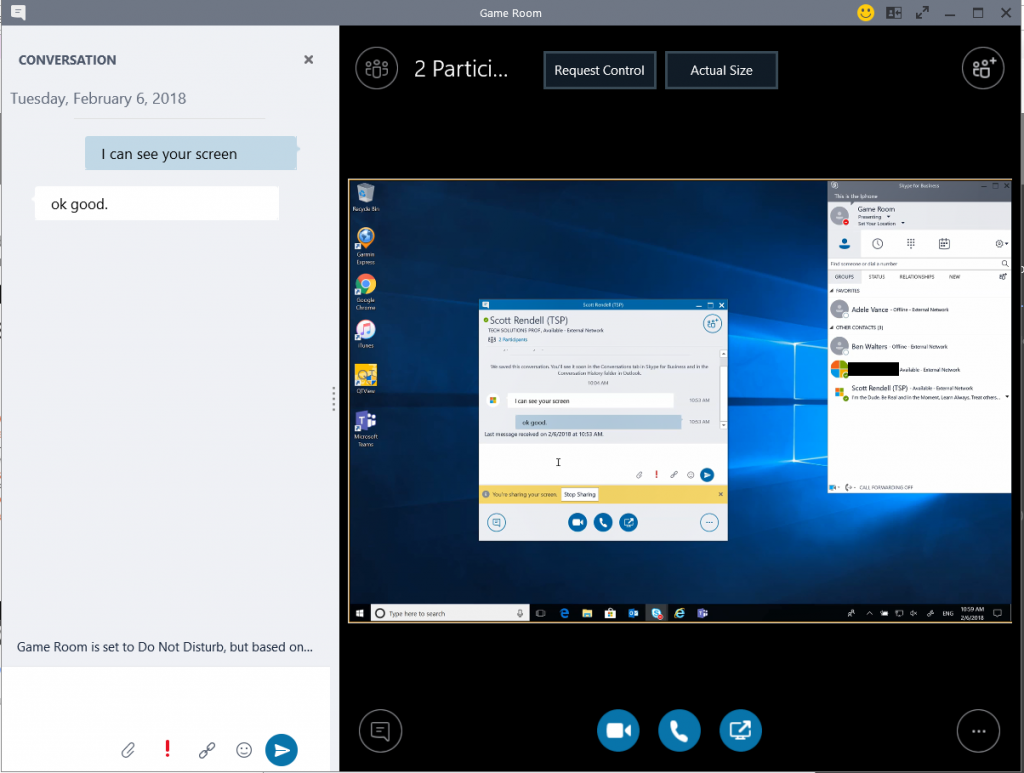
To begin a screen sharing session, click the  icon and choose the screen that you wish to share.
Screen sharing is useful if you want to show others what you are seeing on screen. Some examples might be remote troubleshooting, showing content you cannot give out, or demoing an application.
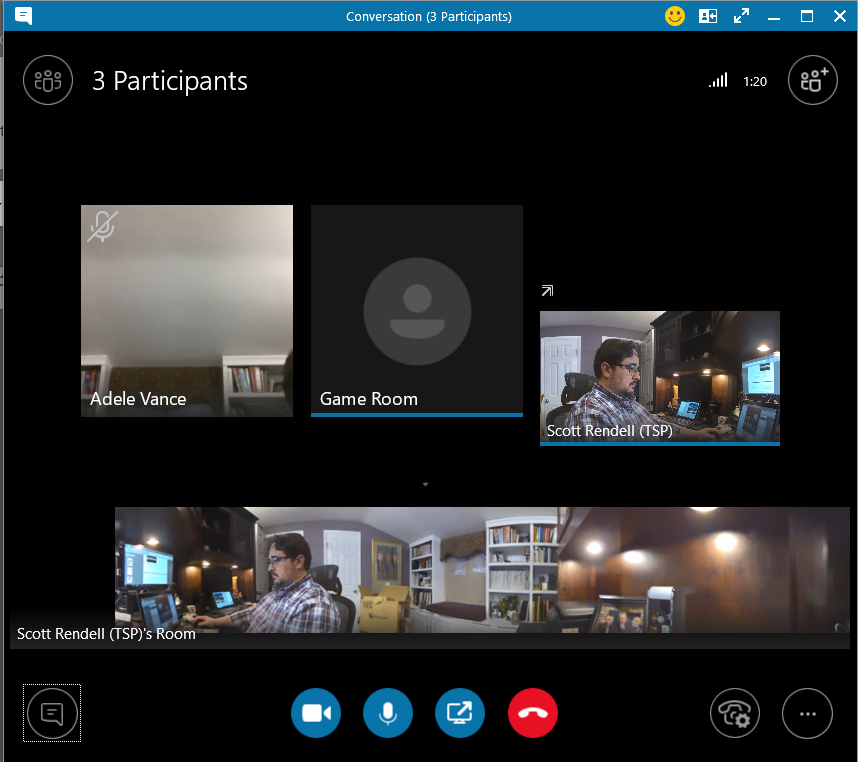
Some notable items on the screen include the IM window and participant window.
These are sometimes enabled by default, but can be turned on and off by clicking the corresponding icon.
 In the upper left hand corner enables/disables the participant list. In the figure above the list is enabled. By disabling it, you remove the list as shown here.
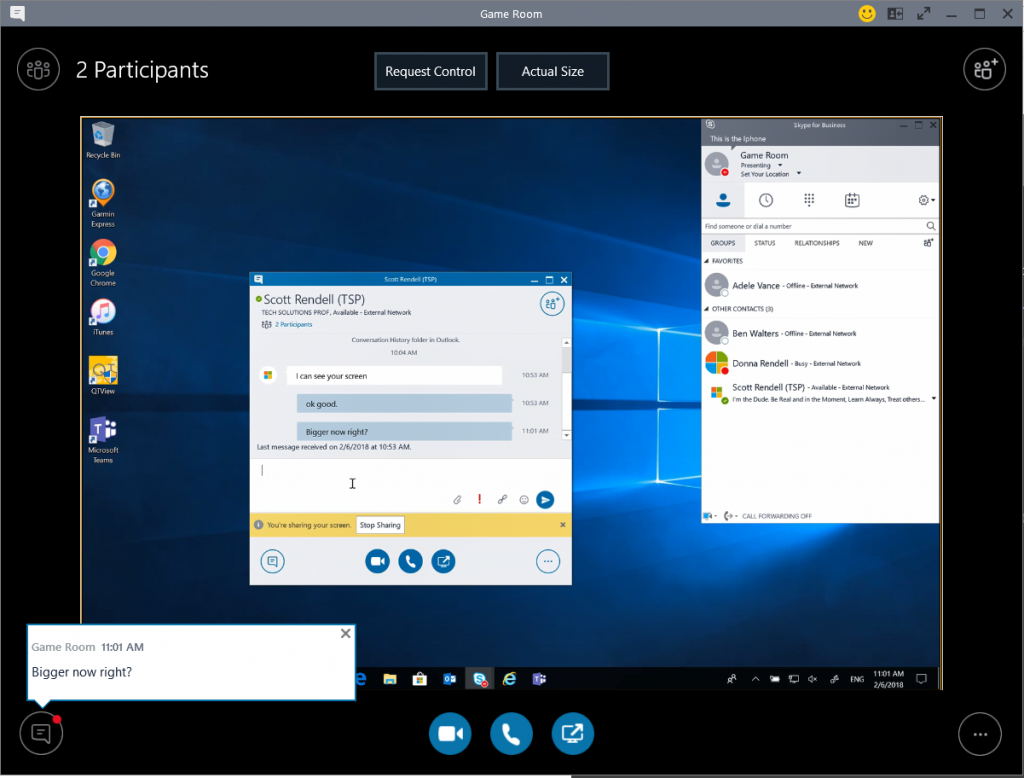
You can also remove the IM window to give yourself a larger view of the presented material.
 removes the IM window, but does NOT disable IM, it simply removes your ability to see it live. You will still get notifications as IMs come in. You will need to re-enable the IM window in order to respond.
As with any IM, or conference, once you are finished, you can simply click the "x" in the upper right hand corner to leave the meeting.
Enjoy your Web Conference with Screen sharing.