写真を加工する Part5.1.1 オーバーレイクラス化
#wp7dev_jp
前回は、レイヤー合成 をベースに オーバーレイ を実装してみました。
さて、今後のことを考えてプログラム設計をちょっと変えてみます。エフェクトの部分だけを別クラス化してみます。
エフェクト系のクラスファイルをまとめるために Effect フォルダを作成します。フォルダを指定したら、「プロジェクト」メニューの「クラスの追加」を選択します。Overray.csを作成します。
Effects/Overray.cs
基本的には、前回の内容をコピペするだけですが、WriteableBitmap で扱わず、画像データそのものである int配列で処理をします。戻り値もint配列を返します。
初めにusing句がたくさんついていますが、System 以外はすべて削除しています。フィルタ処理のための effect はstaticで宣言し、Overayクラスのインスタンスなしに呼び出だせるようにしています。
using System;
namespace Layer
{
public class Overray
{
public static int[] effect(
int[] input1, int[] input2, int width, int height)
{
int[] result = new int[input1.Length];
for (int pixel = 0; pixel < input1.Length; pixel++)
{
uint color1 = (uint)input1[pixel];
uint color2 = (uint)input2[pixel];
uint A1 = (color1 >> 24);
uint R1 = ((color1 >> 16) & 0xFF);
uint G1 = ((color1 >> 8) & 0xFF);
uint B1 = ((color1) & 0xFF);
uint A2 = (color2 >> 24);
uint R2 = ((color2 >> 16) & 0xFF);
uint G2 = ((color2 >> 8) & 0xFF);
uint B2 = ((color2) & 0xFF);
uint A = A2;
uint R = 0;
uint G = 0;
uint B = 0;
//オーバーレイ
if (R1 < 128) R = 2 * R1 * R2 / 255;
else R = 2 * (R1 + R2 - R1 * R2 / 255) - 255;
if (G1 < 128) G = 2 * G1 * G2 / 255;
else G = 2 * (G1 + G2 - G1 * G2 / 255) - 255;
if (B1 < 128) B = 2 * B1 * B2 / 255;
else B = 2 * (B1 + B2 - B1 * B2 / 255) - 255;
if (R > 255) R = 255;
if (G > 255) G = 255;
if (B > 255) B = 255;
result[pixel] =
((int)A << 24) | ((int)R << 16) | ((int)G << 8) | (int)B;
}
return result;
}
}
}
MainPage.xaml.cs
フィルタを実装していた部分は、関数化したのでだいぶすっきりしました。
private void btnEffect_Click(object sender, EventArgs e)
{
//元画像、フィルタ用画像
WriteableBitmap sourcewp1 = new WriteableBitmap(sourceimg1, null);
WriteableBitmap sourcewp2 = new WriteableBitmap(sourceimg2, null);
int wpw = sourcewp1.PixelWidth;
int wph = sourcewp1.PixelHeight;
//最終結果保存用
WriteableBitmap finalwp = new WriteableBitmap(wpw, wph);
//デバッグ用:時間計開始時間設定
DateTime start = DateTime.Now;
int[] resultimage;
resultimage = Overray.effect(
sourcewp1.Pixels, sourcewp2.Pixels, wpw, wph);
Buffer.BlockCopy(
resultimage, 0, finalwp.Pixels, 0, resultimage.Length * 4);
#endregion
//作成された画像を元画像として表示
resultimg.Source = finalwp;
//処理時間表示
ApplicationTitle.Text = "Photo Effect Sample : " +
(DateTime.Now - start).TotalSeconds.ToString() + " sec";
}
こんな感じです。
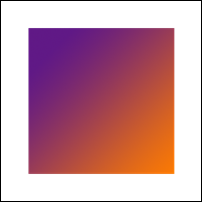
今回はフィルタ用の画像ファイルを変更してみました。フィルタに透明部分を含んでいます。
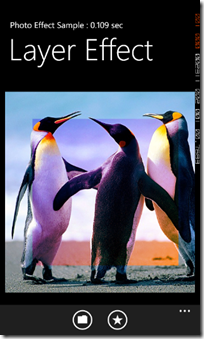
そして、処理結果です。処理時間は0.1秒ほど、ちょっと遅くなった?
関連リンク

