Note
Access to this page requires authorization. You can try signing in or changing directories.
Access to this page requires authorization. You can try changing directories.
UPDATE: Thanks for the feedback in the comments section - we've updated this post to include brand packages with the default color scheme (one with the Microsoft logo, and one without).
- Download the default brand package (without MSFT logo)
- Download the default brand package (with MSFT logo)
Happy Monday everyone! I know folks have been excited about being able to create custom brand packages for Reporting Services since the announcement at PASS last year. And for the past few years, basically every customer I spoke to was looking for this type of functionality. In fact, it was one of the most popular features in the standalone Datazen product. Well, today we’re pleased to announce that with the latest SQL Server release candidate, custom brand packages are now supported in Reporting Services.
Now that brand packages are supported, it’s time for you to make your own. As you’ll soon see, this is VERY easy to do. That’s because the brand package creation experience in Reporting Services has been designed so users don’t need deep css knowledge to create one. Let me show you just how easy it is.
You’ll need the following items to get started -
- Download SQL Server 2016 RC1 (Only RC1 and newer versions of SQL Server 2016 will have brand package support)
- Download a sample brand package (You can use this right away, but I doubt you’ll want to. It is ugly as sin, but there’s a reason why. Just keep reading)
- Download the finished brand package we’ve put together as we walk through this post.
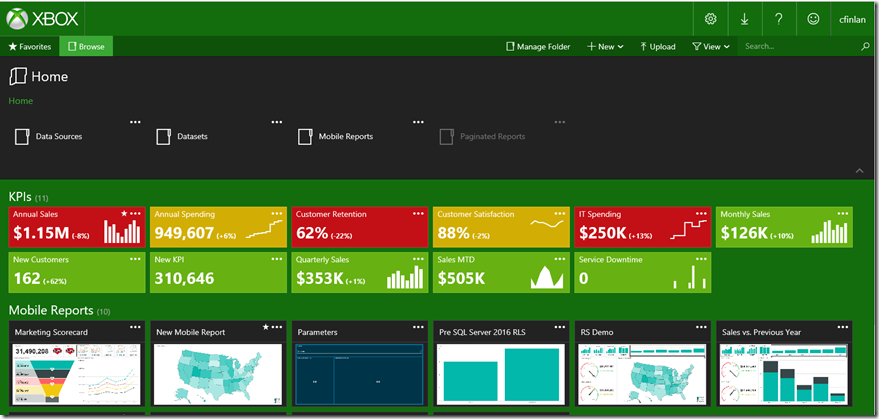
This is what the final product looks like for me.
Pretty cool, huh? Let's get started.
Overview
A brand package for Reporting Services consists of three items and is packaged as a zip file. These items are –
- A colors.json file
- A metadata xml file
- A logo.png file (optional)
You must use these naming conventions for the files included in the brand package, however, you may name the zip file whatever you’d like. Let’s go through these items one at a time as I create the Xbox brand package.
Metadata file
The metadata.xml file allows you to set the name of brand package that you see in Reporting Services, and has a reference entry for both your colors.json file and logo.png file (if applicable).
To change the name of your brand package, change the entry in the XML file title name. It looks like the following item in our sample file –
name="Multicolored example brand"
which means I’m changing it to this in my new brand package
name="Xbox"
Next, to use a logo in your brand package, make sure to update the metadata.xml file to include a reference to a file called “logo.png” in the Contents section.
Example contents section without logo entry –
<Contents>
<Item key="colors" path="colors.json" />
< /Contents>
That’s what my base brand package looks like right now. Since I want to use a logo in mine, I’m going to change it to look like this -
<Contents>
<Item key="colors" path="colors.json" />
<Item key="logo" path="logo.png" />
< /Contents>
Now let’s move onto the biggest part of any brand package – the colors.json file.
Colors
Almost all the work you need to do for your brand package will happen in this file. When the brand package is uploaded, the server extracts the appropriate name/value pairs from the colors.json file and merges them with a master LESS stylesheet, brand.less. This LESS file is then processed and the resulting CSS file is served to the client. All colors in the stylesheet follow the six-digit hexadecimal representation of a color.
The file for RS has two main categories under which items are grouped –
- Interface, which includes items that are specific to the new Reporting Services portal.
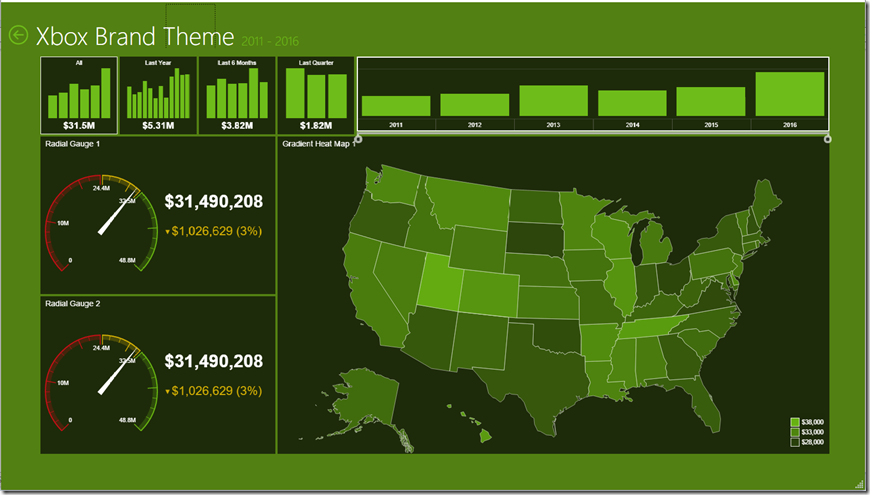
- Theme, which includes items are specific to Mobile Reports you create. Starting with RC2, if you’re using the latest version of the Mobile Report Publisher, when you connect to report server for the first time with the Publisher, a copy of the theme will persist locally with the Publisher and you can use for it any mobile reports you create and publish. An Xbox themed mobile report looks like this, for example -
Now you’ll see why we gave you the sample brand package we did. Go ahead and load that your server now. To do so, you must be an admin in the portal, and you’ll need to follow these steps -
1. Go to Site Settings from the site menu
2. Select the Branding menu
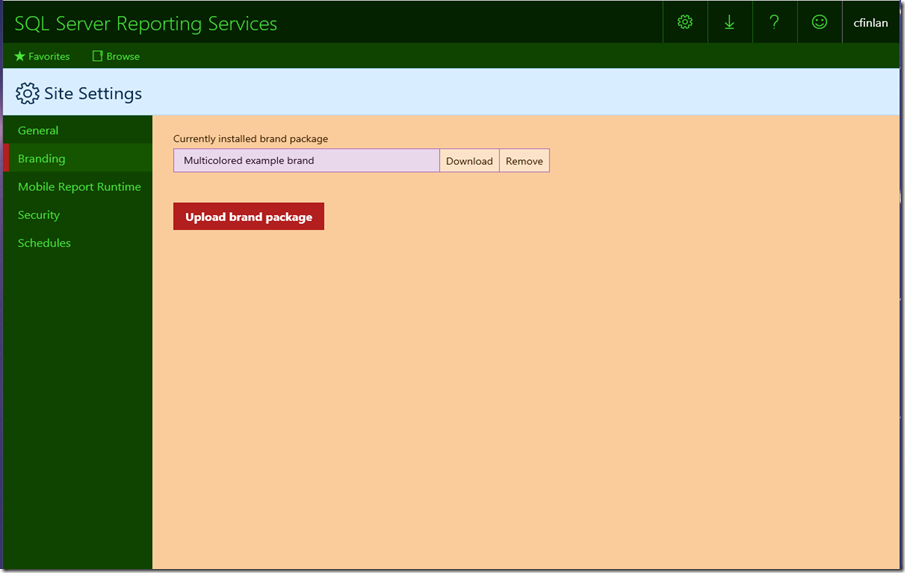
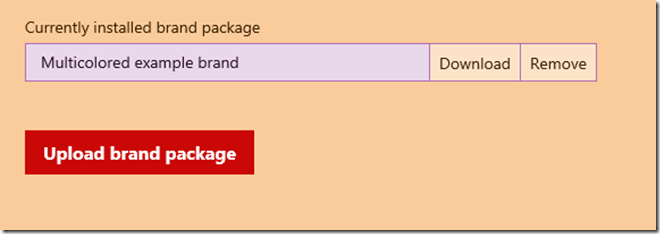
3. Upload the sample brand package zip file title "Multicolored example brand" that you (hopefully) downloaded earlier. Your portal should now look like the following -
GAH! That looks awful, doesn’t it? Well, it’s supposed to. The brand package uses unique colors to make it easy to see which option in the colors.json file maps to each element in the web portal. So let’s look at our file again. The first section of the interface has the following items:
"primary":"#b31e1e",
"primaryAlt":"#ca0806",
"primaryAlt2":"#621013",
"primaryAlt3":"#e40000",
"primaryAlt4":"#e14e50",
"primaryContrast":"#fff",
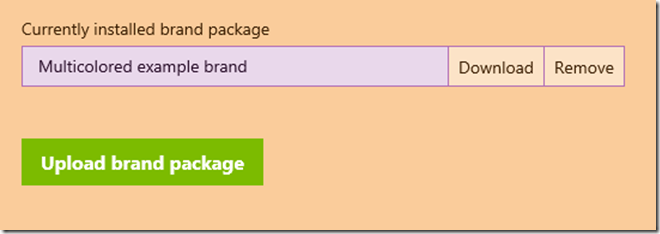
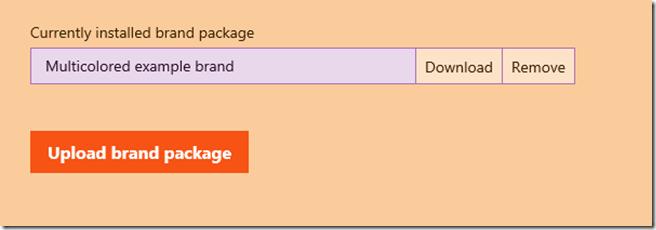
You can use a number of sites to translate these hex codes, but I prefer color-hex.com. So let’s copy the first color into the translator – it looks like the red color I see above in the button background. I'll try replacing it with a green color “#7cbb00” and re-upload my brand package to see what that looks like.
Hey, not bad. But if I roll my mouse over the button, look what happens
I bet that’s the primaryAlt color. Let’s try changing that to the following “#f65314”
So each section of the interface (primary, secondary, etc.) corresponds to a different part of the portal screen. In general terms, that breaks down to the following items under the interface section -
Primary Section – button colors, hover colors
Secondary Section – title bar color, search bar, the left-hand menu (when present), and text color for those items
Neutral Primary – Home background, Reports Area background
Neutral Secondary – Text Box background, Folder Options background, Settings Menu
Neutral Tertiary - Site Settings backgrounds
Danger/Warning/Success Messages
KPI colors (Good – Green, Bad - Red, Neutral – Orange, None – Black)
Couple suggestions for you -
- You are probably going to do a lot of experimenting the first time you create a brand package to see what works and was doesn't. To save time, you don't need to remove the existing brand package you've uploaded before you make a change. Each time you upload a new file, it will simply overwrite the existing one, so you can iterate more quickly.
- While the sample file I provided has every major item with a different color, you might find it easier to manage a much smaller number (three or four), along with white and black. This made it easier for me to get started and create new ones.
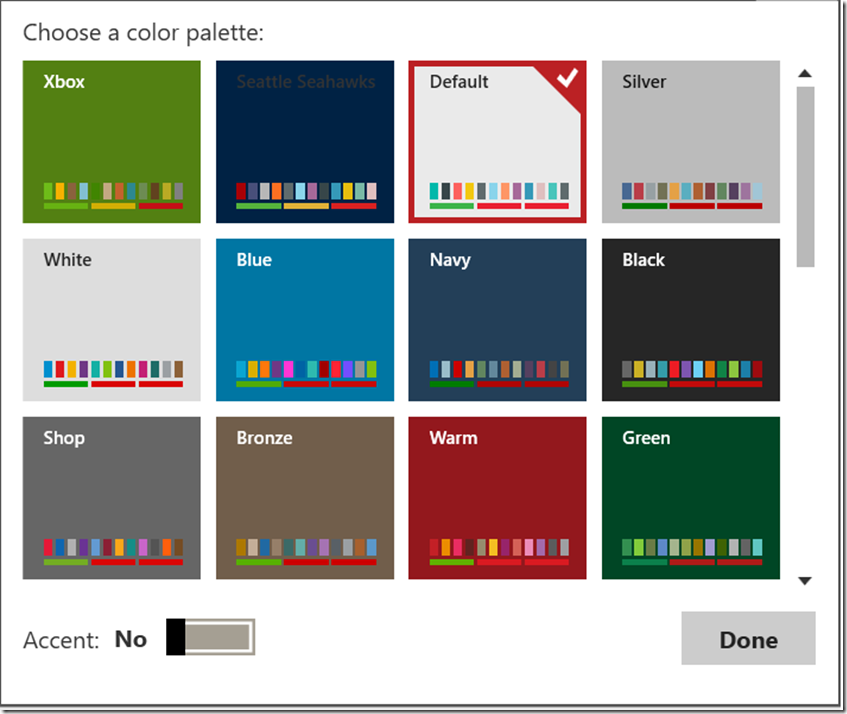
When it comes to the theme for your mobile reports, most of the information you need for that section is visible in the Mobile Report Publisher theme dropdown -
The background color is represented on each theme, along with the data points (the twelve colors lined up at the bottom), with the options for good, bad, and neutral normally being green, red and yellow respectively. The other items called out in the brand package, like accent colors, map colors, panel backgrounds, etc. should be readily understood by anyone who’s used the Mobile Report Publisher (or the Datazen Publisher) before.
Almost done now – just need to add my logo to the brand package.
Logo
If you include a logo with your brand package, it will appear in the reporting portal in place of the Name you set for the portal in the Site Settings menu. You can't use a title and a logo simultaneously in the portal.
Without logo in brand package –
With logo in brand package -
The file you include for a logo must use the .png file format. The file dimensions will be automatically adjusted once uploaded to the server, so you don’t have to save it as a certain size for it to work.
Now it’s your turn!
You now have everything you need to get started creating your own brand packages for Reporting Services. We’re excited to see what you come up with, and we’ll be keeping on eye out on Twitter for screenshots of what you create! As always, please give us feedback around what you like/don’t like in the product so we’re always meeting your needs. Have fun!
- Download SQL Server 2016
- Download Mobile Report Publisher
- Check out the preview documentation: What’s new in Reporting Services (SQL Server 2016)
- Post in the Reporting Services forum (or if you prefer, send us an email)
- Join the conversation on Twitter: @SQLServerBI, #SSRS
Comments
- Anonymous
March 22, 2016
I cannot get the logo to work with multiple .png files and RC1. Works fine without the logo Are there known issues?- Anonymous
March 22, 2016
No, the logo file should work just fine as long as you've named the file logo.png and added the entry to the xml file. Is that what you've been doing?
- Anonymous
- Anonymous
March 23, 2016
Are you planning on releasing a more extensive documentation on the colors.json file? This is helpful, but hoping for something more specific than what was written above. Regardless, thanks for the good work team!- Anonymous
March 24, 2016
Hi Tim,We did put together a TechNet document around this, and Adam Saxton did a short tutorial video to go through it. We'll probably update that closer to launch with additional information.Thanks for the kind words!Chris
- Anonymous
- Anonymous
March 23, 2016
Hi, I am trying SSRS 2016 RC1 and every time I try to upload the multicolor example package, I receive an error saying : 'Une erreur s'est produite. The role 'System Administrator' cannot be found.' The first part of the message is in french because the portal is localized in french, and the security panel says I am a 'Administrateur système' (french translation of System Administrator). Is there a localization problem in the security system ? Regards- Anonymous
March 24, 2016
Hi Frederic,Have you had any issues uploading and using the Xbox brand package? Curious if the issue is limited to that file for you, or is it an issue on the server.Thanks,Chris - Anonymous
March 30, 2016
Hi Frederic,You have to install the ReportServer DB in English (Role are hard coded in the DB :/) from the Configuration Manager.Regards
- Anonymous
- Anonymous
March 23, 2016
Could you please share colors.json file for the default brand? That way we can start tweaking one item at a time and keep the colors we like from the default scheme. Attached xbox branding file has almost all the colors changed from the default brand.- Anonymous
March 24, 2016
Hi Paras,I'll see what we can do around this and update the post accordingly.Thanks!Chris- Anonymous
April 01, 2016
Thanks for including the default brand package Christopher.
- Anonymous
- Anonymous
- Anonymous
March 24, 2016
The comment has been removed- Anonymous
March 25, 2016
Hi Daniel,Yes, that isn't something you can adjust currently. It's something we'll look at in the future to see how we can tweak the brand package options.Thanks,Chris- Anonymous
April 19, 2016
Looks to me like this has been fixed, thanks :D- Anonymous
April 22, 2016
No problem! :)
- Anonymous
- Anonymous
- Anonymous
- Anonymous
March 29, 2016
Too technical stuff. It must work just like advances wordpress themes, this is typical a microsoft toolbox ;-)- Anonymous
March 29, 2016
Ha - we'll make it harder next time. :)
- Anonymous
- Anonymous
March 29, 2016
Nice blog post - Very easy to follow.Is there a way, or are there plans to allow customisation of other features - i.e. fonts, menus, etc.?- Anonymous
March 29, 2016
Hi David,Thanks for the feedback - we haven't made a determination as to whether we'd offer that level of customization in any official capacity. Though since some folks have already asked about it, it's certainly something we'll consider . . .Thanks!Chris
- Anonymous
- Anonymous
March 29, 2016
I am trying to upload my own package and keep getting the error message "There is a problem with the system resource package. The system resource package does not contain a metadata.xml file". The package does, however, contain a metadata.xml file. The package that you provided uploads fine if I do not unzip it. I have found that if I even just unzip the sample brand package provided, and then zip it back up without touching any of the files, I still receive the error message when I upload it. Is this a bug or am I doing something wrong?- Anonymous
March 29, 2016
Hi Ashley,Thanks for bringing this to our attention - I will look into this issue with the engineering team as that isn't expected behavior. For now, I'd recommend you keep the original zip file and also unzip the contents into another folder, make your changes in those unzipped files, and then copy and paste them back into the original zipped folder. This will overwrite the existing files and will upload as expected.Thanks,Chris- Anonymous
March 30, 2016
Hi Ashley,We looked at this - make sure the files you are zipping are being saved into the root folder, and not a subfolder. When you unzip and then rezip the same folder, it will create a subfolder in the package where the files are actually saved, and then won't work.Hope this helped you resolve your issue.Thanks,Chris- Anonymous
March 31, 2016
Thanks, makes sense. I did what you suggested in the first response and it works like a charm! Great blog. Very helpful and super easy. Thanks so much!- Anonymous
March 31, 2016
Our pleasure, Ashley!
- Anonymous
- Anonymous
- Anonymous
- Anonymous
- Anonymous
April 07, 2016
The comment has been removed- Anonymous
April 13, 2016
Hi Patrick,So, the smiley face is gone for RTM :), so that shouldn't be an issue any longer for you. Help will still be there, however, but there is no ability to change the links it points to at this time.Thanks,Chris
- Anonymous
- Anonymous
April 07, 2016
Good Article! However, while technically correct the "You can’t use a title and a logo simultaneously in the portal" is not practically correct. Just add the title as part of your logo and you have both ;-)- Anonymous
April 13, 2016
Hi Ray,Yes, very clever - you can indeed do that.Thanks,Chris
- Anonymous
- Anonymous
April 13, 2016
Hi Christopher,What are Alt2,3,4 colors for?I have a bootstrap css that i use for consisten look and feel across my website, Is there anyway I can feed css directly into the brand package rather than having to create a separate json file to specify colors?- Anonymous
April 13, 2016
Hi Sri,There's no capability to do use a full css in place of the brand package at this time. I know some folks have asked about and are looking into ways they can automatically generate these files through a web interface or the like, and potentially a custom app could be built to translate one to the other.Chris
- Anonymous
- Anonymous
April 17, 2016
Nice, Thanks !!!!www.iransaffrons.com - Anonymous
April 22, 2016
Hello,I have a question. Is there a way to hide completely: Manage Folder, New, Upload, View buttons? Also any links above that? Thank you!- Anonymous
April 22, 2016
Just to clarify for a basic user account, it's ok to still them in admin though. I realize the user doesn't have access to create new or upload, but hiding these options would be ideal- Anonymous
April 22, 2016
There were a number of security items around hide/view that were updated/fixed for RTM that show up in the various RC's, so this shouldn't be an issue in production for you.HTH,Chris
- Anonymous
- Anonymous
- Anonymous
June 02, 2016
Is branding available in standard edition. I don't have the option?- Anonymous
June 03, 2016
Hi Paul,Branding is an Enterprise only feature in SQL Server 2016.Chris- Anonymous
July 07, 2016
Hi Finlan, When i upload Brand package, i have a error metadata file don't exist or problem with the ressource package. Can you help me Sofiane- Anonymous
July 20, 2016
Hi Sofiane,Make sure when you created the package, you didn't accidentally have a nested folder in the zip file. That can sometimes cause the issue - the samples on the website are the best tool to see how the items should look.Chris
- Anonymous
- Anonymous
- Anonymous
- Anonymous
July 17, 2016
Can I change section names in ssrs web portal with branding?eg "KPIs" to "Contoso KPIs" or "Mobile Reports" to "Dashboards"- Anonymous
July 18, 2016
Not in the current version, but we're listening to your feedback on the topic.
- Anonymous
- Anonymous
July 26, 2016
A new caveat why packages might be rejected: The 'official' documentation at https://msdn.microsoft.com/library/mt710551.aspx is incorrect. It establishes the metadata file should be named with a capital M, which simply will not work.It also neglects to document default values, and to document the factlet that one cannot omit unneeded color values from the json. I honestly find learning the two CSS directives for coloring plus basic selectors far easier than this. Branding 2008R2 was more fun (open \Reporting Services\ReportManager\Styles\ReportingServices.css, add an @import url("my-brand.css"); at the top, and for starters try a table.msrs-header .msrs-site_title:before { content: ""; background: url(my-logo.png) no-repeat; float:right; } in the imported file... Of course, that might not work with IE as the old RS forces IE into quirks mode)...- Anonymous
July 27, 2016
Thanks for the feedback! I've followed up with our content team to update the article.
- Anonymous
- Anonymous
July 26, 2016
Can we have any way to use custom icon or custom color for the folders created in the SQL 2016 Report Portal? This can very useful to allow the customer identify their business specific folders.- Anonymous
July 27, 2016
There's no supported way to customize the icon itself, but you can customize the color of the icon in your custom brand package. Notice, in the example in this post (the "Xbox" brand), the folders are white instead of the default black.
- Anonymous
