Create SharePoint Decision meeting workspace from Outlook
The following are the steps to be followed to create SharePoint Decision Meeting WorkSpace
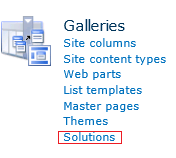
- If you want to create the site from custom site template, upload the site template to the “Solutions” of the SharePoint site collection. To do this open the site collection and navigate to Site Settings --> Galleries -->Solutions as shown below. If not custom site template, you can skip this step
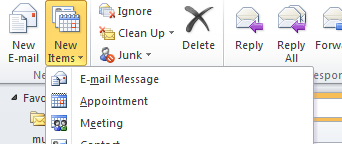
- Open outlook, create a new Meeting.
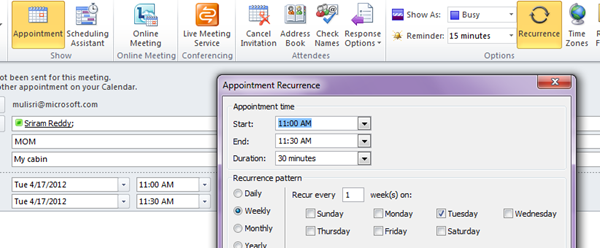
- Fill all the information like To, subject and location. Create a ecurrence based on the requirement. Select the Recurrence Pattern and click on ok. Now meeting got created in the outlook
- Click on “Meeting Workspace” icon on the top of the ribbon

If this icon is not visible, follow the steps below to configure this
-
- Click on the arrow on the right inide of the “Meeting Workspace” icon shown above and select “More Commands” option. The following popup will come.
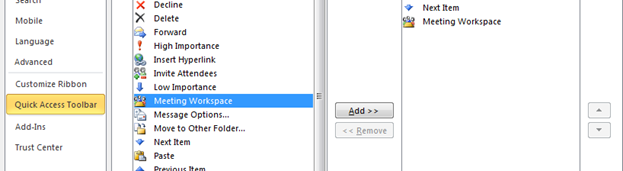
-
- Select “Meeting Workspace” and click on “Add”. Click on Ok
To add this button to ribbon, follow the steps given here
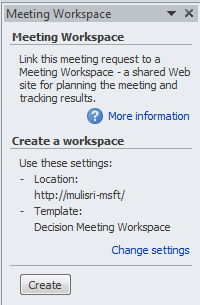
- On clicking on the Meeting Workspace icon, a window will be opened on the right side. Click on “Change Settings” link
- click on “Change Settings” if you dont find any settings or want to change the settings, the following window will be opened
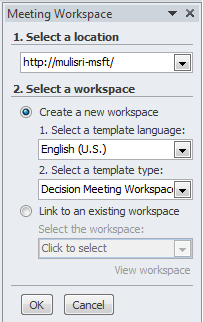
- Under first dropdown “Select a location”, click on “Other…” link to select a different site collection. It will open “Other Workspace Server” popup

Enter the new Project site collection url on this popup and click on Ok
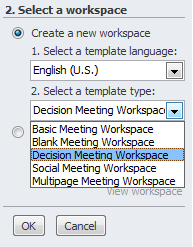
- Under the second section “Select a workspace”, select “English” as template language. In template type section, select the template which is saved in step2. click on Ok to save the settings
- Click Create button to create the workspace. The final window is as shown below

- Click on the link to open the created workspace in browser to make further configuration or entry of other items like meeting details, agenda etc.