Mastering Identity with Azure Active Directory – Episode 3: Creating and managing an Azure Active Directory
The third part of John Craddock’s deep-dive series into Azure Active Directory discusses how to create and fully manage an Azure AD tenant.
 In this series, I will take you through the key aspects of Azure Active Directory, and you will discover how, by using Azure AD, you can build identity solutions for the future. The series is about the technology rather than the marketing hype. It’s also something I cover in more depth in my masterclass, which is a deep-dive into the technologies and goes into the real technical detail. For an introduction to this series and some background on myself, see Episode 1: Introductions all round.
Caveat: To the best of my knowledge the information was accurate at the time of writing this blog but changes to Azure AD and the portals are happening frequently and the precise details may change.
Episode 3: Creating and managing an Azure Active Directory
To be precise, I should be talking about creating an Azure AD tenant or instance, but for brevity, I am just going to use the term Azure AD.
You can create your first Azure AD by signing up for an Azure subscription which could be a trial or Pay-As-You-Go. Alternatively, your first Azure AD could be established when you sign up for a cloud service such as Office 365, Dynamic CRM Online or Intune.
Once you have an Azure AD you can use this single identity store for access to multiple cloud services such as your Azure subscription(s), Office 365 and of course your applications. However, to unleash the full power of Azure AD, with its full suite of identity management capabilities, you will need to upgrade to the Azure Active Directory Premium. There are now two editions of Premium, P1 and P2 and you can find a list of all the features for each version of Azure AD here.
Let’s start by looking at the scenario where you sign up for an Azure trial subscription. Your first step will be to sign-in. If you already have an Azure AD, maybe because you have an Office 365 subscription, you can sign in as an Azure AD user, Microsoft refers to an Azure AD account as a “work or school account.” The Azure subscription is created with the signed in user as the account administrator and the service administrator. The Azure AD is associated with the subscription and co-administrators can be added from that directory.
Alternatively, if there is no Azure AD available when you create a subscription, you must sign in using a Microsoft account, this is referred to as a “personal account.” During the creation of the subscription an Azure AD will be created and associated with the subscription. The signed in Microsoft account user will be the subscription account administrator and the service administrator. The newly created directory will be named “Default Directory” and if the user’s login was john19271@outlook.com the domain name for the directory will be john19271outlook.onmicrosoft.com. john19271@outlook is added to the directory as a global administrator.
Administrators…
In the last couple of paragraphs, I have mentioned account, service, global and co-administrators. So what do they all do?
The account administrator looks after the billing and other admin functions for one or more Azure subscriptions. The service administrator and co-administrator have similar roles with full access to all of the services within a subscription. However, they do not control access data to within an Azure AD. To manage data within an Azure AD you need to have an Azure AD administrative role, the global administrator having full control. See Figure 1 which shows the different administrators. Role Based Access Control (RBAC) provides a number of different Azure AD administrator roles.
[caption id="attachment_17626" align="aligncenter" width="750"]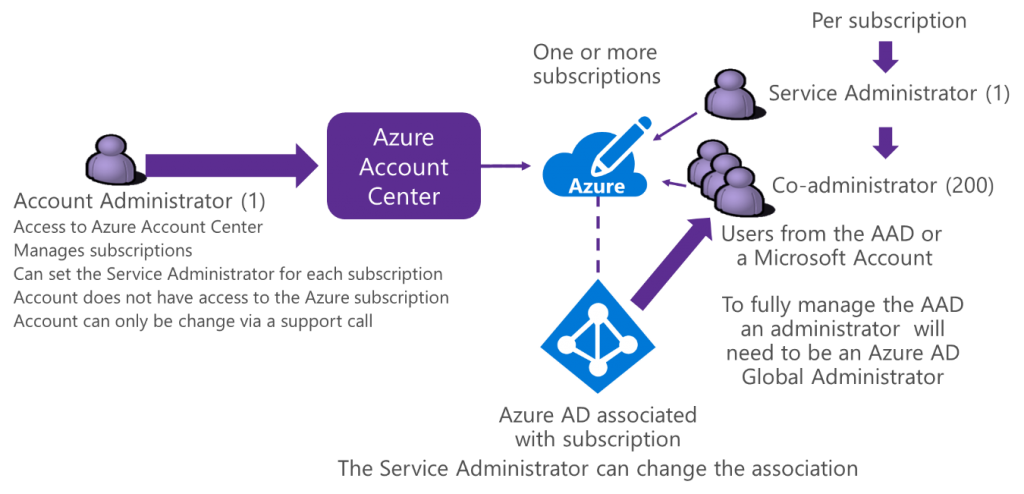 Figure 1: All those administrators![/caption]
To work with all the feature of Azure AD, we need to be able to administrate it through the Azure Portal. As I have previously mentioned, there are two Azure portals the “classic” portal (https://manage.windowsazure.com) and the new portal (https://portal.azure.com). At the time of writing this blog the Azure AD management in the new portal is in public preview (started September 2016) and some management functions are currently not supported, see Figure 2.
[caption id="attachment_17635" align="aligncenter" width="530"]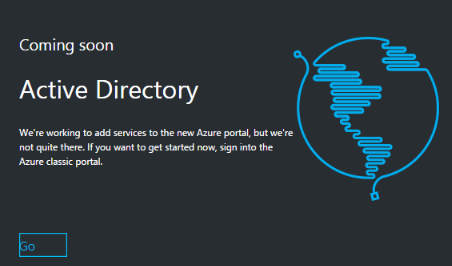 Figure 2: Back to the classic portal to manage the configuration[/caption]
The new portal is where all of the innovation is happening and you will work with this portal to take advantage of some of the newer features, but our challenge today is that we need to use both portals to manage all of the Azure AD capabilities. If you think it is all a bit messy at the moment, you are right, but transitioning to something new and better often comes with a little bit of pain!
To manage Azure AD through the new portal you do not require an Azure subscription, you can sign in to the new portal and add users, etc., you can even upgrade to Azure AD premium. You also don’t need an Azure subscription to manage the Azure AD programmatically or using PowerShell. However, managing the Azure AD through the classic portal requires an Azure subscription. A user who signs in to the classic portal will need to be a service or co-administrator for the subscription. To manage the Azure AD they will also need the appropriate administrator role within the directory.
Working with an Office 365 Azure AD
We now know how to sign up for an Azure subscription using an existing Azure AD or having one automatically created for us, but what if we only have an Office 365 subscription. When you subscribe to Office 365 you automatically have an Azure AD created for you.
As an example let’s take a user John who signs up for an Office 365 trial, during the signup process he chose his login name to be john@xts0365.onmicrosoft.com. John can now access the Office 365 portal at https://portal.office.com and can perform the standard Office 365 administration tasks. He can access the new Azure portal and directly manage aspects of the Azure AD that was created when he signed up for the Office 365 trial. However, if he attempts to go to the classic portal to perform a task that is currently not supported in the new portal, he will be confronted by an error message as shown in Figure 3.
[caption id="attachment_17645" align="aligncenter" width="621"]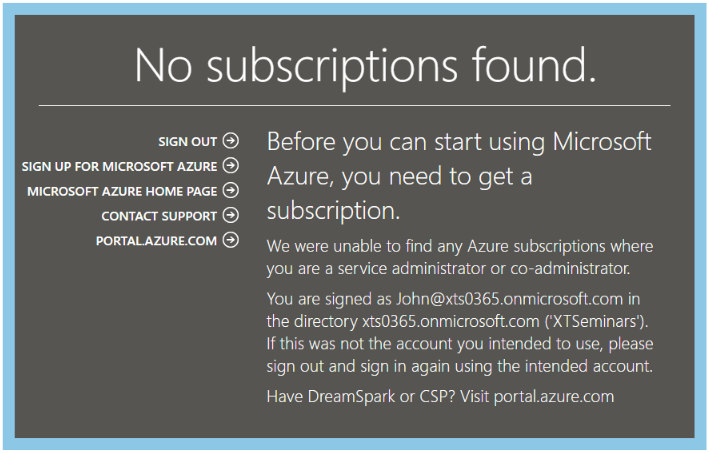 Figure 3: No Azure subscription[/caption]
To manage the Azure AD through the classic portal, he will need to sign up for an Azure subscription.
You can sign up to a trail Azure subscription which will give you a monetary credit towards running any of the Azure cloud services. Alternatively, if you are a paying Office 365 user you can sign up for an “Access to Azure Active Directory” offering which will just allow you to manage Azure AD in the classic portal. See Figure 4. Sign up from the Office 365 portal, select Admin centres | Azure AD, the signed in user will become the Azure subscription account administrator and the service administrator.
[caption id="attachment_17655" align="aligncenter" width="640"] Figure 4: Access to Azure Active Directory[/caption]
When signing up for a full trial Azure subscription, it is important that you are signed in as an Office 365 user so that the Office 365 Azure AD is associated with the subscription. The signed in user will become the Azure account administrator and the service administrator for the subscription.
Adding an Azure AD to an existing Azure subscription
You may have an existing Azure subscription and an Azure AD created by another cloud service such as Office 365. In which case, how do you add the Office 365 directory to your existing subscription?
Adding an existing directory to an Azure subscription is currently performed through the classic portal. To manage this task you must be signed in with a Microsoft (personal) account; if you are signed in with an Azure AD account you will not see the option to “Use existing directory,” see Figure 5. If neither your service administrator nor one of your co-administrators is using a Microsoft account you will need to add a Microsoft account as a co-administrator and then sign in to the classic portal using that account.
[caption id="attachment_17665" align="aligncenter" width="472"]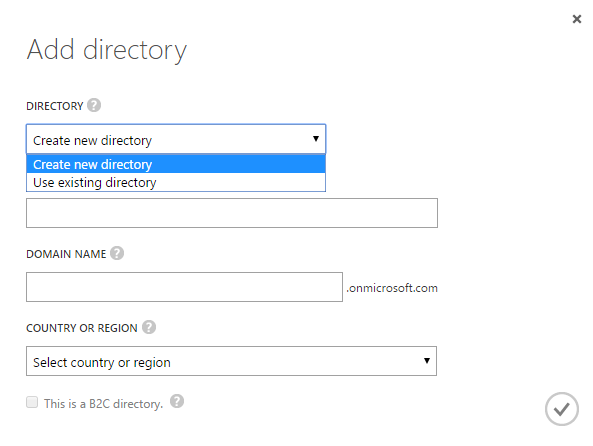 Figure 5: Adding a directory into an Azure Subscription[/caption]
Once the option is selected to “Use existing directory” you will be prompted to sign out and then sign in as the global administrator of the directory to be added. See Figure 6.
[caption id="attachment_17675" align="aligncenter" width="556"]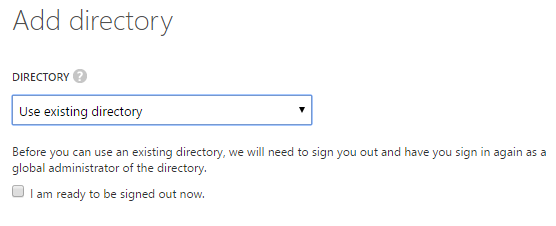 Figure 6: Sign-in as Global Admin for the Azure AD to be added[/caption]
After you are signed into the existing directory, you will be asked to confirm that you want the Microsoft account to be added as a global administrator of the directory. The next step is to sign out and sign into the classic portal using the Microsoft account. You will see the directory is now visible and you can manage it through the classic portal. To allow other subscription co-administrators to manage the Azure AD add them to the directory with appropriate roles.
This blog seems to have got a bit long. However, I want you to understand what we currently have to do to be able to manage an Azure AD tenant fully. Please watch the video which shows how to create a new directory, add your own domain name to the directory and customise the user sign in experience. That’s it until next time.
[embed]https://youtu.be/L_dKaLM06Gs[/embed]
For details of all the episodes in this series, look here. To learn and become skilled in implementing identity systems based on Azure AD, on-premises AD and AD FS join me at one of my Masterclasses. To find out more visit XTSeminars.