Note
Access to this page requires authorization. You can try signing in or changing directories.
Access to this page requires authorization. You can try changing directories.
In SharePoint 2007, Application Pages would inherit from Application Master deployed to Layouts folder. The Site Pages would inherit from a different Site Master deployed to SharePoint Content database. Since there was no way for application pages to inherit from the same master as that of the site pages, the look and feel of the two kinds of pages in a SharePoint application would be different, by default. This problem is overcome in SharePoint 14 with the introduction of Dynamic Master Page feature.
Application Pages that wants to inherit from site master will have to specify DynamicMasterPageFile attribute instead of the MasterPageFile attribute in the Page directive as
<%@ Page Language="C#" AutoEventWireup="true" CodeBehind="ApplicationPage1.aspx.cs" Inherits="SharePointProject15.Layouts.SharePointProject15.ApplicationPage1" DynamicMasterPageFile="~masterurl/default.master" %>
DynamicMasterPageFile attribute can only take two tokens as values; ~masterurl/default.master or ~masterurl/custom.master. These tokens will be resoved by SharePoint at runtime to point to the site's default master and the site's custom master respectively.
Deploying a custom content master page and using it in an application page involves three steps:
- Create and deploy a custom content master.
- Create and deploy a site definition that uses the content master created in step #1 and create a site based on it. [Creating a site definition is just for illustration and is not necessary if you are modifying an existing Site to point to a new content master.]
- Create an application page to be deployed to the site created in step #2
1. Create and deploy a custom content master.
1.1 Create a C# empty SharePoint project with all default selections and add a module element with name "MasterPage" to it.

1.2 Delete the sample.txt by right clicking on it in the solution explorer and selecting delete
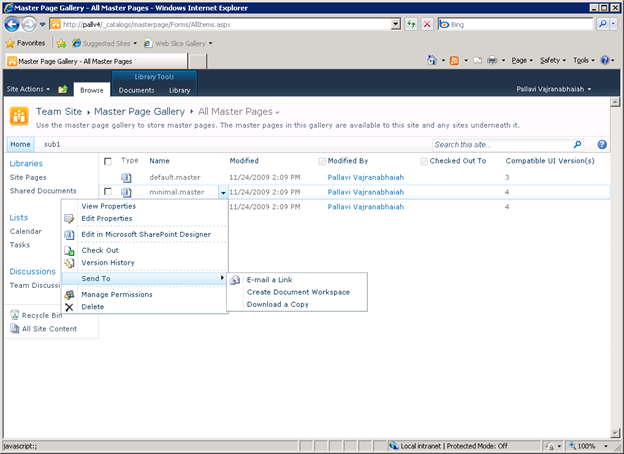
1.3 In Solution Explorer, Right click the "MasterPage" module folder and add a file with name MyCustomContent.master (For example you can add a text file and change the extension from .txt to .master) and add the content to this file. Or you can start with SharePoint's existing content master and modify as needed. For simplicity let us choose an existing content master and proceed with it. To do this, go to master page gallery in SharePoint. Click on the dropdown of the master page you wish to save for example. Minimal.Master and select "Send To" and then "Download a Copy" and save the file.

Right click the "MasterPage" module folder and select "Add Existing" to add the saved master page. Be sure to change the name of the master page (say for example MyCustomContent.master) to avoid overwriting the SharePoint created master page. Double click on the master page to open it in the default editor and make the necessary modifications to the master page. In order to demonstrate the active master page is the new custom master in a simple way, let us change the ContentPlaceHolder with Id "PlaceHolderMain" to "PlaceHolderMyCustomMain".
1.4 Modify the element file associated with the module as follows:
<?xml version="1.0" encoding="utf-8"?>
<Elements xmlns="https://schemas.microsoft.com/sharepoint/">
<Module Name="MasterPage" Url="_catalogs/masterpage">
<File Path="MasterPage\MyCustomContent.master" Url="MyCustomContent.master" />
</Module>
</Elements>
1.5 Right click the project in the solution explorer and select Deploy.
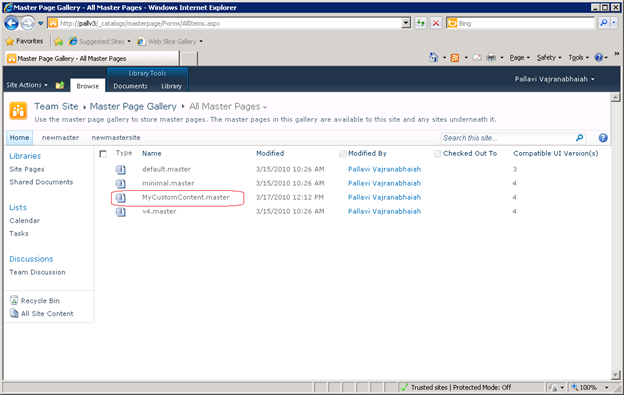
1.6 Verify that the master page got deployed to the master page gallery.

2. Create and deploy a site definition that uses the content master created in step #1 and create a site based on it.
2.1 Create a C# SharePoint Site Definition project called "MyCustomSiteDefinition".
In the onet.xml that gets created as part of the Site Definition project modify the configuration element so that the MasterUrl and CustomMasterUrl points to the newly deployed custom content master, as follows
<Configuration ID="0" Name="MyCustomSiteDefinition" MasterUrl="/_catalogs/masterpage/MyCustomContent.master" CustomMasterUrl="/_catalogs/masterpage/MyCustomContent.master">
Since we have changed the PlaceHolderMain to PlaceHolderMyCustomMain, we will also have to change it in the default.aspx. If we miss this step, SharePoint will throw error when we create a site based on this site definition.
2.2 Open the default.aspx file in the Site Definition project and change the ContentPlaceHolderId attribute in the default.aspx file to "PlaceHolderMyCustomMain" as shown below.

2.3 Right click the Site Definition project in the solution explorer and select Deploy.
2.4 In SharePoint, Click Site Actions | New Site. Select SharePoint Customizations link on the left navigation, enter the title and Url name for your site (example MyCustomSite)

2.5 Click on Create to create the site.

3. Create an application page to be deployed to the site created in step #2.
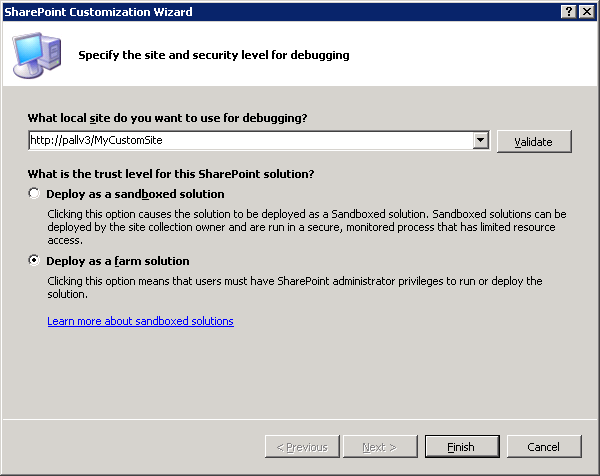
3.1 Create a C# Empty SharePoint project with local site used for debugging pointing to the site created in step #2 which is https:// <machineName> /MyCustomSite.
Choose the option to Deploy as a farm solution. This is required since application pages can only be deployed to layouts folder and not to content database.

3.2 Click Finish and add an Application Page to the project. Right click on the Application Page and select "Set as Startup Item" to set it as startup item.
By default, it shows a warning since the active master page does not have "PlaceHolderMain" defined. If you invoke the IntelliSense, the new placeholder can be seen.

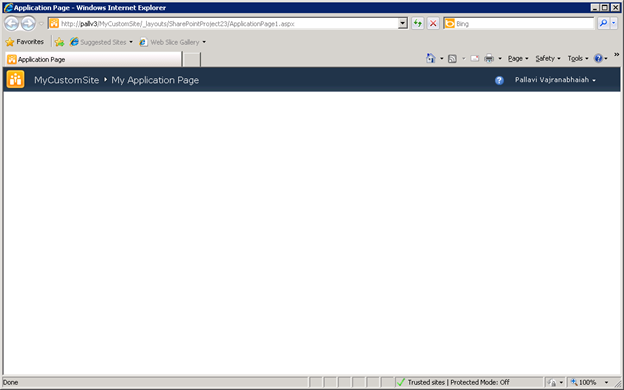
This application page inherits the newly deployed content master and the IntelliSense reflects the same. Press F5 to deploy it and view it in SharePoint. You can see that the look and feel of this page is inherited from the new custom content master.

Pallavi Vajranabhaiah
Comments
Anonymous
May 12, 2010
Great post. I followed along and was able to reproduce the result. However, browsing the application page seems to only work in the debugger (F5). When not debugging, the application page is not available. Is there some additional trick to deploying the application page? tia, MikeAnonymous
May 12, 2010
Hi Mike, I think this is due to auto retracting of features at the end of debugging. You can create your own deployment configuration without the auto retract step if you would like from the SharePoint tab in project properties window. To make it work for the default deployment configuration, could you please deploy the solution by right clicking on the project and selecting deploy and check if it works? Thanks, PallaviAnonymous
May 12, 2010
You can also turn off the auto retract feature for the default deployment configuration by going to SharePoint tab in project properties window and unchecking the "Auto-retract after debugging" checkbox.Anonymous
May 12, 2010
Hi Pallavi, Thanks for the response. Deploying the solution didn't help - was still getting a 404 not found error. but, by editing the vbproj file to point to different subdirectory in the <SharePointSiteUrl> element, I was able to get it to work. Think I'll start from scratch and see if the same thing happens. I'm just learning to use SharePoint as an application platform and I could have made some mistake along the way. MikeAnonymous
October 06, 2010
Hello, How I can combine both master page and site definition in same project ( and eventually in same wsp ) ?Anonymous
August 12, 2011
Thanks for your great post , I use it in my solutions .