Note
Access to this page requires authorization. You can try signing in or changing directories.
Access to this page requires authorization. You can try changing directories.
Author: Yongjun Tian Date: December 2, 2014
This tutorial shows you how to do Azure IaaS node management in HPC IaaS cluster on Azure.
With Add-HpcIaaSNode.ps1 and Remove-HpcIaaSNode.ps1, user could easily expand or shrink the number of IaaS VMs with different customized compute node Images and different VM sizes in multiple cloud services and storage accounts.
With Start-HpCIaaSNode.ps1 and Stop-HpcIaaSNode.ps1, users can grow and shrink the number of Azure VM compute nodes according to the workload. When the number of jobs or tasks increases, start the VMs to bring the compute nodes online to grow the compute resources. When the workload finishes, bring the compute nodes offline and stop the VMs into Stopped (Deallocated) state to save cost.
Prerequisites
1. To use Azure VM nodes management script, the HPC IaaS cluster should be created by HPC IaaS cluster deployment script, if HPC IaaS cluster create by other way, please refer to section “other info”
2. Configure Azure subscription with the Azure powershell cmdlets
Option 1: Using Azure publish settings file
1) Running the following code
Get-AzurePublishSettingsFile
Will launch browser and take you to a page where you can login using the Microsoft account.
2) Once the file is downloaded you can then call:
Import-AzurePublishSettingsFile "C:\MyPublishSettings\mysubscriptions.publishsettings"
Option 2: Manually configuring a subscription
If you want fine grained control over what certificate setting you use you can also manually specify the certificate.
Once your certificate is created and installed in the Azure Management Portal you can use the following code to configure your subscription:
$cert = Get-Item Cert:\CurrentUser\My\<your cert thumbprint>
Set-AzureSubscription -SubscriptionName "<subName>" -SubscriptionId "<subscriptionid>" -Certificate $cert
subName can be defined to by user; subscriptionid can be got from Azure Management portal.
Note: in HPC 2012 R2 Update 1, we only support certificate authentication from Azure powershell, not support Azure AD method now.
Add Azure IaaS nodes
1. Create Azure cloud service, if you already have available cloud service, just go to next step.
The cloud service must be in the same location as the cloud service which hosts head node.
On Azure Management portal, click “NEW”

Select the same region or same affinity group as the cloud service which hosts head node.
2. Get the Azure virtual machine image name from Azure Management portal

During create HPC IaaS cluster, if you initial create broker node/compute node, it will create broker node/compute node image automatically, refer to HPC IaaS cluster deployment script.
If you want to create broker node/compute node image by yourself, refer to section “how to create broker node/compute image” at the bottom of this article.
Copy the image name, it will be used in further step.
3. Open elevated 64 bit Powershell console on head node,

4. Run the following command to add Azure IaaS nodes
Add-HPCIaaSNode.ps1 –ServiceName <serviceName> –ImageName <imageName> –Quantity <nodeCount> –InstanceSize <roleSize> –DomainUserName <username> -DomainUserPassword <password> [-NodeNameSeries <namingSeries>]
serviceName: the Azure cloud service name which you want to create virtual machine on it
imageName: the Azure virtual machine image name which you want to use to create new virtual machine
nodeCount: how many nodes you want to added
roleSize: the Azure virtual machine size, you can run the following command to get all sizes supported by current subscription, more detail, can refer to Azure Role Size
(Get-AzureRoleSize|?{$_.SupportedByVirtualMachines -eq $true}).InstanceSize
username: current domain user name
password: password for current domain user
namingSeries: optional, generating names automatically for new nodes. If not specified, will use the naming series HPC configured, the format should be similar as “AzureCN-%0000%
For example:

After adding node finished, you may need wait for several minutes (you can monitor the new created virtual machine status on Azure management portal), then the nodes will be automatically added to HPC cluster, you need assign node template to these nodes.
Note: As current Azure REST API limitation, under one cloud service, we can only add node one by one. If user want to add many nodes, it may take a long time to finish. So for best practice, users may add nodes under different cloud services in parallel, for example, if users want to add 200 nodes, they can create 10 cloud services at first, and then start 10 “Add-HPCIaaSNode.ps1” commands simultaneously to add 20 nodes under each cloud service.
Stop Azure IaaS nodes
Using the following command to stop Azure IaaS nodes
Stop-HpcIaaSNode.ps1 –Name <nodeName>
nodeName: name of the node to be stopped, support wildcard, for multiple node names separate by comma, for example:
Stop-HpcIaaSNode.ps1 –Name AzureCN-*
Stop-HpcIaaSNode.ps1 –Name AzureCN-0001,AzureCN-0002
After stopped, health of the nodes in HPC will be “ERROR”, the virtual machines in Azure will be in Stopped (Deallocated) state which indicates you are not being billed.
Start Azure IaaS nodes
Using the following command to start Azure IaaS nodes
Start-HpcIaaSNode.ps1 –Name <nodeName>
nodeName: name of the node to be started, support wildcard, for multiple node names separate by comma, for example:
Start-HpcIaaSNode.ps1 –Name AzureCN-*
Start-HpcIaaSNode.ps1 –Name AzureCN-0001,AzureCN-0002
After started, you may need wait for several minutes, you can monitor the virtual machines status on Azure management portal, after virtual machines status change to “Running”, health of the nodes in HPC will be “OK”
Remove Azure IaaS nodes
Using the following command to stop Azure IaaS nodes
Remove-HpcIaaSNode.ps1 –Name <nodeName> -DeleteVHD
nodeName: name of the node to be stopped, support wildcard, for multiple node names separate by comma,
DeleteVHD: will delete associated VHD for the virtual machine, if you want to keep the VHD, you don’t need specify this parameter
For example:
Remove-HpcIaaSNode.ps1 –Name AzureCN-* -DeleteVHD
Remove-HpcIaaSNode.ps1 –Name AzureCN-0001,AzureCN-0002 -DeleteVHD
Check Azure IaaS nodes state
Using the following command to check Azure IaaS nodes status
Get-HPCIaaSNodeState.ps1
The result similar as the following:

It will show the node health in HPC cluster and the virtual machine status in Azure, if HPC nodes mismatch with Azure virtual machine, it will show the errors.
Other Info
If HPC IaaS cluster was not created by HPC IaaS cluster deployment script, user can do the following setting before use above scripts to manage Azure IaaS nodes:
Open elevated 64 bit Powershell console on head node
New-Item -Path HKLM:\SOFTWARE\Microsoft\HPC -Name IaaSInfo
Set-ItemProperty -Path HKLM:\SOFTWARE\Microsoft\HPC\IaaSInfo –Name SubscriptionId -Value <subid>
Set-ItemProperty -Path HKLM:\SOFTWARE\Microsoft\HPC\IaaSInfo -Name DeploymentId -Value <depid>
Set-ItemProperty -Path HKLM:\SOFTWARE\Microsoft\HPC\IaaSInfo -Name VNet -Value <vnet>
Set-ItemProperty -Path HKLM:\SOFTWARE\Microsoft\HPC\IaaSInfo -Name Subnet -Value <subnet>
Set-ItemProperty -Path HKLM:\SOFTWARE\Microsoft\HPC\IaaSInfo -Name AffinityGroup -Value <ag>
Set-ItemProperty -Path HKLM:\SOFTWARE\Microsoft\HPC\IaaSInfo -Name Location -Value $<location>
subid: just your current subscription id
depid: the deployment id of the cloud service which host head node deployment (you can get it from Azure Management portal)
vnet: name of the virtual network which is used for current HPC cluster
subnet: the subnet name of the using virtual network
ag: the affinity group used for the cloud service which host head node deployment, if no, just leave the value empty
location: the datacenter location of current HPC cluster
How to create broker node/compute node image
Option 1(Recommended)
1. Using “Add Azure IaaS node” to add one broker node or compute node, the image should be created by HPC IaaS cluster deployment script during creating HPC IaaS cluster.
2. Using remote desktop to login to that new created virtual machine, then install software/application you want.
3. Capture the image, refer to how to capture a Windows Virtual Machine
4. After capture image, the virtual machine will be automatically deleted, if the node is already automatically added to HPC IaaS cluster, user need manually delete the node from HPC Cluster Manager.
Option 2
Note: if user use this option to create image, the image can only be used in current HPC IaaS cluster, cannot be used for other HPC IaaS cluster, we recommend user to use option 1 to create image.
1. Open Azure management portal, click “New”, choose “VIRTUAL MACHINE” -> “FROM GALLERY”.

2. Choose image, user can select “Windows Server 2012 R2 Datacenter”.

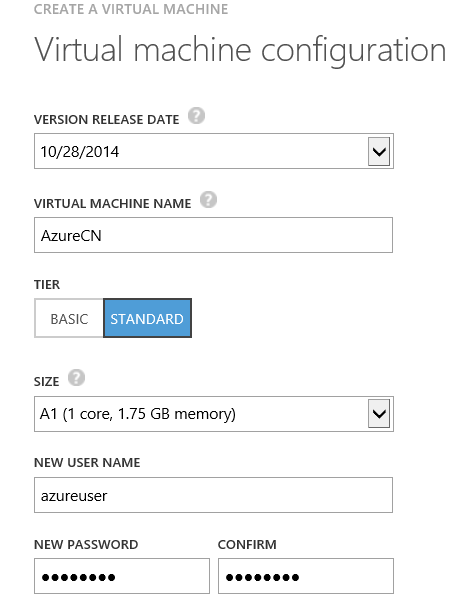
3. Input virtual machine name, user name and password.
4. Select the cloud service or create a new cloud service. Choose the virtual network, you must choose the same virtual network as the head node virtual machine.

5. Finish to create virtual machine, wait the virtual machine ready, and then using remote desktop to login to that new created virtual machine, then install broker node/compute node.
User can get HPC install package from head node file share folder //<head node name>/REMINST
About how to install HPC broker node/compute node, refer to here, see section “To install HPC Pack on a node computer”.
6. User can also install software/application you want.
7. Capture the image, refer to how to capture a Windows Virtual Machine
8. After capture image, the virtual machine will be automatically deleted, if the node is already automatically added to HPC IaaS cluster, user need manually delete it from HPC Cluster Manager.
Comments
- Anonymous
December 02, 2014
Author: Yutong Sun Date: December 2, 2014
HPC Pack 2012 R2 supports Azure Nodes, aka PaaS worker