Create a simple workflow in SharePoint Designer that reads from, and writes to the Products list in SharePoint 2013.
This is the first in a series of blog posts describing how to use workflows together with the Products list in a Product catalog site collection. The purpose of this example is to show you how you can communicate with a list in SharePoint, and by this give you a building block when creating your own workflows.
In this blog post I will show you step-by-step how to create a simple workflow that will read content from a site column, modify the content, and then write the modified content back to the site column. More precisely, I will read the Title of an item, add the words “New Item !!! ” to it, and write the modified name back into the Products list for this item. (“Laptop 14.4W” => “New Item !!! Laptop 14.4W”)
Prerequisites:
- Workflow Manager Client 1.0 installed and connected to the SharePoint installation
- A Product catalog site collection has been created. In the Products list, you must have at least one item, where the site column "Title" contains some content.
- SharePoint Designer (SPD) is installed.
Create a workflow in SPD:
Start by opening SPD and mapping it to the Product catalog site collection. From the Sites menu, click Open Site, and then insert the address of the Site Collection.
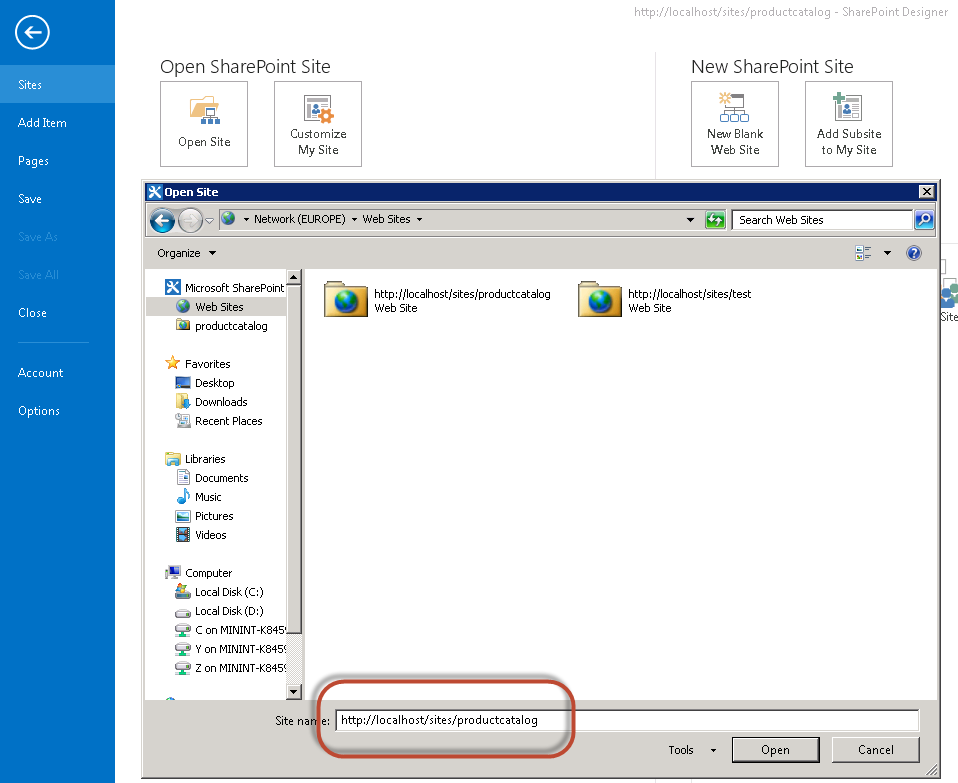
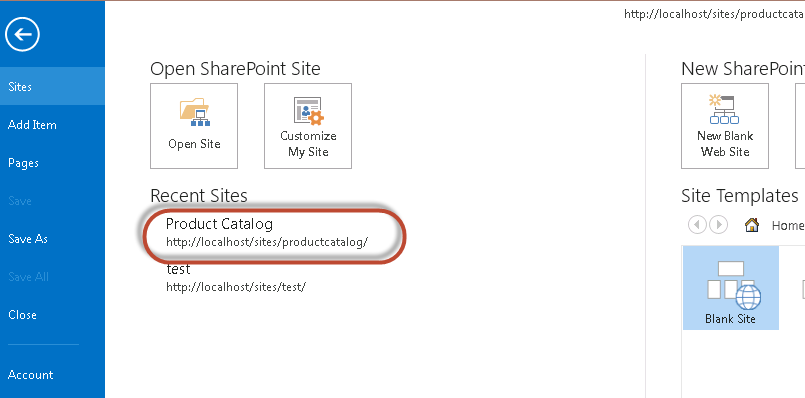
When entering SPD at a later time, your site collection will be listed under Recent Sites.
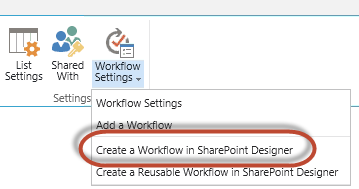
Tip: SPD can also be started from within SharePoint. To do this in the Products list, in the LIST ribbon=>Workflow settings=> click the arrow and select “Create a workflow in SharePoint designer” from the list. SPD is then automatically mapped to the correct site collection.
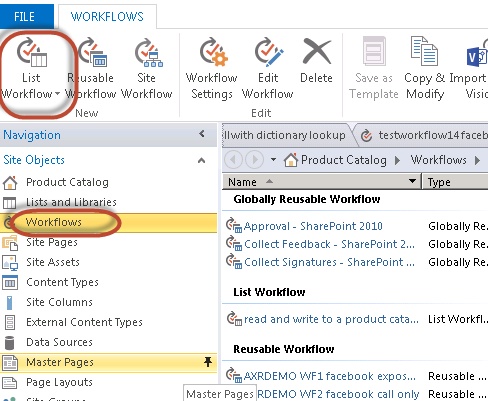
After having mapped SPD to your site collection, the next step is to create a workflow that is associated with the Products list. To do this, click Workflows in the Site objects list to get the right ribbon, then“List workflow”.
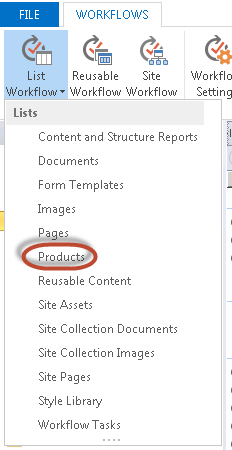
Select the appropriate List, in this case “Products”.
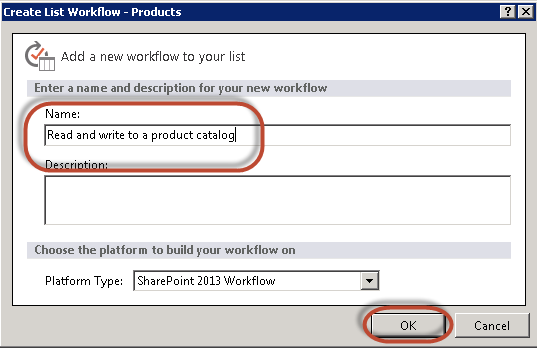
Type a suitable name for your workflow and click OK.
You now have an empty workflow, ready to be filled with workflow steps.
Develop the workflow
The workflow is created declarative; hence no programming is needed when using the SharePoint Designer.
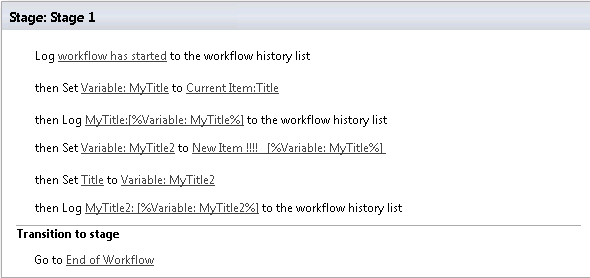
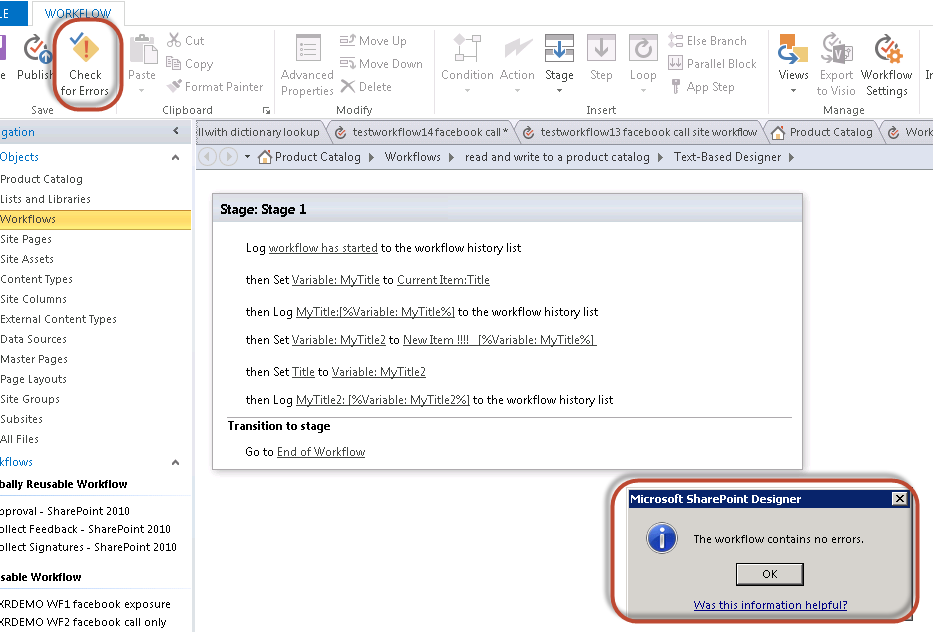
The final workflow will look like this.
Let me guide you through the different steps.
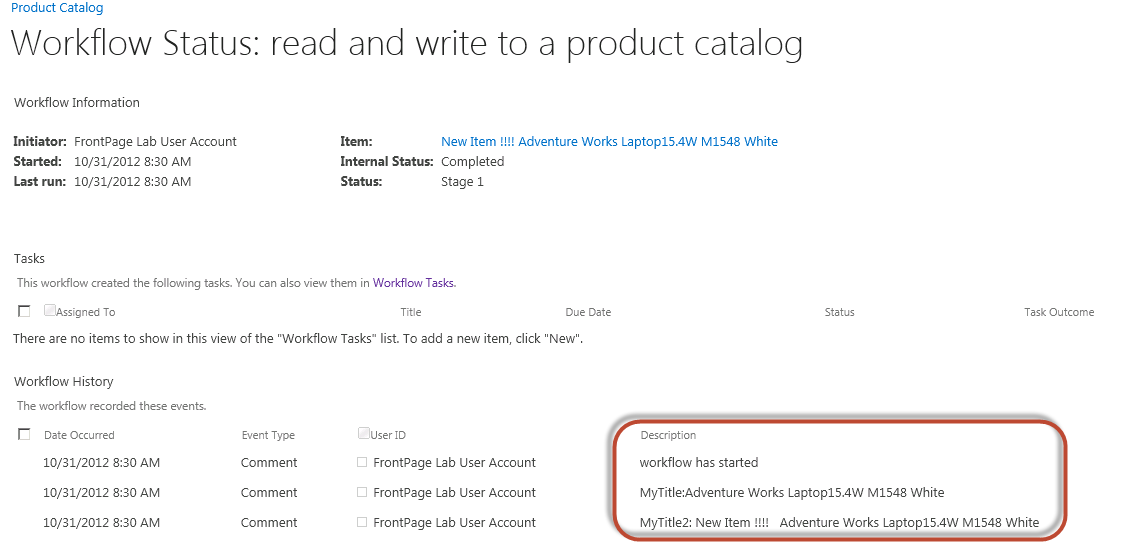
- Line 1: It is always nice to start with a log message. This makes Troubleshooting later much easier. Use the Log to history list action.
- Line 2: Reading from the product catalog is achieved with the Set workflow variable action.
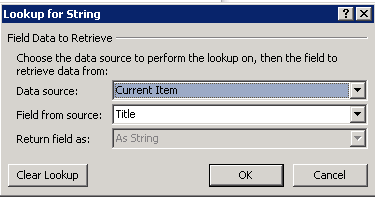
Create your own workflow variable of type String, and do a Lookup for the value in the list column Title in the product catalog. Creating this variable is just to show you that I’m able to fetch data from the product catalog. Since SPD is already mapped to your Site collection, “current item” will present all site columns in the “Field from source” drop down window.
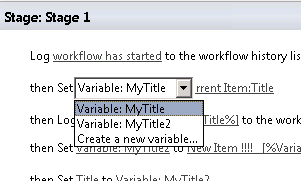
- Line 3: Logging “MyTitle” is just to be able to verify (in the logs later) that we have picked up the right data.
- Line 4: Then create a new variable (MyTitle2) of type string. Use the Set workflow variable action again. Under Value use the String Builder to modify the title. In my example I have added some text to the content in the MyTitle variable. Use the “Add or Change Lookup” button to enter the “Lookup for String” UI as shown in step 2.
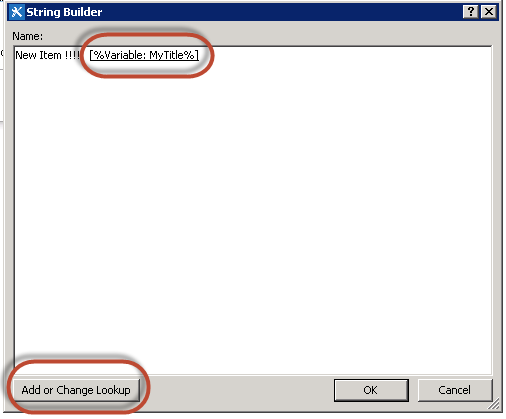
You now have a workflow variable (MyTitle2) containing your new modified title.
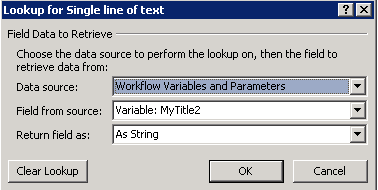
- Line5: Write back to the product catalog by using the Set Field in current item action.
This time the field is a lookup for Site column (Current item:Title) , and the value is the Workflow Variable and Parameters: MyTitle2.
Line 6: All workflows must end with this Go-to statement.
You can check for workflow errors by clicking on “Check for errors”. This feature will only remind you of major mistakes, like not setting a value for a variable. Don’t be surprised if the workflow doesn’t work for other reasons.
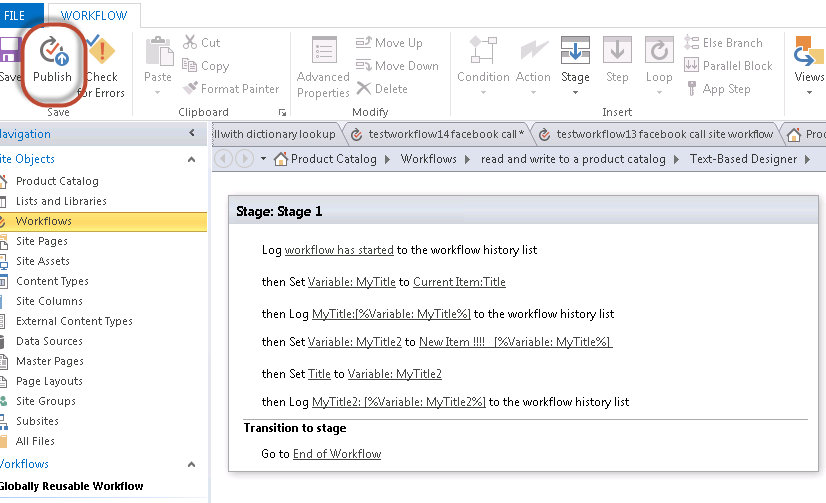
To keep your workflow, click on Save. The workflow is stored but not activated.
The workflow is now done.
How to deploy and activate the workflow for the Products list
Publishing the workflow will deploy it to the SharePoint installation and activated it for the list that you associated the workflow with, in this case, the Products list. To publish your newly created workflow, click Publish.
To verify that your workflow is deployed and activated for the Products list do the following:
In SharePoint, in your Product catalog site collection, go to the Products list; activate the LIST ribbon => Workflow settings. The workflow will be listed under SharePoint 2013 workflows.

Start the workflow
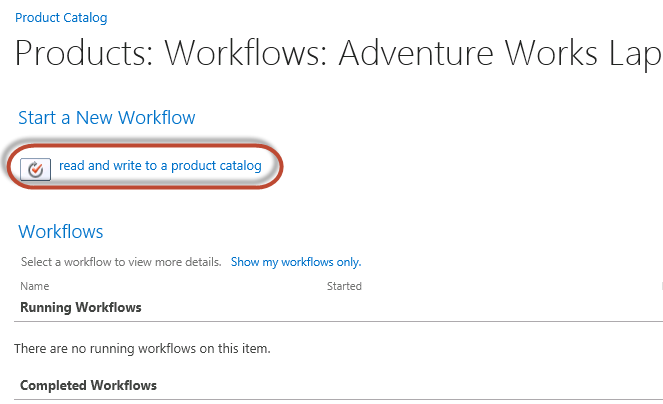
- Go to the Products list, select an item, activate the ITEMS ribbon and then click on Workflows.
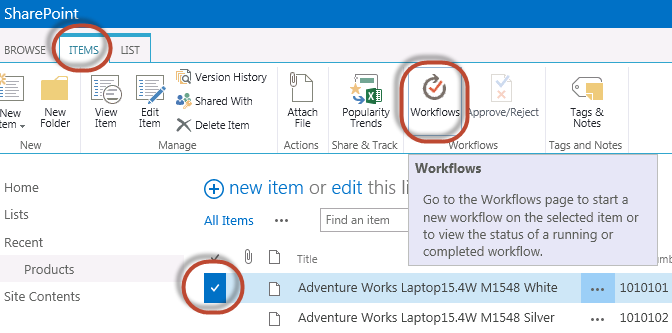
- Activate the workflow by clicking on its name.
After starting the workflow you will return to the product catalog UI.
- To see the status of the workflow, return to the Workflow page as described in the previous step. Internal status will show the status of the workflow.
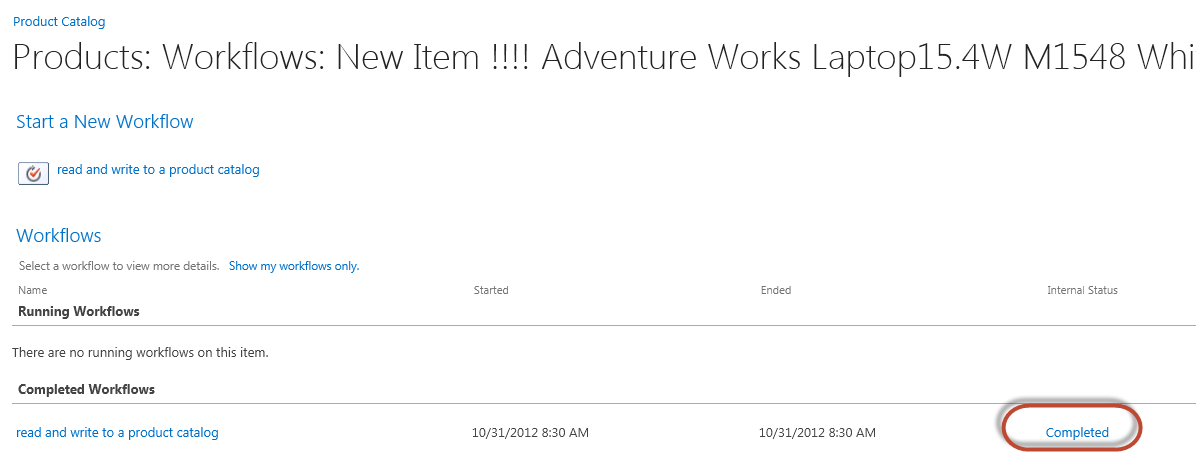
Note: The workflow has completed its task, and we can already see that the title has been modified to “New Item !!! Adventure….” As planned.
- If you want see the logged status messages that you put in your workflow, click on the workflow name, and you will see the workflow details. This is useful during troubleshooting.
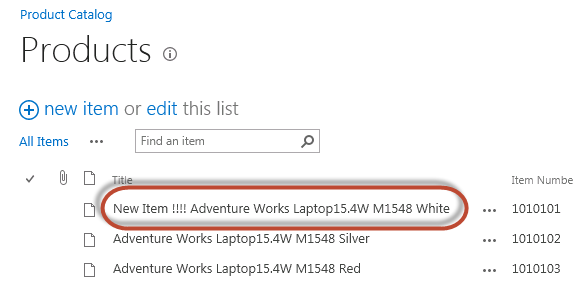
- Verify the final result by going back to the product catalog and observe that the title of the appropriate item has changed.
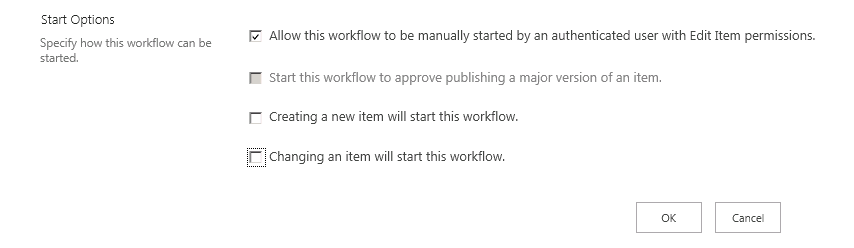
Other starting options:
If you need to start the workflow automatically there are options for this as well.
- Go to the product catalog => LIST ribbon => Workflow settings: click on the workflow name. you will now be presented with the following starting options: