[AX2012 ]Accessing Commerce Data Exchange RealTime Service from workgroup POS
Commonly in test/POC scenarios, we will use self signed certificate for realtime service. And when we need to access real time service from workgroup POS (eg. perform inventory look), it will report us security errors. To make self-signed certificate works in this scenario, we need to manually export the .pfx and .cer file for the self signed cer and import it into the workgroup computer. here are the detailed steps.
How to install a Self signed Certificate
Creating the self-signed certificate on the IIS server
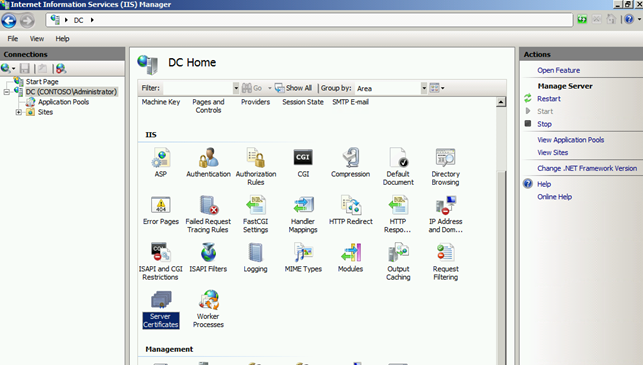
Open Administrative Tools and click on the “Internet Information server (ISS) Manager”
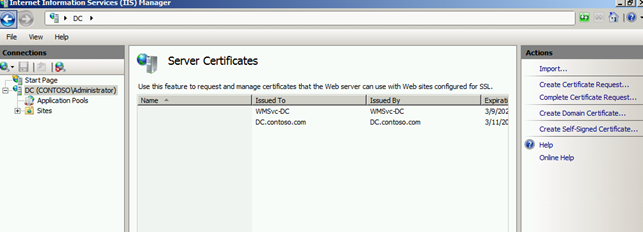
On the Instance home, click on “Server Certificates”
3. In the right actions pane, click on the “Create Self Signed Certificate”
4. Specify a friendly name and press OK
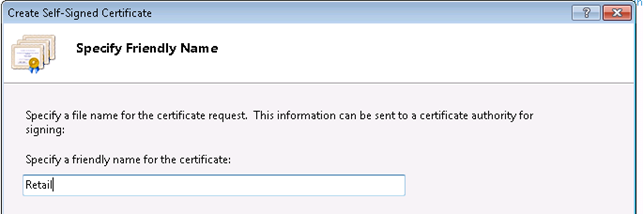
5. The Server certificate is now created.
To export the .pfx and .cer files
On the server where you installed the certificate, choose Start, choose Run, and then in the Open box, type MMC. Choose OK.
On the Console page, on the File menu, select Add/Remove Snap in.
On the Add/Remove Snap-in dialog box, choose Add. The Add Standalone Snap-in page appears. Select Certificates and then choose Add.
On the Certificates snap-in page, select Computer account, and then choose Finish. On the Add Standalone Snap-in page, choose Close, and then on the Add/Remove Snap-in page, choose OK.
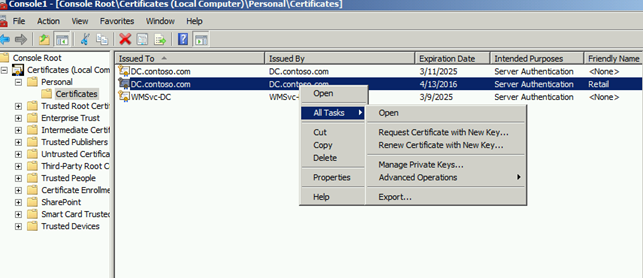
On the Console page, in the navigation pane, expand Certificates – Local Computer, and then expand Personal.
In the navigation pane, select Certificates.
In the details pane, locate the certificate with the friendly name you just specified before.Right-click this certificate, select All Tasks, and then choose Export.
The Welcome to the Certificate Wizard dialog box appears. Choose Next to continue.
On the Export Private Key page, select Yes, export the private key. Choose Next.
On the Export File Format page, make sure that you select Personal Information Exchange – PKCS #12(.PFX).. Choose Next.
On the Password page, supply a password, and then choose Next.
On the File to Export page, type the path and file name of the .pfx file. For example, C:\testcert.pfx. Choose Next.
Choose Finish. On the Certificate Export Wizard page, choose OK to confirm that the export was successful.
Repeat steps 7 and 8.
On the Export Private Key page, select No, do not export the private key, and then choose Next.
On the Export File Format page, make sure that you select DER encoded binary X.509 (.CER), and then choose Next.
On the File to Export page, type the path and file name of the .cer file. For example, C:\testcert.cer. Choose Next.
Choose Finish. On the Certificate Export Wizard page, choose OK to confirm that the export was successful.
Installing the certificate on each workgroup machine
Copy the Pfx and Cer file to the each workgroup machine were you have POS installed.
Double click on the pfx to start the import wizard, and click Next
Click Next
Enter the password for the private key
Do the same for the Cer file. Click on the Install certificate.
You will be prompted that the certificate can´t be certified by the Certificate Authority (CA). Ignore this and finish the import. And now workgroup POS machines should trust teh self-signed cert issued in RTS server.