Note
Access to this page requires authorization. You can try signing in or changing directories.
Access to this page requires authorization. You can try changing directories.
Introduction to Logic Apps
Logic Apps on Microsoft Azure provide a platform to implement workflows. It provides a designer for connecting a series of steps and automating your processes. Triggered as per requirements, Logic Apps can be easily customized and scaled on cloud. Logic Apps in conjunction with different connectors available on cloud and on-premise can be used to model and automate workflows. One such connector is the Microsoft SQL Connector available on Microsoft Azure. It exposes a swagger based API to carry out CRUD and polling operations on the tables within the database. These tables and corresponding database are bound to the connector during creation of the connector itself (Steps shown in later section of this article). In the scenario explained below, we will be looking at how to trigger an action based on the value of a column in a database using a logic app.
Scenario
Make use of Logic Apps to monitor a column in SQL Azure Database and update it accordingly. Further, triggering of the Logic App will be customized. It will be configured to run every minute.
Pre-Requisites
- Azure Subscription
- Standard Tier App Service Plan configured on the subscription. (Making use of Free tier does not allow the customizing of the trigger timings.)
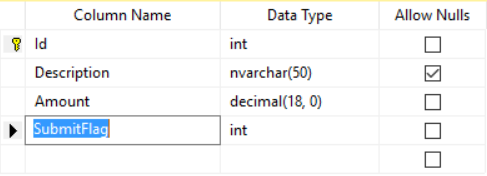
- A SQL Azure Database with a column that will be monitored (in our case we have the Expenses Table with the following schema. We will monitor and update the SubmitFlag Column).
Getting Started
Creating a Logic App on Microsoft Azure portal
- Navigate to portal.azure.com and login with credentials to access your Azure Subscription.
- Click New and then select Web + Mobile. On the next blade choose Logic App.

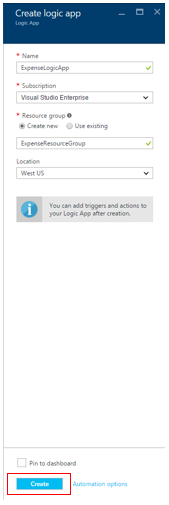
- Create Logic App blade opens. Fill in the required details (Here, Name: ExpenseLogicApp). Keep a note of the resource group and location you allocate to the Logic App. The location of the Microsoft SQL Connector, that you will create later in this article should be the same. (Here, we have West US as the location. We also have our App Service Plan with same location.)
Creating a Microsoft SQL Connector on Microsoft Azure portal
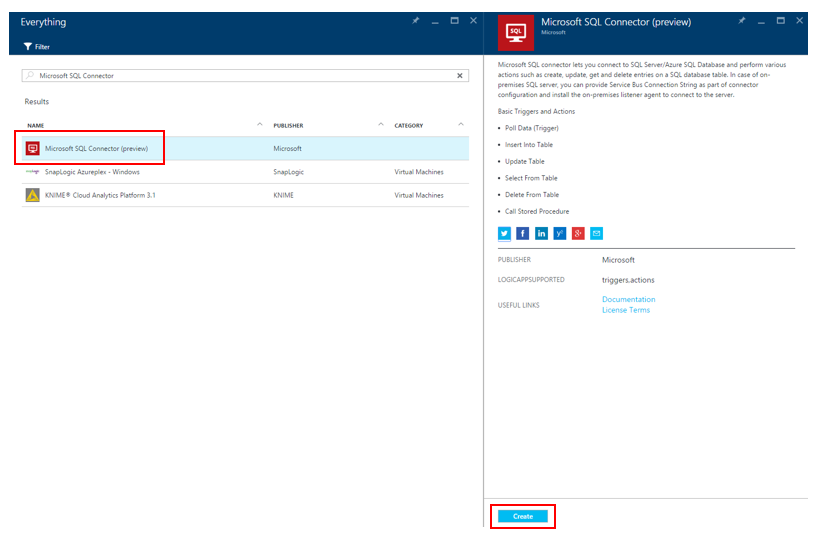
- Click New and then search for Microsoft SQL Connector in Marketplace.

- Select Microsoft SQL Connector(preview) from the blade and then click on Create. As of now it is in preview stage.
- On the Create Tab, make sure that the App Service Plan you select is of Standard Tier. Location and Resource Group is same as that of Logic App. (Here, ResourceGroup is ExpenseResourceGroup and Location West US). Select Package settings and fill out the required details.
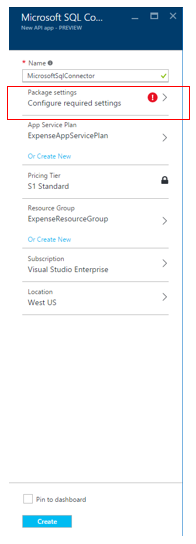
- Fill in the following details.
- Server Name: <YourDbServerName>.database.windows.net
- Port: 1433
- User Name: Username assigned to server while creating it.
- Password: Corresponding password.
- Database Name: Name of the DB in the server which has the table to be monitored.
- Tables: Semicolon separated list of tables within the database.
- Data Available Query: Select Count(*) from <YourTableName>. (This can also be semicolon separated list of commands for each table that you want to include)
- Poll Data Query: Query to fetch data in based on some condition. (Here, SELECT * from Expenses where SubmitFlag = 1).

- Click on OK. Once again open the Package Settings blade and ensure your information is present in the corresponding fields. (Sometimes the information goes missing. This issue was prevalent at the time when this article was written).
- Once verified, click on Create. This will create your Microsoft SQL connector bound to your required Database.
This Connector exposes Swagger based API for carrying out operations on the table of the database to which it is bound. You can check this from the API definition section available on the Dashboard of the SQL Connector.
- Take note of the Host from the Dashboard and build the swagger URL from it. Please note the format : https://<YourHost>.azurewebsites.net/swagger/docs/v1

- Under All Settings blade, select Application settings. Change Access Level to Public (anonymous) and click Save.

- Select Host and then select CORS. Allow all origins by putting in a * and then click on Save.

Design the Logic App Workflow
- Find the Logic App(ExpenseLogicApp) that you created in the above steps. Select Edit.

- The Logic Apps Designer pane opens. Select Blank LogicApp.

- Under Show Microsoft managed APIs, select Http + Swagger. This lets you to use the swagger base API that is exposed by the Microsoft SQL Connector that was created in the above steps.

- Put in the swagger URL that was generated above and click on Next. This gives you an option of all the operations that can be done on the tables that you selected in your database. (Please note the format : https://<YourHost>.azurewebsites.net/swagger/docs/v1)

- Choose Select From Expenses ( this is the table name) (JSON).

- Add the fields to select and the condition for selecting the records in the table. Select Next Step.
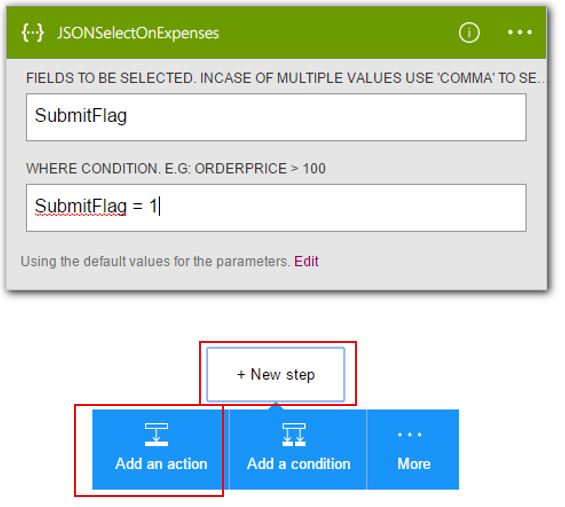
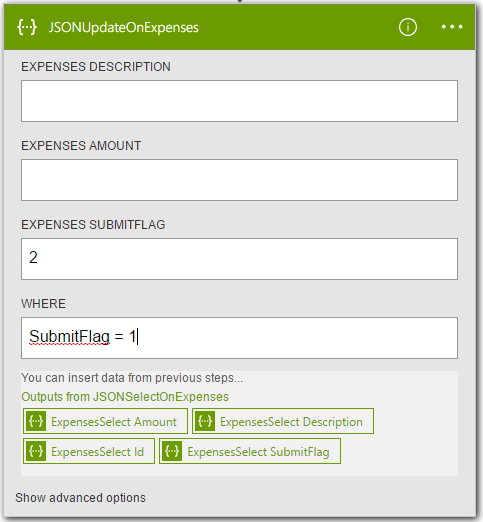
- Repeat steps 3 and 4 to make use of Http + Swagger. Next, select Update Expenses (JSON) .

- Enter the new value for the Column you want to update (Here, SubmitFlag with value 2). Specify the WHERE condition in order to specify the records for which the value should be updated.
Save the flow that you have created and select Code View tab. Scroll down and locate recurrence section. This holds the frequency and interval. These attributes can be modified to customize the triggering of the Logic App Flow. Here, it has been modified to run after every 1 minute. Make changes and Save.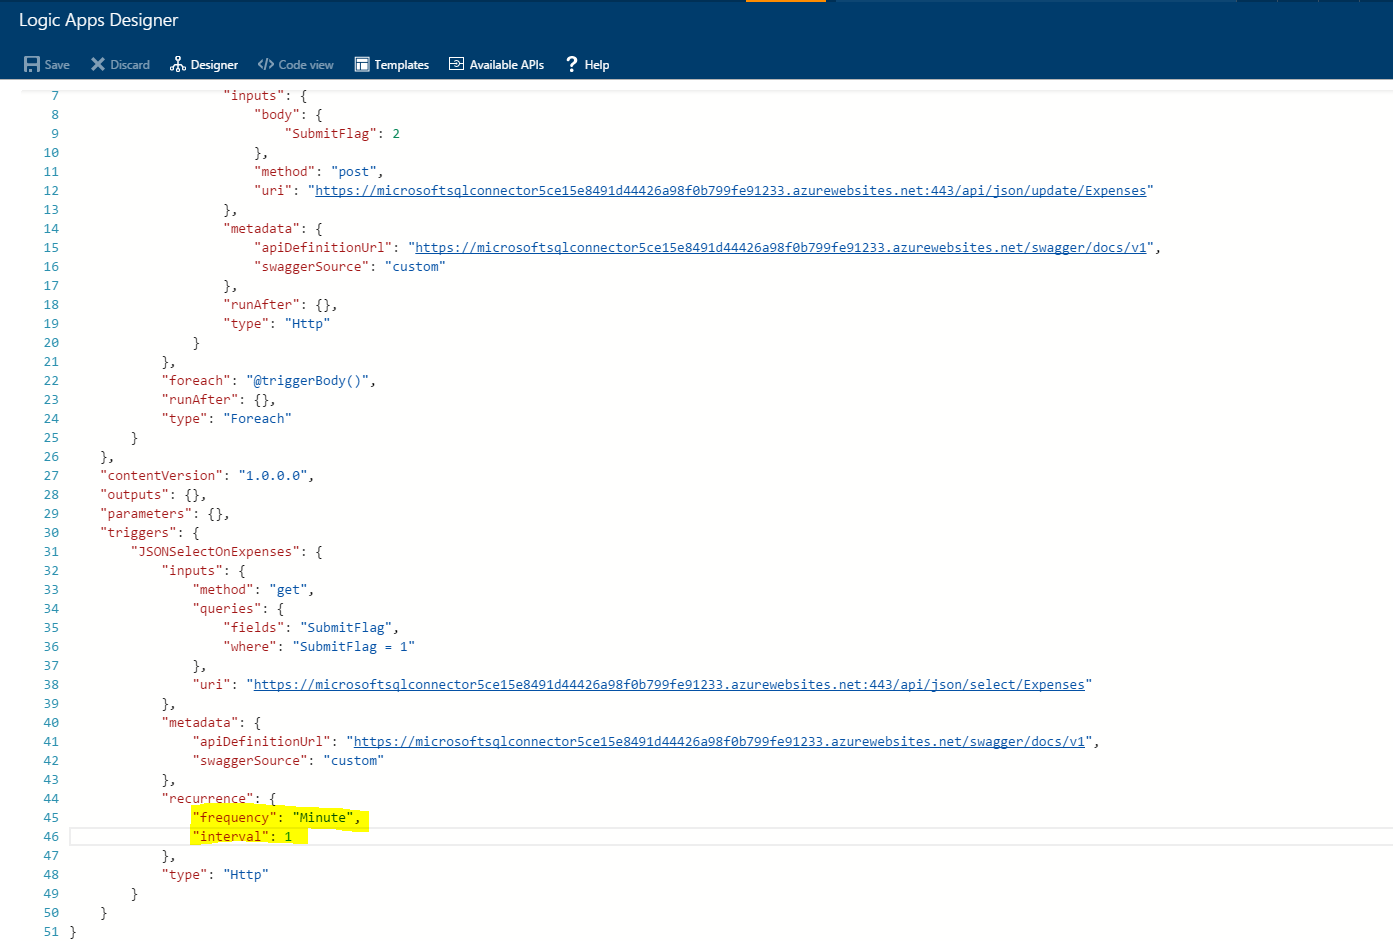
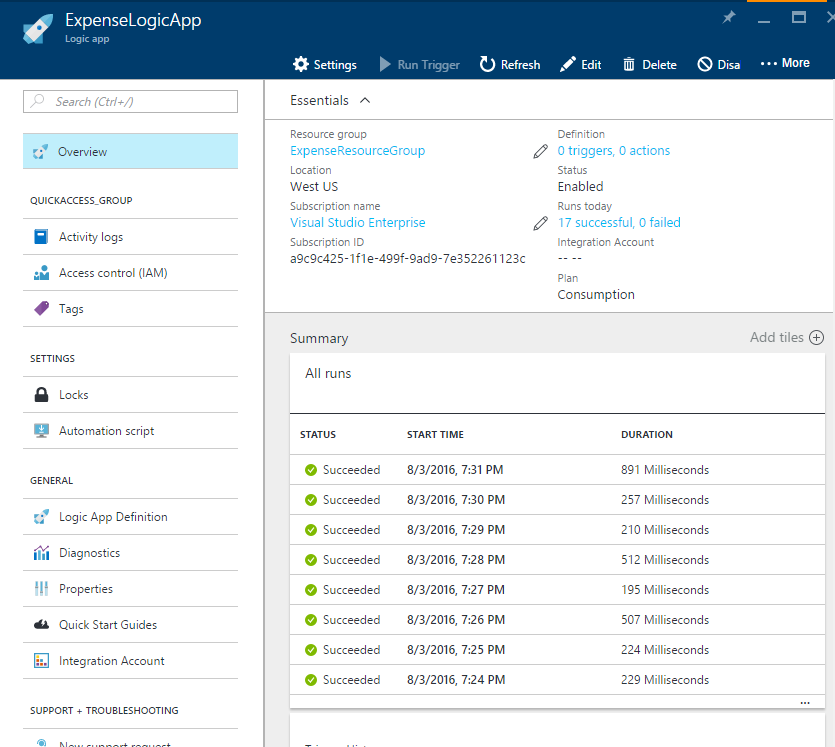
Conclusion
Once configured, the Logic App is triggered after the specified interval. It does carry out the task. In this scenario, it looks for records in the table after every 1 minute. It filters the records based on the condition specified and finally updates the column value to its target value. Success and failure of each trigger can be seen from the Dashboard of the Logic App. You can drill down to have a look at each step of each trigger. You can select the iteration and have a detailed look at each of its steps.