Creating a Custom Extender for an Orchestration-Based Itinerary Service
Introduction
In an Itinerary Service you can use a Resolver for dynamically resolving endpoint information and BizTalk Maps. Most of the times when you create a custom Itinerary Service you want to transform or send your message but there are also cases that you want to do something else like logging or validating your message. In that case Resolvers are not useful because the properties and data that they return contain endpoint information and maps.
The Itinerary Designer in Visual Studio fortunately allows you to create custom extenders for Itinerary Service model elements that can be used to add properties to the property bag for use by Orchestration-based Itinerary Services. Through this you no longer need to use a Resolver to feed your Orchestration with dynamic data because you can set the properties directly on the Itinerary Service.
Steps
In the following example is described how you can extend the Itinerary Designer to create an Orchestration Extender which contains a Policy and a DocumentType property. These properties are used in a Validation Orchestration Service which validates the message by using the Business Rule Engine.
The following steps are necessary to make it work:
- Create .NET Helper Classes that are used in the Validation Service and in the Policy.
- Create a Custom Extender for an Orchestration-Based Itinerary Service.
- Create an Orchestration-Based Itinerary Service to validate the message.
- Create a Business Rule Policy for validation.
- Create an Itinerary with the Validating Service.
Installation Prerequisites
You must install the following prerequisite SDKs. Follow this sequence to install the prerequisites:
- Microsoft Visual Studio 2012 SDK

Figure 1. Microsoft Visual Studio 2012 SDK installation wizard.
- Microsoft Visual Studio 2012 Visualization & Modeling SDK
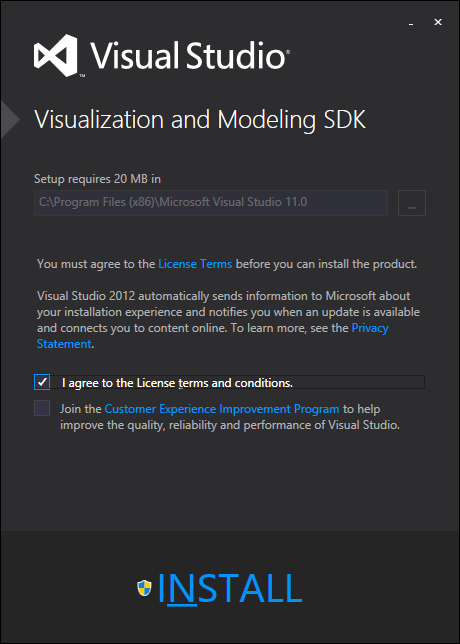
Figure 2. Microsoft Visual Studio 2012 Visualization & Modeling SDK installation wizard.
Create .NET Helper Classes that are used in the Validation Service and in the Policy
Custom .NET Classes are used in the Validation Service to read the PropertyBag and in the Business Rule Policy to set the error.
Create a .NET Class to set the error in the Business Rule Policy if the validation fails.
01.[Serializable]
02.public class  Message
03.{
04.    private string  _error = string.Empty;
05.
06.    public string  Error
07.    {
08.        get { return _error; }
09.    }
10.
11.
12.    public void  SetErrorMessage(string message)
13.    {
14.        _error = message;
15.    }
16.}
Create a .NET Class to read the properties from the PropertyBag.
01.[Serializable]
02.public class  ItineraryServiceDictionary
03.{
04.    private Dictionary<string, string> resolverDictionary;
05.
06.    public ItineraryServiceDictionary(Dictionary<string, string> dictionary)
07.    {
08.        if (dictionary == null)
09.        {
10.            throw new  ArgumentNullException("dictionary");
11.        }
12.        this.resolverDictionary = dictionary;
13.    }
14.
15.    public string  Item(string  key)
16.    {
17.        string str = string.Empty;
18.        key = key.Trim();
19.        if (this.resolverDictionary.ContainsKey(key))
20.        {
21.            str = this.resolverDictionary[key];
22.        }
23.        return str;
24.    }
25.
26.    public Dictionary<string, string> BaseDictionary
27.    {
28.        get
29.        {
30.            return this.resolverDictionary;
31.        }
32.    }
33.}
Create a Custom Extender for an Orchestration-Based Itinerary Service
Create an Extension Provider class that derives from the ExtensionProviderBase class and have the ExtensionProviderAttribute applied to it with properties that identify the extension and its purpose. These values will be displayed to the user in the Itinerary Designer when the user is setting the Extender property on a model element.
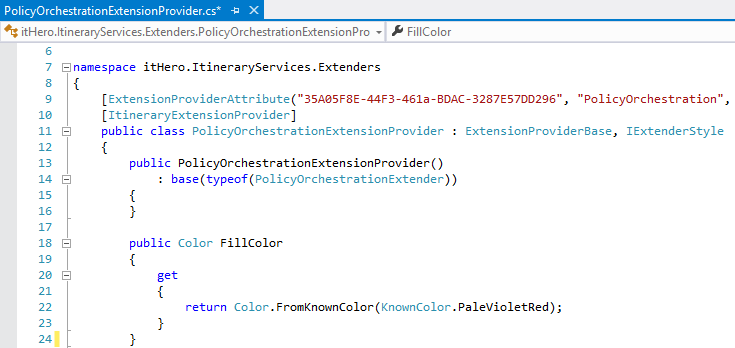
Figure 3. Extension Provider class in Visual Studio.
In the Extender class, the following attributes are applied to the properties: attributes necessary for proper display in a property grid, attributes included in the Microsoft Enterprise Library for validation purposes, attributes necessary for proper serialization, and/or attributes that determine how properties are persisted.
01.[Serializable]
02.[ObjectExtender(typeof(ItineraryService))]
03.public class  PolicyOrchestrationExtender : ItineraryServiceExtenderBase, IOrchestrationItineraryServiceExtender
04.{
05.    [Editor(typeof(BiztalkOrchestrationServiceNameEditor), typeof(UITypeEditor))]
06.    [TypeConverter(typeof(TypeConverter))]
07.    [EditorOutputProperty(BiztalkOrchestrationServiceNameEditor.ServiceId, "ServiceId")]
08.    public override  string ServiceName { get; set; }
09.
10.    public override  string ServiceType
11.    {
12.        get { return "Orchestration"; }
13.    }
14.
15.    [Category(PolicyOrchestrationExtensionProvider.ExtensionProviderPropertyCategory),
16.        Description("Specifies the Business Rule Policy."),
17.        DisplayName("Policy"),
18.        ReadOnly(false),
19.        Browsable(true)]
20.    [XmlElement]
21.    [StringLengthValidator(1, RangeBoundaryType.Inclusive, 0, RangeBoundaryType.Ignore, MessageTemplate =  "The 'Policy' property should not be null or empty.")]
22.    [PersistInPropertyBag]         //NOTE: This property will be persisted in the service property bag
23.    public string  Policy { get; set; }
24.
25.    [Category(PolicyOrchestrationExtensionProvider.ExtensionProviderPropertyCategory),
26.        Description("Specifies the DocumentType."),
27.        DisplayName("DocumentType"),
28.        ReadOnly(false),
29.        Browsable(true)]
30.    [XmlElement]
31.    [StringLengthValidator(1, RangeBoundaryType.Inclusive, 0, RangeBoundaryType.Ignore, MessageTemplate =  "The 'DocumentType' property should not be null or empty.")]
32.    [PersistInPropertyBag]         //NOTE: This property will be persisted in the service property bag
33.    public string  DocumentType { get; set; }
34.}
Build the project and from the \bin\Debug folder of the Visual Studio project, copy the file itHero.ItineraryServices.Extenders.dll to the directory:
C:\Program Files (x86)\Microsoft Visual Studio 11.0\Common7\IDE\Extensions\Microsoft.Practices.Services.Itinerary.DslPackage\Lib

**Figure 4. **Microsoft.Practices.Services.Itinerary.DslPackage\Lib folder in Windows Explorer.
Create an Orchestration-Based Itinerary Service to validate the message
The Orchestration Extender properties are used in a Validation Orchestration Service which validates the message by using the Business Rule Engine.
In this Wiki is not described how to create a Custom Itinerary Orchestration Service. See the following Wiki for detailed information on how to do this:
http://social.technet.microsoft.com/wiki/contents/articles/22038.creating-a-custom-itinerary-orchestration-service-for-the-recipient-list-pattern.aspx
In the Orchestration use a custom .NET Class to read the values from the PropertyBag.
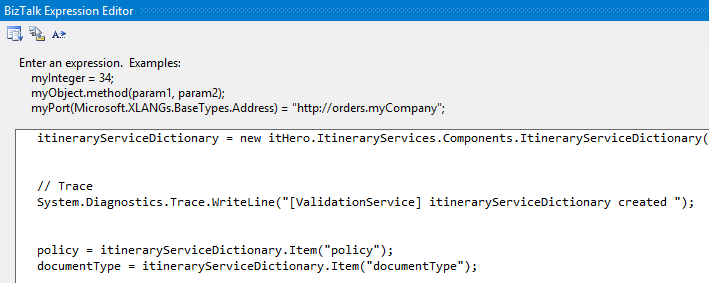
Figure 5. Custom .NET Class in Expression Shape to read the values from the PropertyBag.
Execute the Business Rule Policy.
Test if the message is valid. Throw an Exception if validation fails.

**Figure 6. **Orchestration-Based Itinerary Service.
Build the Project.
Open the esb.config file located in C:\Program Files (x86)\Microsoft BizTalk ESB Toolkit.
Add the custom Orchestration Service in the itineraryServices section.
<itineraryService type="ESB.ItineraryServices.ValidationService, itHero.ItineraryServices.Orchestrations, Version=1.0.0.0, Culture=neutral, PublicKeyToken=ea5135d336848c97" name="ValidationService" stage="None" scope="Orchestration" id="2000"/>
Create a Business Rule Policy for validation
The Validation Orchestration uses the Business Rule Engine to validate the message. With a custom .NET class is the error set.
The following steps describe how to add a custom .NET Class to the Business Rule Composer and how to create a Business Rule Policy to validate the message.
- Start Business Rule Composer.
- Add a New Vocabulary in the Facts Explorer to use a custom class in the BRE.
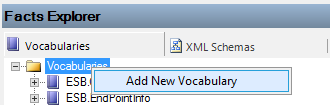
Figure 7. Add a New Vocabulary in the Facts Explorer.
- Add a New Definition to the Vocabulary.

**Figure 8. **Add a New Definition in the Facts Explorer.
- Add a .NET Class to the Vocabulary Definition.

**Figure 9. **Add a .NET Class in Vocabulary Definition Wizard.
- Set the Definition name and select the .NET Class.

Figure 10. Specify a definition for a .NET Class in Vocabulary Definition Wizard.
- Specify the Display Name.
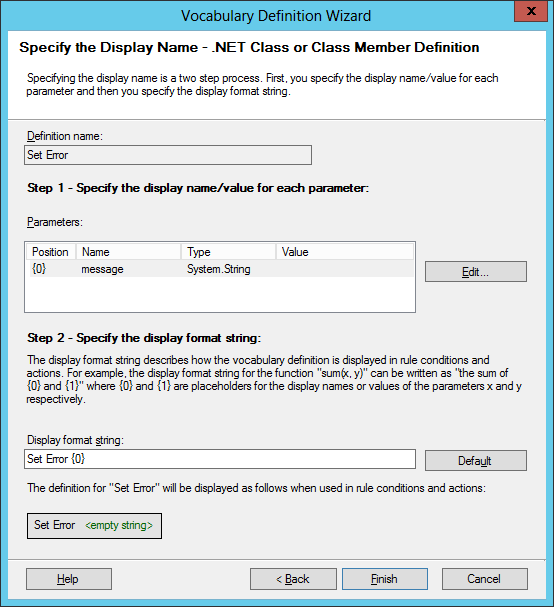
**Figure 11. **Specify the Display Name in Vocabulary Definition Wizard.
- Create a Business Rule Policy to validate the message. Use the custom class to set the error if the validation fails.
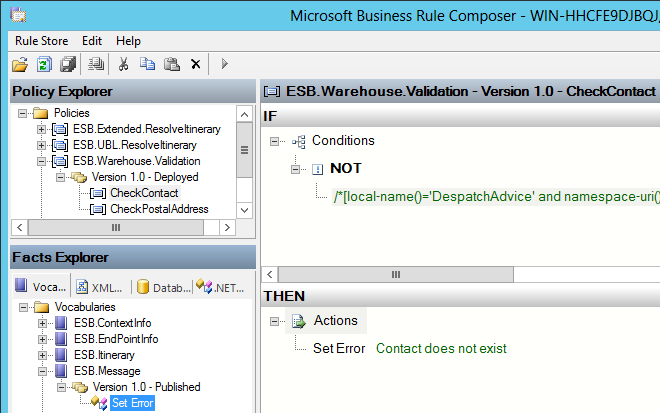
**Figure 12. **Business Rule Policy in Business Rule Composer.
Create an Itinerary with the Validating Service
Create an Itinerary that uses the Business Rule Policy Orchestration Extender and the Validation Service to validate the message.
- Create an Itinerary in the Itinerary Designer.
- In the Toolbox, click an Itinerary Service model element, and then drag it to the design surface. In the Properties window of the ItineraryService model element, set the Itinerary Service Extender property to Business Rule Policy Orchestration Extender.
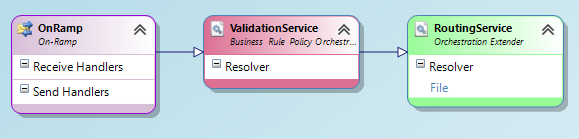
Figure 13. Itinerary in Visual Studio.
- In the Itinerary Service Properties set the name of the Business Rule Policy and the Document Type.
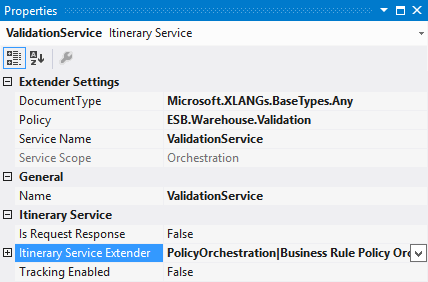
Figure 14. Itinerary Service properties.
- When you export the Itinerary the properties are stored in the PropertyBag.
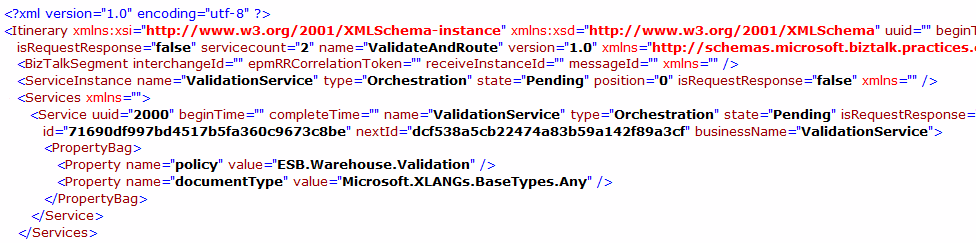
Figure 15. XML of an exported Itinerary.
Testing
Once the Orchestration Service is deployed to BizTalk and the custom component .dll file is placed in the GAC, the Itinerary is ready to be tested.
- Run the Itinerary Test Client to send a message with the itinerary to the ESB.ItineraryServices On-Ramp.
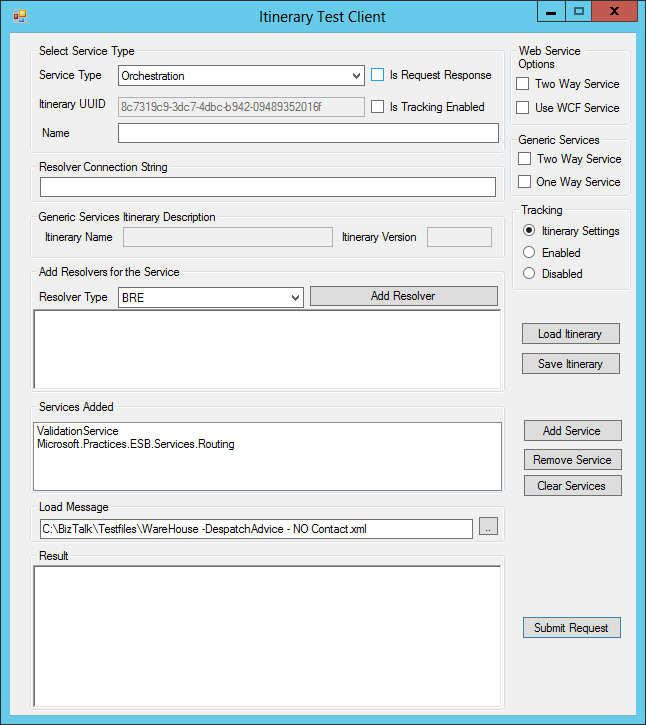
Figure 16. Itinerary Test Client.
- Run DebugView to watch the trace output.

Figure 17. Trace output in DebugView.
- If the validation of the BizTalk message fails a Fault message is stored in the Fault table in the EsbExceptionDb database.

**Figure 18. **Fault table in the EsbExceptionDb database.
Downloads
You can download the sample tool with the source code here:
Creating a Custom Extender for an Orchestration-Based Itinerary Service sample
See Also
Read suggested related topics:
Another important place to find a huge amount of BizTalk related articles is the TechNet Wiki itself. The best entry point is BizTalk Server Resources on the TechNet Wiki.