Authentication and Authorization in Microsoft Azure Mobile Services
Introduction
In this article, i'll describe how you can Authenticate and Authorize users of Windows Store Apps using Microsoft Azure Mobile Services. The IDENTITY Tab in Microsoft Azure Mobile Services provides you the facility to restrict access of operations such as Insert, Modify, Read and Delete. In this way you can Authenticate users using Microsoft Azure Mobile Services.
Detailed Explanation
Now, the first piece of the article is "Authentication". You can do authentication in Mobile Services using Microsoft Account, Facebook, Twitter, Google or Windows Azure Active Directory. Once the users is Authenticated, many developers want to implement certain Authorization Policies. For example, you are developing an application, and you want an Authenticated user to Insert or Modify or Delete some data. To implement these type of Authorization Policies, we use Server Side Scripts.
The very first thing to do is to open Azure Management Portal and create a new Mobile Service. To create Mobile Service, Click on New --> Compute --> Mobile Service --> Create. See the image below.

You'll see the following pop-up window. I'm going to call this "AuthenticationDemo", using existing database. You may create a new database if you don't have an existing one.
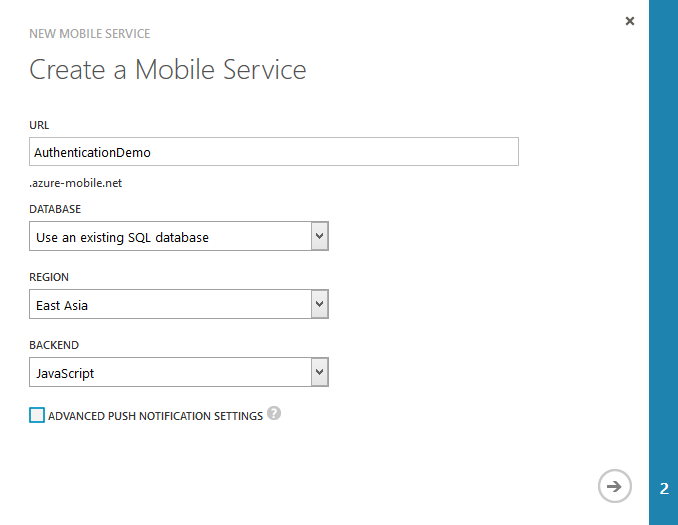
After inserting the details, Click the Next Arrow button at the bottom right.
It'll ask for database credentials. As we are using an existing database, so we've to give the Server Name, Login Name and Password.

Click the tick button after entering the credentials. The Mobile Service will be created in few seconds.
Once it is created, the first thing we have to do is step in to the AuthenticationDemo Mobile Service and Click on DATA tab to create a new table. Actually this table is going to store the data for the Mobile Service.
Click on ADD TABLE to create a new table.
I'm creating a TodoItem table. Now, when the client tries to perform any of the operations such as Insert, Read, Edit or Delete, i can set permissions here that who have the access to do these operations individually. By default, it is "Anybody with the Application Key". I'm changing it to "Only Authenticated Users" option so that only the authenticated users can have access to do these operations. Please see the image below.
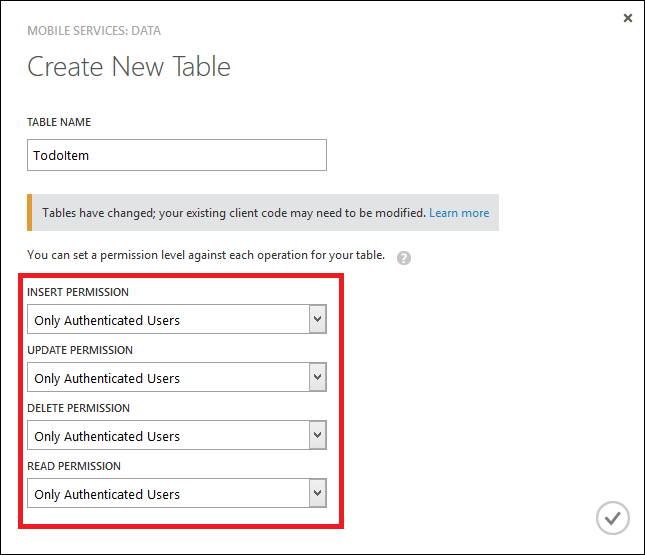
So i set the permissions, hit save button. And the table is now created.
Now, to configure which Authentication option that you want the client application to be able to use, use the IDENTITY tab. Within this tab, you can see the "Microsoft Account", "Facebook", "Twitter", "Google" and "Windows Azure Active Directory" as options.

Here, i'll choose Microsoft Account to authenticate the user. You can see, it is asking for the Client ID, Client Secret and the Package SID of our application.
To find this, first of all we have to register the application with Windows Store. To do this, go to the Windows Dev Portal. Click on Submit an app, Reserve an app name. Here i reserved "Authentication Demo". After reserving the name, than Click "Services".

In this Menu, you can see the "Microsoft Azure Mobile Services" heading. Under this heading, click on the "Live Services Site" link.

It will take you the the Live Services Site where you can find those credentials for mobile services.

Copy Package SID, Client ID and Client Secret and paste it into the portal. Hit the Save Button.
So now our changes are saved, what we need to do is the last step of creating this application.
The last step is to fire the Redirect Domain, which is our Mobile Service required for the authentication to be successful. So, to get that Redirect Domain URL, go to the Dashboard of the Mobile Service in Azure Management Portal, and find the "MOBILE SERVICE URL". See the image below.
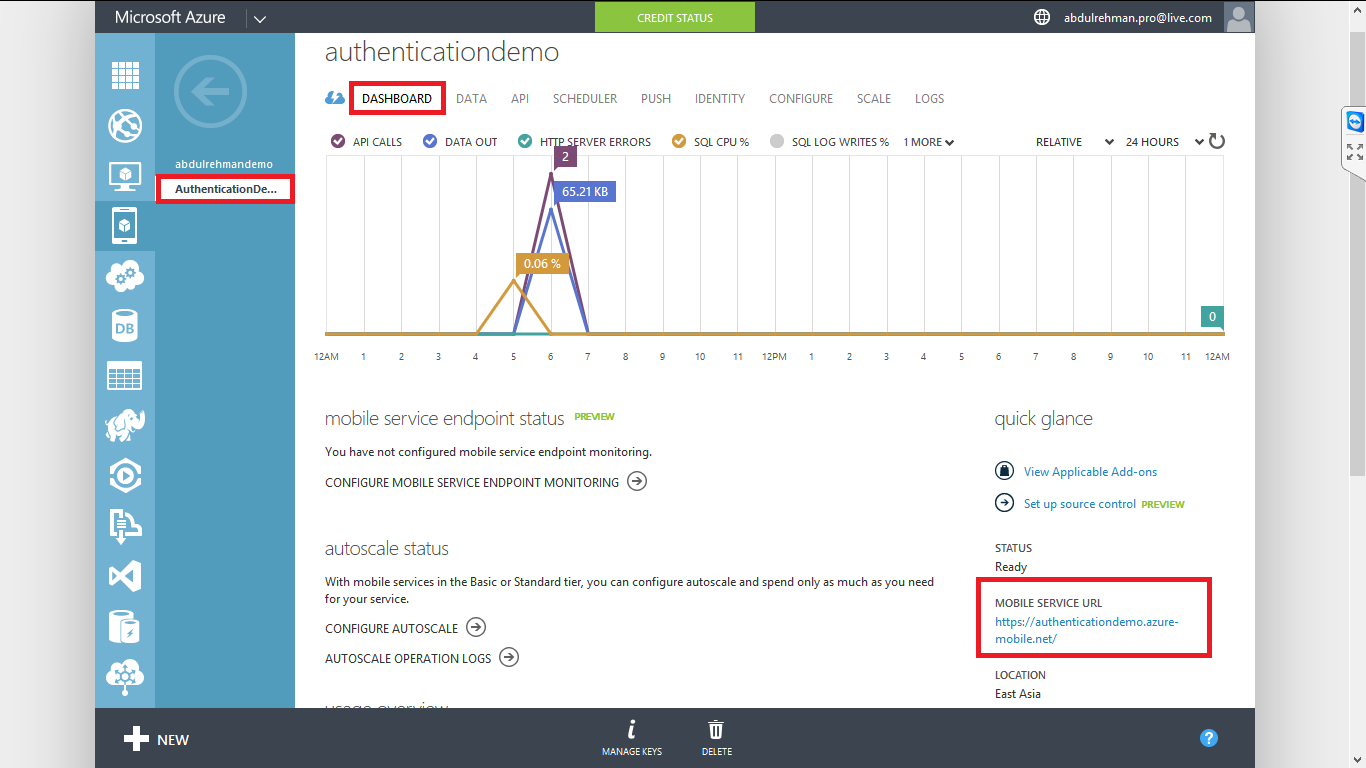
Select and copy this URL, go to the Live Services Site, and than "API SETTINGS". See the vertical menu on the left for the link.
In API SETTINGS, you'll see the text box for the Redirect Domain, now this is the domain where our mobile service will be redirected to.
Paste the copied URL here and modify it like this
https://<mobile service url>/login/microsoftaccount
In my case, it will be https://authenticationdemo.azure-mobile.net/login/microsoftaccount
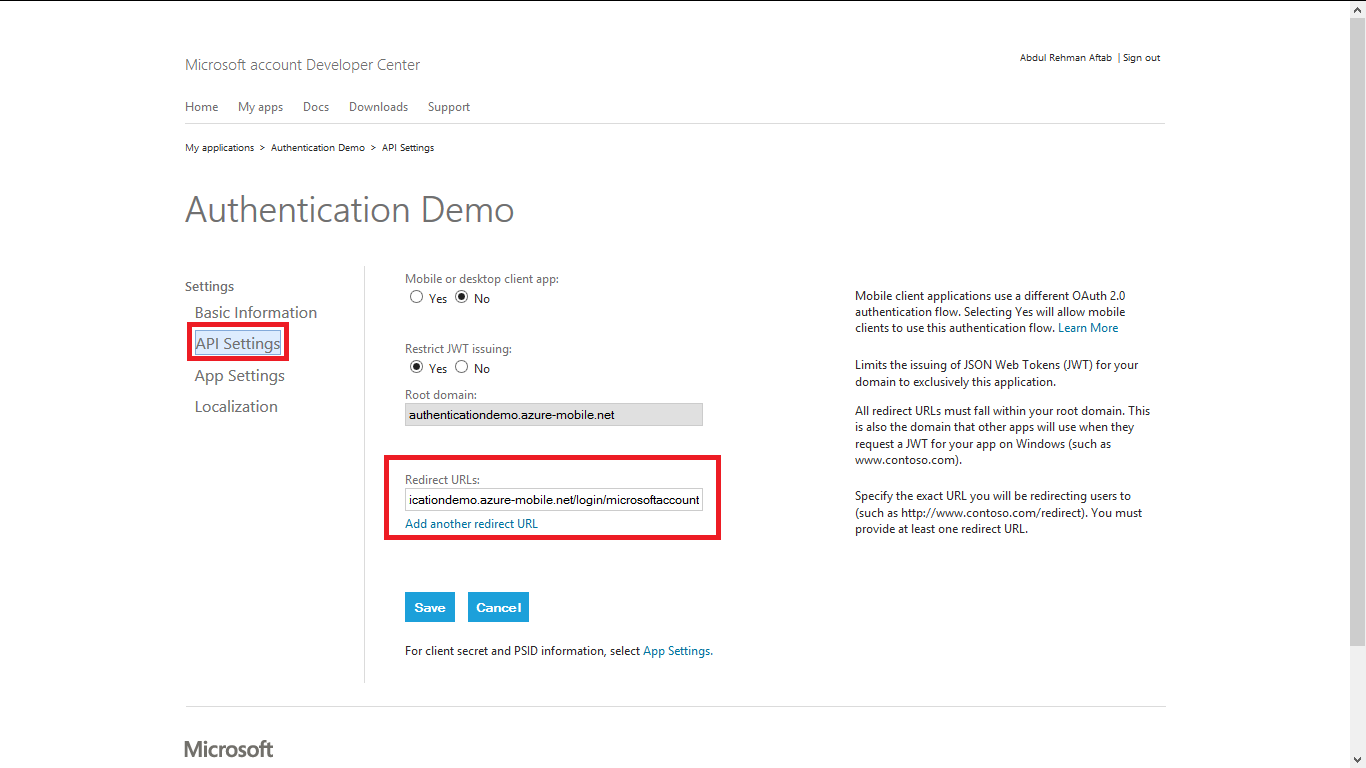
After entering and modifying URL, hit SAVE
So now our backend is ready. Lets start working on the client application, where this Mobile Service will be used and Authenticate the Users.
So, In the Mobile Service menu, Go to the Quick Start, and Click on "Create a New Windows Store App".
Here it will ask to install the Visual Studio, which is already installed, And also we created the table before and set the permissions to "Only Authenticated Users". So lets move to the Step 3, and download the C# Project.

So this is our client application. Open the app in Visual Studio and Run it.
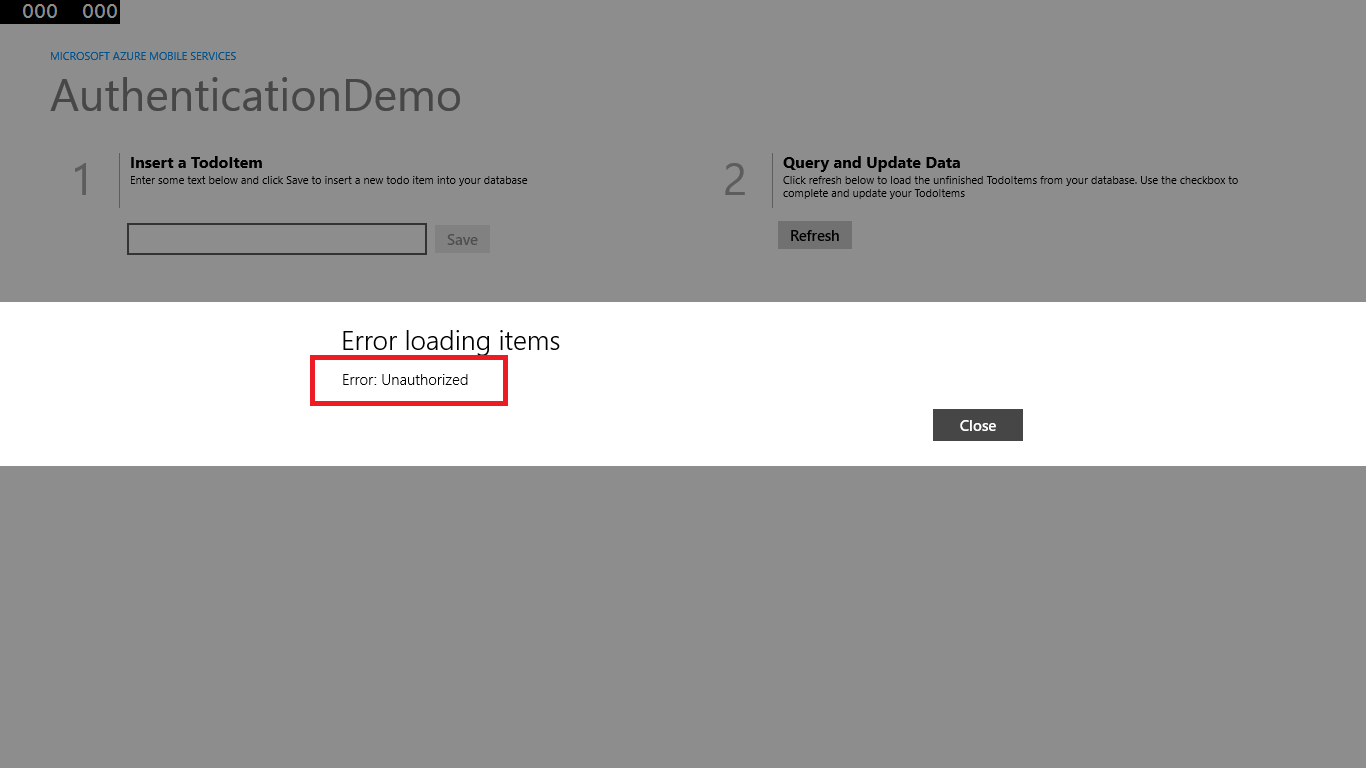
At the current time, our application doesn't do the Authentication thing. And we should get the error of "Unauthorized" because we've specify that our TodoItem table required the Authenticated User to be allowed to perform the operation.
Lets run the app, the first application this application will do is to try to get the List of the Items from the Server by hitting our Mobile Service.
So when it hit the Mobile Service and try to read the table, it get back with an "Unauthorized" error. You'll see the exception.
So, what we need to do here is to implement the Authorization Step. So lets do that.
Go to the MainPage.xaml.cs page. In main page, you can see the OnNavigatedTo method. That's where we refresh our items. Here what it looks like.

So what we need to do is to Authenticate before we Refresh the items each time we navigate to this page.
So this is going to be like this.
First of all, make this method an async method. That means it will contain an await call.
After this, write this line before the Refresh code.
await Authenticate();
Which means it will Authenticate before Refresh.
Now this Method will be like this.
protected async override void  OnNavigatedTo(NavigationEventArgs e)

{
  await Authenticate();
  RefreshTodoItems();
}
And we'll write that Authenticate() method like this.
public async System.Threading.Tasks.Task Authenticate()
{
     await App.MobileService.LoginAsync(MobileServiceAuthenticationProvider.MicrosoftAccount);
}
Notice here we are using giving the Provider name as Microsoft Account because we have to Authenticate Users with it.
Now run the app, and you'll see the Authentication part in it. It'll ask for your Microsoft Account credentials.
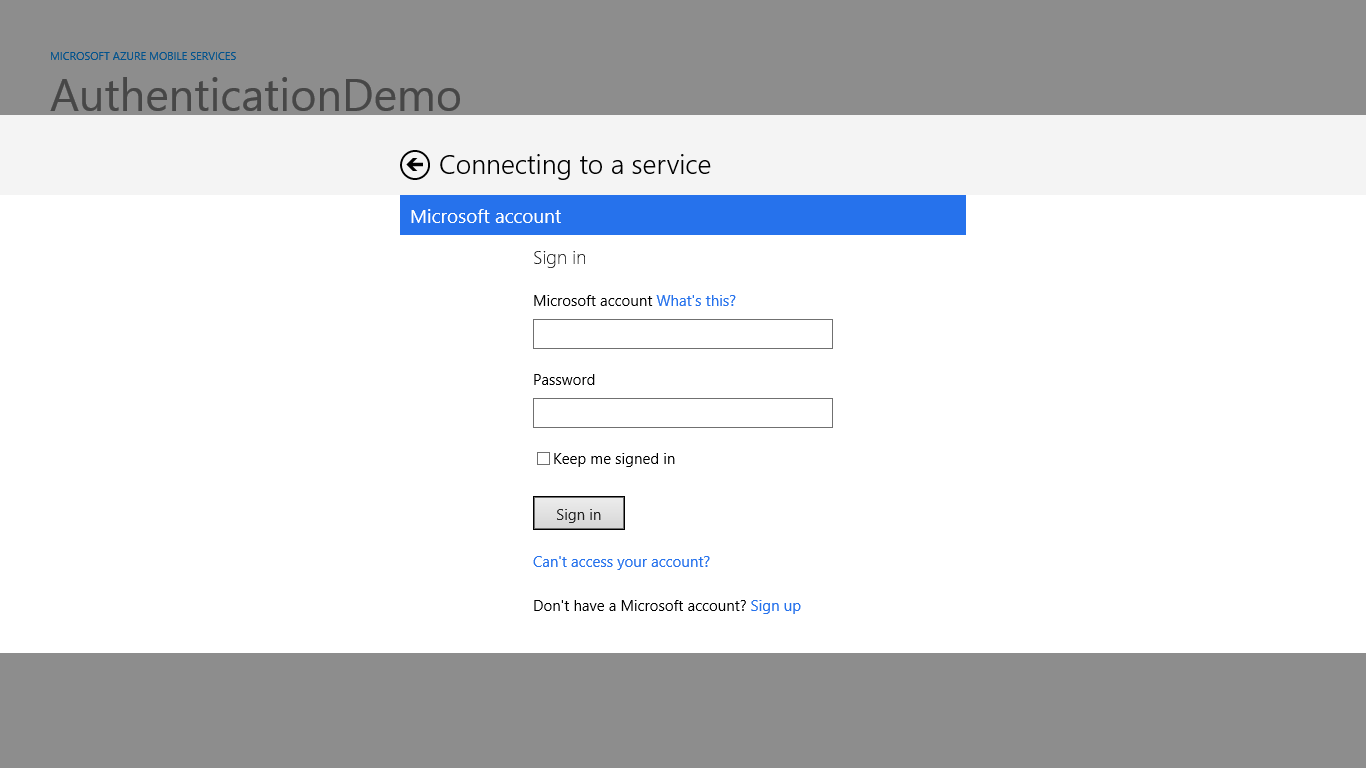
Put the credentials, hit Sign in and than it'll ask you to allow this app to access user's data. Hit yes and here you go!
You'll see that there is no error or exception now. and You can use the app and add items to the list. So that's how Authentication Done. :)
One more thing here. What if the Authentication fails? What if user clicks the back button? What if he put wrong credentials?
So we should handle this case as well. So let's do this by using while and try --- catch block.
Now the code will be like this.
public async System.Threading.Tasks.Task Authenticate()
{
     while (App.MobileService.CurrentUser == null)
     {
          string message;
          try
          {
               await App.MobileService.LoginAsync(MobileServiceAuthenticationProvider.MicrosoftAccount);
               message = "Login Successful and User Authenticated";
          }
          catch (InvalidOperationException)
          {
               message = "Login Unsuccessful";
          }

          MessageDialog dialogMessage = new  MessageDialog(message, "Login Status");
          await dialogMessage.ShowAsync();
     }
}
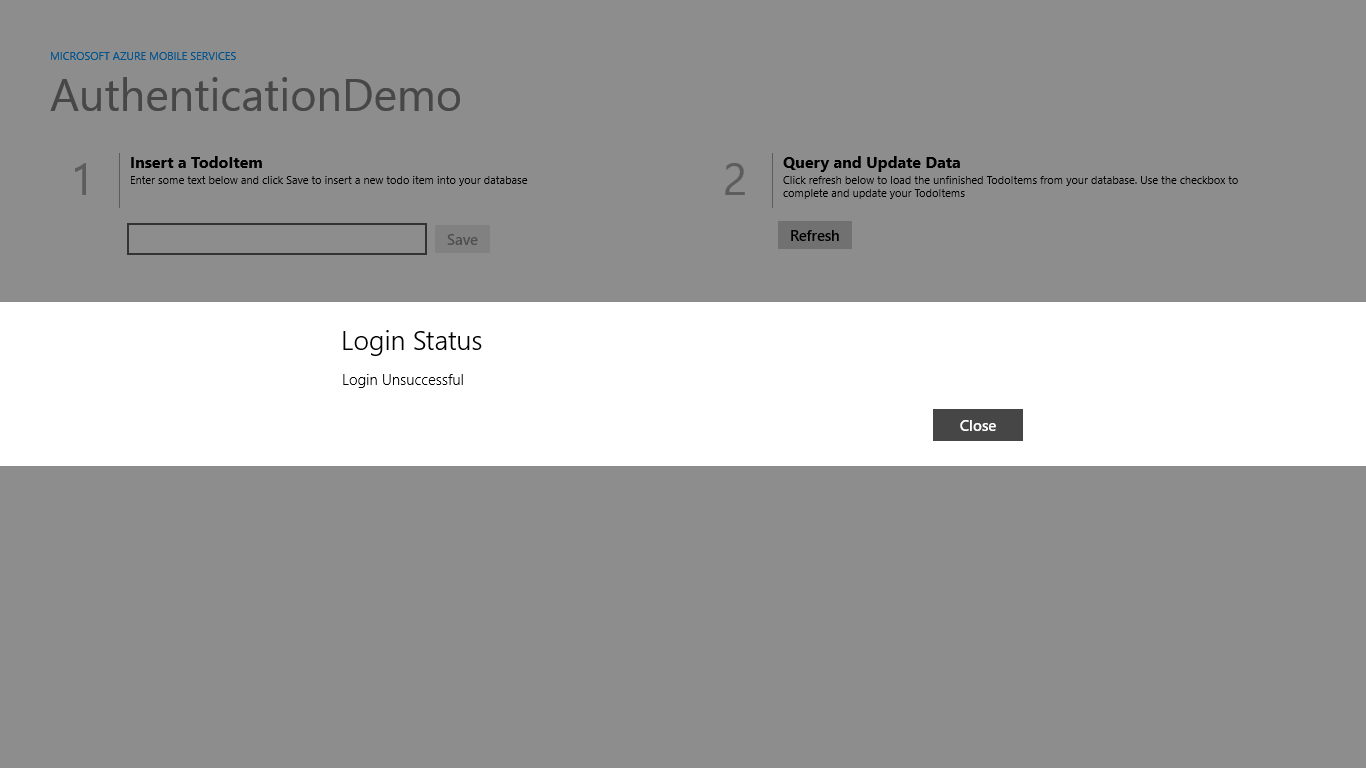
So here, when authentication process starts, it will ask user for Microsoft Account, if user press the back button or something else happened, move to the catch block and the message will be displayed. And when the user enters all information correct and sign in, the message in try block will be displayed and the user can use the app.
Here is the screenshot when user hit Back Button instead of putting details.
Likewise it will show the message when the user will be authenticated successful.
So this is how you can Authenticate and Authorize the User using Microsoft Account.
So How you can Authenticate the User with Google, Facebook, Twitter or Windows Azure Active Directory? This will be in the next article. I'll post the link in the revision. So stay tuned.
Hope it will be helpful.
Source Code Sample App
Click here to download the Sample App Source Code
Please do give your feedback in comments.
Thank you!