Note
Access to this page requires authorization. You can try signing in or changing directories.
Access to this page requires authorization. You can try changing directories.
In this article I will show you how to create a custom formatter in ASP.Net Web API to send object in Request body with specific format.
Formatters in ASP .NET Web API plays an important role, when the request comes to the server, depending on the media-type, determines which formatter has to be used to parse the request and assemble the data into appropriate format as response. In ASP.Net Web API when the request is made by the user, Web API framework checks if it is Simple Type or a Complex Type. All types like string, integers, etc. are simple types and by default ASP.Net Web API read those values from URI and uses Model binding. On the other hand for complex types, ASP.Net WEB API framework read it from request body by default (the behavior can be overridden) an depending on the content-type load specific formatter from the list of formatters available in HttpConfiguration list.
Let suppose we want to send object in pipe format. In this post I will send a user object in request body in below format.
User object have two properties namely Name and Position and we need to send data in below format:
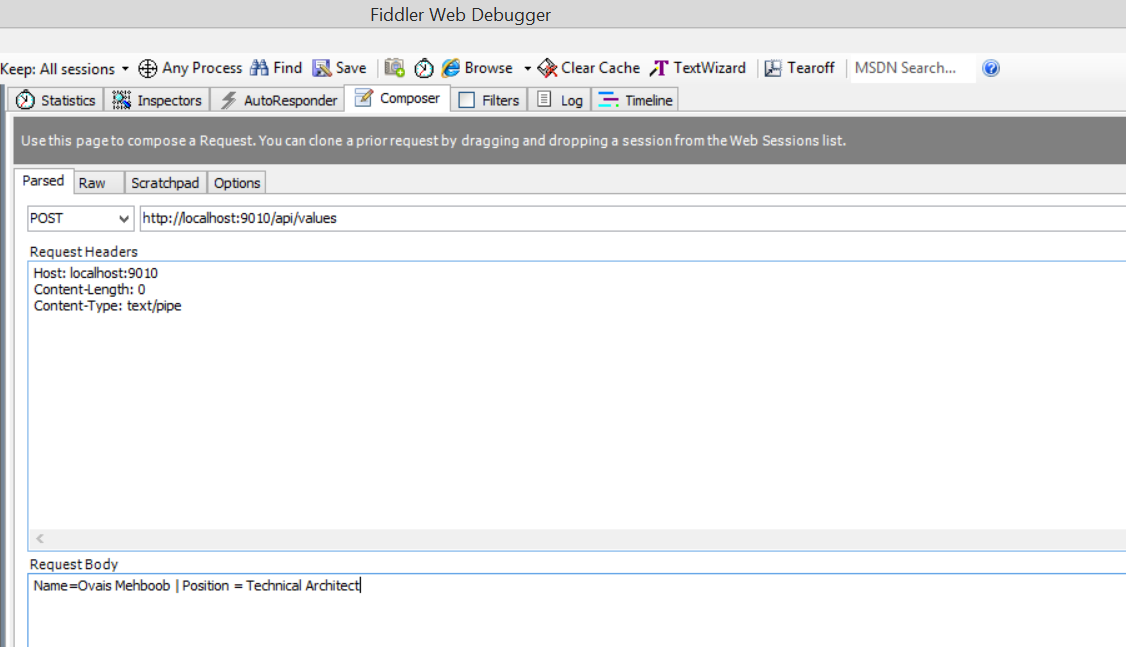
Request Body: Name=Ovais | Position=Technical Architect
This can be done by implementing a custom formatter. When you are creating a custom formatter in ASP.Net Web API, you have two options one is when the request is arrived on server and you want to return the data in specific format or when the request arrives and you want to read/parse the data in specific format.
Steps to follow:
- Create a new Web API project in Visual Studio
- Add a new User class having two string properties namely Name and Position
- Add a new folder named “Infrastructure”. It’s always a good practice to place all the core level classes in particular folder. In my case I have named it Infrastructure.
- Add a new class and named it PipeFormatter
- Derive this class from BufferedMediaTypeFormatter
- Override CanReadType and ReadToStream methods and add the logic to handle incoming request
- Below is the complete code of PipeFormatter class
public class  PipeFormatter : BufferedMediaTypeFormatter
    {

        public PipeFormatter()
        {
            SupportedMediaTypes.Add(new System.Net.Http.Headers.MediaTypeHeaderValue("text/pipe"));

        }

        public override  bool CanReadType(Type type)
        {
                if (type == typeof(User))
            {
                return true;
            }
            return false;

        }

        public override  object ReadFromStream(Type type, System.IO.Stream readStream, System.Net.Http.HttpContent content, IFormatterLogger formatterLogger, System.Threading.CancellationToken cancellationToken)
        {
            User userObject = new  User();
            StreamReader reader = new  StreamReader(readStream);
            string str=reader.ReadToEnd();
            String[] propArr = str.Split(new char[] { '|' });
            foreach (var val in propArr)
            {
                string[] propIntArr = val.Split(new char[] { '=' });
                if (propIntArr[0].ToLower().Trim().Equals("name"))
                {
                    userObject.Name = propIntArr[1].ToString();
                }
                else if  (propIntArr[0].ToLower().Trim().Equals("position"))
                {
                    userObject.Position = propIntArr[1].ToString();
                }
            }

            return userObject;
        }
    }
- In the above code you can see that I have added the “text/pipe” media type in the supported media type list. This you have to add it so you can specify the Content-Type attribute when sending HTTP request.
- Now open the WebApiConfig class placed under App_Start folder
- Add an entry in the config.Formatters collection as below.
config.Formatters.Add(new WebApplication1.Infrastructure.PipeFormatter());
- Build the project and run.
- In order to test I used Fiddler
- Requesting from fiddler
- ReadFromStream method is called and populate the User object

- And finally on my controller Post method I can receive the object as shown in the diagram below

Hope this helps.