Managing and Installing App-V 4.x Packages
Note: This wiki is based on managing and Installing App-V 4.x Packages. The Managing and Installing steps for App-V v5 have changed.
**
Introduction**
After the sequencing process of applications through the Application Virtualization Sequencer, you can import them into the *App-V Management Server *and manage them through the Application Virtualization Management Console.
To do that, open the Application Virtualization Management Console in Start> Administrative Tools. Before you start to import the applications, you can create groups for better organization. In the example in Figure 1 were created three groups: Office Apps, Apps Line of Business and Finance Apps. Click the right button in the group that the application must be imported and click Import Applications, as also shown in Figure 1

Figure 1 - Import Application
Specify the folder path created by the Sequencer and select the file with the SPRJ. extension. The screen in Figure 2 appears. Check the application name, version, data sharing and application access. You can also assign it to a group of servers or the App-V license. After the settings, click Next.

Figure 2 – General Information
In Published Shortcuts, choose the locations that the application's shortcut should be created.

Figure 3 – Shortcuts
Verify the options provided by the Sequencer in File Associations and if necessary, add or change the associations. If you have any of these extensions on the client machine with the virtual application, the program will automatically run when you open any of them. Click Next.

Figure 4 - File Associations
On the next screen, you must add the group of users who may receive the application via the App-V. All users who are in this group receive the application at logon time or depending on the client update, which by default is one hour.
Therefore the application assignment management can be made through Active Directory, without the needs to access the Server App-V. Add the groups and click Next and then Finish.
NOTE: If your File Types appear as above with default APP-V shortcut you can manually browse to the icons folder on your content share for each FTA. - Rory Monaghan (Rorymon)
NOTE: If you specify a different group to install the Server App-V, add it to the policy "Default Policy" in Provider Policies into the Application Virtualization Management Console.

*Figure 5 - Access Permission
*
All computers that need to use some application App-V will need to have installed the Application Virtualization Client and even configured to receive packets from the App-V Server. For more information about the client installation, access http://technet.microsoft.com/en-us/library/cc817162.aspx.
To verify that the client is installed and configured correctly, open the Control Panel, click Administrative Tools and then click Application Virtualization Client. Click Publishing Servers and verify that the connection if the Server AppV exists and is set as an example in Figure 6.
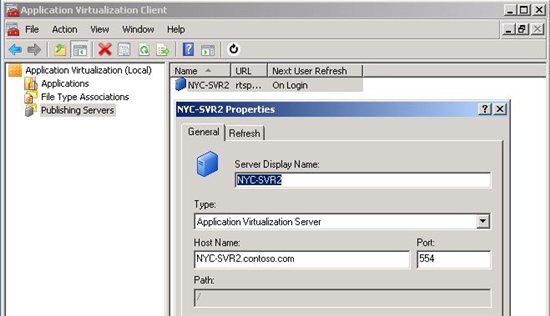
Figure 6 - Configuring the AppV Client
In the next user logon shortcuts to applications will be displayed according to the configuration during the importation.
In the example, in Figure 7 there are three applications: Microsoft Office Excel Viewer, Microsoft Word Viewer 1997 and Microsoft Word Viewer 2003. You cannot run Word Viewer 97 and 2003 on the same machine, but because they are being virtualized in the "bubble" created by the App-V there are no compatibility problems, since the files, records, services and components are independent to each other.
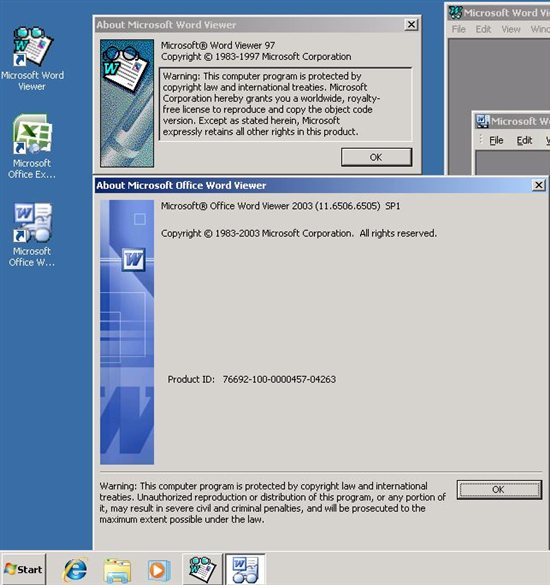
Figure 7 - Advanced Settings
Leandro Carvalho
MCSA+S+M | MCSE+S | MCTS | MCITP | MCBMSS | MCT | MVP Virtual Machine
MSVirtualization | Wordpress | Winsec.org | LinhadeCodigo | MVP Profile
Twitter: LeandroEduardo | LinkedIn: Leandroesc