Windows 10 Apps: Leverage Continuum feature to change UI for Mouse/Keyboard users using custom StateTrigger
Introduction
Several of the controls in Windows Univeral Apps will change dynamically depending on whether the user is using a mouse click or a touch event. However, you can take advantage of one of Continuum's features to make your controls more appropriate to mouse users versus touch users: the Tablet Mode. This is the setting that makes all apps full-screen and disables the desktop when turned on.
This article will show you how to have the app's UI respond dynamically to changes made to the Tablet Mode set in the OS. The method used will involve creating a custom Trigger based on StateTriggerBase and using it within the VisualStateManager.
Design Problem
Windows Universal App controls are well designed to be used by both touch and mouse/keyboard users. The new AdaptiveTrigger is one of the new features that allows UI designers to reflow the app for different screen sizes. However, there are still certain controls that are less effective using a mouse/keyboard than their equivalents in Win32 apps. This can leave mouse/keyboard power users frustrated with Windows Universal Apps.
For example, a ListViewItem within a ListView defaults to a relatively large font with a MinHeight of 44 pixels. This particular MinHeight is designed to allow touch targets to be large enough for fingers. However, a mouse/keyboard user does not need the ListViewItem to take up this much space since the mouse is more precise. As a consequence, the ListView will display fewer items and require the user to scroll more. Visualize the number of emails visible in the Windows 8 Mail app versus a Win32 mail app like Outlook or even Thunderbird. Something so basic can discourage a keyboard/mouse user from using Windows Universal Apps.
Solution
Within the Windows.UI.ViewManagement namespace is a class called UIViewSettings that contains a property called UserInteractionMode. This is the setting that determines whether or not Tablet Mode has been turned on or off in the OS. This setting is either UserInteractionMode.Mouse (Tablet Mode off) or UserInteractionMode.Touch (Tablet Mode on).
class ContinuumTrigger : StateTriggerBase
One easy way to make this property available to your UI is to create a custom Trigger using the StateTriggerBase base class. The class in this example will be called ContinuumTrigger.
public class  ContinuumTrigger : StateTriggerBase
{
    public string  UIMode
    {
        get { return (string)GetValue(UIModeProperty); }
        set { SetValue(UIModeProperty, value); }
    }

    // Using a DependencyProperty as the backing store for UIMode.  This enables animation, styling, binding, etc...
    public static  readonly DependencyProperty UIModeProperty =
        DependencyProperty.Register("UIMode", typeof(string), typeof(ContinuumTrigger), new  PropertyMetadata(""));

    public ContinuumTrigger()
    {
        Initialize();
    }

    private void  Initialize()
    {
        if (!Windows.ApplicationModel.DesignMode.DesignModeEnabled)
        {
            WindowActivatedEventHandler windowactivated = null;
            windowactivated = (s, e) =>
            {
                Windows.UI.Xaml.Window.Current.Activated -= windowactivated;
                var currentUIMode = Windows.UI.ViewManagement.UIViewSettings.GetForCurrentView().UserInteractionMode.ToString();
                SetActive(currentUIMode == UIMode);
            };
            Windows.UI.Xaml.Window.Current.Activated += windowactivated;

            Windows.UI.Xaml.Window.Current.SizeChanged += Current_SizeChanged;
        }
    }

    private void  Current_SizeChanged(object sender, Windows.UI.Core.WindowSizeChangedEventArgs e)
    {
        var currentUIMode = Windows.UI.ViewManagement.UIViewSettings.GetForCurrentView().UserInteractionMode.ToString();
        SetActive(currentUIMode == UIMode);
    }
}
The DependencyProperty allows you to set the different states, "Touch" and "Mouse", in the VisualStateManager. There is no event that is fired with the UserInteractionMode property changes, so this class watches for the Window SizeChanged event. While this fires when the Tablet Mode changes even if the app is already maximized.
However, watching this event won't indicate what the UserInteractionMode is when the app starts. The UIMode property won't be set when the window is created and the SizedChanged event fires at the beginning. Instead, this class also watches the Window Activated event. It only needs to do so once and unsubscribes the event as soon as it fires. In this event, the UIMode property will have been populated with the definitions in your VisualStateManager and the trigger will work correctly.
When either event fires, the class checks the UserInteractionMode and compares it to the UIMode that is set. If they match, the base class's SetActive method is called with true for its parameter.
VisualStateManager
The ContinuumTrigger class is used within the VisualStateManager as a way to set properties within your XAML depending on the UserInteractionMode. For example, if the goal is to shrink the ListViewItem when using Mouse/Keyboard, one method is to create two different ItemContainerStyle resources: one for Touch and one for Mouse/Keyboard.
The first style is derived from the default ListViewItem's style. The second style is intended for Mouse/Keyboard operations by shrinking the FontSize, MinHeight, and MinWidth. These can be placed in Page.Resources.
<Style x:Key="TouchListViewStyle" TargetType="ListViewItem">
    <Setter Property="FontSize" Value="{ThemeResource ControlContentThemeFontSize}" />
    <Setter Property="MinHeight" Value="44"/>
    <Setter Property="MinWidth" Value="88"/>
</Style>
<Style x:Key="MouseListViewStyle" TargetType="ListViewItem">
    <Setter Property="FontSize" Value="12"/>
    <Setter Property="MinHeight" Value="22"/>
    <Setter Property="MinWidth" Value="44"/>
</Style>
The ListView that will be modified must be named using the x:Name="TransformingListView" notation. The VisualStateManager section should be placed in the root Grid of your page.
<VisualStateManager.VisualStateGroups>
    <VisualStateGroup>
        <VisualState>
            <VisualState.StateTriggers>
                <triggers:ContinuumTrigger UIMode="Touch" />
            </VisualState.StateTriggers>
            <VisualState.Setters>
                <Setter Target="TransformingListView.ItemContainerStyle" Value="{StaticResource TouchListViewStyle}"/>
            </VisualState.Setters>
        </VisualState>
        <VisualState>
            <VisualState.StateTriggers>
                <triggers:ContinuumTrigger UIMode="Mouse" />
            </VisualState.StateTriggers>
            <VisualState.Setters>
                <Setter Target="TransformingListView.ItemContainerStyle" Value="{StaticResource MouseListViewStyle}"/>
            </VisualState.Setters>
        </VisualState>
    </VisualStateGroup>
</VisualStateManager.VisualStateGroups>
Each VisualState section defines a StateTrigger that activates the property changes defined in the Setters section. There are two sections: one in which the UIMode of the ContinuumTrigger is set as "Touch" and one where it is set as "Mouse".
Result
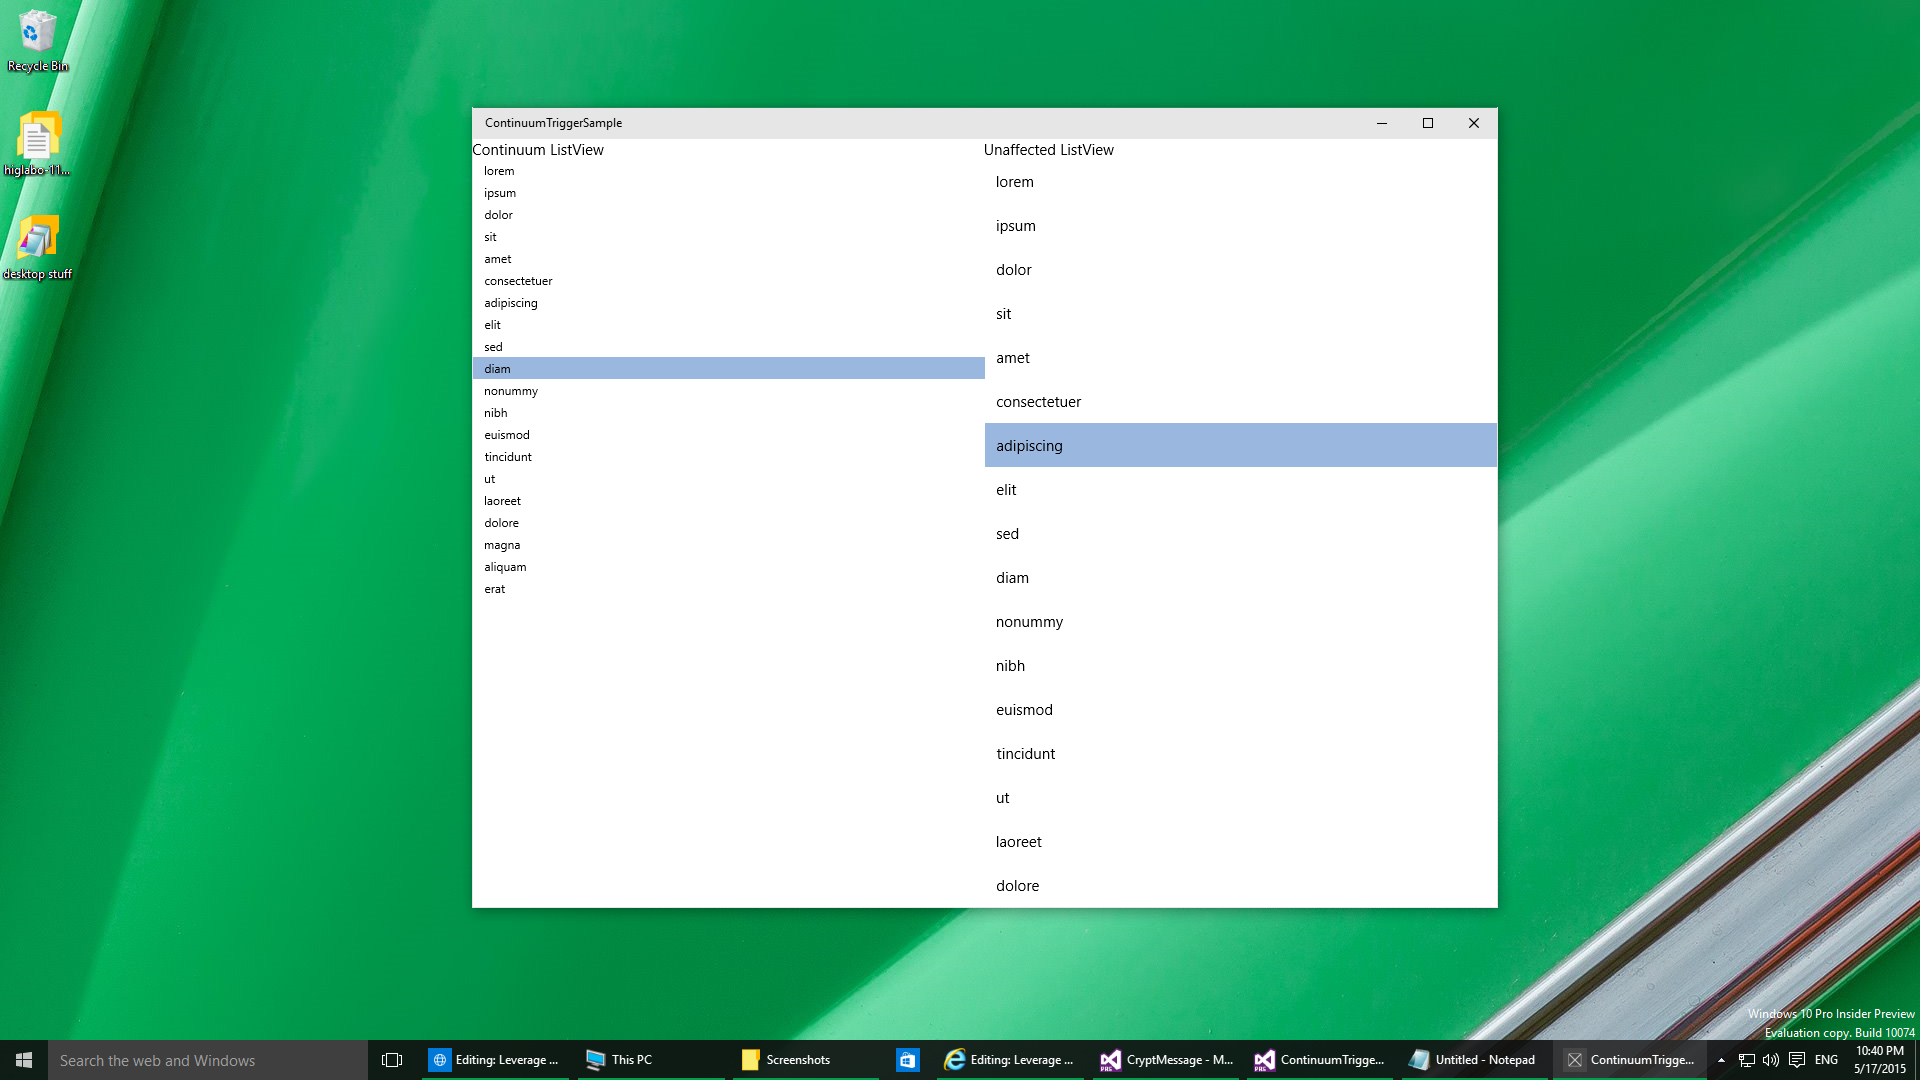
The following image is from a sample app with two ListViews side-by-side using the same data. The left is styled using the TouchListViewStyle previously defined. The right is using the default ListView style. The left ListView's style is applied using the VisualStateManager and ContinuumTrigger. The OS is currently in "Desktop Mode", i.e. Tablet Mode is turned off.
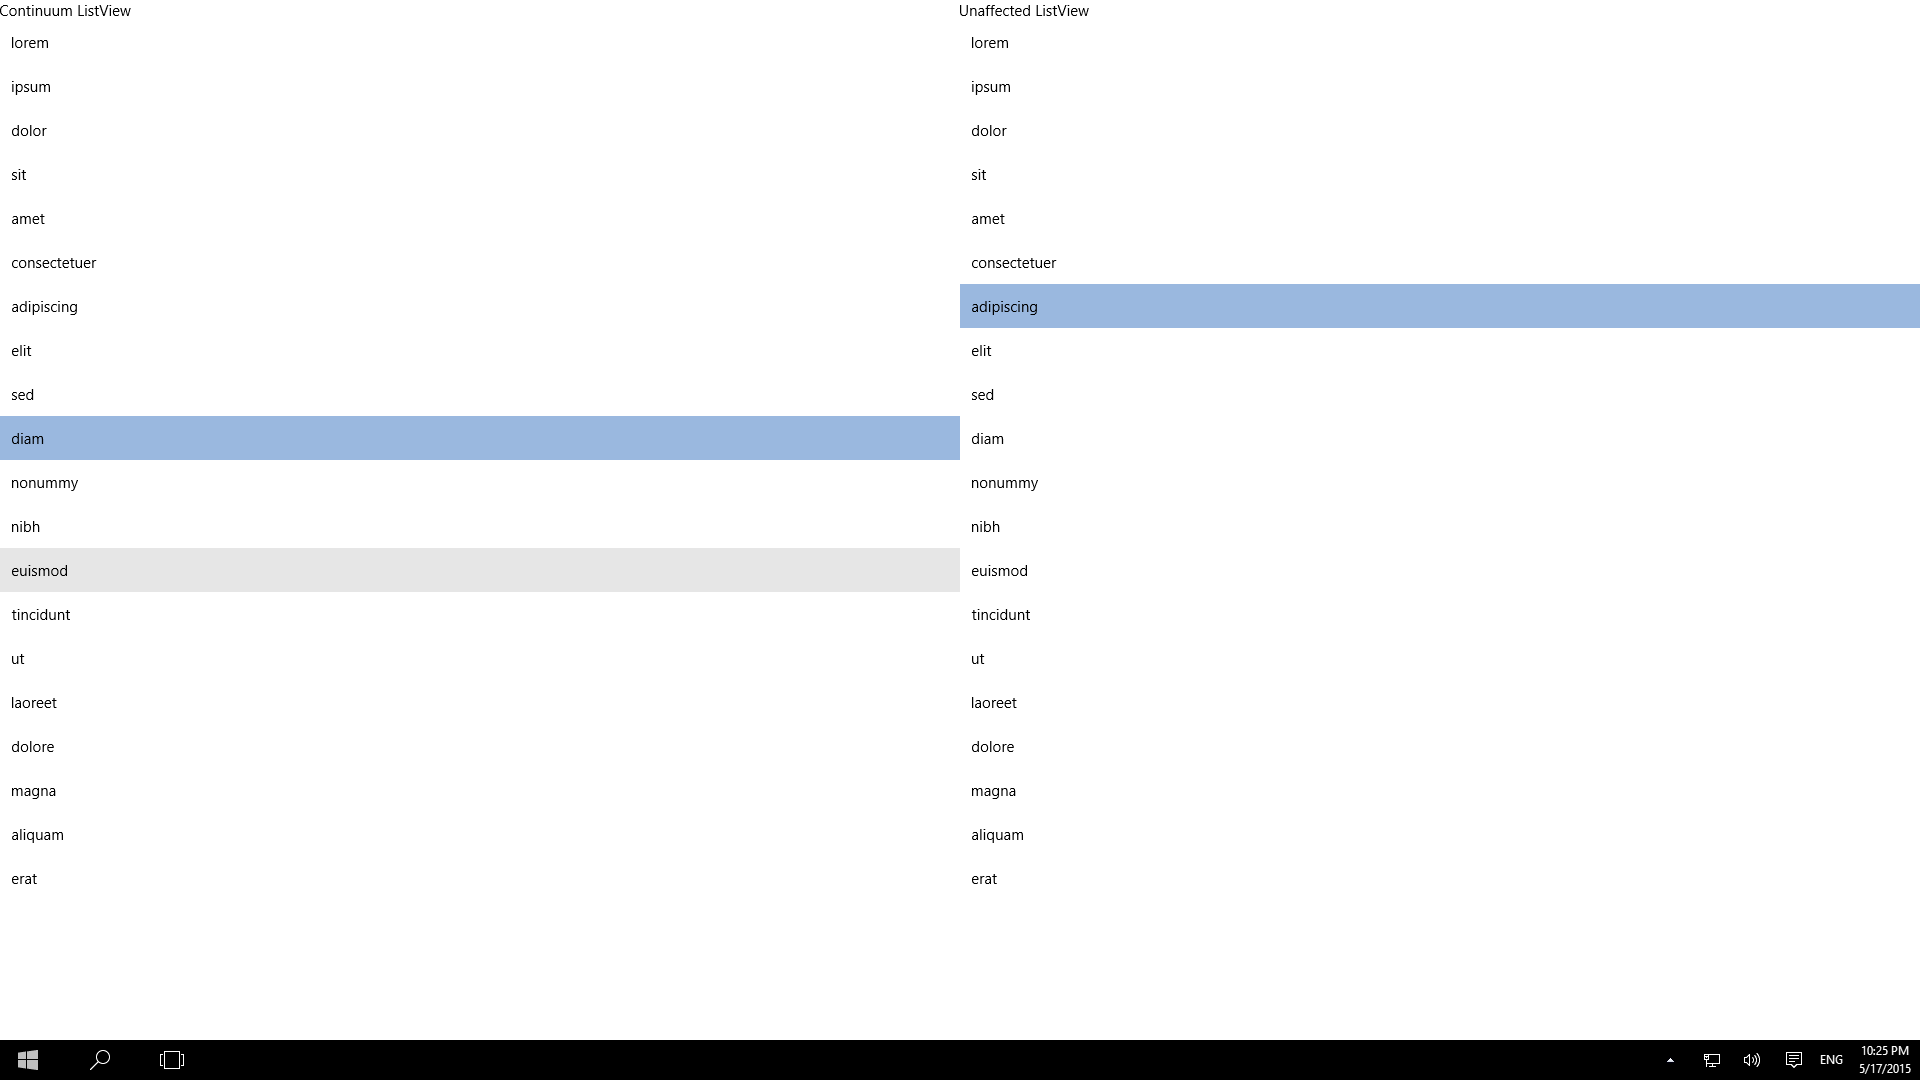
When switched to Tablet Mode in the OS, the ListView changes styling to the TouchListViewStyle without losing state.
Sample Project
Download a sample project from the GitHub Demo repository.
References
Creating the ContinuumTrigger class using StateTriggerBase was made possible using Juan Pablo G.C.'s Advanced View States for Windows 10 apps article and the State Triggers sample from Microsoft/Windows-universal-samples on GitHub.