Microsoft Small Basic: Painting Tool Using Graphics Window
Introduction 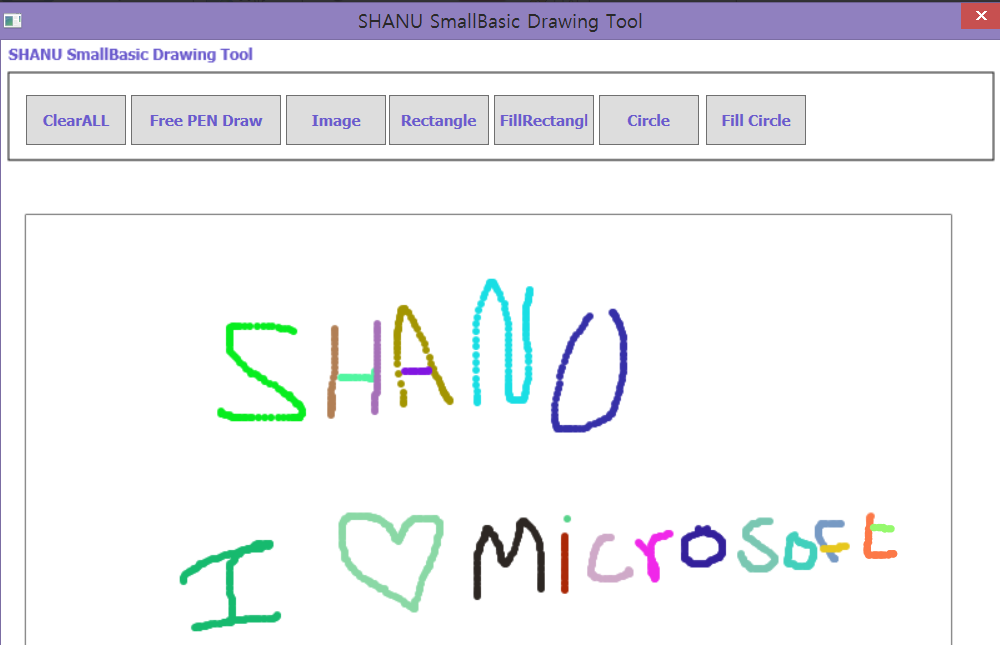
In this article we will see how to create our own Painting tool using Small Basic Graphics Window. In our previous article we have explained about getting started with Small Basic Microsoft Small Basic for Beginners: Getting Started.Now in this article we will see more in detail about how to create SmallBasic Graphical output using GraphicsWindow . In this article we will see
- How to create our first GraphicsWindow
- How to add Animation to move graphic Objects
- Create our own painting Tool using SmallBasic GraphicsWindow.
In my previous article I have explained about how to install and create our first SmallBasic programs .if you are new to SmallBasic kindly visit the article and study for getting started with SmallBasic.
Code part
1.How to create our first GraphicsWindow
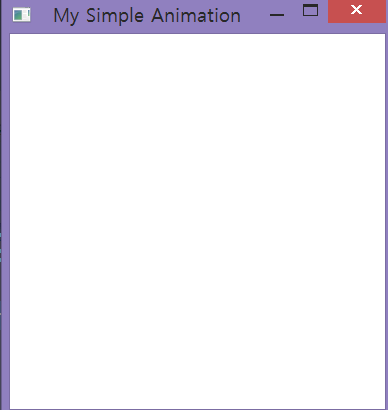
Now let’s see how to create our first GraphicsWindow.To create the graphical window in small basic we using “GraphicsWindow.show()”. Here in this code we can see we have set the height, width and title for our Window.
'Set the Graphics Window size and sow with your title
GraphicsWindow.Show()
GraphicsWindow.Title = "My Simple Animation"
GraphicsWindow.Height = 300
GraphicsWindow.Width = 300
Create your first SmallBasic program, copy and paste the above code. When we run this program from SmallBasic we can see new window will be opened like below.
So now we have created our graphic window so what will be next .Yes lets add few graphics to our window. For this now let’s see how to create a simple animation to display a car move from left to right.
2. How to add Animation to move graphic Objects
In this program I have commented and explained about each functionality
**First create a graphics window **
'Set the Graphics Window size and sow with your title
GraphicsWindow.Show()
GraphicsWindow.Title = "My Simple Animation"
GraphicsWindow.Height = 600
GraphicsWindow.Width = 600
Next declare the variable and set the value for drawing
''Set the global variable for draing car for animation
xval=20
yval=160
carWidth=150
carHeight=40
First we will draw the simple car like graphics with wheel and also a simple road with black color. Here for using simple animation in this program we use the delay and clear all the graphics and redraw.
' redraw the car for every time delay
up:
' to Draw the road
GraphicsWindow.BrushColor = "black"
GraphicsWindow.PenWidth = 2
GraphicsWindow.FillRectangle(0, yval-60, GraphicsWindow.Width, yval+carHeight)
GraphicsWindow.PenColor = "Black"
GraphicsWindow.PenWidth = 2
'for adding the Top Part of Car
GraphicsWindow.DrawRectangle(xval+carWidth/4, yval-carHeight+10, carWidth/2, carHeight-10)
GraphicsWindow.BrushColor = "Orange"
GraphicsWindow.FillRectangle(xval+carWidth/4, yval-carHeight+10, carWidth/2, carHeight-10)
'for adding the Main Part of Car
GraphicsWindow.DrawRectangle(xval, yval, carWidth, carHeight)
GraphicsWindow.BrushColor = "Orange"
GraphicsWindow.FillRectangle(xval, yval, carWidth, carHeight)

'' for Draw Back  Wheel
GraphicsWindow.BrushColor = "black"
GraphicsWindow.DrawEllipse(xval+carWidth/12, yval+carHeight, 34, 34)
GraphicsWindow.BrushColor = "gray"
GraphicsWindow.FillEllipse(xval+carWidth/12, yval+carHeight, 34, 34)

'' for Draw Front  Wheel
GraphicsWindow.BrushColor = "black"
GraphicsWindow.DrawEllipse(xval+(carWidth-46), yval+carHeight, 34, 34)
GraphicsWindow.BrushColor = "gray"
GraphicsWindow.FillEllipse(xval+(carWidth-46), yval+carHeight, 34, 34)

'for the timer we use this delay
Program.Delay(1000)
'after the delay time we clear all the graphics
GraphicsWindow.Clear()
'using Goto we will  again redraw the graphics with new xval position
If xval+carWidth <=GraphicsWindow.Width Then
  xval=xval+20
Else
  xval=20
  EndIf
  Goto up
Complete Animation Code:
Here is the complete code. You can just copy all this code from here and paste in your SmallBasic editor and run the program to see the Graphical Animation.
**Note : **You can also copy the code and run the sample from Small Basic Website Link http://smallbasic.com/program/?BFM797
'Set the Graphics Window size and sow with your title
GraphicsWindow.Show()
GraphicsWindow.Title = "My Simple Animation"
GraphicsWindow.Height = 600
GraphicsWindow.Width = 600

''Set the global variable for draing car for animation
xval=20
yval=160
carWidth=150
carHeight=40

' redraw the car for every time delay
up:
' to Draw the road
GraphicsWindow.BrushColor = "black"
GraphicsWindow.PenWidth = 2

GraphicsWindow.FillRectangle(0, yval-60, GraphicsWindow.Width, yval+carHeight)


GraphicsWindow.PenColor = "Black"
GraphicsWindow.PenWidth = 2
'for adding the Top Part of Car
GraphicsWindow.DrawRectangle(xval+carWidth/4, yval-carHeight+10, carWidth/2, carHeight-10)
GraphicsWindow.BrushColor = "Orange"
GraphicsWindow.FillRectangle(xval+carWidth/4, yval-carHeight+10, carWidth/2, carHeight-10)
'for adding the Main Part of Car
GraphicsWindow.DrawRectangle(xval, yval, carWidth, carHeight)
GraphicsWindow.BrushColor = "Orange"
GraphicsWindow.FillRectangle(xval, yval, carWidth, carHeight)

'' for Draw Back  Wheel
GraphicsWindow.BrushColor = "black"
GraphicsWindow.DrawEllipse(xval+carWidth/12, yval+carHeight, 34, 34)
GraphicsWindow.BrushColor = "gray"
GraphicsWindow.FillEllipse(xval+carWidth/12, yval+carHeight, 34, 34)


'' for Draw Front  Wheel
GraphicsWindow.BrushColor = "black"
GraphicsWindow.DrawEllipse(xval+(carWidth-46), yval+carHeight, 34, 34)
GraphicsWindow.BrushColor = "gray"
GraphicsWindow.FillEllipse(xval+(carWidth-46), yval+carHeight, 34, 34)


'for the timer we use this delay
Program.Delay(1000)

'after the delay time we clear all the graphics
GraphicsWindow.Clear()

'using Goto we will  again redraw the graphics with new xval position
If xval+carWidth <=GraphicsWindow.Width Then
  xval=xval+20
Else
  xval=20
  EndIf
Goto up
3. Create our own painting Tool using SmallBasic GraphicsWindow 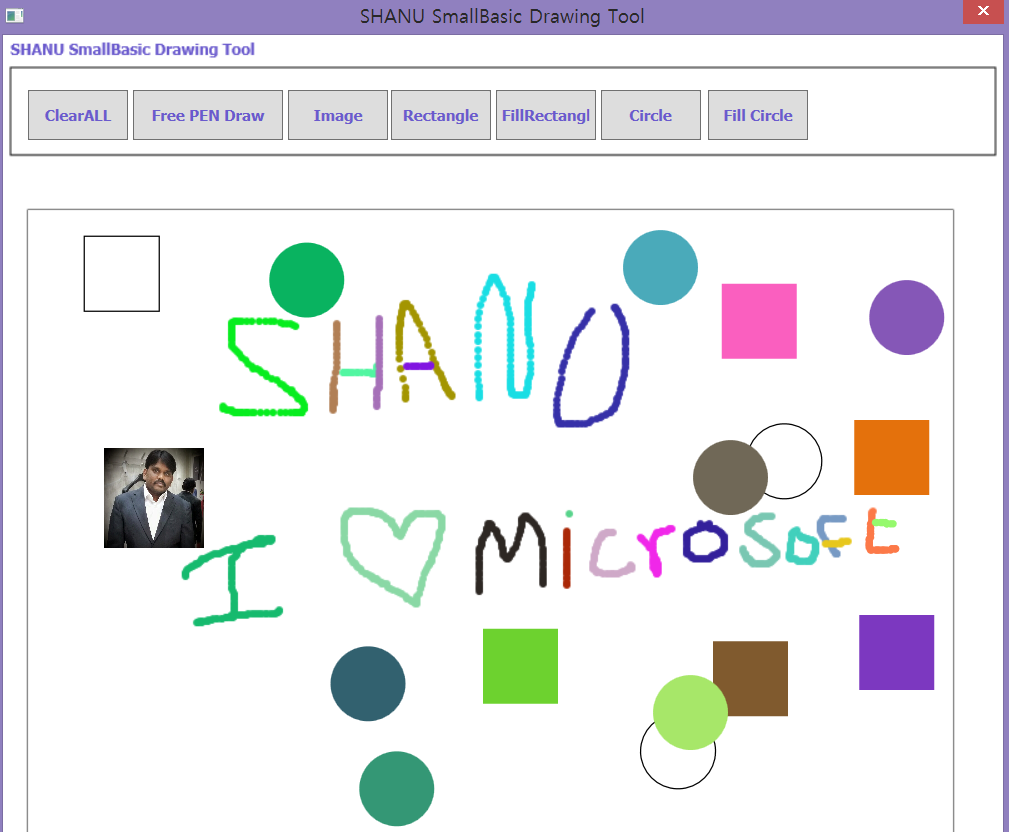
In this Drawing Tool user can
- Free PEN Draw ( user can make a free drawing inside the draw area)
- Image (User can add the image inside the draw area for now here we are selecting the image from C drive .you can set your path to draw the image)
- Rectangle ( user can draw Rectangle inside the draw area)
- Fill Rectangle ( user can Fill Rectangle inside the draw area)
- Circle ( user can Draw Circle inside the draw area)
- Fill Circle ( user can Fill Circle with Circle inside the draw area)
- Clear All (This will clear all the graphics inside the draw area.)
Create Window
First we will create our Graphics window and then create our Toolbar rectangle inside our graphics window.
'Set the Graphics Window size and sow with your title
GraphicsWindow.Show()
GraphicsWindow.CanResize = "False"
GraphicsWindow.Title = "SHANU SmallBasic Drawing Tool"
GraphicsWindow.Height = 800
GraphicsWindow.Width = 800
Draw Toolbar
GraphicsWindow.PenColor = "Black"
GraphicsWindow.PenWidth = 1
titles="SHANU SmallBasic Drawing Tool
GraphicsWindow.DrawBoundText(6, 4, GraphicsWindow.Width, titles)
GraphicsWindow.DrawRectangle(6, 26, GraphicsWindow.Width-12, 70)
drawType=0
Create Buttons
We will create Buttons and event for the button. We will draw all the buttons inside our tool bar rectangle.
Draw the buttons at the toolbar
drawButtons()
Controls.ButtonClicked = ButtonEvents

Sub drawButtons
clearAll = Controls.AddButton("ClearALL", 20, 44)
  Controls.SetSize(clearAll, 80, 40)
  freePen = Controls.AddButton("Free PEN Draw", 104, 44)
  Controls.SetSize(freePen, 120, 40)
   drawImage = Controls.AddButton("Image",228, 44)
   Controls.SetSize(drawImage, 80, 40)
    drawRectangle = Controls.AddButton("Rectangle",310, 44)
    Controls.SetSize(drawRectangle, 80, 40)
     fillRectangle = Controls.AddButton("FillRectangle",394, 44)
     Controls.SetSize(fillRectangle, 80, 40)
      drawCircle = Controls.AddButton("Circle",478, 44)
      Controls.SetSize(drawCircle, 80, 40)
        fillCircle = Controls.AddButton("Fill Circle",564, 44)
    Controls.SetSize(fillCircle, 80, 40)
EndSub
Painting Area
We will set the Draw Area Height and Width and draw our Draw area outer line using drawRectangle.
'set the Drwaing Area Starting Xval,Yval and width and Height
drawXval=20
drawYval=140
  drawWidth=GraphicsWindow.Width-60
 drawHeight=GraphicsWindow.Height-200
   '' Draw the Draw Area inside this area we will draw
  GraphicsWindow.DrawRectangle(drawXval, drawYval, drawWidth,  drawHeight)
**Button Click Event **
In each button click event we set the drawType with number.For the Clear All we fill the draw area with White backcolor so that it be like clear all paintings.
'' Check for the button clieked event and perform the action
  Sub ButtonEvents
buttonText = Controls.GetButtonCaption(Controls.LastClickedButton)


If buttonText = "ClearALL" Then
  ' Clear the draw Area for redraw
  drawType=1
    GraphicsWindow.BrushColor="white"
  GraphicsWindow.FillRectangle(drawXval, drawYval, drawWidth,  drawHeight)

  ElseIf buttonText = "Free PEN Draw" Then
    ' Draw the Free Pen
  drawType=2
ElseIf buttonText = "Image" Then
   ' Add Image in draw area
  drawType=3

ElseIf buttonText = "Rectangle" Then
   ' Draw Rectangle in draw area
   drawType=4
   ElseIf buttonText = "FillRectangle" Then
   ' Fill Rectangle in draw area
   drawType=5
    ElseIf buttonText = "Circle" Then
   ' Draw Circle in draw area
   drawType=6
     ElseIf buttonText = "Fill Circle" Then
   ' Draw Circle in draw area
   drawType=7

  EndIf
EndSub
**Mouse Click Event **
In Mouse click event we check for the draw type Number and draw the graphics appropriately .for example if the draw Type is 3 then we add the image to the draw area, same like this all other graphics will be added like rectangle, circle etc.
Note: For image here I have fixed one image and set the image path for C Drive. Kindly change as per your image name and Image path.
'Mouse Click Events

'here we check for draw type and if the dray type is
GraphicsWindow.MouseDown = MouseClick
  Sub MouseClick
  OrgX = GraphicsWindow.MouseX
  OrgY = GraphicsWindow.MouseY

   ' If the Drawtype is 3 then its for  Image Add
 If drawType=3 Then
    if OrgX >drawXval And  OrgX<drawWidth Then
      if OrgY >drawYval And  OrgY<drawHeight+drawYval-6 Then
        image2 = "C:\ShanuICON.jpg"

            GraphicsWindow.DrawResizedImage(image2, OrgX, OrgY, 80, 80)

        EndIf
        EndIf
          '-- end Draw Image
        ' to Draw  Rectangle
     ElseIf drawType=4 Then
    if OrgX >drawXval And  OrgX<drawWidth Then
      if OrgY >drawYval And  OrgY<drawHeight+drawYval-6 Then
        GraphicsWindow.DrawRectangle(OrgX, OrgY, 60,  60)
        EndIf
      EndIf
       ' to Fill  Rectangle
     ElseIf drawType=5 Then
    if OrgX >drawXval And  OrgX<drawWidth Then
      if OrgY >drawYval And  OrgY<drawHeight+drawYval-6 Then
        GraphicsWindow.FillRectangle(OrgX, OrgY, 60,  60)
        EndIf
     EndIf
       ' to Draw Circle
     ElseIf drawType=6 Then
    if OrgX >drawXval And  OrgX<drawWidth Then
      if OrgY >drawYval And  OrgY<drawHeight+drawYval-6 Then
        GraphicsWindow.DrawEllipse(OrgX, OrgY, 60,  60)
        EndIf
     EndIf
       ' to Fill Circle
     ElseIf drawType=7 Then
    if OrgX >drawXval And  OrgX<drawWidth Then
      if OrgY >drawYval And  OrgY<drawHeight+drawYval-6 Then
        GraphicsWindow.FillEllipse(OrgX, OrgY, 60,  60)
        EndIf
     EndIf
    EndIf
EndSub
**Mouse Move Event **
In this event we will draw our free PEN Draw. In this we will check for the drawType is 2 then we will check for the left mouse clicked .If both is true then we will draw a free mouse move daring on the draw area.
'Mouse Move event is used to draw the free pen
GraphicsWindow.MouseMove = MouseDrag

Sub MouseDrag
  x = GraphicsWindow.MouseX
  y = GraphicsWindow.MouseY


  'If the drawtype is 2 then for Free Pen draw here we will draw the colors with random
  If drawType=2 Then
  If (Mouse.IsLeftButtonDown) then
    if x >drawXval And  x<drawWidth Then
      if y >drawYval And  y<drawHeight+drawYval-6 Then

GraphicsWindow.FillEllipse(x, y, 6, 6)
        EndIf

    EndIf
  Endif
EndIf
'-- fre pen
EndSub
Complete painting Tool Code:
Here is the complete code. You can just copy all this code from here and paste in your SmallBasic editor and run the program for fun with your own Drawing Tool.
**Note : **You can also copy the code and run the sample from Small Basic Website Link http://smallbasic.com/program/?BFM797
'Set the Graphics Window size and sow with your title
GraphicsWindow.Show()
GraphicsWindow.CanResize = "False"
GraphicsWindow.Title = "SHANU SmallBasic Drawing Tool"
GraphicsWindow.Height = 800
GraphicsWindow.Width = 800

'Draw Toolbar
GraphicsWindow.PenColor = "Black"
GraphicsWindow.PenWidth = 1
titles="SHANU SmallBasic Drawing Tool
GraphicsWindow.DrawBoundText(6, 4, GraphicsWindow.Width, titles)
GraphicsWindow.DrawRectangle(6, 26, GraphicsWindow.Width-12, 70)
drawType=0


'Draw the buttons at the toolbar
drawButtons()

Controls.ButtonClicked = ButtonEvents

Sub drawButtons
clearAll = Controls.AddButton("ClearALL", 20, 44)
  Controls.SetSize(clearAll, 80, 40)
  freePen = Controls.AddButton("Free PEN Draw", 104, 44)
  Controls.SetSize(freePen, 120, 40)
   drawImage = Controls.AddButton("Image",228, 44)
   Controls.SetSize(drawImage, 80, 40)
    drawRectangle = Controls.AddButton("Rectangle",310, 44)
    Controls.SetSize(drawRectangle, 80, 40)
     fillRectangle = Controls.AddButton("FillRectangle",394, 44)
     Controls.SetSize(fillRectangle, 80, 40)
      drawCircle = Controls.AddButton("Circle",478, 44)
      Controls.SetSize(drawCircle, 80, 40)
        fillCircle = Controls.AddButton("Fill Circle",564, 44)
    Controls.SetSize(fillCircle, 80, 40)
EndSub

''set the Drwaing Area Starting Xval,Yval and width and Height
drawXval=20
drawYval=140
  drawWidth=GraphicsWindow.Width-60
 drawHeight=GraphicsWindow.Height-200

 '' Draw the Draw Area inside this area we will draw
  GraphicsWindow.DrawRectangle(drawXval, drawYval, drawWidth,  drawHeight)

  '' Check for the button clieked event and perform the action
  Sub ButtonEvents
buttonText = Controls.GetButtonCaption(Controls.LastClickedButton)


If buttonText = "ClearALL" Then
  ' Clear the draw Area for redraw
  drawType=1
    GraphicsWindow.BrushColor="white"
  GraphicsWindow.FillRectangle(drawXval, drawYval, drawWidth,  drawHeight)

  ElseIf buttonText = "Free PEN Draw" Then
    ' Draw the Free Pen
  drawType=2
ElseIf buttonText = "Image" Then
   ' Add Image in draw area
  drawType=3

ElseIf buttonText = "Rectangle" Then
   ' Draw Rectangle in draw area
   drawType=4
   ElseIf buttonText = "FillRectangle" Then
   ' Fill Rectangle in draw area
   drawType=5
    ElseIf buttonText = "Circle" Then
   ' Draw Circle in draw area
   drawType=6
     ElseIf buttonText = "Fill Circle" Then
   ' Draw Circle in draw area
   drawType=7

  EndIf
EndSub

  'Mouse Click Events

'here we check for draw type and if the dray type is
GraphicsWindow.MouseDown = MouseClick
  Sub MouseClick
  OrgX = GraphicsWindow.MouseX
  OrgY = GraphicsWindow.MouseY


   ' If the Drawtype is 3 then its for  Image Add
 If drawType=3 Then
    if OrgX >drawXval And  OrgX<drawWidth Then
      if OrgY >drawYval And  OrgY<drawHeight+drawYval-6 Then
        image2 = "C:\ShanuICON.jpg"

            GraphicsWindow.DrawResizedImage(image2, OrgX, OrgY, 80, 80)

        EndIf
        EndIf
          '-- end Draw Image
        ' to Draw  Rectangle
     ElseIf drawType=4 Then
    if OrgX >drawXval And  OrgX<drawWidth Then
      if OrgY >drawYval And  OrgY<drawHeight+drawYval-6 Then
        GraphicsWindow.DrawRectangle(OrgX, OrgY, 60,  60)
        EndIf
      EndIf
       ' to Fill  Rectangle
     ElseIf drawType=5 Then
    if OrgX >drawXval And  OrgX<drawWidth Then
      if OrgY >drawYval And  OrgY<drawHeight+drawYval-6 Then
        GraphicsWindow.FillRectangle(OrgX, OrgY, 60,  60)
        EndIf
     EndIf
       ' to Draw Circle
     ElseIf drawType=6 Then
    if OrgX >drawXval And  OrgX<drawWidth Then
      if OrgY >drawYval And  OrgY<drawHeight+drawYval-6 Then
        GraphicsWindow.DrawEllipse(OrgX, OrgY, 60,  60)
        EndIf
     EndIf
       ' to Fill Circle
     ElseIf drawType=7 Then
    if OrgX >drawXval And  OrgX<drawWidth Then
      if OrgY >drawYval And  OrgY<drawHeight+drawYval-6 Then
        GraphicsWindow.FillEllipse(OrgX, OrgY, 60,  60)
        EndIf
     EndIf
    EndIf


EndSub


'Mouse Move event is used to draw the free pen
GraphicsWindow.MouseMove = MouseDrag

Sub MouseDrag
  x = GraphicsWindow.MouseX
  y = GraphicsWindow.MouseY


  'If the drawtype is 2 then for Free Pen draw here we will draw the colors with random
  If drawType=2 Then
  If (Mouse.IsLeftButtonDown) then
    if x >drawXval And  x<drawWidth Then
      if y >drawYval And  y<drawHeight+drawYval-6 Then

GraphicsWindow.FillEllipse(x, y, 6, 6)
        EndIf

    EndIf
  Endif
EndIf
'-- fre pen
EndSub

  '' used for free pen for fill random colors
  GraphicsWindow.MouseUp   = MouseUp
  Sub MouseUp
  GraphicsWindow.BrushColor=GraphicsWindow.GetRandomColor()

EndSub
See Also