Install Umbraco CMS on Microsoft Azure
In this article, you will go step by step to create Umbraco CMS from Web App gallery option or from a complete list of Azure Web App on Microsoft Azure. Umbraco CMS is a popular .NET solution to bring quickly to market dynamic web applications using the ASP.NET framework. It is a modern UI, pure .NET architecture and also will select for web CMS. Umbraco is easy to use, simple to extend and integrates with existing systems. Now the user focuses on the experience, not the infrastructure. It gives every site a global presence and places no limits on scale or growth. Nearly every site, no matter how modest, can take advantage of the cloud with Microsoft Azure.
Umbraco CMS currently powers more than 2,500,000 websites worldwide. Few websites are listed below:
Prerequisites
- Microsoft Azure Subscription (MSDN subscribers or sign up for one month free trial)
You will Learn
- How to Install Umbraco CMS on Azure
- Create SQL Database & Server on Azure
Install Umbraco CMS
Step 1: Navigate to Azure Portal and sign in with Azure Credentials.
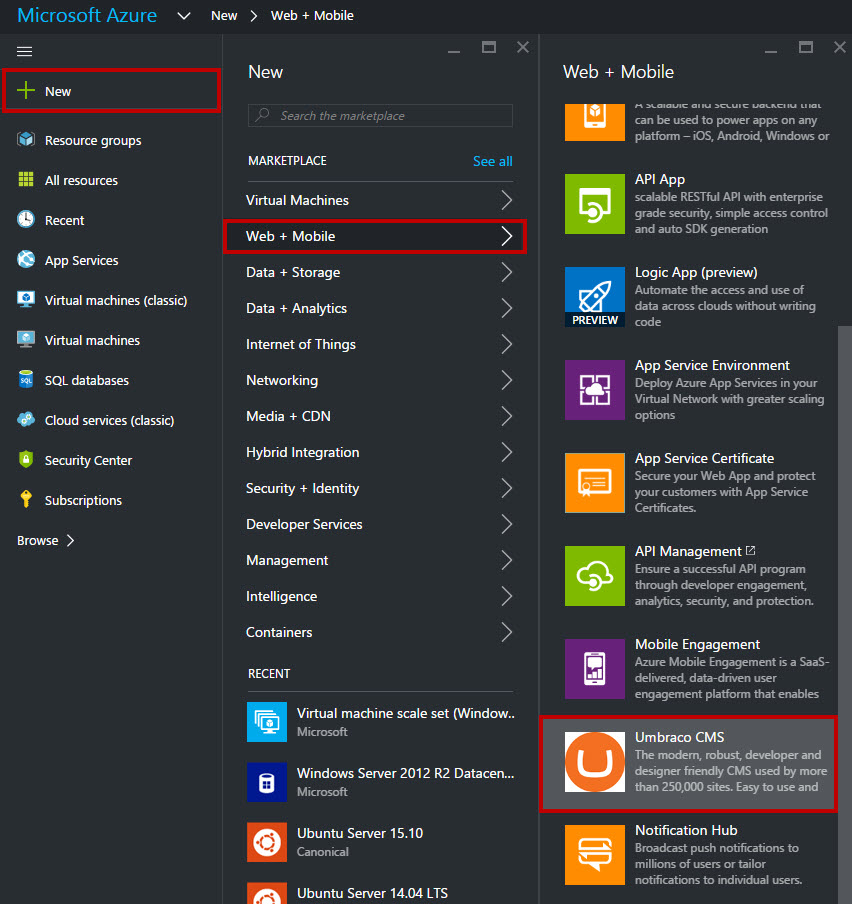
Step 2: Click +New -> Web + Mobile -> Umbraco CMS
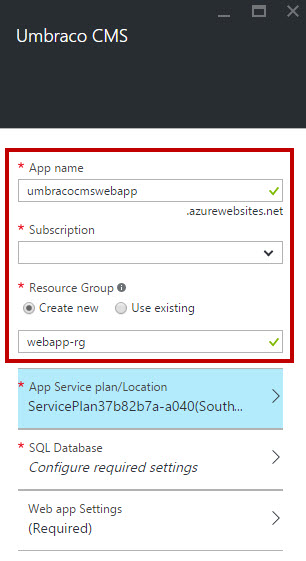
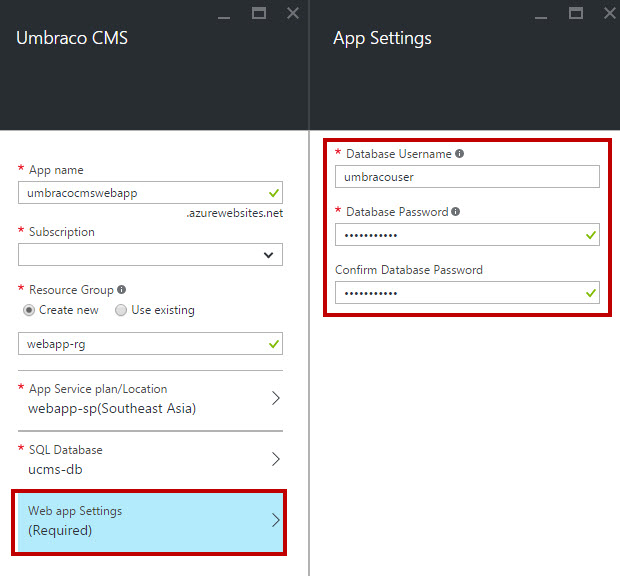
Step 3: Enter App Name, Subscription, Resource Group: Create New or use Existing
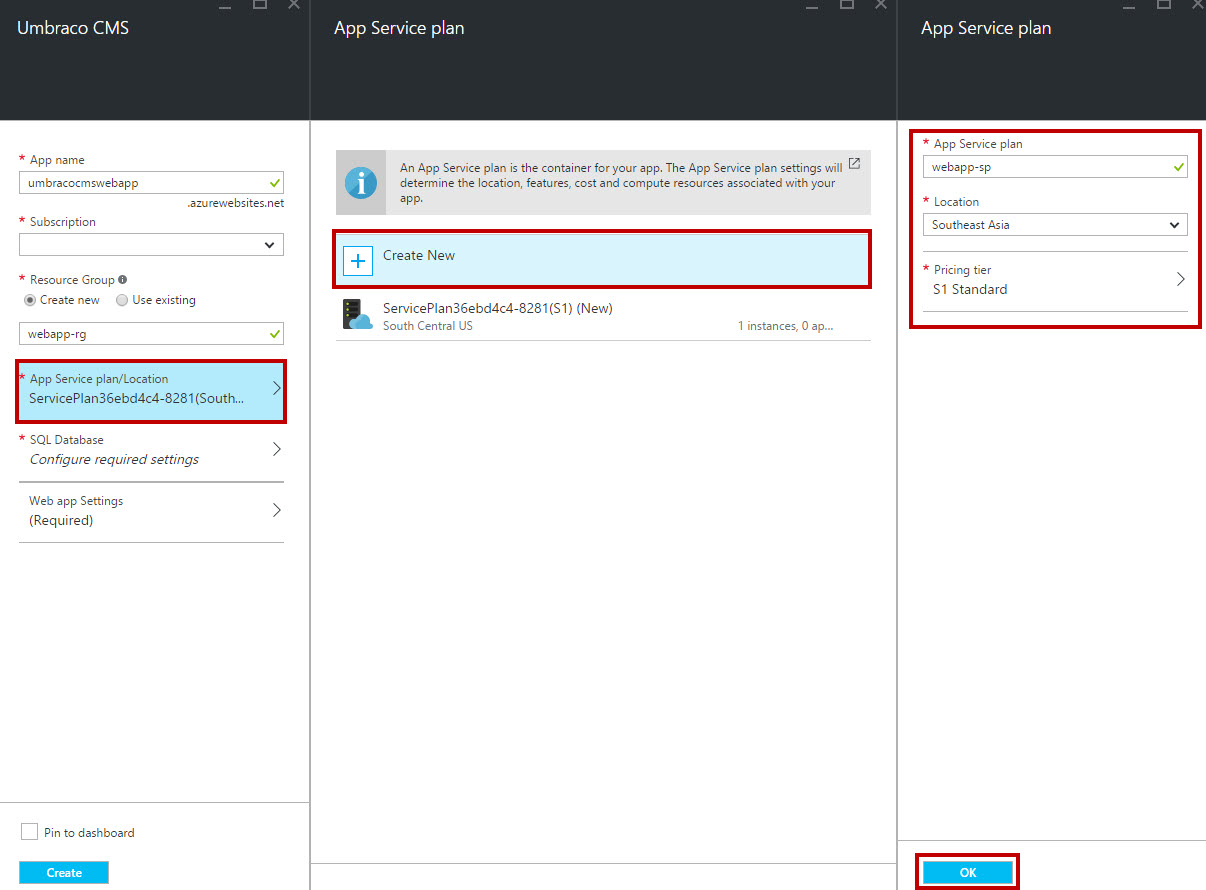
Step 4: App Service Plan/Location
Click “Create New” option and enter app service plan, Location, Pricing Tier.
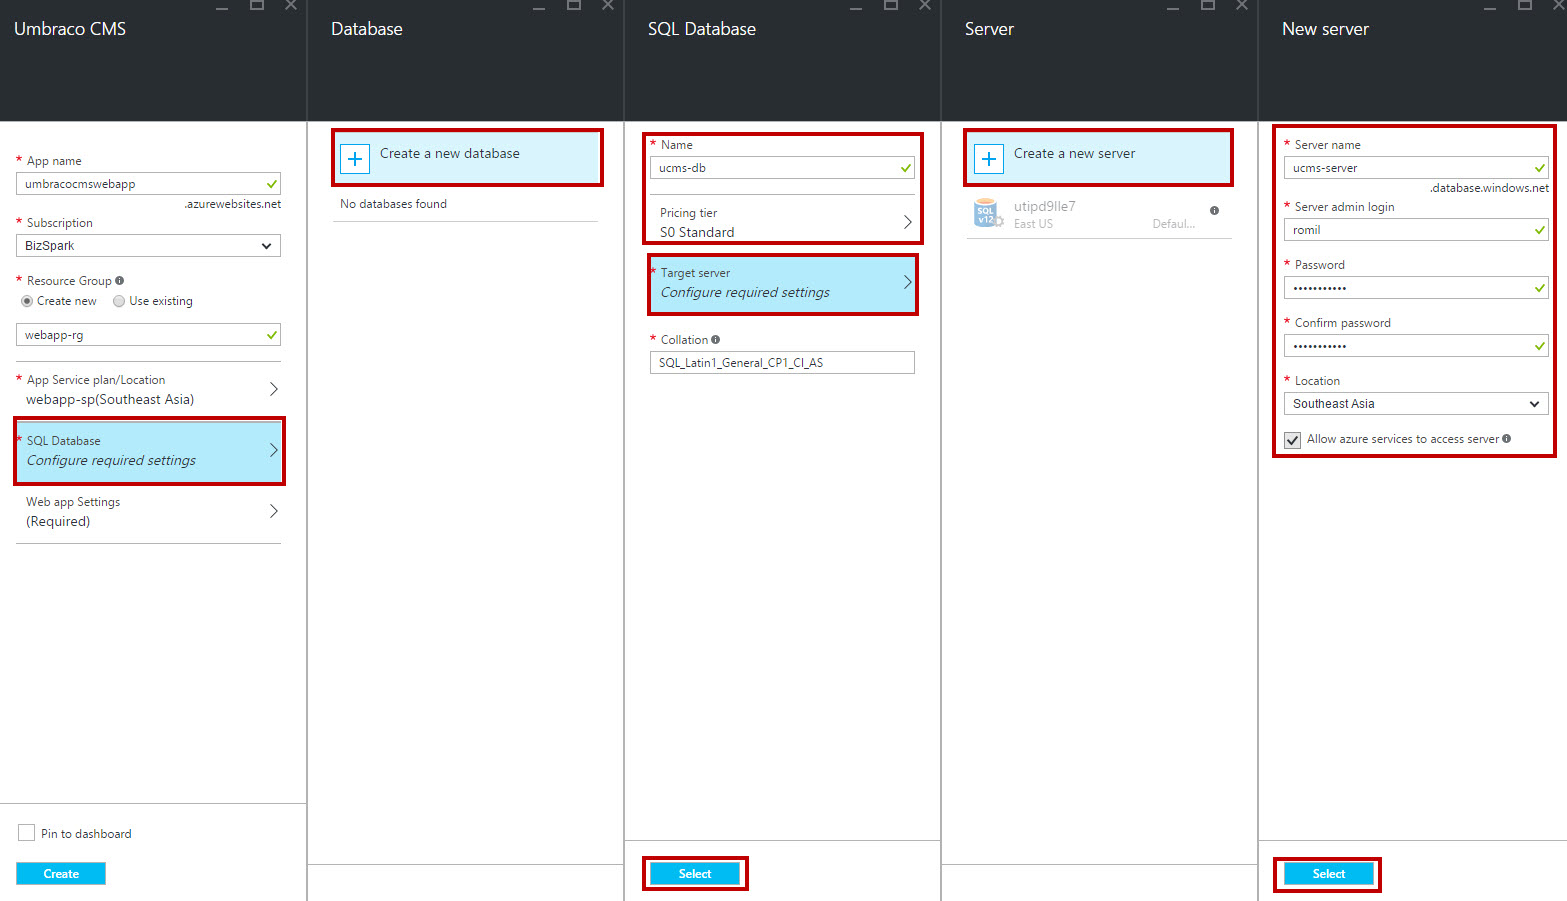
Step 5: SQL Database
By default in Azure Subscription, no SQL Database is available so we need to create new SQL Database and server. Click “Create a new database” option and enter Database Name, Pricing Tier, Target Server, Collation. Again, we need to create New Server. Select Target Server -> Create a new server -> Enter Server Name, Server admin login, Password, Location.
Step 6: Last option is Web app settings. Enter database Username, Password.
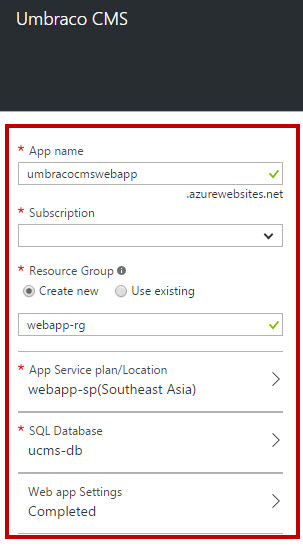
Summary details of Umbraco CMS Web App
Step 7: Within a few seconds Umbraco CMS Web App will be ready. Click Web App URL

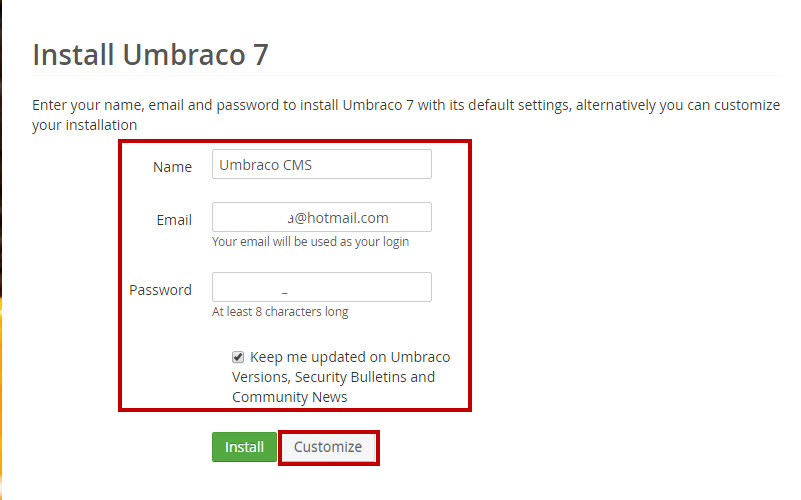
Step 8: Installation page of Umbraco CMS will open. Enter Name, Email and Password. Click “Customize” button because we need to set up Microsoft Azure SQL Database as a back-end.
Step 9: Connection string of Azure SQL Database available on Azure Portal so again go back to Azure Portal and copy-paste SQL database details to Umbraco Database setting options.
Data Connections -> defaultConnection -> Connection Strings

First, set Database type to Microsoft SQL Azure. Enter Server and Database name. After this enter database access credentials.

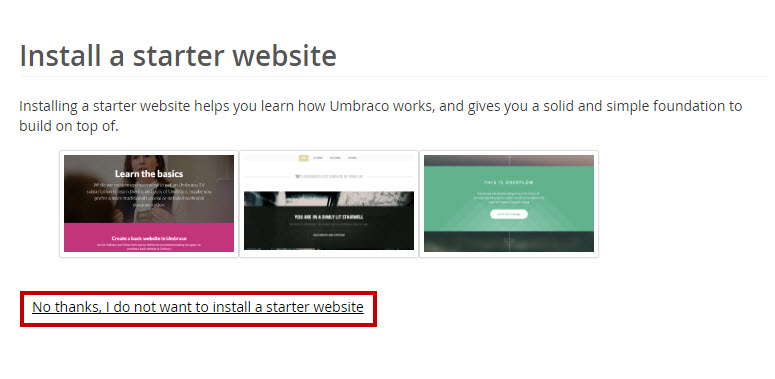
Step 10: Please select “No thanks, I do not want to Install a starter website” option because we don’t want to use a ready template or starter website.
Step 11: Setting up database page will open

Step 12: Umbraco CMS dashboard or settings page will open to customize the website.
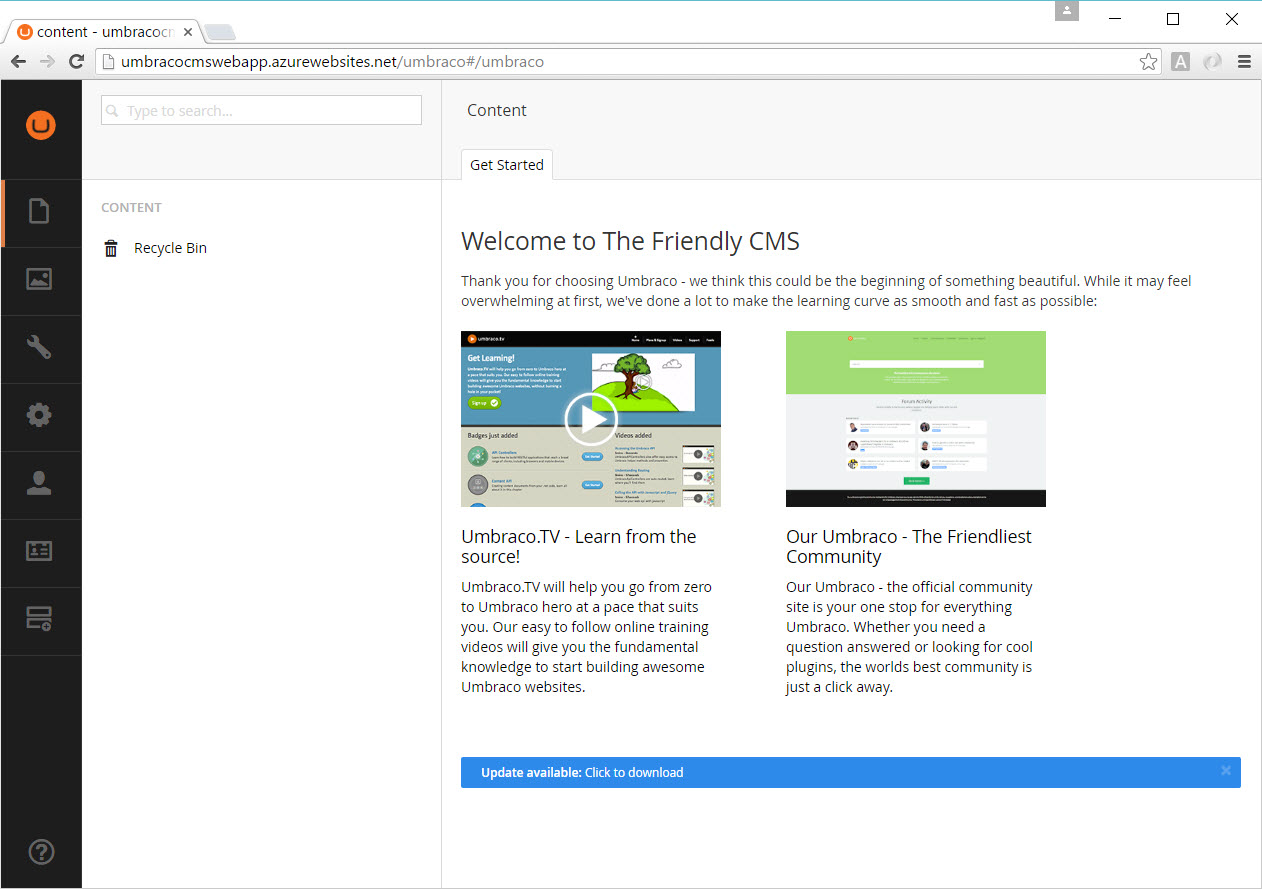
Congratulations you have successfully configured Umbraco CMS on Microsoft Azure!