Azure - Install Azure AD Connect with SQL Express
To successfully synchronize your on-premise Active Directory with Windows Azure Active Directory you can use either DirSync or Azure AD Connect.
For reference you can read more here:
https://azure.microsoft.com/en-us/documentation/articles/active-directory-aadconnect/
Step 1: Download Azure ADSync services. Here is the link:
https://www.microsoft.com/en-us/download/details.aspx?id=47594
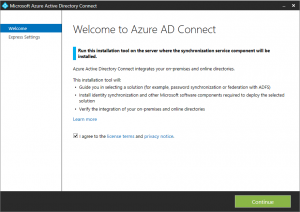
Step 2: When you have completed the downloaded, right Click on the **AzureADConnect.msi **and select "run as administrator".
https://collaborationpro.com/wp-content/uploads/2016/08/ADConnect1-300x212.png
Once the file launches, to continue, agree to the license terms which will enable the button and then click the continue button.
https://collaborationpro.com/wp-content/uploads/2016/08/ADConnect2-300x211.png
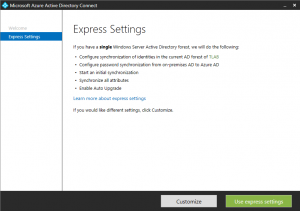
On the Express settings page, click the grey Customize button as we will be doing a custom installation and not the express one.
On the Install required components do not select any checkbox. Click Install.
On the User sign-in screen select Password Synchronization and click Next.
On the Connect to Azure AD screen, enter the username and password of an Azure global administrator for your Azure AD. Click Next.
https://collaborationpro.com/wp-content/uploads/2016/08/ADConnect3-300x211.png
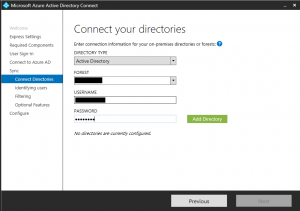
On the Connect to ADDS screen enter the username and password for the user that has an enterprise admin account and click Add Directory. Click Next.
Side Note: Enterprise Admins permissions are not required. Here are the minimum permissions required:
|
|
https://collaborationpro.com/wp-content/uploads/2016/08/ADConnect4-282x300.png
If you intend to configure sync to ‘write back’ information from Azure Active Directory to your local Active Directory, ensure the account has write permissions to the directory objects and attributes you intend to be written back.
https://collaborationpro.com/wp-content/uploads/2016/08/ADConnect5-300x210.png
On the Uniquely identifying your users screen leave default settings. (Note: changing source attribute for userPrincipalName is part of Alternate Login ID configuration). Click Next.
On the Filter users and devices (it is recommended implement filtering in here for Proof of Concept due to group membership limitation). Click Next.
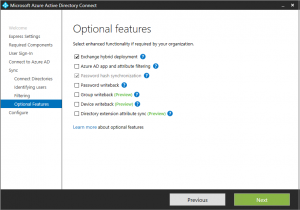
On the Optional features select “Exchange hybrid deployment” and “Password hash synchronization”. Click Next.
https://collaborationpro.com/wp-content/uploads/2016/08/ADConnect6-300x211.png
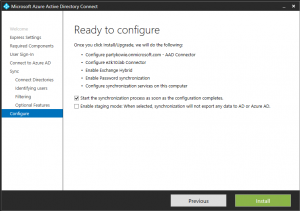
Ensure that the above option is selected and then click Install.
Once complete then click Exit.