Note
Access to this page requires authorization. You can try signing in or changing directories.
Access to this page requires authorization. You can try changing directories.
Introduction
In this article, we will see in detail about how to create first SQL Server database in Azure and create a table for the Azure SQL Database from SQL Server Management Studio.
Prerequisites
Azure Account: If you don’t have free account you can create from this link
SQL Server 2014 or Above
Create New SQL Database on Azure:
Using your Azure account login to Azure site. From the dashboard page on the left side menu, we can see the SQL databases. Click that menu to create our first SQL Database on Azure.

We can see the Add icon at the top. To create our first SQL Database again click the Add icon.

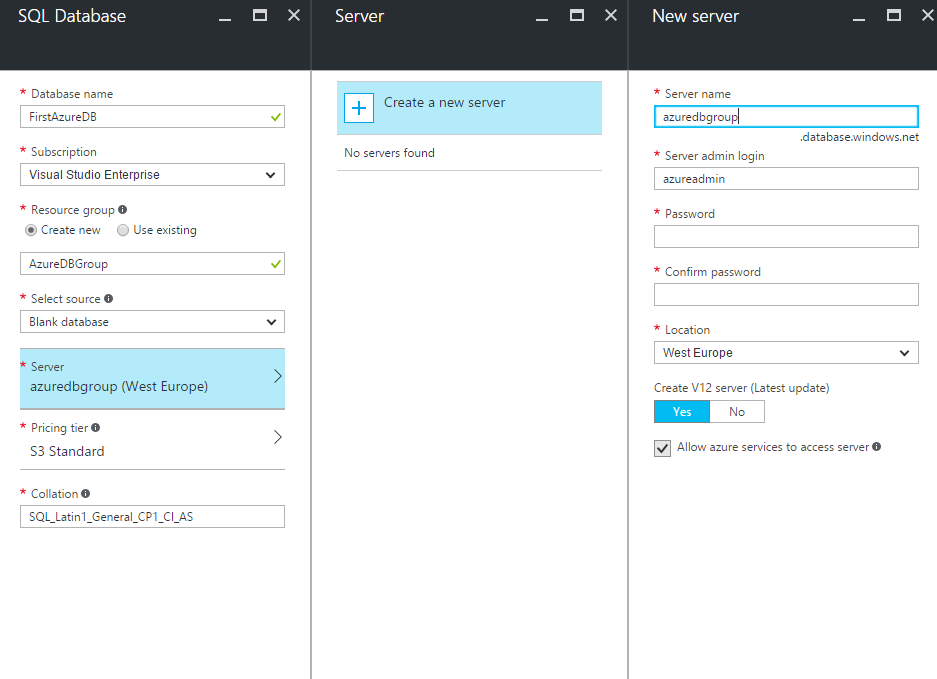
Here we give our new Database Name and select or create our Resource Group.

Creating SQL Server on Azure
If we don’t have any SQL Server created, then first we need to create a new SQL Server to create our database.
Here we give our new Server name and login ID and Password for login to our Azure SQL server.
Once our Server was created, select the newly added SQL server to create our database.
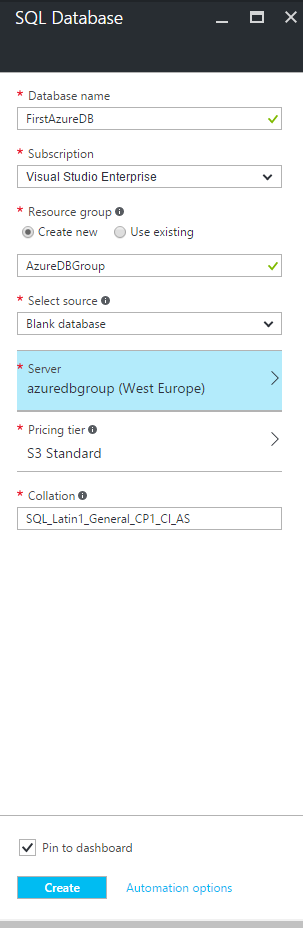
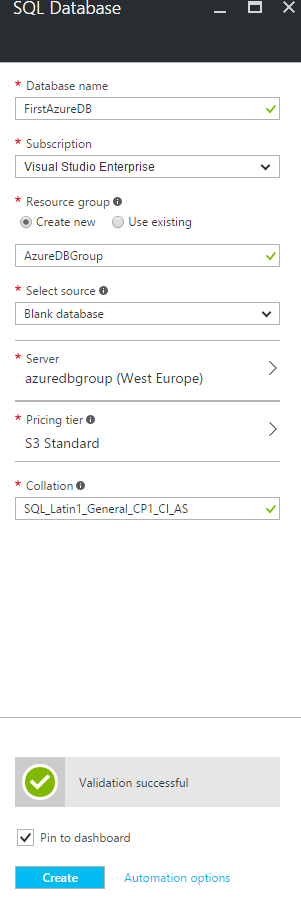
Click on Create button at the bottom to create our new database on selected Server. Now we can see a confirmation message as Validation Successful.
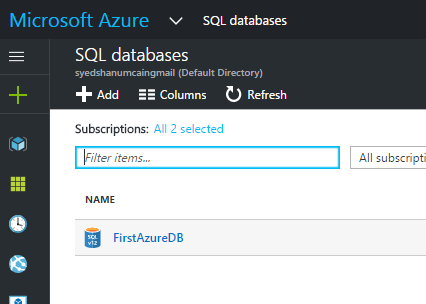
We can see our new Database has been created.
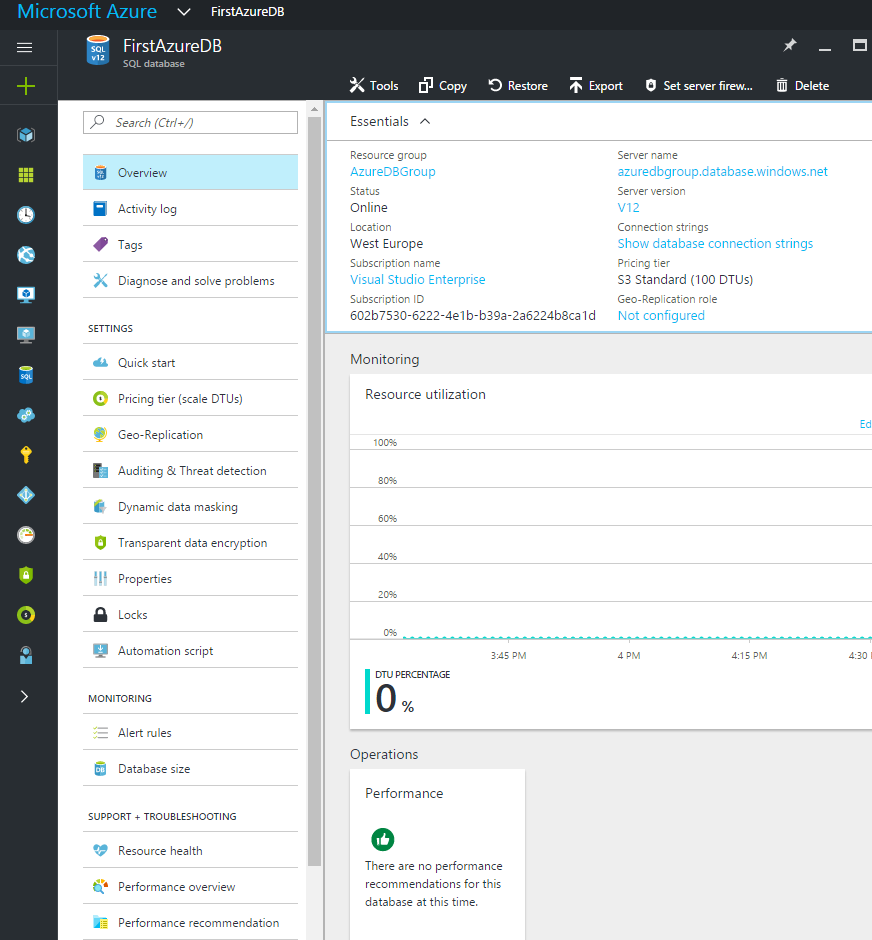
We can see all the details for the newly created database from the database dashboard page.
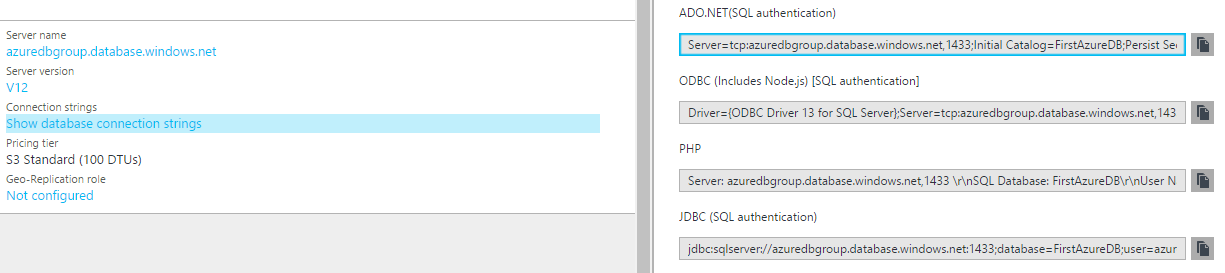
To know our Azure SQL connection, we can click on the “Show database connection strings”. We can see the connection string for ADO.NET, ODBC, PHP and JDBC. We can use this connection string in our technology applications to connect Azure databases. For example, to work with Microsoft .NET we can select ADO.NET, for working with JSP or java we can use JDBC or ODBC and to work with PHP application we can use the PHP Connection strings.
Connecting Azure SQL Serve from Local SQL Server
Now we have created our SQL Database on Azure and to create tables and insert sample record we will use SQL Server Management Studio to connect to our Azure server.
We need to give our Azure SQL Server name with our given ID and password.
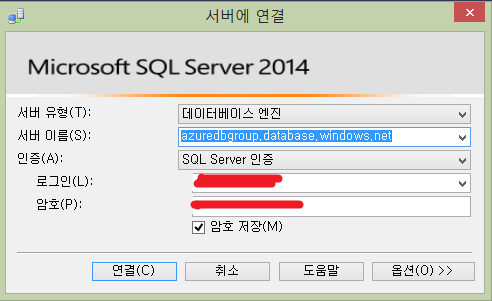
When we try to connect for the first time we may get the error like this below image.

This error is due to the firewall rule is not set our selected Azure Server.
Setting Azure SQL Server firewall rule
You can find “Set server Firewall” at the top. Click to set our firewall rule.
**  **
**
Click on “Add Client IP” to set our new Firewall rule.

Click save to add our new Firewall Setting.

** **After saving the new Firewall setting, now again connect to our Azure SQL server form our local SQL Server management studio.
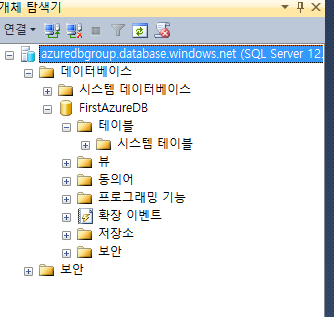
Creating Tables for Azure SQL Database
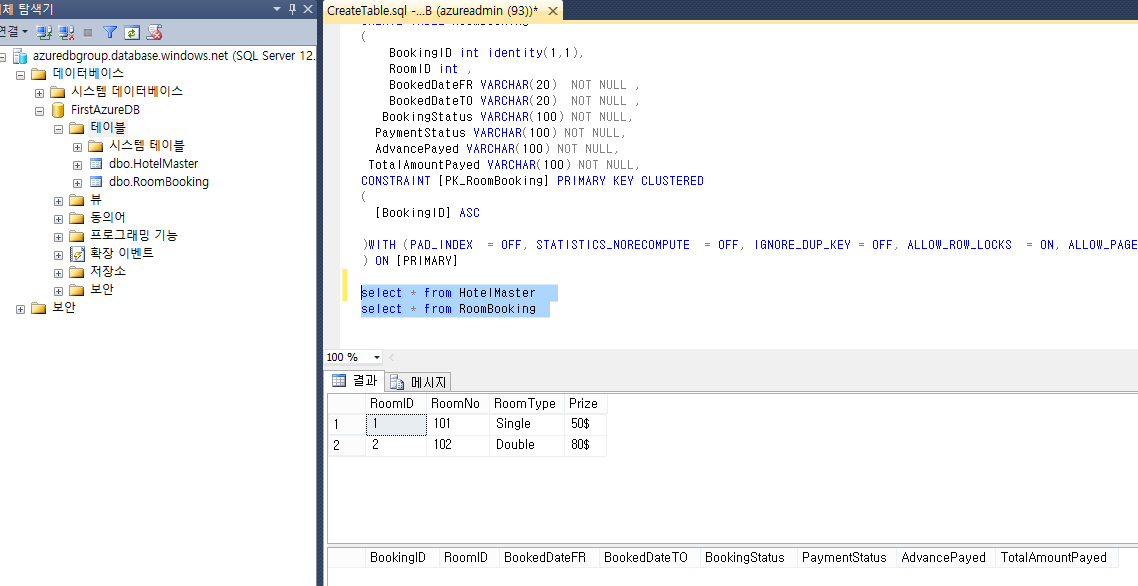
Now we have connected our Azure SQL server, let’s create Table’s and insert a record to our Azure database.
In Query Analyzer run the below Create SQL script to create our Tables.
IF EXISTS ( SELECT  [name] FROM  sys.tables WHERE  [name] = 'HotelMaster'  )
DROP TABLE  HotelMaster
GO

CREATE TABLE  HotelMaster
(
  RoomID int  identity(1,1),
   RoomNo VARCHAR(100)  NOT NULL ,
   RoomType VARCHAR(100)  NOT NULL ,
   Prize    VARCHAR(100)  NOT NULL
CONSTRAINT [PK_HotelMaster] PRIMARY KEY  CLUSTERED
(
  RoomID ASC

)WITH (PAD_INDEX  = OFF, STATISTICS_NORECOMPUTE  = OFF, IGNORE_DUP_KEY = OFF, ALLOW_ROW_LOCKS  = ON, ALLOW_PAGE_LOCKS  = ON) ON  [PRIMARY]
) ON  [PRIMARY]

 Insert into  HotelMaster(RoomNo,RoomType,Prize) Values('101','Single','50$')
  Insert into  HotelMaster(RoomNo,RoomType,Prize) Values('102','Double','80$')

select * from HotelMaster


IF EXISTS ( SELECT  [name] FROM  sys.tables WHERE  [name] = 'RoomBooking'  )
DROP TABLE  RoomBooking
GO

CREATE TABLE  RoomBooking
(
    BookingID int  identity(1,1),
    RoomID int  ,
    BookedDateFR VARCHAR(20)  NOT NULL ,
    BookedDateTO VARCHAR(20)  NOT NULL ,
   BookingStatus VARCHAR(100) NOT NULL,
  PaymentStatus VARCHAR(100) NOT NULL,
  AdvancePayed VARCHAR(100) NOT NULL,
 TotalAmountPayed VARCHAR(100) NOT NULL,
CONSTRAINT [PK_RoomBooking] PRIMARY KEY  CLUSTERED
(
  [BookingID] ASC

)WITH (PAD_INDEX  = OFF, STATISTICS_NORECOMPUTE  = OFF, IGNORE_DUP_KEY = OFF, ALLOW_ROW_LOCKS  = ON, ALLOW_PAGE_LOCKS  = ON) ON  [PRIMARY]
) ON  [PRIMARY]

select * from HotelMaster
select * from RoomBooking
Now we can see our new tables has been created in Azure SQL database.