Quick Guide to Create form in Microsoft Forms
What it is?
With Microsoft Forms, you can create surveys, quizzes, and polls, and easily see results as they come in. When you create a quiz or form, you can invite others to respond to it using any web browser, even on mobile devices. As results are submitted, you can use built-in analytics to evaluate responses. Form data, such as quiz results, can be easily exported to Excel for additional analysis or grading.
Getting Started
Note: Currently, while this article is being written, Microsoft Forms is available for only First Release customers.
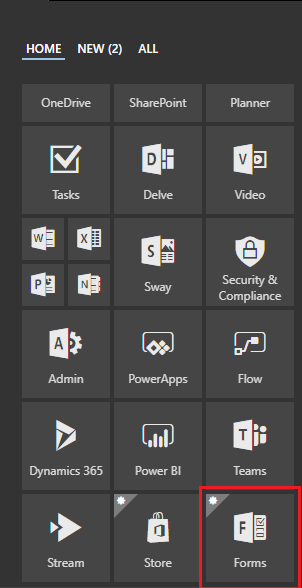
- Login to your Office 365 account
- From the Navigation bar, select “Forms” as show below:
Creating your first form:
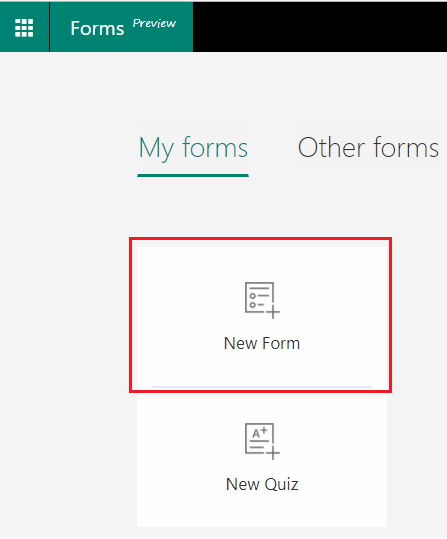
- Creating a new form is pretty easy. You can either create “New Form” or “New Quiz”. As of now, we would create New Form so click on that option.
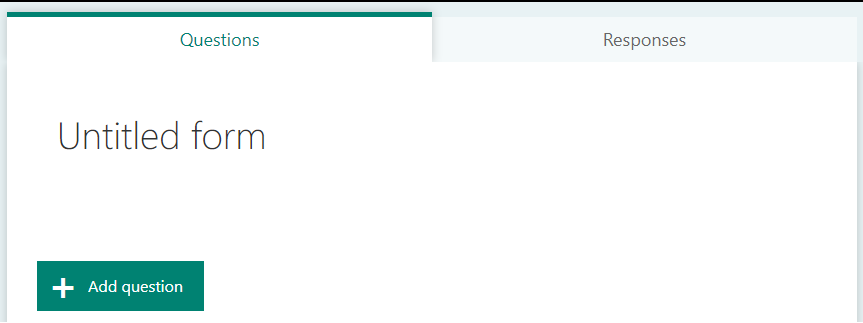
- Form Design area has two main sections-
Questions: Where you can design the form, add questions, attach images etc. The form you design here will be presented to the end users
Responses: This is the result area where all responses will be analysed and presented
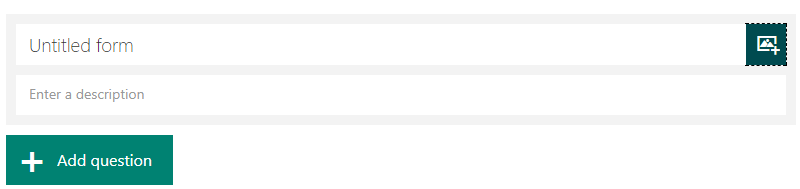
- Click on the “Untitled Form” section and enter Title and Description of the form. You can also attach images. Images can be imported form 3 locations:
- Image search using Bing Search
- OneDrive
- Upload from your local machine or network drive
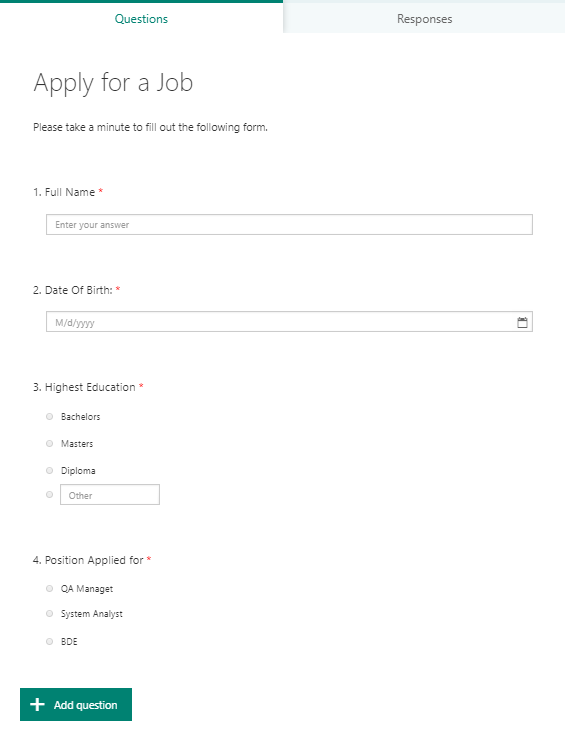
- Enter Title “Apply for a Job” and Description “Please take a minute to fill out the following form.”
- Click on “Add Question” it will present option of Field type as below:
- Click on “Text”. It will add a text field with an option to enter “Question” value. Your questions can be configured with variety of options based on data type selected.
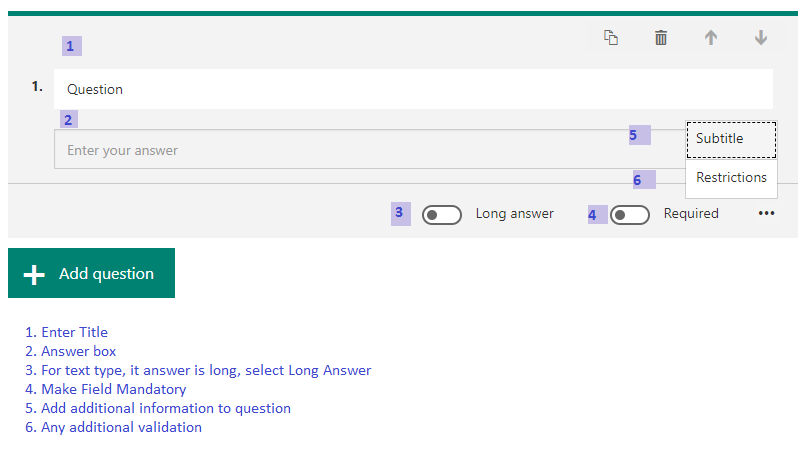
- Add more questions as required. You can also change the order of questions using arrow buttons.
- I created a simple form with below fields
Once you are done designing the form, click on “Share” from top navigation to get options of how the form can be shared with either users of your tenant or anonymous users
From the “Send and Collect Responses” dropdown, select “Anyone with the link can respond” and click on “Copy”
Now you are ready to present you form to users. Quick and easy!
View and Analyse Response
- To view response, open the form and click on Responses Tab. You can see the total count of response received in tab heading itself
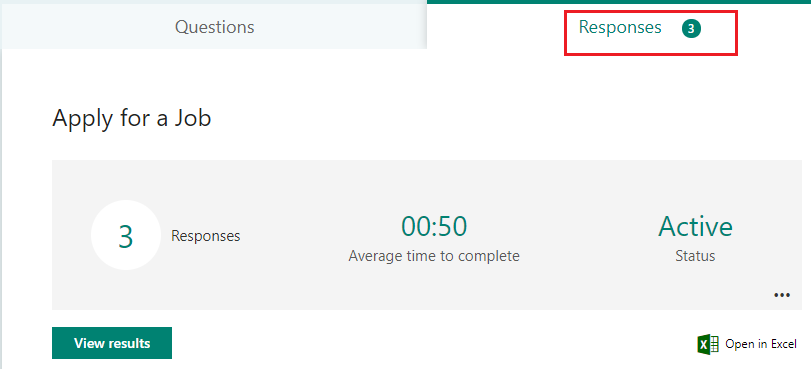
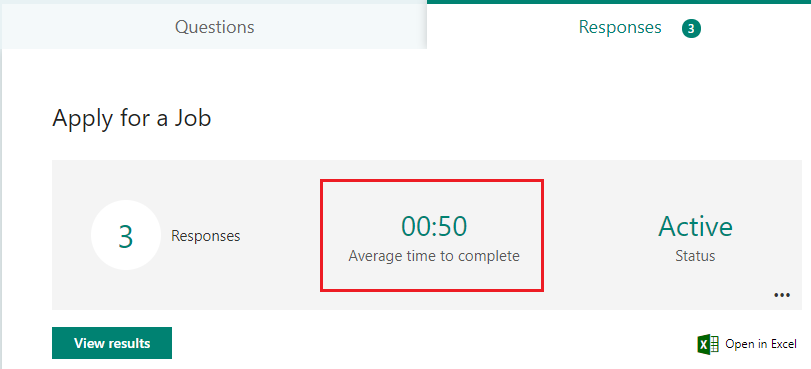
- Another helpful thing here is it shows the Average Response time required to complete the form.
- Also, for choice fields, it automatically creates visual representation in form of Pie charts based on responses received.
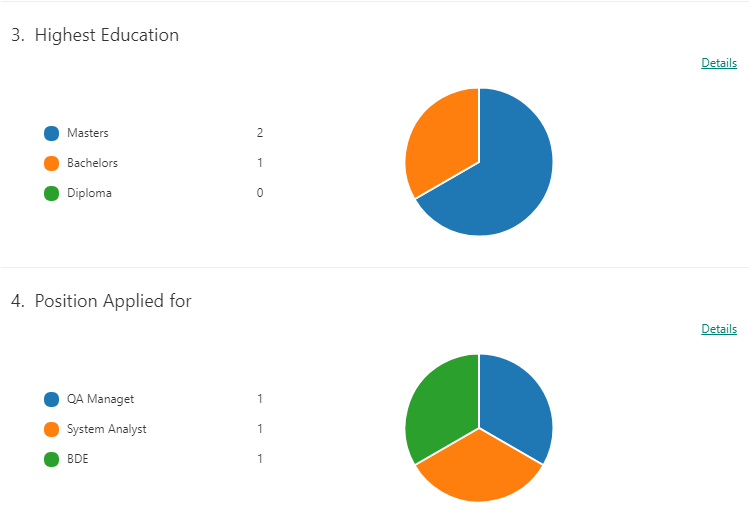
- You can also view the responses in excel. And save it for further analysis or exporting.
Conclusion:
All I can say is, MS Forms is extremely simple and quick way to create forms and quiz. Over and above just getting response from users in excel, MS forms provides a handy interface to analyse the same.