Installation Guide for SQL Server 2011 - Denali CTP 3
This document will guide you how to install SQL Server Denali CTP3. This is intended to give you a “quick start” of Denali CTP3 installation but this is not a document intended to replace the full product's installation guide found on MSDN Library from this link:
Installation How-to Topics : SQL Server Denali
SQL Server Denali CTP 3 is available for download from this link. If you are a hobbyist or an enthusiast of SQL server and you want to deep dive into SQL server, I would suggest that you go for 64 bit version because some of the SQL Server features are not available in 32 bit.
Beginning Installation
Assuming we have successfully downloaded the installer, click on it to begin installation as shown in figure 1. step no #1. This will extract the installer to a folder named “SQLFULL_x64_ENU” see step #2 as shown below:

*Figure 1: extracting the installer
*
Run Setup
The next step is to run the setup. Click on Setup as illustrated in setup #1 of figure 2. Click installation as shown in step #2. Click on “new SQL Server stand-alone installation or add features to an existing installation” as shown in step #3. Step 4 Will launch “setup and support rules” which will check if our machine and other resources comply with the system requirements.

*Figure 2. Runnning Setup
*
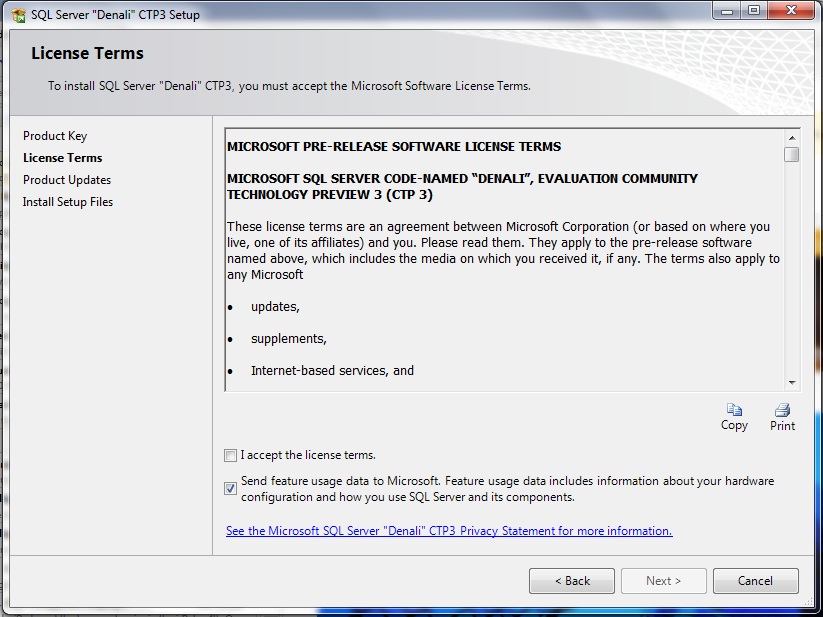
Enter Product key and License Agreement
The next screen will ask us for product key and the license agreement. Enter "evaluation"
for the product key. This will give us 180 days to evaluate. We have to "Accept the license
term" to proceed

*Figure #3 Enter product Key
 *
*
*Figure 4. License Terms
*
Setup Support rules
Setup and support rules will report all the possible problems that might occur when we install SQL Server setup files. We need to address all the items that fail before setup can continue. (Please note the text in bold on the series of steps at the left side of the dialog box. This tells you where you are in the entire setup process.)

*Figure 6. Setup Support Rules
*
Installation Type
This windows will allow us to choose which installation path we want go through which is either we want to “perform a new installation” or Add or remove feature from an existing SQL Server installation instance. If we are coming from “SQL Server 2000”, an instance here (starting from SQL Server 2005) refers to an installation instance which contains features such as SAAS, SSRS and SSIS. This features can be referred to by the instance name. For example an SSAS server can be referred to as “Server1\instance1” and its database engine can be referred to as the same.
This window will also show us all the current installed instances of SQL Server.
From here we need to click Next to continue.
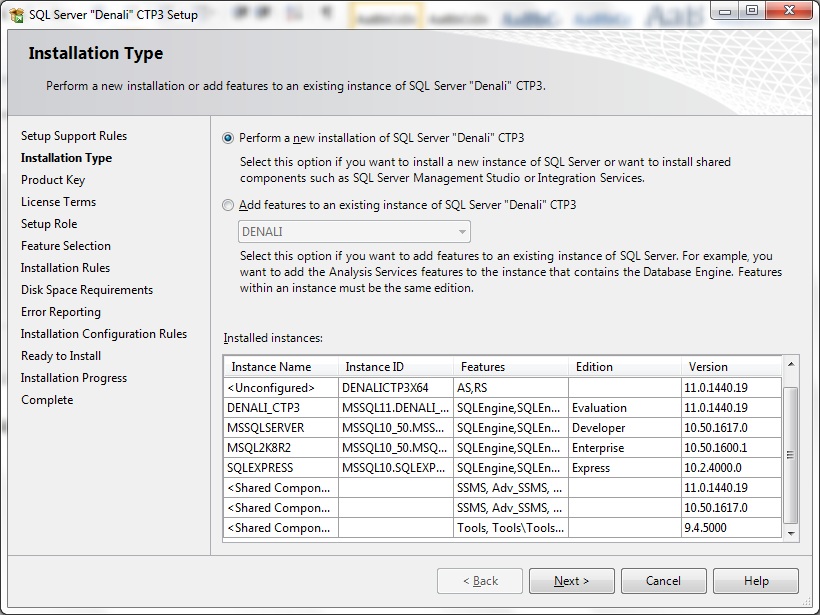
*Figure 7: Installation Type
*Product key Again
I think this is a bug. Denali CTP 3 will ask for a product key again for the second time.
A possible defect has been logged to Microsoft Connect found from this link.
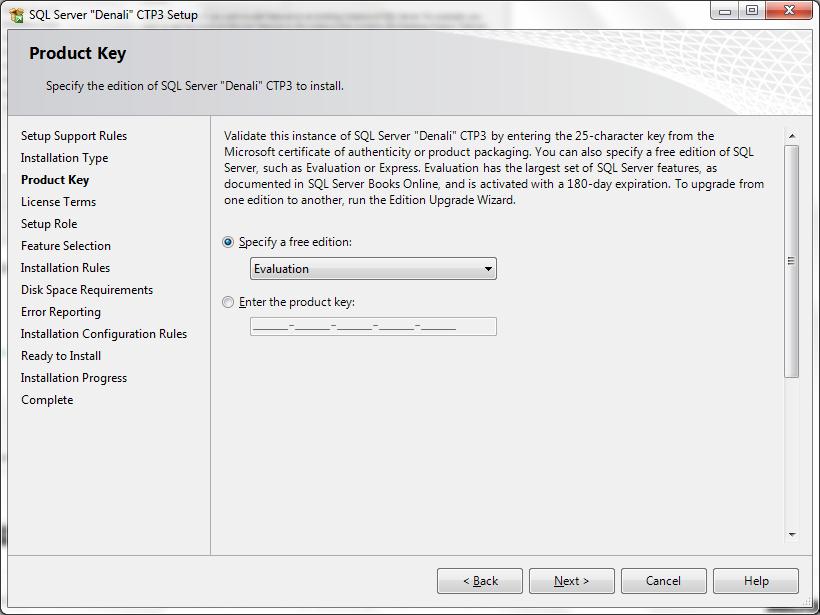
*Figure 8. SQL Server installation requesting product key again
*
And Yet Another License Agreement
We might have seen this in figure 4. But if we are fond of playing "spot the difference" we can find it on the left side of the dialog which basically tells us where we are in the setup process.
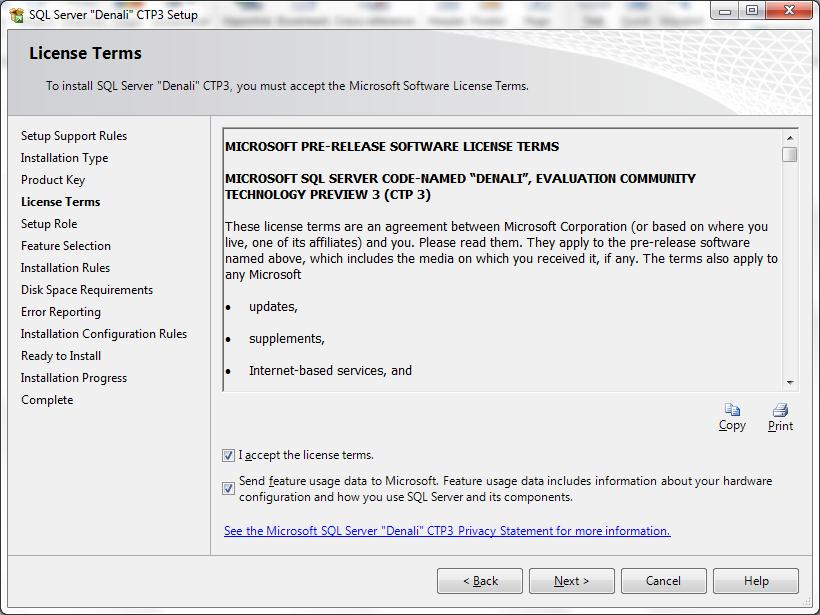
*Figure 9. Another prompt for license terms
*
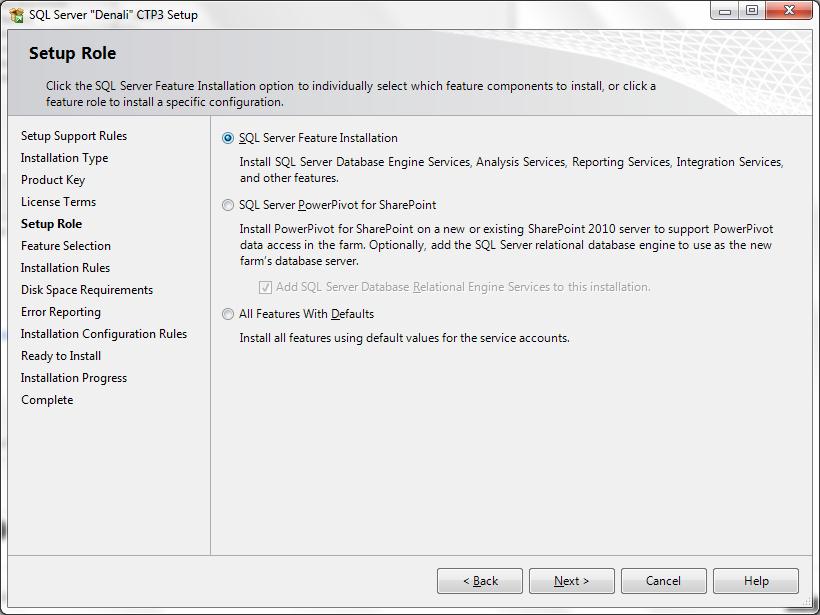
Setup Roles
For this I’m going to choose the feature installation which will install SSRS, SSAS, SSIS and the Database engine.
Installation Rules
This will check if all the required features will push through. We need to have the bar all green before we can proceed.

*Figure 11. Installation rules
*
Instance configuration
This dialog box will ask us to name the "instance". Remember that the instance name “does not only refer” to the “database instance” but to all feature installation. For example, in figure 12 below, the instance name is “SQL_DENALI_X64” . Therefore my my box will have an individual SSRS, SSAS, SSIS and database servers but all of them will all be referred to as “myServername\SQL_DenaliX64”.

Figure 12. Instance Configuration
Disk space requirements
This dialog will show us if we have available hard disk space requirement before we can proceed with the setup.

Figure 13. Disk Space Consideration
Service Account

Analysis Service Configuration
Here we are going to "add current user" as administrator. If we are the current user, we alone
would be the administrator of the feature. If we leave, this machine cannot be used by anyone
with an "admin" privilege. For development environment we can click "add" to add
the builtin\administrator account so that any administrator of the computer can also be an admin to that SQL feature.
For production environment I suggest that we have a domain group "Domain_name\SQLAdmins" and add them as
administrator of the SQL feature.
We will have to configure several services (data engine, ssis,ssrs) in this manner. If we do not add others
as administrator to the box. The feature instance will be unusable when we are gone or leave the company.
If we add the built-in administrator all administrator in the box can access sql server. We will need to configure
the service based on what we need. An important point to remember here is that we should manage permissions
in groups (active directory group).

Reporting Service Configuration

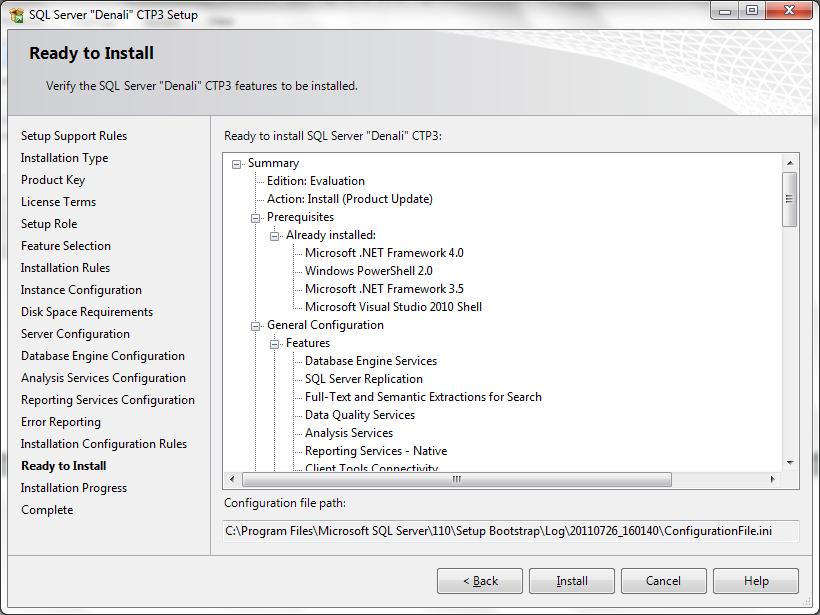
Installation Configuration Rules 
Summary

Succeeded
