Note
Access to this page requires authorization. You can try signing in or changing directories.
Access to this page requires authorization. You can try changing directories.
“Apps for SharePoint are easy-to-use, lightweight web applications that integrate popular web standards and technologies to extend the capabilities of a SharePoint website.” [MSDN]
** **
Configuring an on-premises development environment for Apps
Prerequisites
- A Windows server machine, installed and configured for SharePoint
- Microsoft SQL server
- Microsoft Visual Studio
1. Confirm that the SharePoint Administration (spadmin) and SharePoint Timer (sptimer) services are running.
- Start -> Administrative Tools-> Services
- Or using command prompt
- net start spadminv4
- net start spadminv4
2. Start “App Management Service” and “Microsoft SharePoint Foundation Subscription Settings service”
- Go to SharePoint Central Administration
- Application Management -> Service Applications -> Manage Services on Server
- Start App Management Service
- Start Microsoft SharePoint Foundation Subscription Settings service
https://4.bp.blogspot.com/-6nvomdCmK7I/V08ZBGReQJI/AAAAAAAADG0/eh1P6ZXYZqIQkLvNH9Zbi6KcEi3Krn_owCLcB/s640/1.png
- Make sure your user (not SP-Farm) has the following permissions
- securityadmin fixed server role on the SQL Server instance
- db_owner fixed database role on all databases that are to be updated
- Administrators group on the server on which you are running the Windows PowerShell cmdlets
If not assign those permissions to that user
- Create service applications - Need to create following service applications
- App Management Service Application
- Subscription Settings Service Application
Open the SharePoint Management Shell and run the following commands.
(Account should be the above account )
$account = Get-SPManagedAccount "domain\user"
$appPoolSubSvc = New-SPServiceApplicationPool -Name SettingsServiceAppPool -Account $account
$appPoolAppSvc = New-SPServiceApplicationPool -Name AppServiceAppPool -Account $account
$appSubSvc = New-SPSubscriptionSettingsServiceApplication -ApplicationPool $appPoolSubSvc -Name SettingsServiceApp -DatabaseName SettingsServiceDB
$proxySubSvc = New-SPSubscriptionSettingsServiceApplicationProxy -ServiceApplication $appSubSvc
$appAppSvc = New-SPAppManagementServiceApplication -ApplicationPool $appPoolAppSvc -Name AppServiceApp -DatabaseName AppServiceDB
$proxyAppSvc = New-SPAppManagementServiceApplicationProxy -ServiceApplication $appAppSvc
Then navigate to Central administration -> Application Management -> Service Applications - > Manage Service Application. You will be able to see the newly created above service applications.
- Configuring App URLs
- Central Administration -> Apps -> Configure App URLs
- Create the app domain name- Ex. App.mydomain.com
- Create the app domain prefix – Ex. App
If the domain name is not a proper one make sure to add a DNS entry with that domain name in the Host file in the VM.
https://2.bp.blogspot.com/-32JB7GGvEuw/V08ZD9nFR-I/AAAAAAAADG4/ueooUCdTj7AG6fPKSyWjsaO8WolJc7XEgCLcB/s640/2.png
6. Create a web application
- Central Administration -> Application Management -> Web Application -> Manage Web Application -> Create a new web application
7. Create a new site collection under the web application created above
- Central Administration -> Application Management -> Site Collections -> Create Site Collections
Create a site collection with a “Developer Site” template
https://3.bp.blogspot.com/-luO8BUmK15s/V08ZFXX6uvI/AAAAAAAADG8/-0TdRTXye-YDnBQJIWrLkTr1zdAbW0UpwCLcB/s640/3.png
- Make sure that the user (created in step 3) has the Db-Owner permission to below databases if not, assign the Db-Owner permission to the user
- SharePoint_Config
- SharePoint_Admin_ [GUID]
- Current web application content database that needs to host the app
- App management service application database
- Subscription Settings service application database
9. Log in to the virtual machine again with the user account configured in step 3 (Non-farm account)
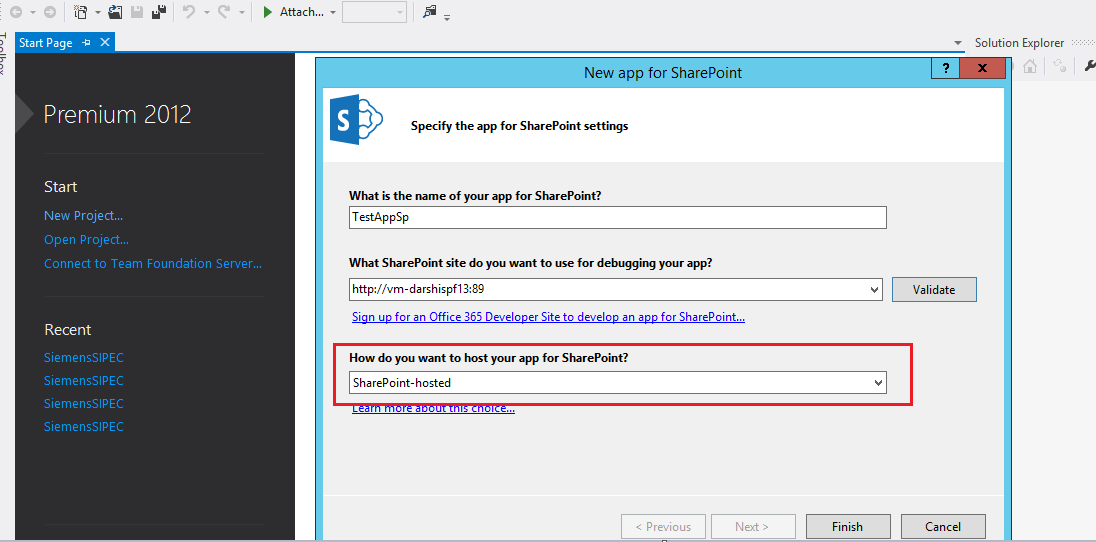
- Create App
- Open Visual Studio and create a new project with the template “App for SharePoint 2013”
- Put a name for the Sharepoint app
- Put above-created site collection URL to SharePoint site for debugging
- Choose "SharePoint-Hosted" for the host type
https://4.bp.blogspot.com/-KAGc5y1fCpc/V08ZH3Id9cI/AAAAAAAADHA/iNTuf42pM8UgPqleLAAngA1HTQZFfN3SgCLcB/s640/4.png
Deploy the application
Add below Registry entries to the windows registry
- Go to “HKEY_LOCAL_MACHINE\SYSTEM\CurrentControlSet\Control\Lsa”
- Add a dword , name = DisableLoopbackCheck , value=1
- Go to “HKEY_LOCAL_MACHINE\SYSTEM\CurrentControlSet\Services\LanmanServer\Parameters”
- Add a dword , name= DisableStrictNameChecking , value=1 , type=decimal
https://4.bp.blogspot.com/-uFfvD5fNRUo/V08ZXszAd7I/AAAAAAAADHE/OK3D9oBCzKYTE40JDjF49GivPlCQIqwegCLcB/s640/5.png
Go to your developer site -> Apps In Testing -> Click on the app you have created
You will be redirected to the fresh app you just have created
Set up a Development Environment for Creating SharePoint Hosted App
More details read...
Set up an on-premises development environment for SharePoint Add-ins