ASP.NET Core 2.0: Building Weather Assistant Chatbot using Bot Builder SDK v4
Introduction
In this article we will see how to create a simple weather assistant chat bot using the Microsoft Bot Framework. We will target specifically the version 4.x of the bot builder SDK. This version allows us to create the bot using ASP.NET core 2 which makes it more interesting to build. The bot that is discussed in this article, queries the Yahoo Weather API and parses the response into Weather for Current Day or a forecast for 10 days based upon the request from the user.
Design Principle
In this article, we are not going to impart intelligence to our bot. Our bot will do only function of querying and displaying the weather data to the user. Our use case is simple, hence our design should also be simple. One point that we need to consider is that since the bot relies on conversation to gather data, it is a real possibility that the user might try to lead the bot astray by asking random questions that are out of the scope of the bot. If that happens then the bot will start to behave stupidly and will not be able to resolve the queries of the user. This results into a poor user experience, which will in inadvertently led to the user getting fed up with the bot and they will not come back to use the bot services. So the principle for our design is simple “We will greet the user and tell them what the bot can do. If the user tries to request any other option we will politely tell them that we cannot support the function at this point of time”
Basic Concepts
In case of bots, as stated earlier the conversation is the medium through which the user interacts with the application(the bot). So in case of the bot what ever happens we call that an activity, so an action basically is an activity. When the user replies or asks a question, they are sending a message to the bot hence it becomes an activity and it is called message activity. This is the basic activity around which most of the logic is written. There are the other handful of activities which monitor when another party joins the conversation, leaves it or if there is any update to the conversation.
When bot gets a message and replies to it, that constitutes a complete cycle when the conversations is initiated either way. This is called a Turn. Now a bot can collect information from user in various way
- Asking user questions
- Giving a form to user to fill out.
The first is achieved using a dialog and the later is done using form flow. Today we will implement simple dialogs to collect information from the user.
What Are Dialogs?
Dialog provide a way for the developers to code in the questions or prompts that they want the bot to ask the user. The dialog is synonymous to the dialogues that happen in human conversation. In a human scenario the conversation generally proceed in a way, a formal greeting and then the rounds of discussion to exchange meaningful information and then the end. In case of bots dialogs allow us to do exactly that. We create a dialog for each question that we want to ask the user and then collect the answer using state management. This is a simplest scenario. Dialogs can be complex and composite where one parent dialog has multiple dialogs and perform their own tasks. We will explore them in later posts in this series. Let us think what questions we want to ask the user.
- Their name
- The place for which they want to get the weather report
- If they want weather for today or the forecast for ten days.
We will create a dialog for each of the questions mentioned above. It should be observed that the information we are gathering is happening one after another and each question can be viewed as one step in a waterfall. Hence we will create a master/main dialog and use another three dialogs as waterfall steps each executed in the order they are defined. We will add one more dialog to send the end result to user and end the conversation.
Bot Code
Yahoo Weather API
In this tutorial we will use the yahoo weather API. More information about this API can be found out at developer portal of yahoo at Yahoo Weather API for your apps. This API accepts a particular location and returns the current weather and returns forecast for 10 days including the day of query. This response can be returned in a json or a xml format and the method to query the result is a GET method. Following is a sample response returned by the yahoo weather API for Adelaide, South Australia on 31st August 2018.
{
  "query": {
    "count": 1,
    "created": "2018-08-31T10:34:16Z",
    "lang": "en-US",
    "results": {
      "channel": {
        "units": {
          "distance": "mi",
          "pressure": "in",
          "speed": "mph",
          "temperature": "F"
        },
        "title": "Yahoo! Weather - Adelaide, SA, AU",
        "link": "http://us.rd.yahoo.com/dailynews/rss/weather/Country__Country/*https://weather.yahoo.com/country/state/city-1099805/",
        "description": "Yahoo! Weather for Adelaide, SA, AU",
        "language": "en-us",
        "lastBuildDate": "Fri, 31 Aug 2018 08:04 PM ACST",
        "ttl": "60",
        "location": {
          "city": "Adelaide",
          "country": "Australia",
          "region": " SA"
        },
        "wind": {
          "chill": "50",
          "direction": "248",
          "speed": "18"
        },
        "atmosphere": {
          "humidity": "90",
          "pressure": "994.0",
          "rising": "0",
          "visibility": "15.2"
        },
        "astronomy": {
          "sunrise": "6:36 am",
          "sunset": "5:56 pm"
        },
        "image": {
          "title": "Yahoo! Weather",
          "width": "142",
          "height": "18",
          "link": "http://weather.yahoo.com",
          "url": "http://l.yimg.com/a/i/brand/purplelogo//uh/us/news-wea.gif"
        },
        "item": {
          "title": "Conditions for Adelaide, SA, AU at 07:30 PM ACST",
          "lat": "-34.918072",
          "long": "138.598236",
          "link": "http://us.rd.yahoo.com/dailynews/rss/weather/Country__Country/*https://weather.yahoo.com/country/state/city-1099805/",
          "pubDate": "Fri, 31 Aug 2018 07:30 PM ACST",
          "condition": {
            "code": "29",
            "date": "Fri, 31 Aug 2018 07:30 PM ACST",
            "temp": "54",
            "text": "Partly Cloudy"
          },
          "forecast": [
            {
              "code": "39",
              "date": "31 Aug 2018",
              "day": "Fri",
              "high": "56",
              "low": "50",
              "text": "Scattered Showers"
            },
            {
              "code": "26",
              "date": "01 Sep 2018",
              "day": "Sat",
              "high": "56",
              "low": "49",
              "text": "Cloudy"
            },
            {
              "code": "30",
              "date": "02 Sep 2018",
              "day": "Sun",
              "high": "54",
              "low": "42",
              "text": "Partly Cloudy"
            },
            {
              "code": "30",
              "date": "03 Sep 2018",
              "day": "Mon",
              "high": "55",
              "low": "40",
              "text": "Partly Cloudy"
            },
            {
              "code": "32",
              "date": "04 Sep 2018",
              "day": "Tue",
              "high": "59",
              "low": "41",
              "text": "Sunny"
            },
            {
              "code": "39",
              "date": "05 Sep 2018",
              "day": "Wed",
              "high": "64",
              "low": "50",
              "text": "Scattered Showers"
            },
            {
              "code": "39",
              "date": "06 Sep 2018",
              "day": "Thu",
              "high": "55",
              "low": "47",
              "text": "Scattered Showers"
            },
            {
              "code": "39",
              "date": "07 Sep 2018",
              "day": "Fri",
              "high": "53",
              "low": "48",
              "text": "Scattered Showers"
            },
            {
              "code": "30",
              "date": "08 Sep 2018",
              "day": "Sat",
              "high": "58",
              "low": "48",
              "text": "Partly Cloudy"
            },
            {
              "code": "32",
              "date": "09 Sep 2018",
              "day": "Sun",
              "high": "68",
              "low": "48",
              "text": "Sunny"
            }
          ],
          "description": "http://l.yimg.com/a/i/us/we/52/29.gif\"/>\n \nCurrent Conditions:\n Partly Cloudy\n \n \nForecast:\n Fri - Scattered Showers. High: 56Low: 50\n Sat - Cloudy. High: 56Low: 49\n Sun - Partly Cloudy. High: 54Low: 42\n Mon - Partly Cloudy. High: 55Low: 40\n Tue - Sunny. High: 59Low: 41\n \n \nhttp://us.rd.yahoo.com/dailynews/rss/weather/Country__Country/*https://weather.yahoo.com/country/state/city-1099805/\">Full Forecast at Yahoo! Weather\n \n \n \n]]>",
          "guid": { "isPermaLink": "false" }
        }
      }
    }
  }
}
We get above response by querying the end point
https://query.yahooapis.com/v1/public/yql?q=select * from weather.forecast where woeid in (select woeid from geo.places(1) where text="PlaceHere")&format=json
Creating Bot Project
Let us create a sample bot called WeatherAssistantBot using the Echo Bot Project Template for VS 2017. This template can be downloaded from the Visual Studio MarketPlace at Bot Builder V4 SDK Template for Visual Studio.

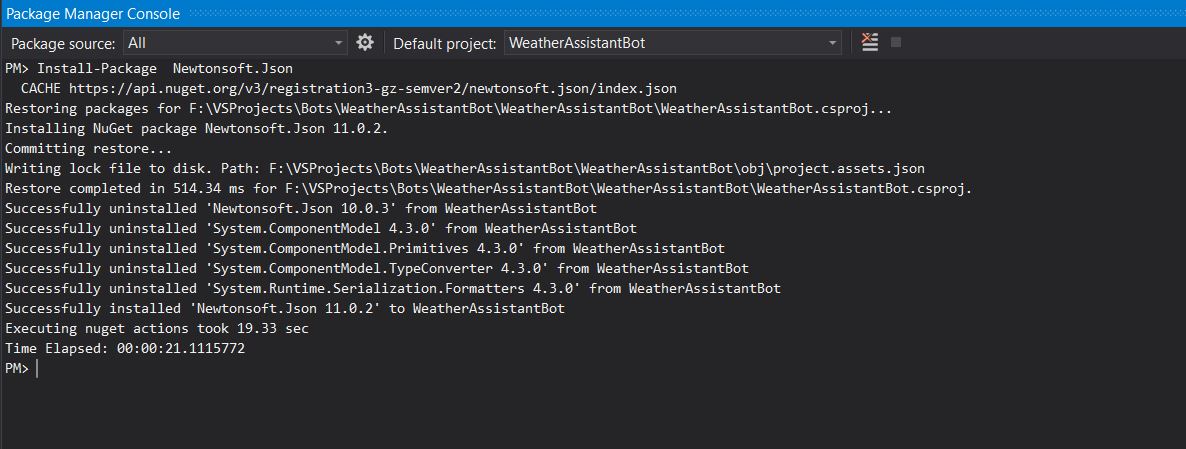
Let us install the NewtonSoft.Json package into our project as we will require the package to parse the json object which we will receive from the Yahoo weather API. The package can be installed using Nuget Package Manager Console as shown below
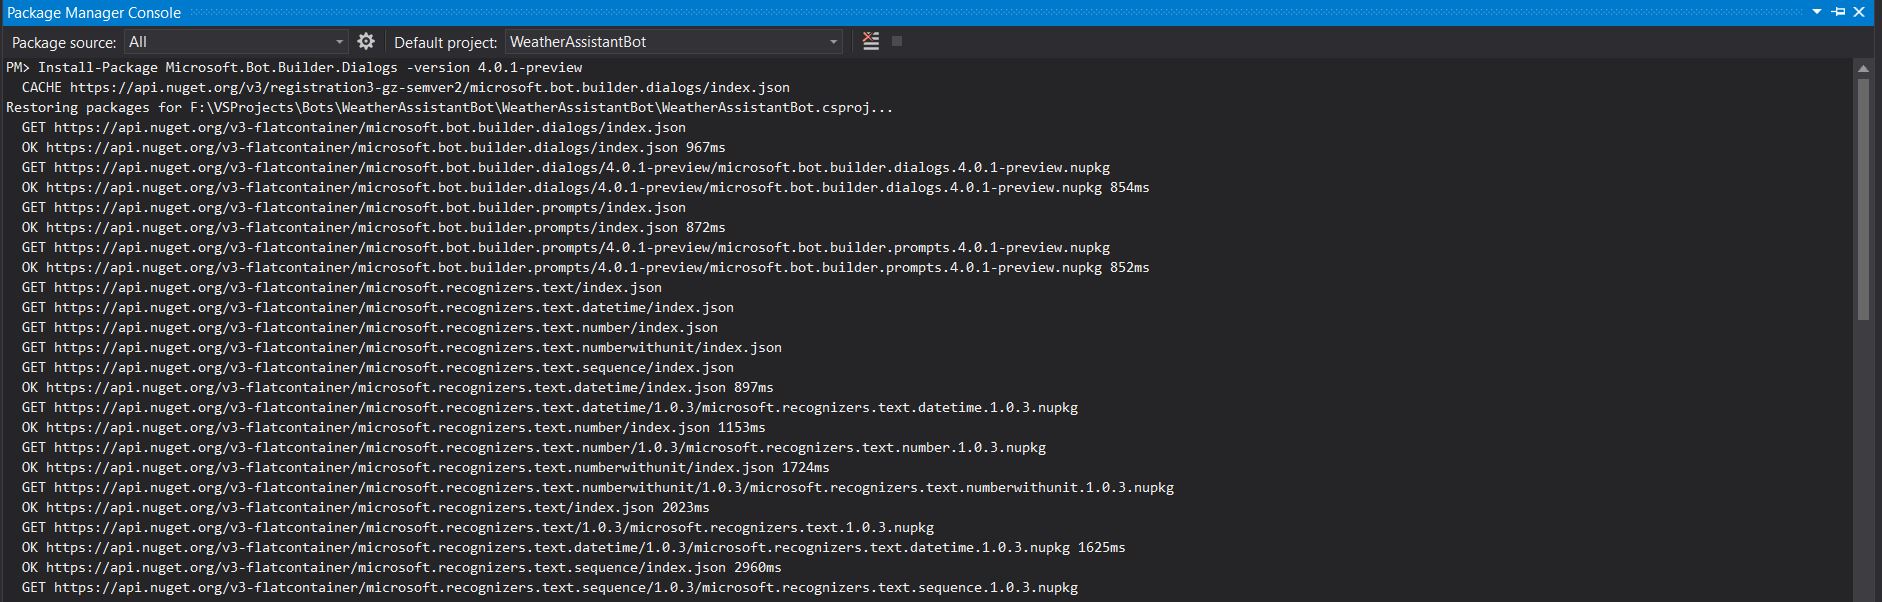
As this Bot works on Dialogs, it is necessary to install the Dialogs package from the Bot Builder SDK using Nuget Package Manager. It can be done as shown below.
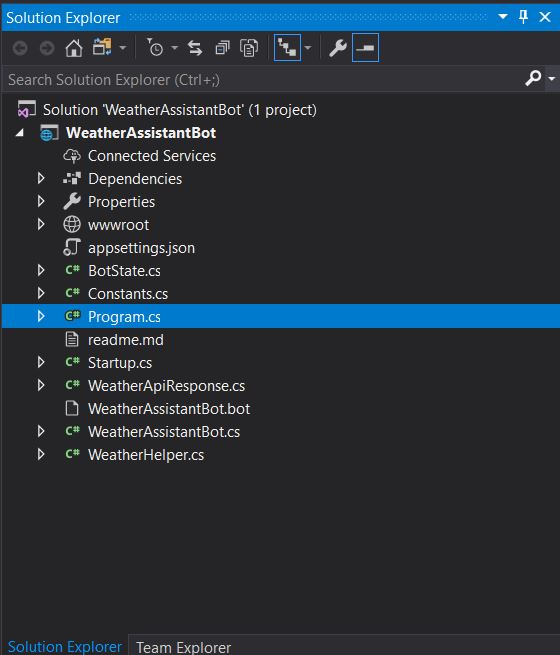
The solution looks like following.
Constant.cs
This class stores the Yahoo Weather API url and an enum for the dialog steps that will be created to ask the user question.
public class  Constants
{
    ///
    /// End Point To Access the Yahoo Weather API
    ///
    public const  string YahooQueryEndpoint = @"https://query.yahooapis.com/v1/public/yql?q=select * from weather.forecast where woeid in (select woeid from geo.places(1) where text=""{0}"")&format=json";

    public enum  DialogSteps
    {
        NameStep,
        PlaceStep,
        GetServiceChoice,
        MainDialog
    }

}
WeatherApiResponse.cs
This is the class generated using the json response we got from querying the Yahoo API. The json to C# extension available on Visual Studio Market place was used to generate a C# class. The extension can be downloaded from market place. We will deserialize the json response into this class once we receive the response from the Yahoo Weather API.
BotState.cs
This class is used to store the state of the bot. In this sample the state is stored in memory which will clear out the state once the session for the bot is finished. In more critical scenarios custom SQL databases, Azure table or Azure CosmosDB. The class is inherited from a Dictonary and stores the Name, Place and the weather report option which the user will share with the bot. The structure of the class is as follows.
namespace WeatherAssistantBot
{
    ///
    /// Class to store the Name.Place and serviceChoice in Memory during Conversation
    ///
    public class  BotState : System.Collections.Generic.Dictionary<string, object>
    {
        private const  string NameKey = "Name";
        private const  string PlaceKey = "Place";
        private const  string ServiceKey = "ServiceChoice";

        public BotState()
        {
            this[NameKey] = null;
            this[PlaceKey] = null;
            this[ServiceKey] = 0;
        }

        public string  Name
        {
            get { return (string)this[NameKey]; }
            set { this[NameKey] = value; }
        }

        public string  Place
        {
            get { return (string)this[PlaceKey]; }
            set { this[PlaceKey] = value; }
        }

        public int  ServiceChoice
        {
            get { return (int)this[ServiceKey]; }
            set { this[ServiceKey] = value; }
        }
    }
}
WeatherAssistantBot.cs
This is one of the most important classes in the solution as it contains the dialogs and the logic to construct the dialogs. This class is inherited from the IBot interface. We will begin by creating a dialog set object which will store all the dialogs and the bot framework will manage state and execute the dialogs based upon how they are defined in the dialogset. Now let us create a Task to greet the user and get their name. This will be an asynchronous task and will be the first to be invoked in the waterfall. The task looks like below.
private readonly  DialogSet dialogSet;

private async Task GetNameTask(DialogContext dialogContext,  object  result, SkipStepFunction next)
{
    await dialogContext.Prompt(Constants.DialogSteps.NameStep.ToString(), "Hi User.May I please know your name?"  );
}
The DialogContext object is constructed in the OnTurn Task which calls the dialogs. This dialog will ask the user for their name. Once the user replies back, we will send out another prompt using a GetPlaceTask. The task looks like follows
private async Task GetPlaceTask(DialogContext dialogContext,  object  result, SkipStepFunction next)
{
    var state = dialogContext.Context.GetConversationState();
    state.Name = ((TextResult)result).Value;
    await dialogContext.Prompt(Constants.DialogSteps.PlaceStep.ToString(), $"Hi {state.Name}, I am Weather Assistant Bot. \n I can get weather reports for you.\n Please enter a name of place.");
}
In this task we are saving the Name that we received from the user and then we are asking them to enter the name of the place. Post this we get the information about the choice of weather report using the **GetServiceChoiceTask ** which is as follows
private async Task GetServiceChoiceTask(DialogContext dialogContext, object  result, SkipStepFunction next)
{
    var state = dialogContext.Context.GetConversationState();
    state.Place = ((TextResult)result).Value;
    await dialogContext.Prompt(Constants.DialogSteps.GetServiceChoice.ToString(), $"Please Enter 1 for Today's weather or 2 for next 10 days forecast.");
}
In this task we save the name of the place which the user sent us. Then we ask the user to enter 1 or 2 as a choice. In next task **ReplyBackTask ** we actually call the helper which gets and parse the response from Yahoo API based upon the option that was entered. The task is as follows
private async Task ReplyBackTask(DialogContext dialogContext, object  result, SkipStepFunction next)
        {

            var state = dialogContext.Context.GetConversationState();
            int serviceChoice = 0;

            int.TryParse(((TextResult)result).Value, out  serviceChoice);
            if (serviceChoice == 1 || serviceChoice == 2)
            {
                state.ServiceChoice = serviceChoice;
                WeatherHelper weatherHelper = new  WeatherHelper();
                string weatherReport = await weatherHelper.GetWeatherReport(state.Place, state.ServiceChoice);
                await dialogContext.Context.SendActivity($"Dear {state.Name}, \n {weatherReport}");

            }
            else
            {
                await dialogContext.Context.SendActivity($"Hi {state.Name}, \n You have entered {serviceChoice} which is incorrect. \n Thanks for using WeatherAssistant");
            }

            await dialogContext.End();
        }
Here a call to the WeatherHelper class is made which parses the response. We then pass the response back to the user using the SendActivity method and once the response is sent we end the activity and the cycle restarts again. Now let us see how we can add the dialogs. It is done using the public constructor without parameters as shown below.
public WeatherAssistantBot()
        {
            dialogSet = new  DialogSet();
            dialogSet.Add(Constants.DialogSteps.NameStep.ToString(), new  Microsoft.Bot.Builder.Dialogs.TextPrompt());
            dialogSet.Add(Constants.DialogSteps.PlaceStep.ToString(), new  Microsoft.Bot.Builder.Dialogs.TextPrompt());
            dialogSet.Add(Constants.DialogSteps.GetServiceChoice.ToString(), new  Microsoft.Bot.Builder.Dialogs.TextPrompt());
            dialogSet.Add(Constants.DialogSteps.MainDialog.ToString(), new  WaterfallStep[] { GetNameTask, GetPlaceTask, GetServiceChoiceTask, ReplyBackTask });

        }
The OnTurn Task is responsible for tracking the current context and passing control to the next dialog and handling of the state. In this Task we check if the activity received is a message or not. If it is a message, we keep the conversation alive by using the Continue method on the current context (In order to check if the conversation is just initiated we check the Responded flag and if it is not true we initiate the conversation),
public async Task OnTurn(ITurnContext turnContext)
{
    var state = turnContext.GetConversationState();

    var dialogContext = dialogSet.CreateContext(turnContext, state);

    if (dialogContext.Context.Activity.Type == ActivityTypes.Message)
    {
        await dialogContext.Continue();
        if (!dialogContext.Context.Responded)
        {
            await dialogContext.Begin(Constants.DialogSteps.MainDialog.ToString());
        }
    }

}
WeatherHelper.cs
We have an asynchronous Task in this helper which calls the Yahoo API and then based upon the choice made calls the necessary methods to parse the string. Let us see the code to get the response from Yahoo API.
public async Task<string> GetWeatherReport(string place, int option)
        {
            string weatherResponse = string.Empty;
            HttpClient client = new  HttpClient();

            string uri = String.Format(Constants.YahooQueryEndpoint, place);
            HttpResponseMessage resp = await client.GetAsync(uri);
            var response = resp.Content.ReadAsStringAsync();

            WeatherApiResponse weatherApiResponse = JsonConvert.DeserializeObject(response.Result);

            switch (option)
            {
                case 1: weatherResponse = GetTodaysWeather(weatherApiResponse);
                    break;
                case 2: weatherResponse = GetForecast(weatherApiResponse);
                    break;

                default:
                    break;
            }

            return weatherResponse;
        }
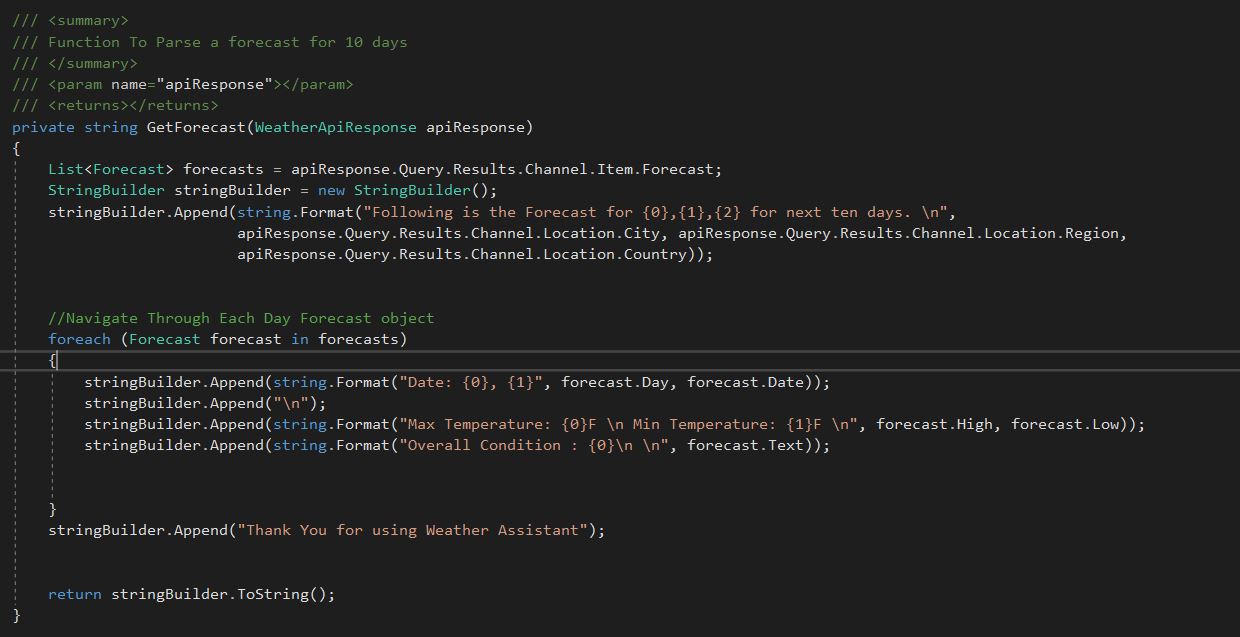
the code is self-explanatory. The methods to parse the string are shown below.

Program.cs
There is no change in this class at all.
Startup.cs
We will just replace the name of the EchoBot with WeatherAssistantBot in this class. Another change we will make is to replace TurnState with BotState in the class. The startup.cs after modification looks like following.
public class  Startup
    {

        public Startup(IHostingEnvironment env)
        {
            var builder = new  ConfigurationBuilder()
                .SetBasePath(env.ContentRootPath)
                .AddJsonFile("appsettings.json", optional: true, reloadOnChange: true)
                .AddJsonFile($"appsettings.{env.EnvironmentName}.json", optional: true)
                .AddEnvironmentVariables();

            Configuration = builder.Build();
        }

        public IConfiguration Configuration { get; }

        // This method gets called by the runtime. Use this method to add services to the container.
        public void  ConfigureServices(IServiceCollection services)
        {
            services.AddBot(options =>
            {
                options.CredentialProvider = new  ConfigurationCredentialProvider(Configuration);
                options.Middleware.Add(new CatchExceptionMiddleware(async (context, exception) =>
                {
                    await context.TraceActivity("WeatherBot Exception", exception);
                    await context.SendActivity("Sorry, it looks like something went wrong!");
                }));

                IStorage dataStore = new  MemoryStorage();
                options.Middleware.Add(new ConversationState(dataStore));
            });
        }

        // This method gets called by the runtime. Use this method to configure the HTTP request pipeline.
        public void  Configure(IApplicationBuilder app, IHostingEnvironment env)
        {
            if (env.IsDevelopment())
            {
                app.UseDeveloperExceptionPage();
            }

            app.UseDefaultFiles()
                .UseStaticFiles()
                .UseBotFramework();
        }
    }
WWWRoot
The default.htm should be modified to highlight the name of the bot. The project generated from the template will have the name EchoBot in it.
Testing
Following are the three scenarios we will test
- Get Today's Weather
- Get Forecast
- Enter any incorrect option
These scenarios are tested using the bot emulator that we saw how to use in last part.
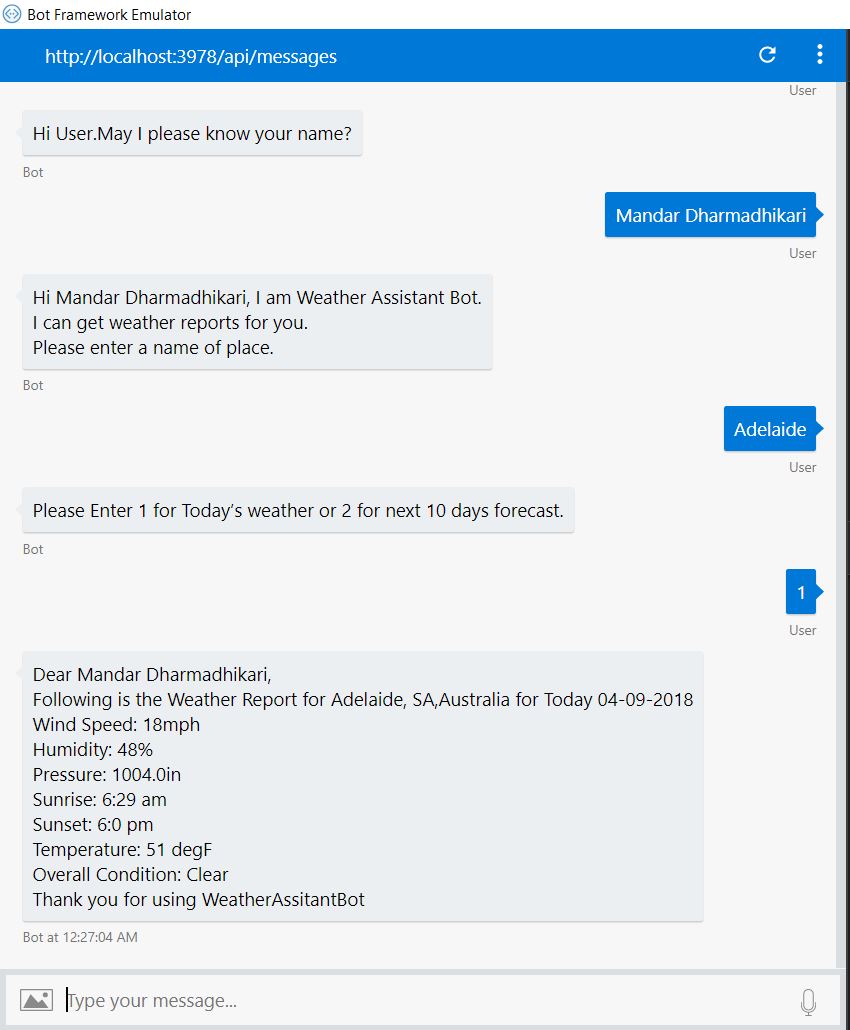
Get Today's Weather
Below is the sample captured in the bot emulator.
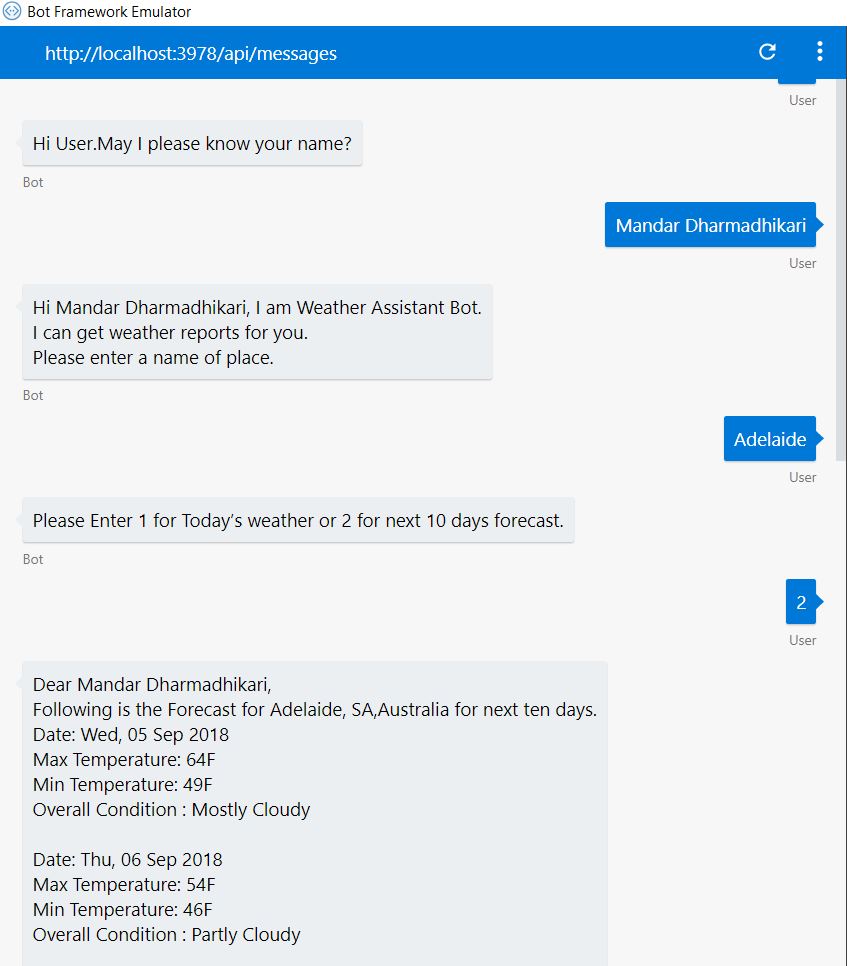
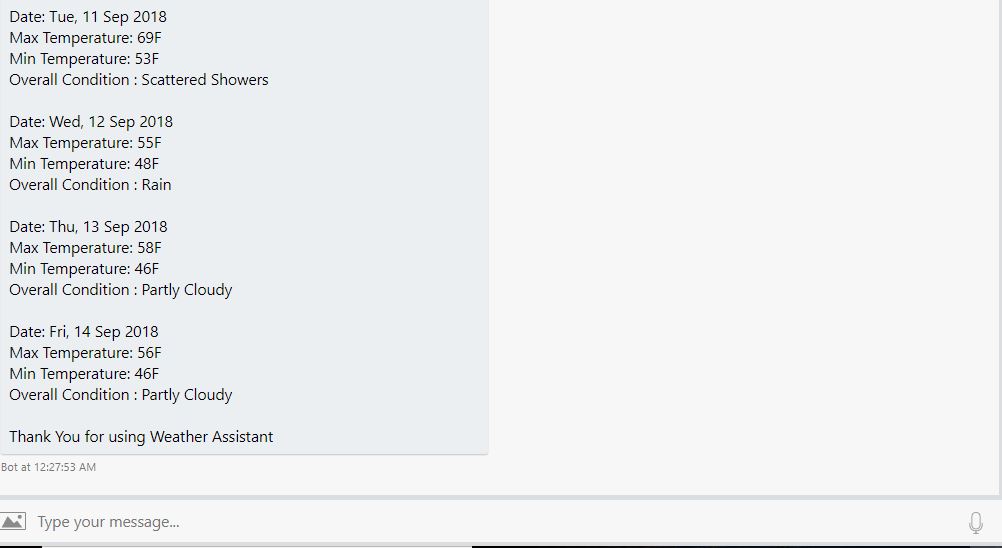
Get Forecast
Below are the samples recorded in the bot emulator

Incorrect Response
There can be many test cases for this like entering invalid name, place by providing string values with improper content. In such cases we need to apply proper validation e.g regex validations on email etc. We are not going to do that in this tutorial. The case we are studying is what happens when the user enters any other option than 1 and 2 as requested by bot. Following is a sample conversation

Conclusion
This article establishes a basic foundation on how to use the Dialogs feature in the new Bot Builder SDK v4 with ASP.NET core program. There is some learning curve to the new Bot Builder SDK as the way the things are coded has changed.
See Also
Following links can be referred to for extra reading around the topic.
- Microsoft Bot Framework: Building Intelligent Chat Bot Using Azure Functions and LUIS
- Microsoft Bot Framework: Create An Intelligent Bot Application
- Chat Bot with Azure Bot Service
References
Following articles were referred to while writing this post.
- Azure Bot Service Documentation
- Entities and activity types
- Design and control conversation flow
- Yahoo Weather API for your apps