DPM: Step-by-Step Guide: Performing a Bare Metal Recovery from Microsoft Azure
This guide applies to System Center Data Protection Manager 2016, 1801, 1807
Introduction
In this Wiki article, we will go through on how to perform a Bare Metal Recovery (BMR) from Microsoft Azure using System Center Data Protection Manager 1807.
For this guide, we will be performing a bare metal recovery on a Hyper-V virtual machine. Our virtual machine in this guide is called MGMT2016, the virtual machine settings are as follows:
- **Name: **MGMT2016
- Operating System: Windows Server 2016 Standard
- Configuration version: 8.2
- Generation: 2
- Memory: 4GB
- **vCPU: **1
- Hard Drive:
- C-drive (35GB)
- D-drive (10GB)
Prerequisites
- Microsoft Azure subscription.
- Recovery Services vault.
- System Center Data Protection Manager (DPM) server.
- A Bare Metal Recovery/System State recovery point in Microsoft Azure.
- A Windows network share to store the BMR/System State recovery point.
Overview of the DPM environment
Before we start we will have a quick look at our Azure and DPM environments.
We will start by checking out the DPM server and its protection group(s).
Open the System Center DPM Administrator Console on the DPM server.
[

](resources/2477.DPM_5F00_BMR_5F00_Azure_5F00_4.png)
Once the System Center DPM Administrator Console has opened, let's start by heading to the Management tab on the left.
[

](resources/0511.DPM_5F00_BMR_5F00_Azure_5F00_6.png)
Now head to the Production Servers (previously called "Agents").
Here we can see all the servers/clients with the DPM agent installed, in our case we have the server MGMT2016 with the agent version of 5.1.363.0.
Now let's head to the Protection tab in the lower left corner.
[

](resources/2642.DPM_5F00_BMR_5F00_Azure_5F00_9.png)
In here we can see everything we have protected, so in our case, we should see our Protection Group(s) for the MGMT2016 server and it's System Protection.
To perform a BMR / System State recovery we will need a Windows share, in this guide I have a separate disk on my DPM server called "Azure Recovery" and within this disk, we have a shared Windows folder called "VMRecovery".
The share permissions are set as follows:
[

Everything looks good, now let's have a quick look in our Azure environment.
Overview of the Azure Recovery Services Vault
Open up a browser and head to the Microsoft Azure portal at https://portal.azure.com/
 [
[](resources/1464.DPM_5F00_Azure_5F00_2.0.png)
Sign in to the Microsoft Azure portal.
Once we're signed in, we will head to our Recovery Services Vault, type "Recovery Services Vault" in the search box and click on Recovery Services Vault.
We should now find our Recovery Services Vault that we have created, click on it to access it.
[

](resources/7230.DPM_5F00_BMR_5F00_Azure_5F00_11.png)
We will be directed to the overview page of our Recovery Services Vault, now we will want to see that we actually have a BMR backup available, click on Backup items which can be found in the Recovery Services Vault menu on the bottom left.
[

](resources/0181.DPM_5F00_BMR_5F00_Azure_5F00_13.png)
In the Backup items, we will see all items that are backed up from DPM to the Azure Recovery Services Vault, in this guide we will only have a BMR/System State backup so the backup items value will be one (1).
If we click on the DPM backup item we will see what exactly is backed up.
We can even click on the specific backup item, in our case the System Protection to get even more details.
We have now checked both DPM and the Azure Recovery Services Vault and everything looks good.
Restoring the Bare Metal Recovery with DPM
We are now ready to start the BMR / System State recovery, head back to the DPM server and then go to the System Center DPM Administrator Console.
Go to the Recovery tab on the bottom left corner.
Now in browse to the server we want to perform a BMR recovery on and highlight the System Protection.
[

](resources/6254.DPM_5F00_BMR_5F00_Azure_5F00_21.png)
Next choose an available recovery point.
Once we have chosen our date for the recovery point, right-click the System Protection and choose Recover... to start the recovery wizard.
[

](resources/1524.DPM_5F00_BMR_5F00_Azure_5F00_23.png)
A Recovery Wizard window will open up, click Next to continue.
Select the recovery type, in here we only have the only option to check the Copy to a network folder alternative, then click Next to continue.
Now specify to which location the recovery point will be recovered to by clicking Browse and then browse to the shared folder.
We should now have selected a recovery destination, click Next to continue.
[

In the next step, we have the possibility to configure some recovery options, we will go with the defaults in this guide, click Next to continue.
We will now see a summary window of our recovery, click Recover to start the recovery process.
The recovery process will now start.
[

](resources/8407.DPM_5F00_BMR_5F00_Azure_5F00_31.png)
The window can be closed if we need to do other things within DPM, the recovery process can be viewed in the Monitoring task area.
Once the recovery is complete we can see the recovery status in the recovery wizard.
If the recovery wizard closed, we can also see recovery status in the Monitoring tab, go to Monitoring, go to Today's jobs and then either browse through manually or search for the server that we performed a recovery of.
[

](resources/1665.DPM_5F00_BMR_5F00_Azure_5F00_33.png)
We can now see that DPM has successfully created a folder with a recovery on our network shared folder.
**Note: **It is very important to know this folder name, as we will need it when performing the recovery.
Inside the "DPM_timetamp" folder we can find the WindowsImageBackup folder, this is the folder that Windows will look for when performing a recovery.
We are now ready to perform the bare metal recovery.
Performing the Bare Metal Recovery on a server
To start the bare metal recovery, we will start by mounting a Windows Server 2016 image (ISO).

**Note: **If you have a physical server, mount the ISO with for example a USB memory stick or through the ILO (HPE), IDRAC (Dell), IMM (IBM).Since we are using Hyper-V, the virtual machines boot up very quickly, so we will need to change the boot order and set the DVD Drive as the first boot option.
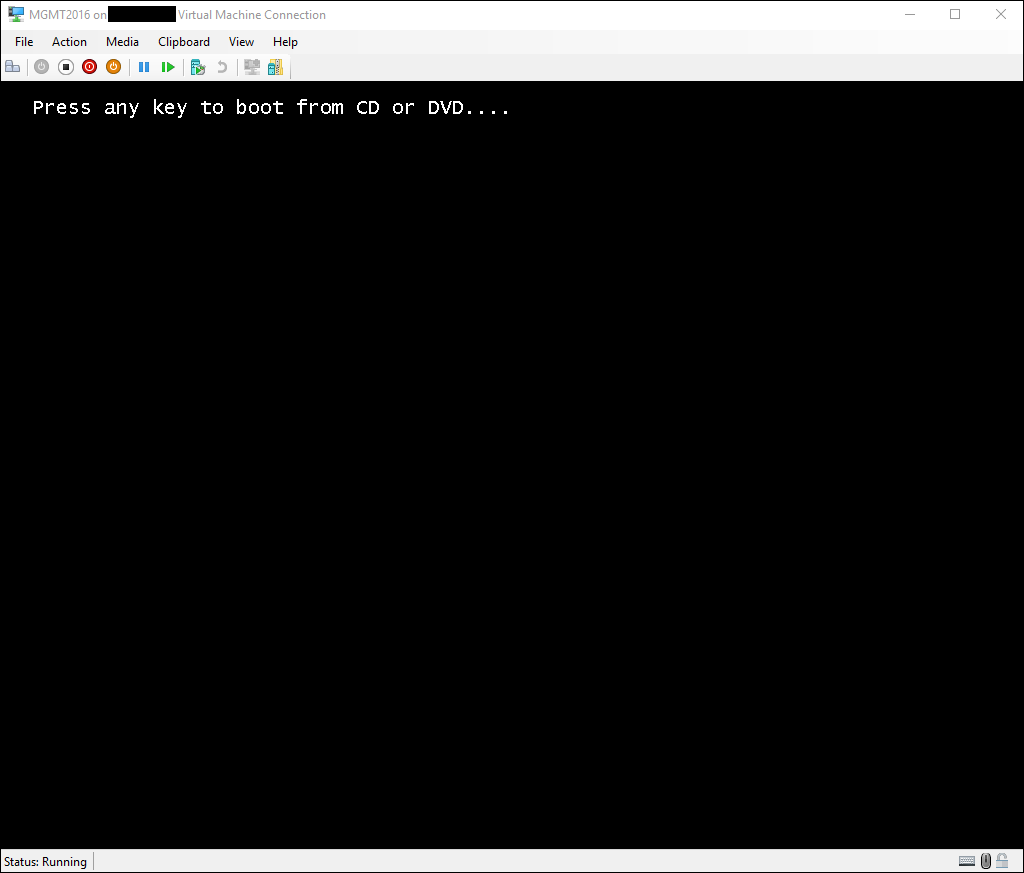
Now boot up the server and when it says Press any key to boot from CD or DVD.... press any key.
On the Choose an Option window, click on Troubleshoot.
In the Advanced Options window click on System Image Recovery.
[

](resources/7103.DPM_5F00_BMR_5F00_Azure_5F00_39.png)
Next, choose the local Administrator to perform this operation.
[

](resources/0247.DPM_5F00_BMR_5F00_Azure_5F00_40.png)
Enter the password of the local Administrator account (make sure you have it documented!), and then click Continue.
[

](resources/4760.DPM_5F00_BMR_5F00_Azure_5F00_41.png)
Windows will automatically try to find a system image on this computer, since we don't have any system image backup stored on this server it will fail, click Cancel.
[

](resources/7558.DPM_5F00_BMR_5F00_Azure_5F00_42.png)
We will manually select a system image, Select a system image should be checked, click Next to continue.
Next click on Advanced...
**
[
](resources/7750.DPM_5F00_BMR_5F00_Azure_5F00_44.png)**
Since we have the recovery stored on a Windows network share, choose Search for a system image on the network.
[

](resources/4861.DPM_5F00_BMR_5F00_Azure_5F00_45.png)
Click Yes to continue searching for a system image on the network.
[

](resources/1638.DPM_5F00_BMR_5F00_Azure_5F00_46.png)
Now we will need to enter the network path of where our DPM recovery point, we have to give the path of the parent folder of the WindowsImageBackup folder.
(See Step 15 under Performing the Bare Metal Recovery)We should now see our recovery image in the list as shown below, select it and click Next to continue the recovery process.
**Note: **If you don't insert the parent folder (in our case "DPM_timestamp..") the list of available recovery points will be empty.
Next up we will see the date of the recovery point and which drives are included, click Next to continue.
[

](resources/8130.DPM_5F00_BMR_5F00_Azure_5F00_52.png)
On the next screen click Next to continue.
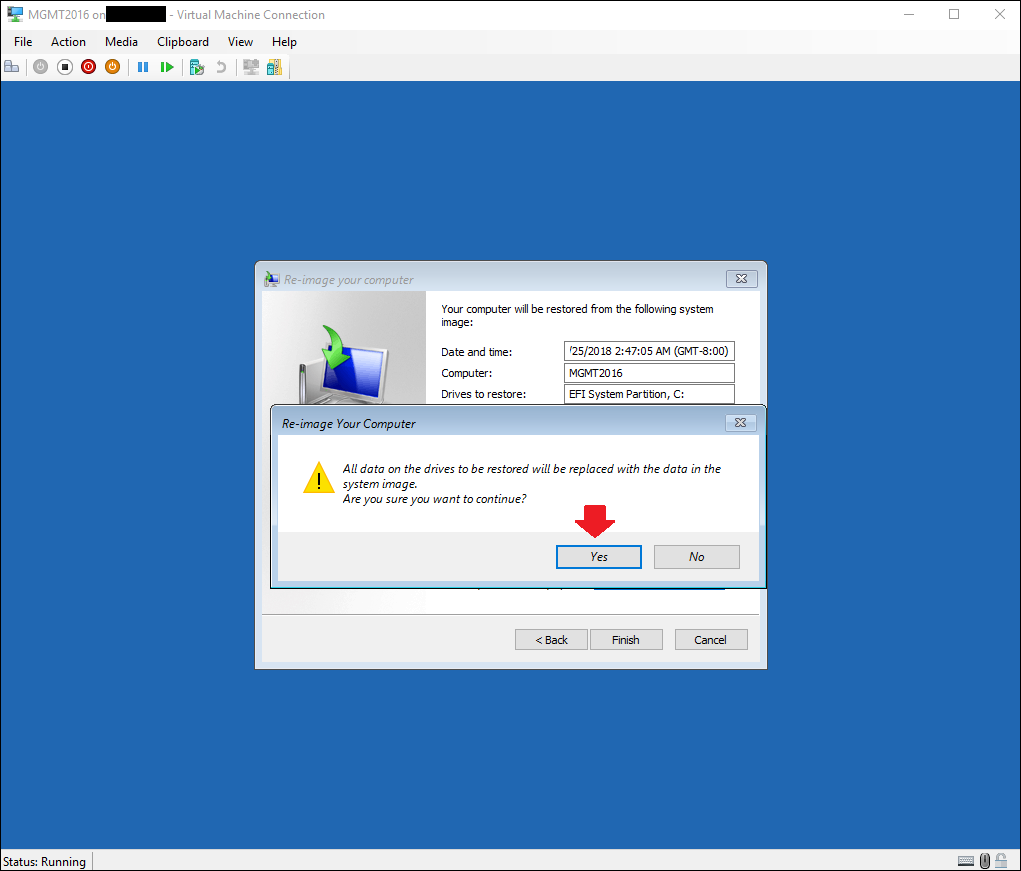
Finally we will see a summary of what will be restored, click Finish to start the bare metal recovery.
We will now be prompted with a message saying that "All data on the drives to be restored will be replaced with the data in the system image.
[

](resources/8032.DPM_5F00_BMR_5F00_Azure_5F00_55.png)
Are you sure you want to continue", click Yes.
The restore is now in progress.
Once the restore has completed, we should be good to go and log in and use the server once again!
We have now successfully performed a bare metal recovery!


