Note
Access to this page requires authorization. You can try signing in or changing directories.
Access to this page requires authorization. You can try changing directories.
Introduction
All the Windows and Windows Server users know that the operating system features a built-in antimalware protection tool named Windows Defender.
The UI of this tool has passed through several changes, but that's not the only way Windows Defender can be managed: a Windows PowerShell module named "Defender" (provided within the operating system's PowerShell) can be used to manage Windows Defender without using the GUI and this could be useful in automation scenarios of Defender, especially when the GUI is not available as in Windows Server Core installations.
Let's take a look at what we can do on Windows Defender via PowerShell.
The Cmdlets
Having a comprehensive overview of the PowerShell cmdlets for Windows Defender is quite simple and relies (of course) on the Get-Command cmdlet: open an administrative PowerShell window and execute the following
Get-Command -Module Defender
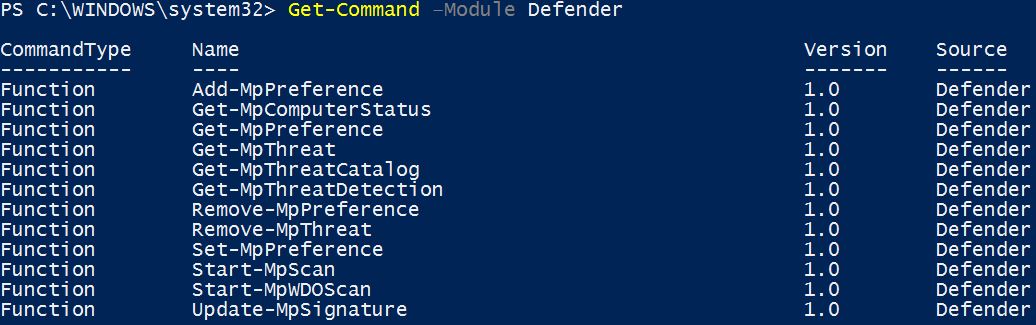
The output of the execution of the cmdlets displays the short list of available cmdlets included in the "Defender" module. Use the Get-Help cmdlet to get a detailed description of each cmdlet aw well as usage examples.
Let's take a look at each of them.
Getting the System Antimalware Protection Status
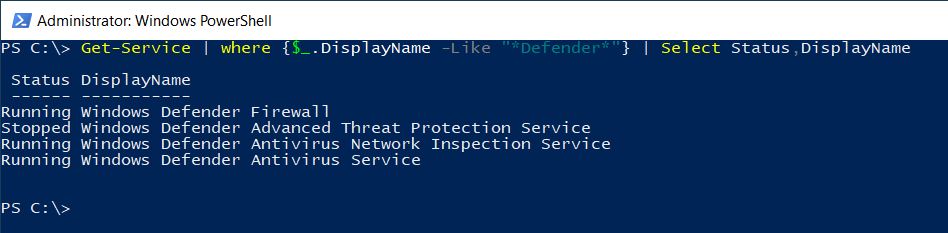
Before using any of the cmdlets available in the "Defender" module, you probably would be sure that all the Windows Defender related services are up and running: this can be easily checked by using the Get-Service cmdlet and filtering its output as following
The first cmdlet in the "Defender" module you'd probably execute would be Get-MpComputerStatus to get the status of the antimalware protection software installed on the computer: simply type Get-MpComputerStatus and hit ENTER to display a bunch of properties related to the status of Windows Defender.
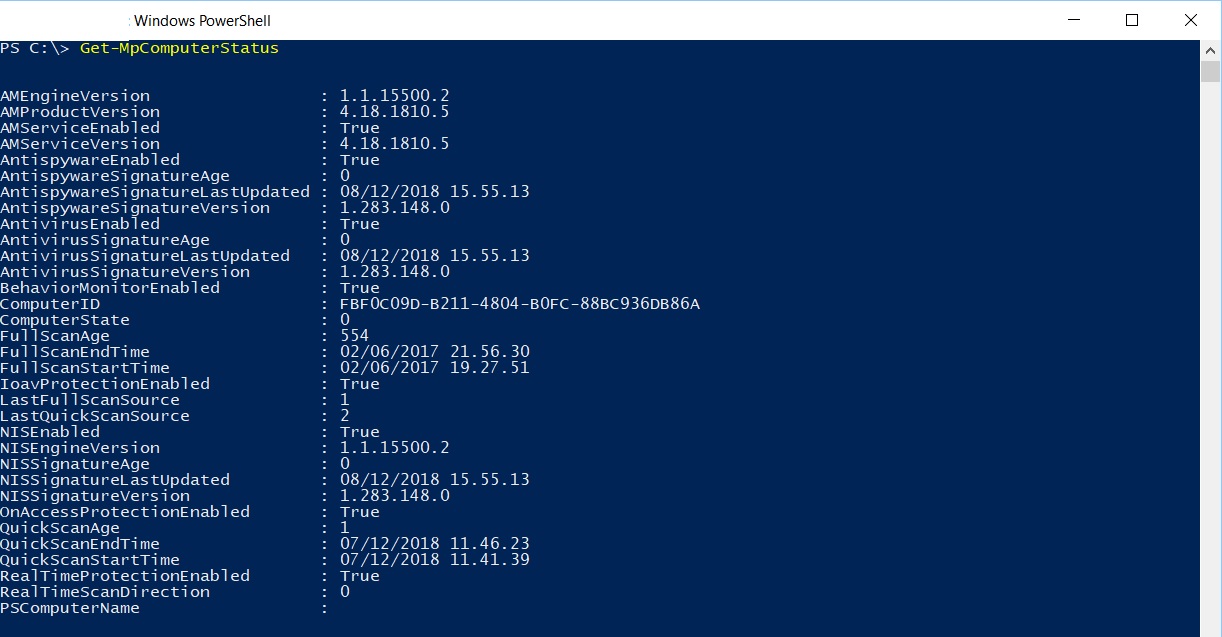
Each of these properties provide you with information about the status of Windows Defender.
Let's take a look at some of them:
- AMEngineVersion: version of the antimalware engine
- NISEngineVersion: version of the network inspection system engine
- AMServiceEnabled: activation of the antimalware service
- AMProductVersion: antimalware client version
- AMServiceVersion: antimalware service version
- AntispywareEnabled: antispyware protection activation status
- AntispywareSignatureLastUpdated: threat definitions' creation date
- AntispywareSignatureVersion: antivirus signatures version
- AntivirusSignatureVersion: antispyware signatures version
- NISSignatureVersion: network inspection system signatures version
- AntivirusEnabled: antivirus protection activation status
- AntivirusSignatureLastUpdated: date and time of last update for the antivirus signatures
- FullScanAge: number of days since the last system's full scan
- FullScanEndTime: end date and time of the last full scan of the system
- FullScanStartTime: start date and time of the last full scan of the system
- NISEnabled: network inspection system activation status
- NISSignatureLastUpdated: date and time of last update for the network inspection system's signatures
- QuickScanAge: number of days since the last quick scan of the system
- QuickScanEndTime: end date and time of the last quick scan of the system
- QuickScanStartTime: start date and time of the last quick scan of the system
- RealTimeProtectionEnabled: real-time protection activation status
Working with Defender Preferences
The Windows Defender preferences can be viewed or manipulated by using a group of four cmdlets: Get-MpPreference, Set-MpPreference, Add-MpPreference and Remove-MpPreference.
Getting Windows Defender Preferences
The Get-MpPreference cdmlet gets and displays the current preferences for Windows Defender scans and updates.
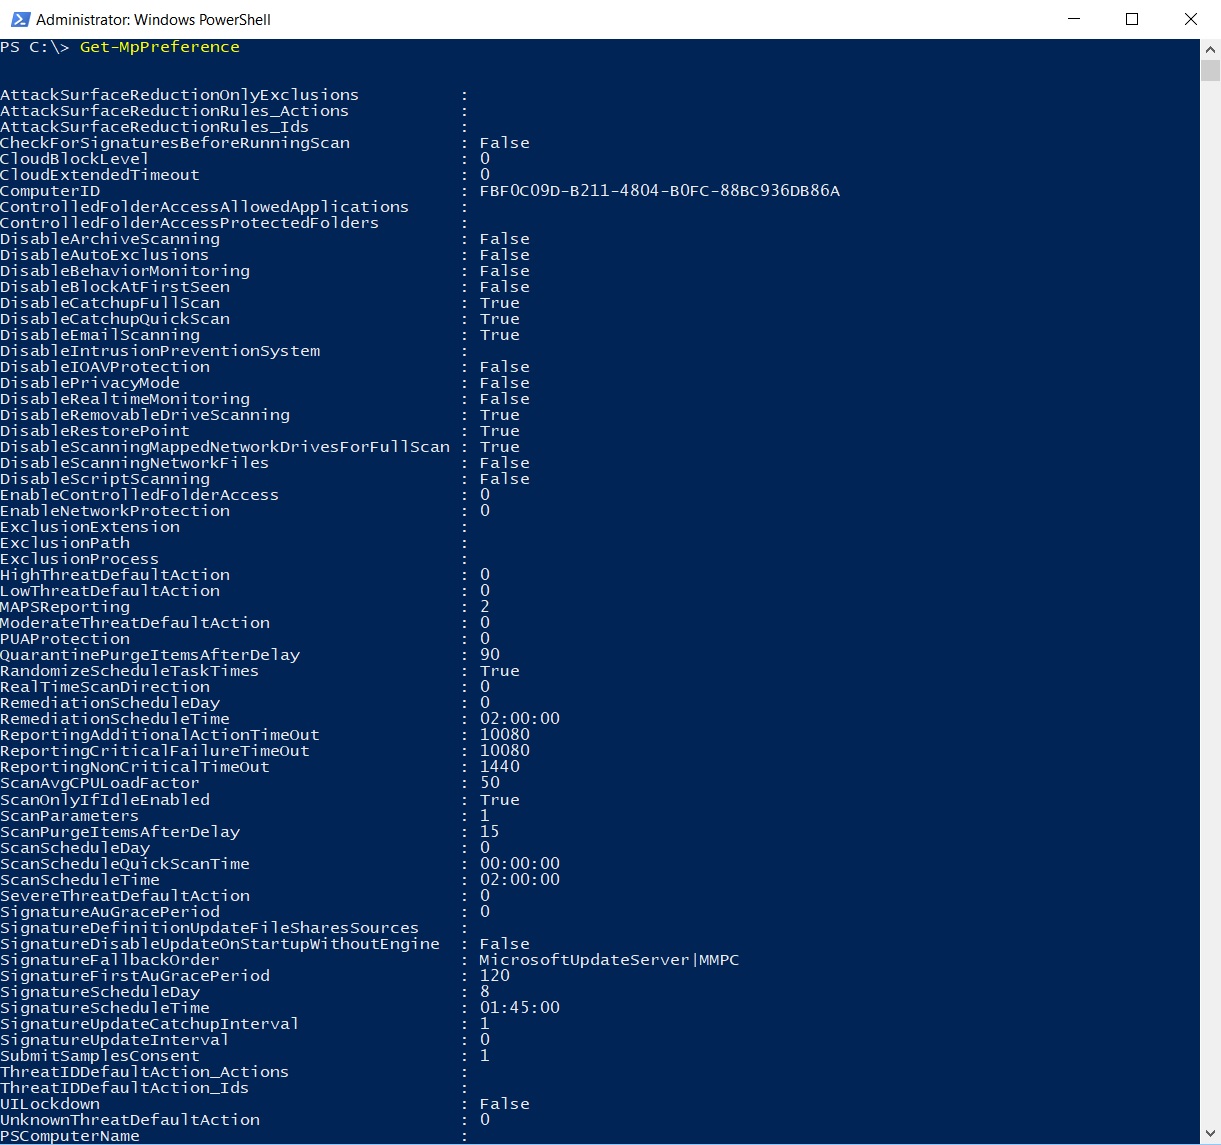
The cmdlet's execution displays a huge set of properties, such as:
- CheckForSignaturesBeforeRunningScan: if $True, Windows Defender will check for new virus and spyware definitions before running a scan
- DisableArchiveScanning: if set to either 0 or $False or not specified, Windows Defender scans archive files
- ExclusionExtension: specifies an array of file name extensions to exclude from scheduled, custom and real-time scanning.
- ExclusionPath: specifies an array of file paths to exclude from scheduled and real-time scanning; specifying a folder will exclude all the files under the folder.
- ExclusionProcess: specifies an array of paths to process images; any files opened by the specified processes will be excluded from scheduled and real-time scanning (the processes themselves will not be excluded).
The -CimSession parameter can be used to run the cmdlet in a remote session or on a remote computer.
Setting Windows Defender Preferences
The Set-MpPreference cmdlet configures preferences for Windows Defender scans and updates.
Adding Windows Defender Preferences
The Add-MpPreference cmdlet modifies settings for Windows Defender. The parameters for this cmdlet allows the user to
- -ExclusionPath: add exclusions for file name paths
- -ExclusionExtension: add exclusions for file name extensions
- -ExclusionProcess: add exclusions for file name processes
- -ThreatIDDefaultAction_Actions: specify an array of the actions to take for the IDs specified by using the ThreatIDDefaultAction_Ids parameter; the acceptable values for this parameter are
- 1: Clean
- 2: Quarantine
- 3: Remove
- 4: Allow
- 8: UserDefined
- 9: NoAction
- 10: Block
- **-ThreatIDDefaultAction_Ids **specify an array of threat IDs to apply the dafult action to
Removing Windows Defender Preferences
The Remove-MpPreference cmdlet removes exclusions or default actions; it can be used to remove exclusions for file name extensions, paths and processes, or default actions for high, moderate and low threats. The parameters for this cmdlet allows the user to
- -Force: force the cmdlet's execution without user confirmation
- -HighThreatDefaultAction: remove the automatic remediation action specified for the high threat alert level
- -LowThreatDefaultAction: remove the automatic remediation action specified for the low threat alert level
- -ModerateThreatDefaultAction: remove the automatic remediation action specified for the moderate threat alert level
- -SevereThreatDefaultAction: remove the automatic remediation action specified for the severe threat alert level
- -ThreatIDDefaultAction_Ids: array of threat IDs for which the default action must be removed
- -ThrottleLimit: maximum number of concurrent operations that can be established to run the cmdlet; if 0 or omitted, an optimum throttle limit for the cmdlet based on the number of CIM cmdlets that are running on the computer is calculated
- -UnknownThreatDefaultAction: remove the automatic remediation action specified for the severe threat alert level
Getting Threats' information
There are three cmdlets aimed at getting and displaying information about threats: Get-MpThreats, Get-MpThreatDetection and Get-MpThreatCatalog.
Getting the history of detected threats
The Get-MpThreat cmdlet gets the history of threats that Windows Defender detected on the computer; if you want information about a specific threat, use the -ThreatID parameter and pass an array of threat IDs.
Getting active and past malware threats
The Get-MpThreatDetection cmdlet gets active and past malware threats that Windows Defender detected in the systrem; if you want information about a specific threat, use the -ThreatID parameter and pass an array of threat IDs.
Getting known threats from the definitions catalog
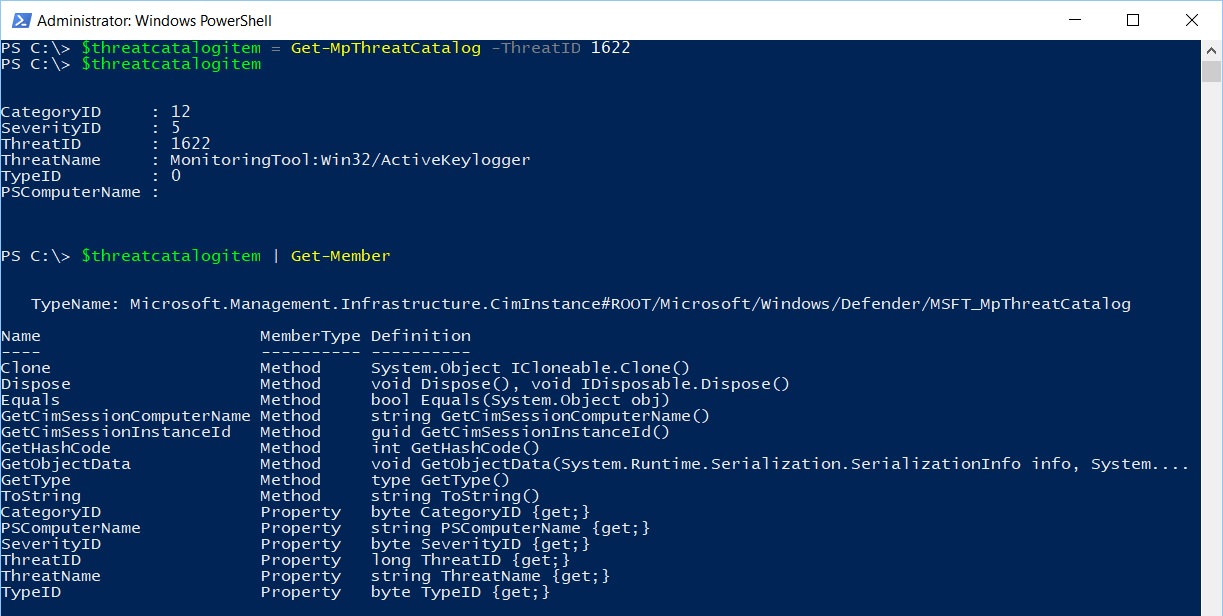
The Get-MpThreatCatalog cmdlet displays information about known threats from the definitions catalog; as per the previous two cmdlets, if you want information about a specific threat, use the -ThreatID parameter and pass an array of threat IDs.

Each item returned by the cmdlet is an object of type Microsoft.Management.Infrastructure.CimInstance#ROOT/Microsoft/Windows/Defender/MSFT_MpThreatCatalog and its properties can be easily displayed as follows.
Updating Antimalware Definitions
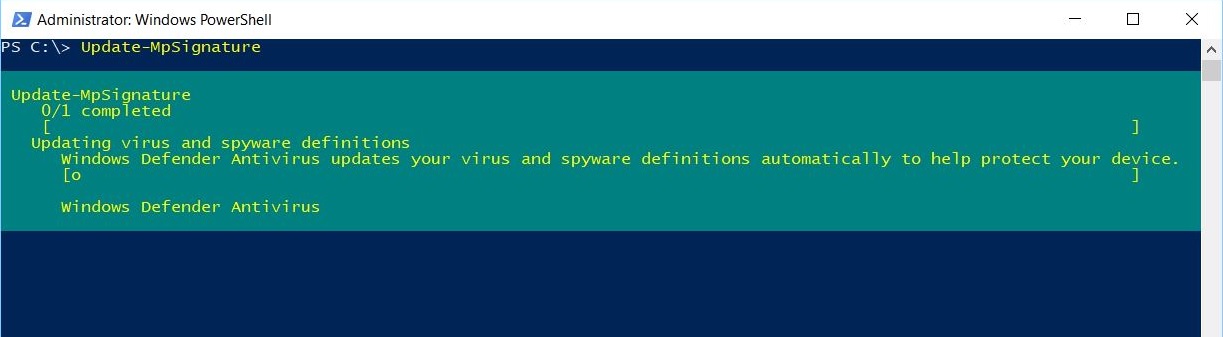
To update antimalware definitions with the latest definitions available simply execute the Update-MpSignature cmdlet.
The -UpdateSource parameter allows to specify the update source (by default, the Microsoft Update Server is used) to download the latest definitions: it can assume the following values
- InternalDefinitionUpdateServer: Windows Software Update Services (WSUS) server
- MicrosoftUpdateServer: Microsoft Update Server
- MMPC: Microsoft Malware Protection Center
- FileShares: a network file share
Performing a System Scan
There are two cmdlets that can be used to perform a system scan: Start-MpScan and Start-MpWDOScan.
Performing an Online Scan
The Start-MpScan cmdlet starts a scan on the computer.
The target to scan can be the whole system or a specific file or folder path: in this case, the -ScanPath parameter will be used to specify the scan's target.
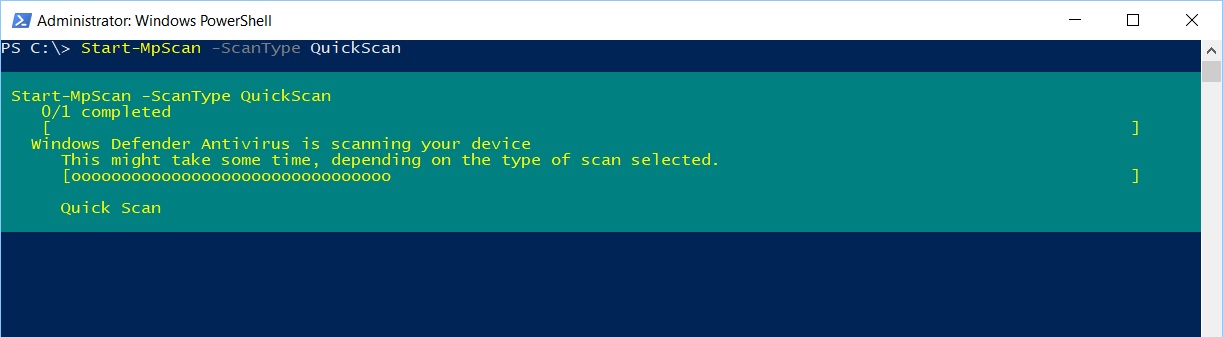
The -ScanType parameter allows the user to specify the type of scan to be performed: the acceptable values for this parameter are:
- FullScan
- QuickScan
- CustomScan
Performing an Offline Scan
Windows Defender Offline is an antimalware scanning tool that lets you boot and run a scan from a trusted environment: the scan runs from outside the normal Windows kernel so it can target malware that attempts to bypass the Windows shell, such as viruses and rootkits that infect or overwrite the master boot record (MBR).
In order to perform an offline scan, you have to execute the Start-MpWDOScan cmdlet: this kind of scan will make the system restart and perform the scan (it will take about 15 minutes to complete).
Removing Threats from the System
If one or more threats have been detected in the system, removal is a very simple action: just execute the Remove-MpThreat cmdlet to remove all of them**.**