Live Share Feature in Visual Studio 2019 and Visual Studio Code
Introduction
This article explains about live share feature in visual studio 2019 and visual studio code step by step. One of the important features is live share to getting our team started with collaborative editing and debugging in just a few simple steps. We can share the code through visual studio 2019 or visual studio code to our teammates without using any other screen sharing software.
Step 1
We need to install the Visual Studio 2019 and Visual studio code using the following link “https://visualstudio.microsoft.com/downloads/”.
Step 2
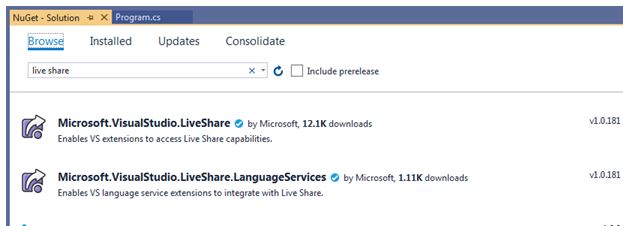
Live share extension default added in Visual Studio 2019. We can check live share extensions whether installed or not using the following way. Go to Tools à NuGet Package Manager à Manage NuGet Packages for Solution.
Go to Browse and search like “Live Share” and we can find the extensions are installed or not. Live share extensions already installed and it looks like below.
Open Visual studio code and click extension and type “Live Share” and install the Live Share extension in visual studio code.

Step 3
Open a new project in Visual Studio 2019. Here we are opening console application in Visual Studio 2019 looks like below screenshot.
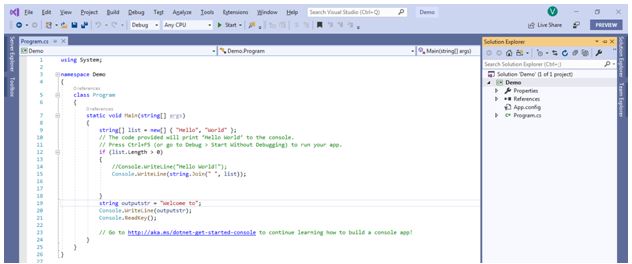
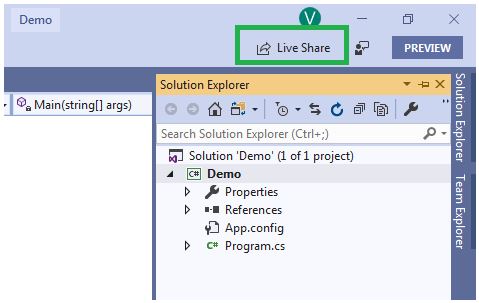
Our application is ready now, we can share the application screen using “Live Share”. Click the live share option on the top of the right side in the Visual Studio 2019.
After clicking the live share we can get the information window looks like below.

We need to know more about “Live Share”, click more info link. We get the detailed information about live share looks like the below screenshot.

Step 4
Copy the “Live Share” link using “Copy again” and share to our team members for collaboration. Our live share link looks like below. “https://prod.liveshare.vsengsaas.visualstudio.com/join?1B7E66EEFD7B78A1E27ED321D37424254335”
Open the new Visual Studio 2019 and go to the “File” menu and click “Join Live Share Session”

Step 5
Copy the live share session link and paste into the “Enter Collaboration Session Invite Link” text box and click Join button.

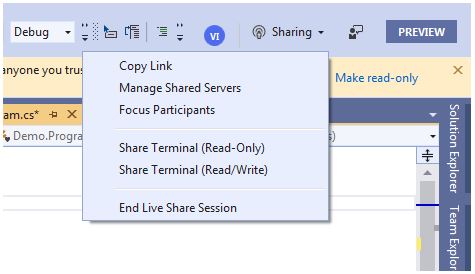
Sharing is started now and we can write, debug and built the code from both sides. When we write the code or doing anything we can watch each side. We have opened two Visual Studio 2019 in a single machine, for demo purpose. We can see the screen sharing look like below.

We have a lot of options are there. Click “Sharing” in the top of visual studio code we can find the all the features looks like below. We can share “Live Share” with “Read-Only” and “Read/Write”. Click “End Live Share Session” to stop live sharing.
Join Collaboration Session Using Visual Studio Code
Open the visual studio code and go to live share and click “Join collaboration session” option looks like below screenshot.

Copy the Collaboration URL and past into the Visual Studio code and click the join button.

After pasting URL then click enter, Sharing will be started. We see the live sharing looks like the below screenshot.

We can make collaboration from Visual Studio to Visual Studio or Visual Studio to Visual studio code.
Conclusion
This article explained about live share feature in visual studio 2019 and visual studio code step by step. I hope this is very useful for new learners and those who are learning about the new features of Visual Studio 2019.