Azure SQL - Failover Group Configuration
Introduction
In this post, we will see how to set up Failover Group on Azure SQL Databases. What Failover Group does is to create a second database replica in the same or another region.
Prerequisites
- Active Azure Subscription
- Azure SQL Database Server(s) + database(s)
How To Configure Failover Group
By following the next steps, we able to configure a demo Failover Group on an Azure SQL Database service.
Step 1. Create Failover group
Considering that we have create and configure two Azure SQL Server + databases, the first step is to create a failover group. We can do this from the Settings - Failover groups.

Step 2. Configure Failover group
Failover group configuration is quite simple if we have completed the prerequisites.
Note
The failover group name MUST contain lowercase letters, numbers, and '-', can't start or end with '-' or have more than 63 chars.
We have to fill in the settings as the image below show and select Create.
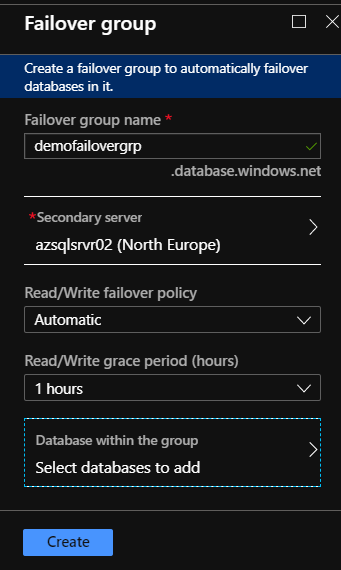
| Setting | Value |
| Failover group name | Type the failover group name |
| Secondary server | Select the secondary server for the failover group |
| Read/Write failover policy | Select a failover policy to use (manual or automatic) |
| Read/Write grace period | Select a grace period to us e (min 1 hour, max 24 hours)* |
| Database within the group | Select any database we want to be in the failover group |
* The Read/Write grace period setting is when we use manual(asynchronous) failover policy. This is the period that the service wait before the failover procedure begins, that could be the reason for a possible data loss.
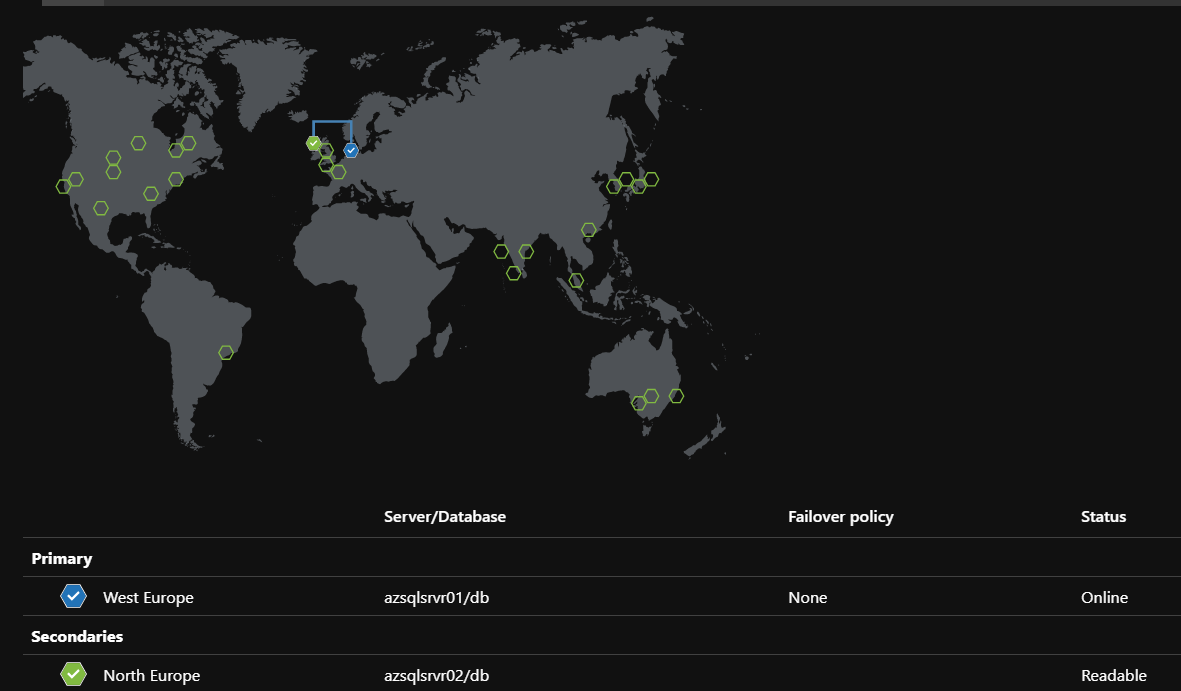
Failover group Geographic Locations
After the steps above we can see the Primary (West Europe) and Secondary (North Europe) endpoint for the failover group.
Listener Endpoints
At the image below shown the connections that we can use to our applications, the secondary(Read-only) endpoint is the best choise for reporting apps, for example Power BI.
