Microsoft 365 Graph API using PowerShell
Introduction

Microsoft Graph is the gateway to data and intelligence in Microsoft 365. It provides a unified programmability model that you can use to access the tremendous amount of data in Office 365, Windows 10, and Enterprise Mobility + Security. It offers a single endpoint, https://graph.microsoft.com, to provide access to rich, people-centric data and insights exposed as resources of Microsoft 365 services. Microsoft Graph exposes REST APIs and client libraries to access data on the following Microsoft 365 services:
- Office 365 services: Delve, Excel, Microsoft Bookings, Microsoft Teams, OneDrive, OneNote, Outlook/Exchange, Planner, and SharePoint
- Enterprise Mobility and Security services: Advanced Threat Analytics, Advanced Threat Protection, Azure Active Directory, Identity Manager, and Intune
- Windows 10 services: activities, devices, notifications
- Dynamics 365 Business Central
By using an Azure AD application, we can send queries to the Graph API by way of issuing HTTP requests to https://graph.microsoft.com. The Get request to https://graph.microsoft.com/v1.0/users will fetch us all the Azure AD users. We will divide the article into the below sections
Create Azure AD Application
- Assign Permissions
- Create Access Token
- Use the token to access the API
Create Azure AD Application
Lets get started with the creation of azure AD Application for which we will go to the Azure Portal(Portal.Azure.Com) and head to Azure App Registrations. Select New Registration.
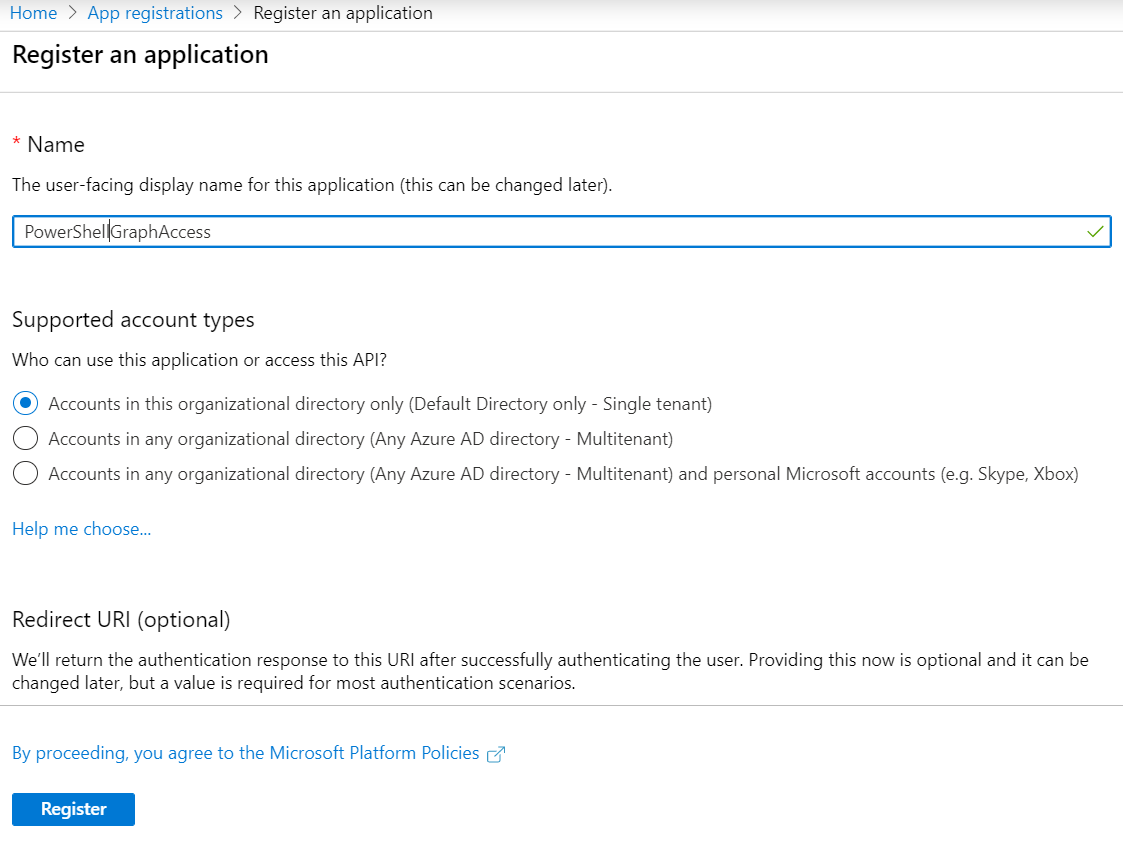
Specify the application name and register.
Create Client Secret
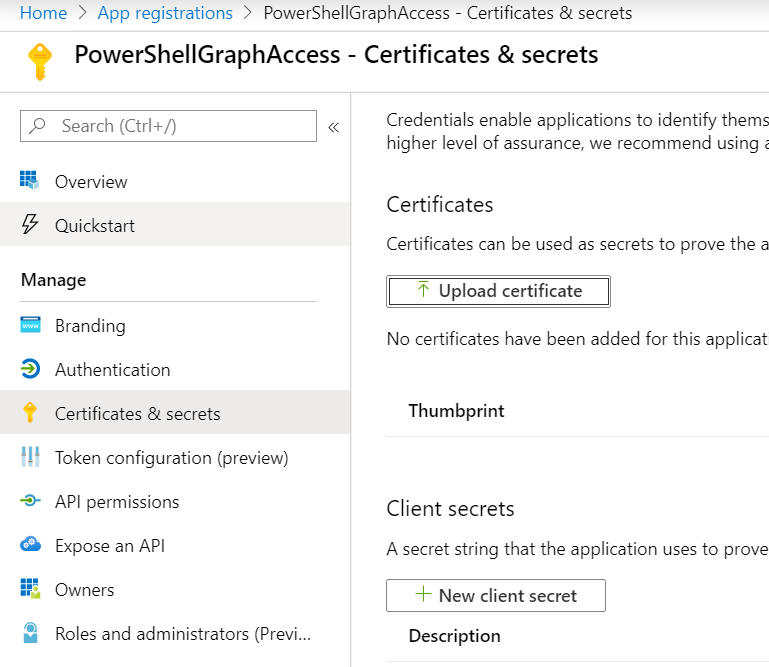
Now we have to create an application secret which will be used for authenticating . From within the application page, select Certificates and secrets and select New client secret.
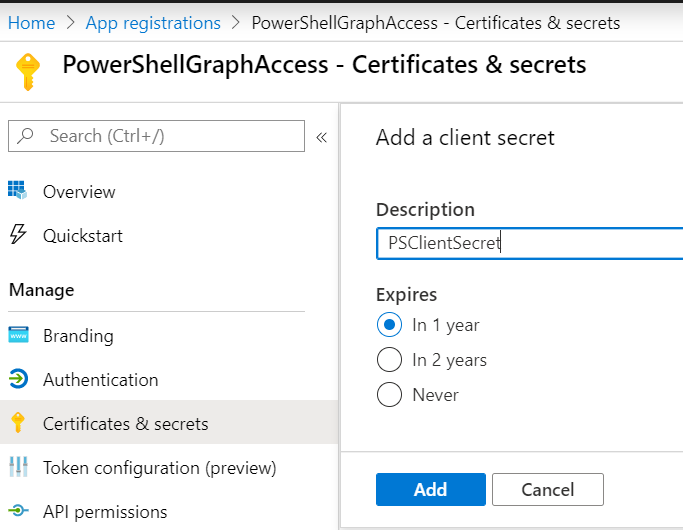
Specify the description and expiry for the client secret
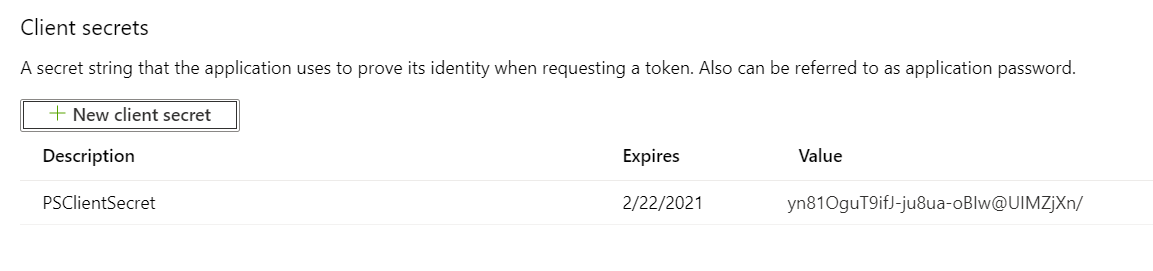
Copy the client secret as it will be hashed out once you navigate away from the page.
Assigning Permissions
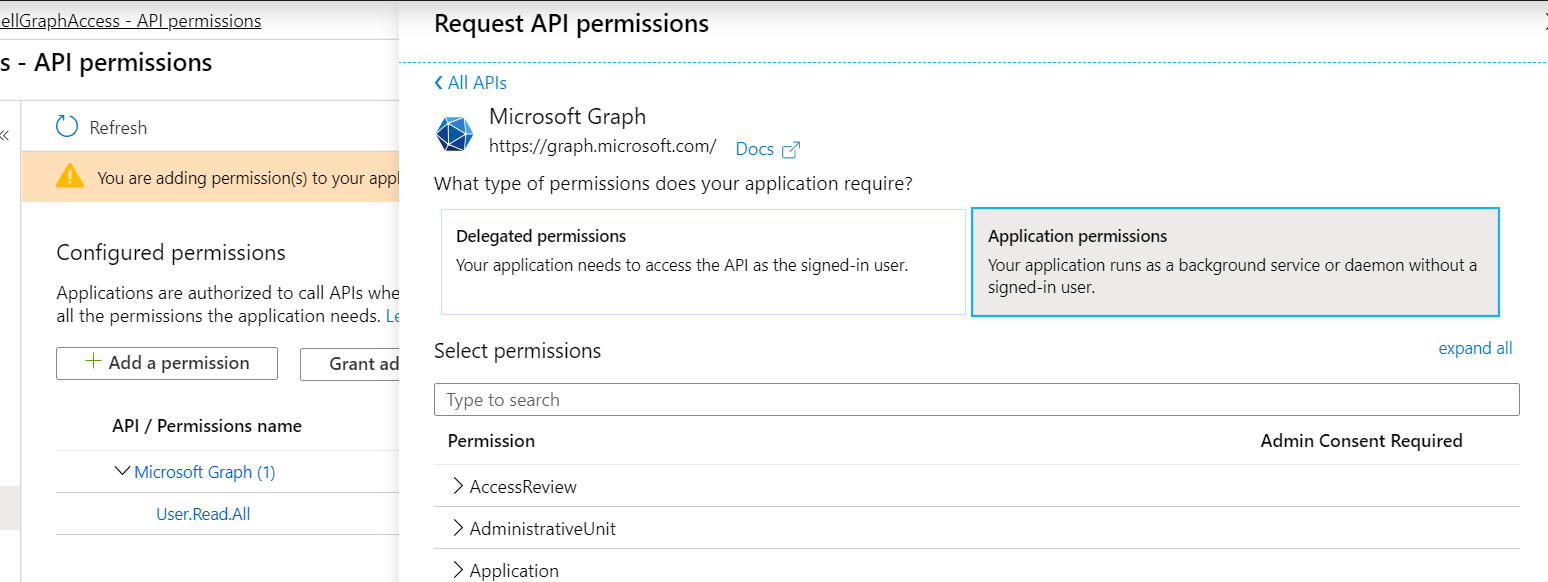
Now we will have to assign permissions to it.There are two kinds of permissions :
- Delegated Permissions : This works well for user facing applications that will accept user credentials for authentication. These permissions are granted when making requests to the API based on a user being authenticated
- Application Permissions : In this case we are assigning the permission to the application itself. The upside is that it allows application to access API without user authentication and is a perfect match of unattended applications.
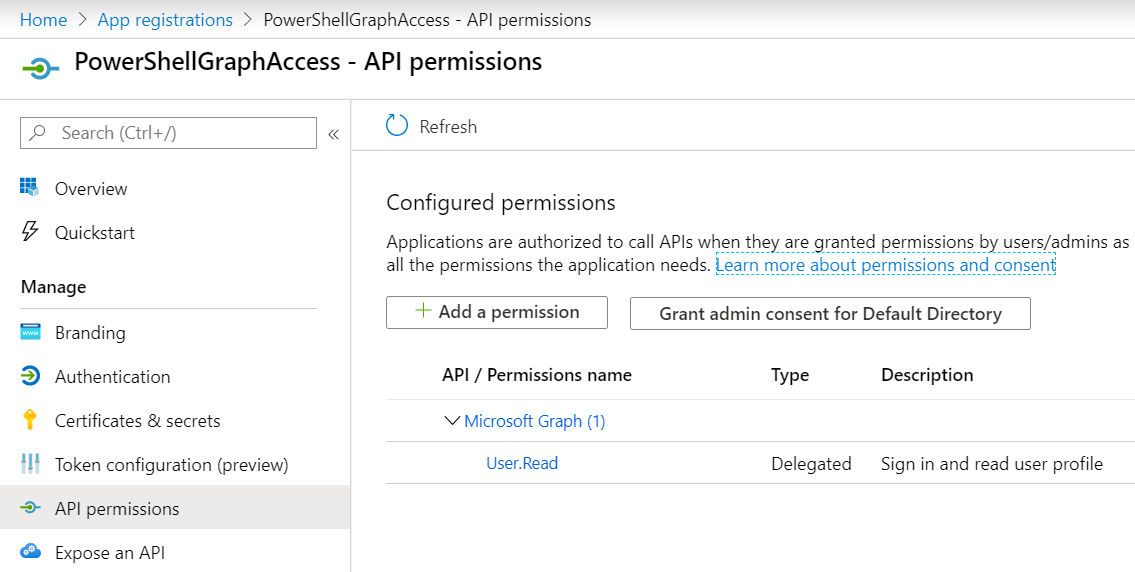
In this article we will see how to work with Application Permissions. From API Permissions, select Add a Permission.
There are numerous permissions that can be assigned to the application . An overview of the permissions can be found here
Get Users from Azure AD
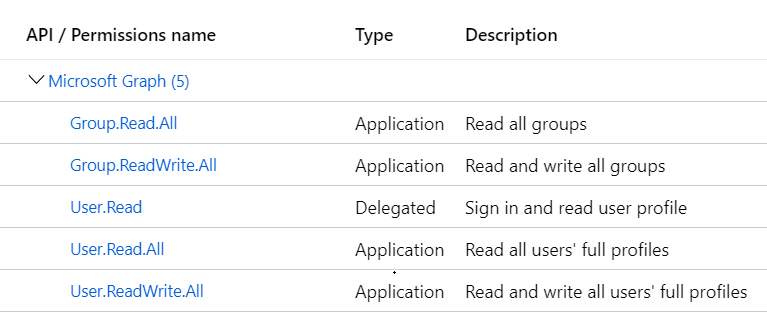
In the sample script below, we will try to fetch the users from the azure AD and as specified in the documentation we will be granting the below permissions to the application.
To grant the permissions, Click on Add Permission -> Application Permissions
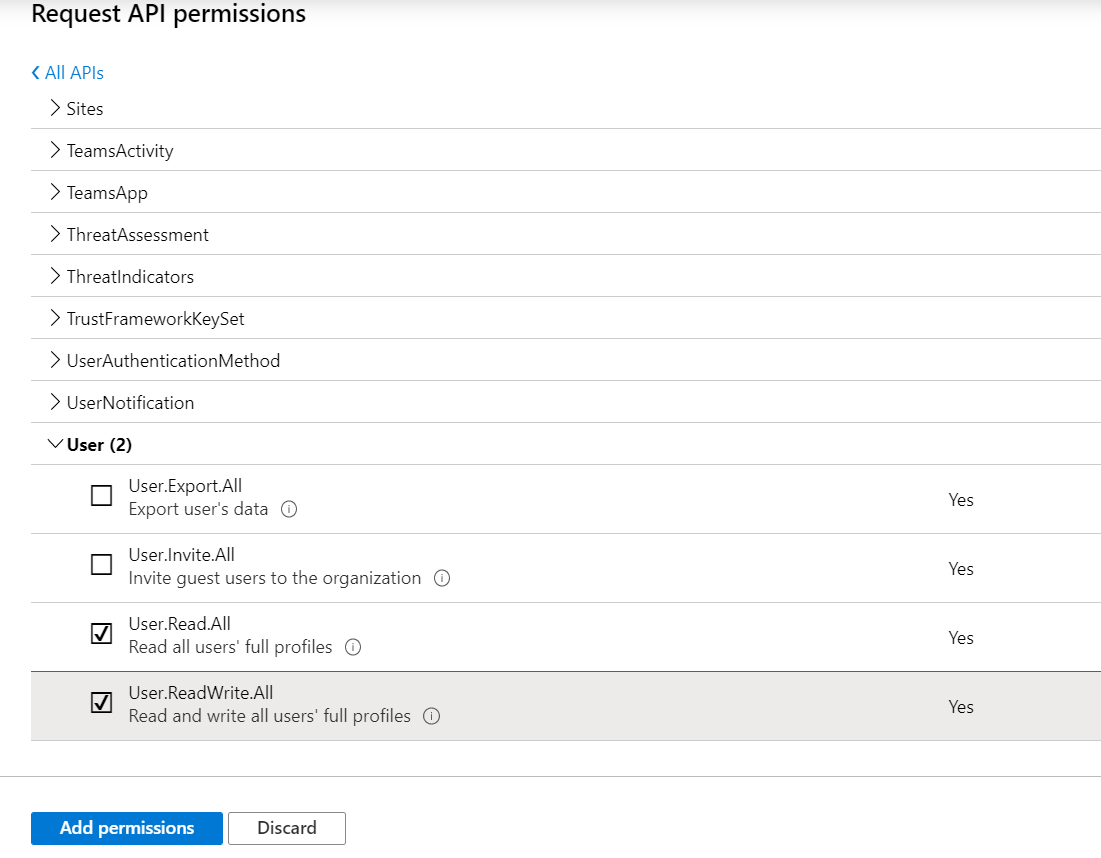
Select the User Read Permissions as shown below :
Select the Group permissions as well,
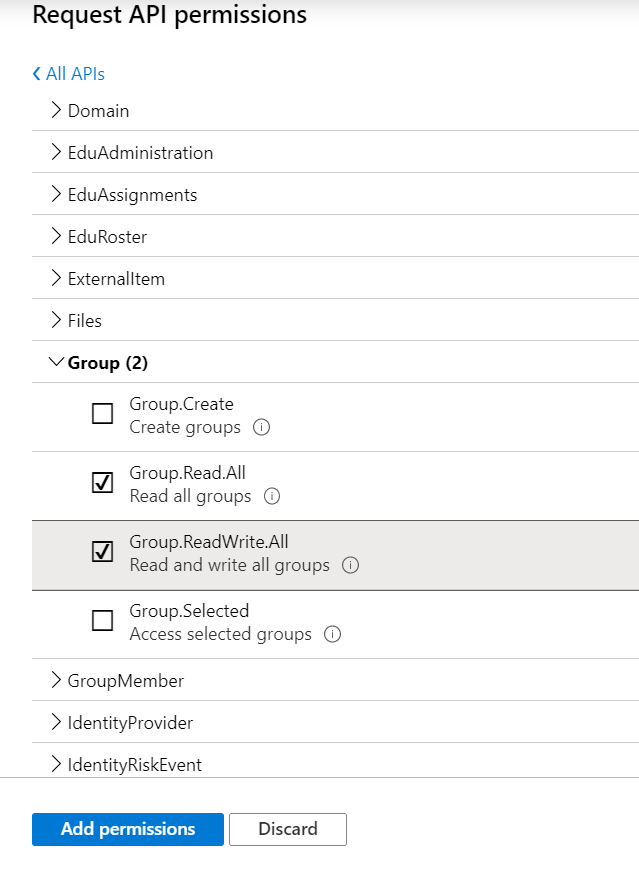
Click on Add Permissions to add the permissions the application, however you will notice that Admin Consent has to be done for completing permission assignment .

Click on Grant admin consent to grant the permissions to the application else the Graph API call will error out.
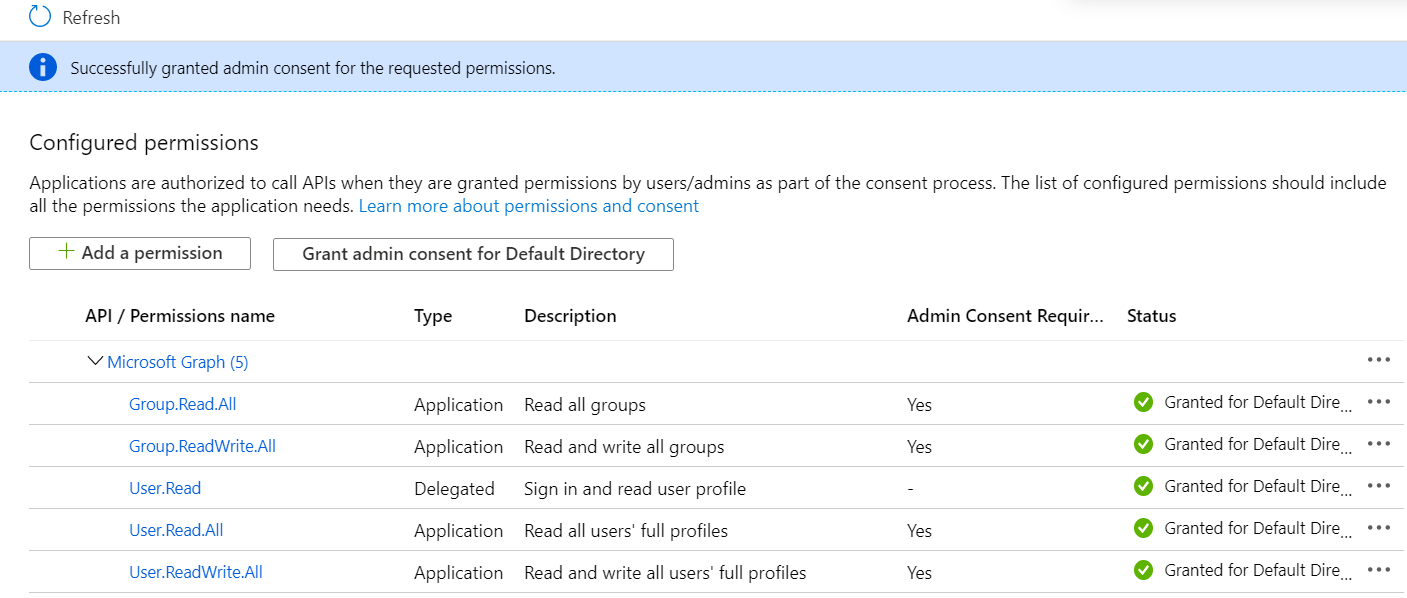
Thus we have successfully added the permissions and granted consent as well.
Retrieve Authentication Token From Azure AD
So as to issue to the API request, we need to authenticate the Azure Ad and get the token. So as to retrieve the token , we will use the code below :
# Construct the authentication URL
$uri = "https://login.microsoftonline.com/$tenantId/oauth2/v2.0/token"

#The Client ID from App Registrations
$clientId = "9f9c4be5-53e1-4f15-9fed-3ea4807e2b"

#The Tenant ID from App Registrations
$tenantId = "d1f1c2da-7667-42f6-bed2-ef9543f6ee"

#The Client ID from certificates and secrets section
$clientSecret = '-UBNrhrsD5rcA=ap=/5snjdkt5e4x-kG'


# Construct the body to be used in Invoke-WebRequest
$body = @{
    client_id     = $clientId
    scope         = "https://graph.microsoft.com/.default"
    client_secret = $clientSecret
    grant_type    = "client_credentials"
}

# Get Authentication Token
$tokenRequest = Invoke-WebRequest -Method Post -Uri $uri -ContentType "application/x-www-form-urlencoded" -Body $body -UseBasicParsing

# Extract the Access Token
$token = ($tokenRequest.Content | ConvertFrom-Json).access_token
$token

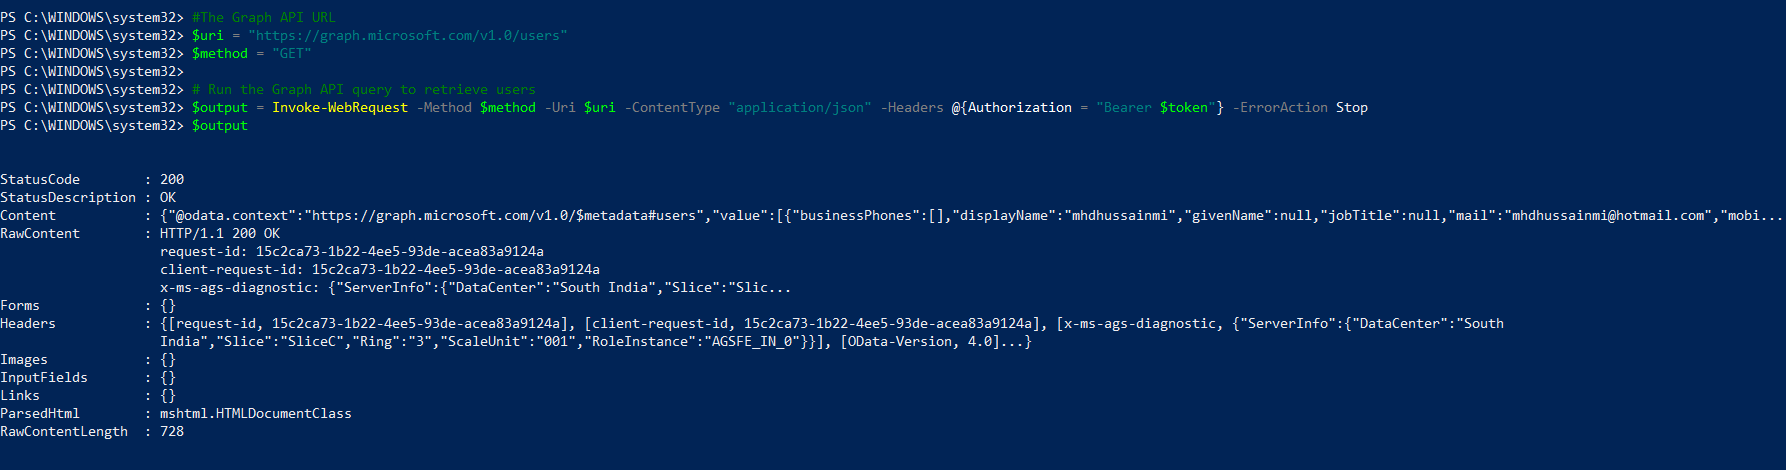
Once the token is retrieved, we can issue the Graph API call using this token as below :
#The Graph API URL
$uri = "https://graph.microsoft.com/v1.0/users"

$method = "GET"

# Run the Graph API query to retrieve users
$output = Invoke-WebRequest -Method $method -Uri $uri -ContentType "application/json" -Headers @{Authorization = "Bearer $token"} -ErrorAction Stop
Content key will have the users data.
Get SharePoint Site Data
Just like we used the Graph API to get the Azure AD users, we can connect to SharePoint Site and get the details. However we will have to assign different set of permissions this time. We will assign the following permissions to the application.
Once the permissions are assigned, retrieve the access token using the same code fragment we used previously.With the access token, we can query the SharePoint Site as shown below:
#The Graph API URL
$uri = "https://graph.microsoft.com/v1.0/sites/fb0605f6-46e8-4487-910d-e1f361cdf3c0"

$method = "GET"

# Run the Graph API query to retrieve users
$query = Invoke-WebRequest -Method $method -Uri $uri -ContentType "application/json" -Headers @{Authorization = "Bearer $token"} -ErrorAction Stop
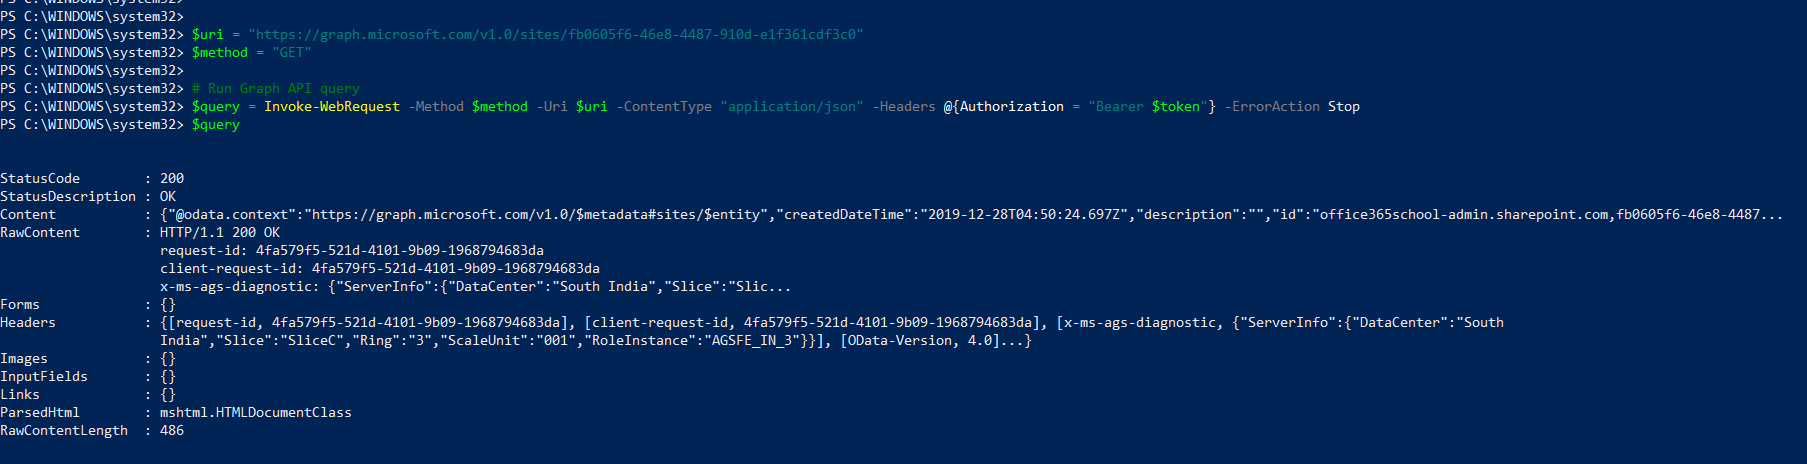
Content Key will have the details about the site.
The ID used in the URI is the Site ID of the Corresponding SharePoint Site which can be retrieved using CSOM as shown below :
#Load SharePoint CSOM Assemblies
Add-Type -Path "C:\Program Files\Common Files\Microsoft Shared\Web Server Extensions\16\ISAPI\Microsoft.SharePoint.Client.dll"

Add-Type -Path "C:\Program Files\Common Files\Microsoft Shared\Web Server Extensions\16\ISAPI\Microsoft.SharePoint.Client.Runtime.dll"


#Parameter
$SiteURL = "https://office365school-admin.sharepoint.com"


#Get Credentials to connect
$Cred= Get-Credential

#Setup the context
$Ctx = New-Object Microsoft.SharePoint.Client.ClientContext($SiteURL)
$Ctx.Credentials = New-Object Microsoft.SharePoint.Client.SharePointOnlineCredentials($Cred.Username, $Cred.Password)

 #Get Site and Web Objects
$Ctx.Load($Ctx.Site)
$Ctx.Load($Ctx.Web)
$Ctx.ExecuteQuery()

 #sharepoint online powershell get site collection id
Write-host -f Green "Site ID:"$Ctx.Site.Id

#sharepoint online powershell get site id
Write-host -f Green "Web ID:"$Ctx.Web.Id
Note:
In case you get the error “Either scp or roles needs to be present”, it is because the token generated does not have the permissions that we had assigned in the App Registration section. We can check for this by taking the token to the site https://jwt.io/ and decoding it . Check for the permissions section and see if the permissions are present in the roles section.

Summary
Thus we saw how we can authenticate the Graph API from Powershell and interact with Azure AD and SharePoint.