Block all USB/External Storage Drives on Mac, Windows workstations with Microsoft Endpoint Manager
Introduction:
Recently I came across a customer(organization) which was using Microsoft Endpoint manager for their systems management, MDM and so on.
Our customer had a bunch of Windows Workstations and Mac workstations reporting to Microsoft Endpoint manager. At MEM (Microsoft Endpoint manager) level, we plan to have different security, compliance policies to be in compliant with our internal polices and external standards we have adopted.
Issue we faced:
One of the security policy requirements dictates that we prevent all users from using USB/External storage media, so that no one will be able to steal the data out of our workstations via external portable storage medium.
As we had both Windows and Mac workstations, we had to come up with specific approaches for both Mac and Windows separately.
As you may know – (MSFT Endpoint Manager does not have out-of-the-box config to block external drives for Mac workstations) this blog is mainly intended to explain the work-around for this limitation and help customers to block USB/External drives on their mac workstations with help of MSFT Endpoint manager.
Below are the steps which could be performed to block USB/Storage on Windows and Mac correspondingly.
Mac Workstations:
Though we have a GUI setting for Windows, there is no such straight forward config to block external storage for Mac workstations within MSFT Endpoint Manager.
Apple expects most of the similar settings, configs to be delivered as ‘Configuration Profiles’ to its workstations, in other words, we may want to create a configuration profile for this purpose and push the custom profile via our MSFT Endpoint Manager
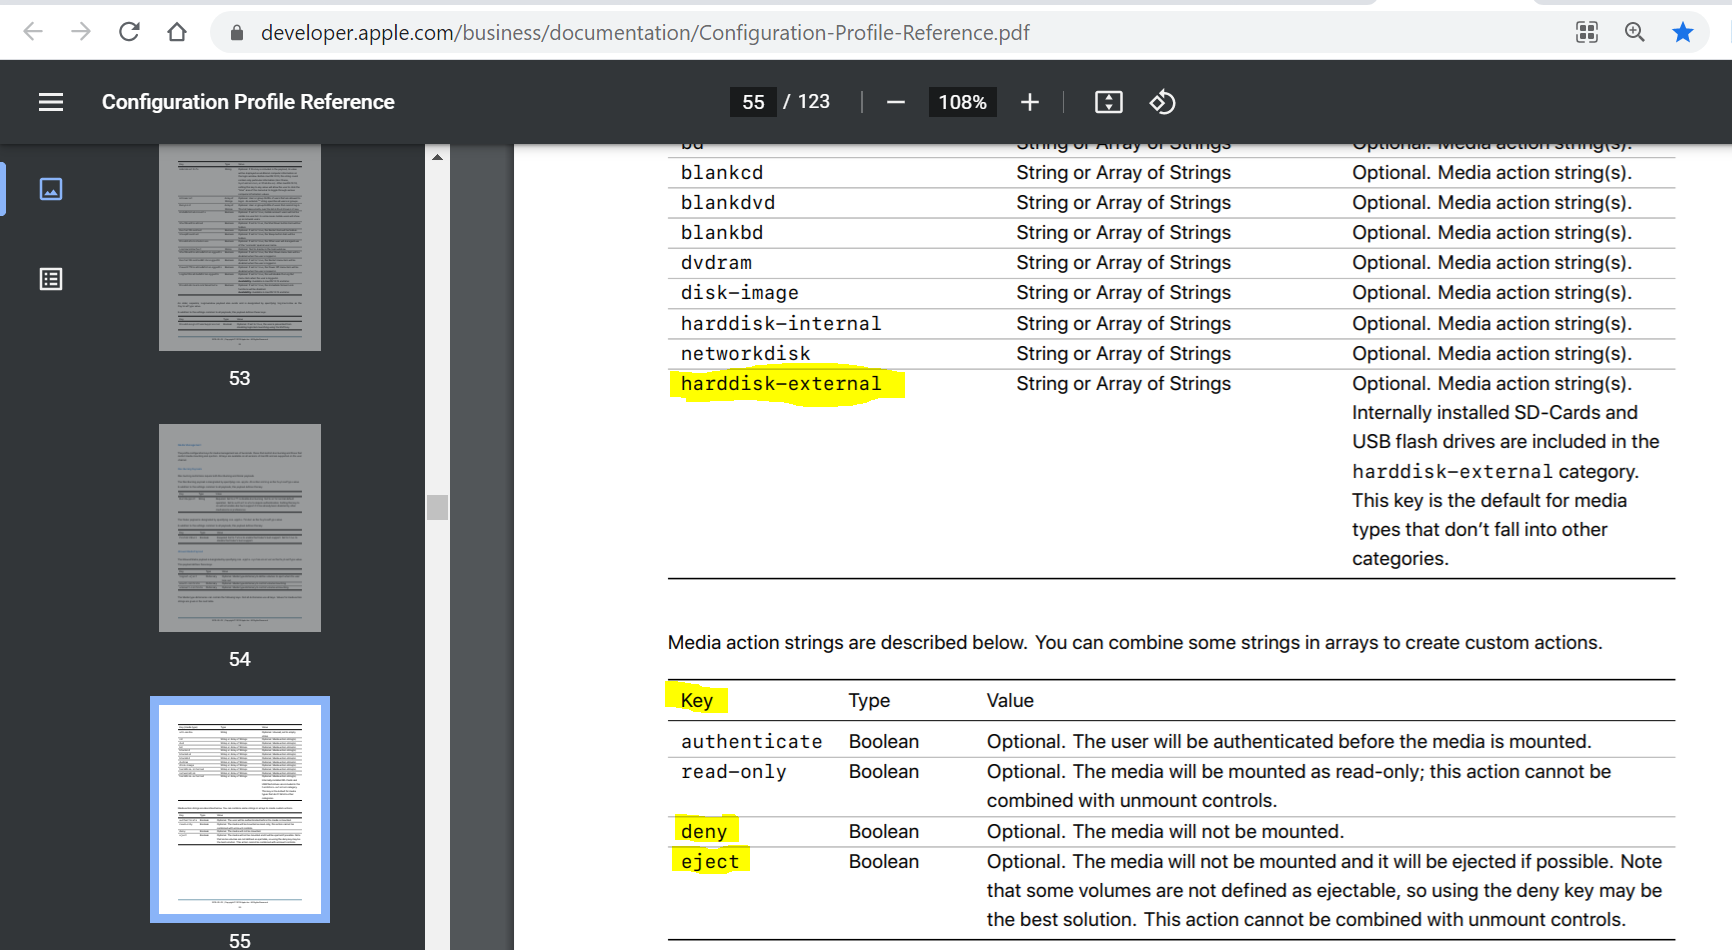
Apple’s complete Configuration profile reference is here è https://developer.apple.com/business/documentation/Configuration-Profile-Reference.pdf
Upon closer look you can find a setting along with the key to block all external HDDs
As you have the setting now here, now we can use different tools to populate the custom profiles (using the tools like iMazing or Apple Configurator 2)
Below is a sample of configuration profile with above setting built in my labs.
<?``xml version``=``"1.0" encoding``=``"UTF-8"``?>
<!DOCTYPE plist PUBLIC "-//Apple//DTD PLIST 1.0//EN" "http://www.apple.com/DTDs/PropertyList-1.0.dtd">
<plist version="1.0">
<dict>
    <key>PayloadContent</key>
    <array>
        <dict>
            <key>PayloadDescription</key>
            <string>Configures Allowed Media settings</string>
            <key>PayloadDisplayName</key>
            <string>Allowed Media</string>
            <key>PayloadIdentifier</key>
            <string>com.apple.systemuiserver</string>
            <key>PayloadOrganization</key>
            <string></string>
            <key>PayloadType</key>
            <string>com.apple.systemuiserver</string>
            <key>PayloadUUID</key>
            <string>236E259B-C530-4497-A0E1-2D680SD14330</string>
            <key>PayloadVersion</key>
            <integer>1</integer>
            <key>mount-controls</key>
            <dict>
                <key>harddisk-external</key>
                <array>
                    <string>eject</string>
                </array>
            </dict>
        </dict>
    </array>
    <key>PayloadDescription</key>
    <string>This policy automatically alerts for and ejects external drives when connected.</string>
    <key>PayloadDisplayName</key>
    <string>Block External Drives</string>
    <key>PayloadIdentifier</key>
    <string>com.contoso.087B9469-4904-49EB-8913-DA4AB370SD1C</string>
    <key>PayloadOrganization</key>
    <string>contoso</string>
    <key>PayloadScope</key>
    <string>System</string>
    <key>PayloadType</key>
    <string>Configuration</string>
    <key>PayloadUUID</key>
    <string>087B9469-4904-49EB-8913-DA4AB370SD1C</string>
    <key>PayloadVersion</key>
    <integer>1</integer>
</dict>
</plist>
Follow the below steps to create a ‘custom profile’ and push it to all mac clients with Microsoft Endpoint Manager.
- Copy paste all the above code on to a text editor like notepad and save it as <Any_FileName>.mobilecofig
- Navigate to Endpoint Manager home page (https://endpoint.microsoft.com/#blade/Microsoft_Intune_DeviceSettings/DevicesWindowsMenu/configProfiles )
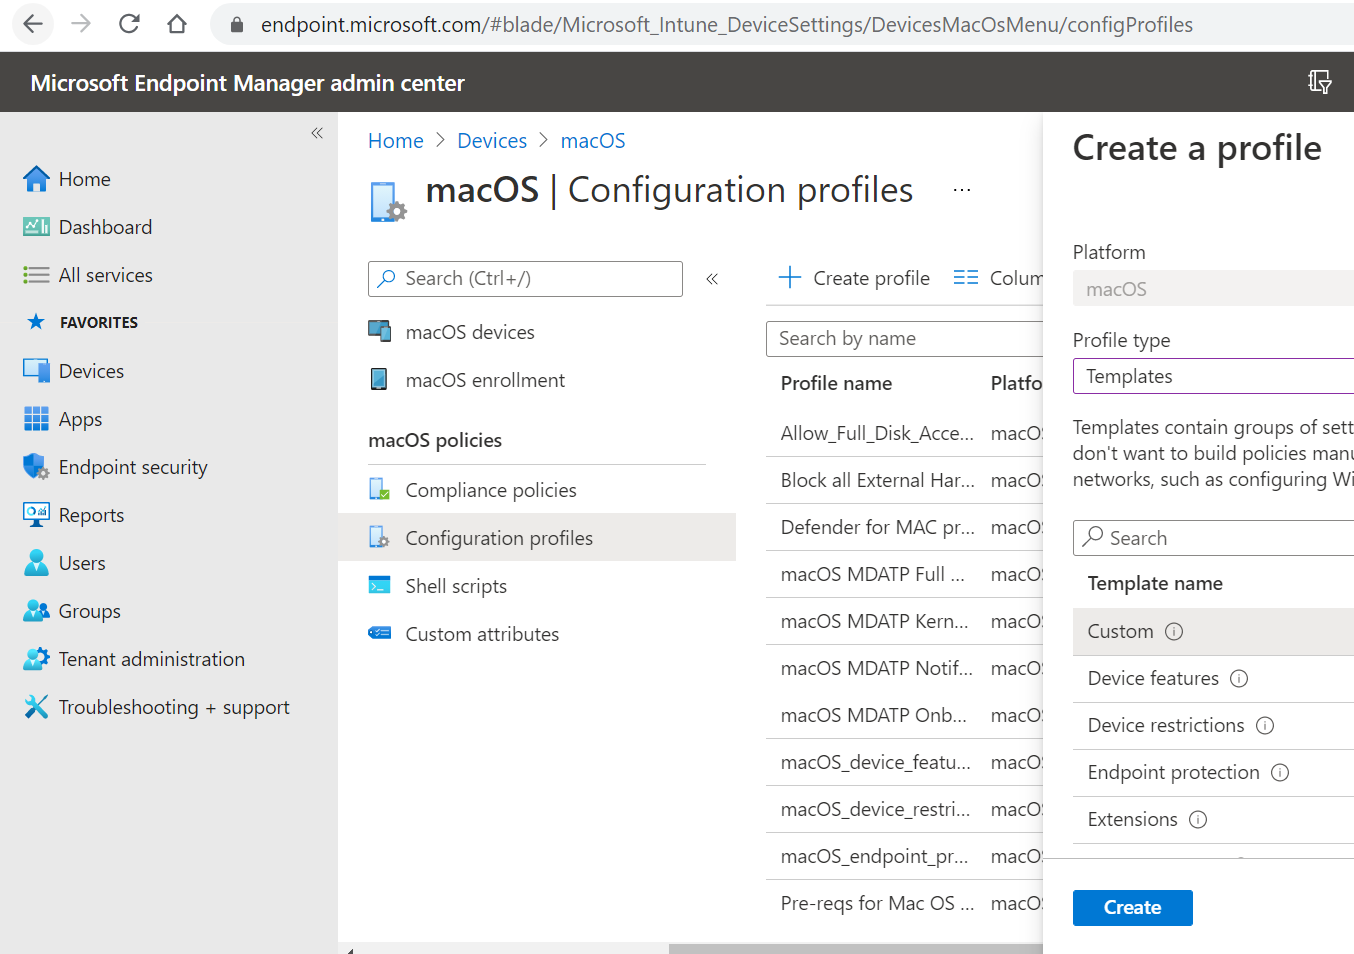
- Click ‘Create Profile’ è Select ‘MacOS’ as platform , ‘Templates*’* as Profile type, select ‘Custom’ under Template name click on ‘Create’
- Screenshot from my lab here:
- Screenshot from my lab here:
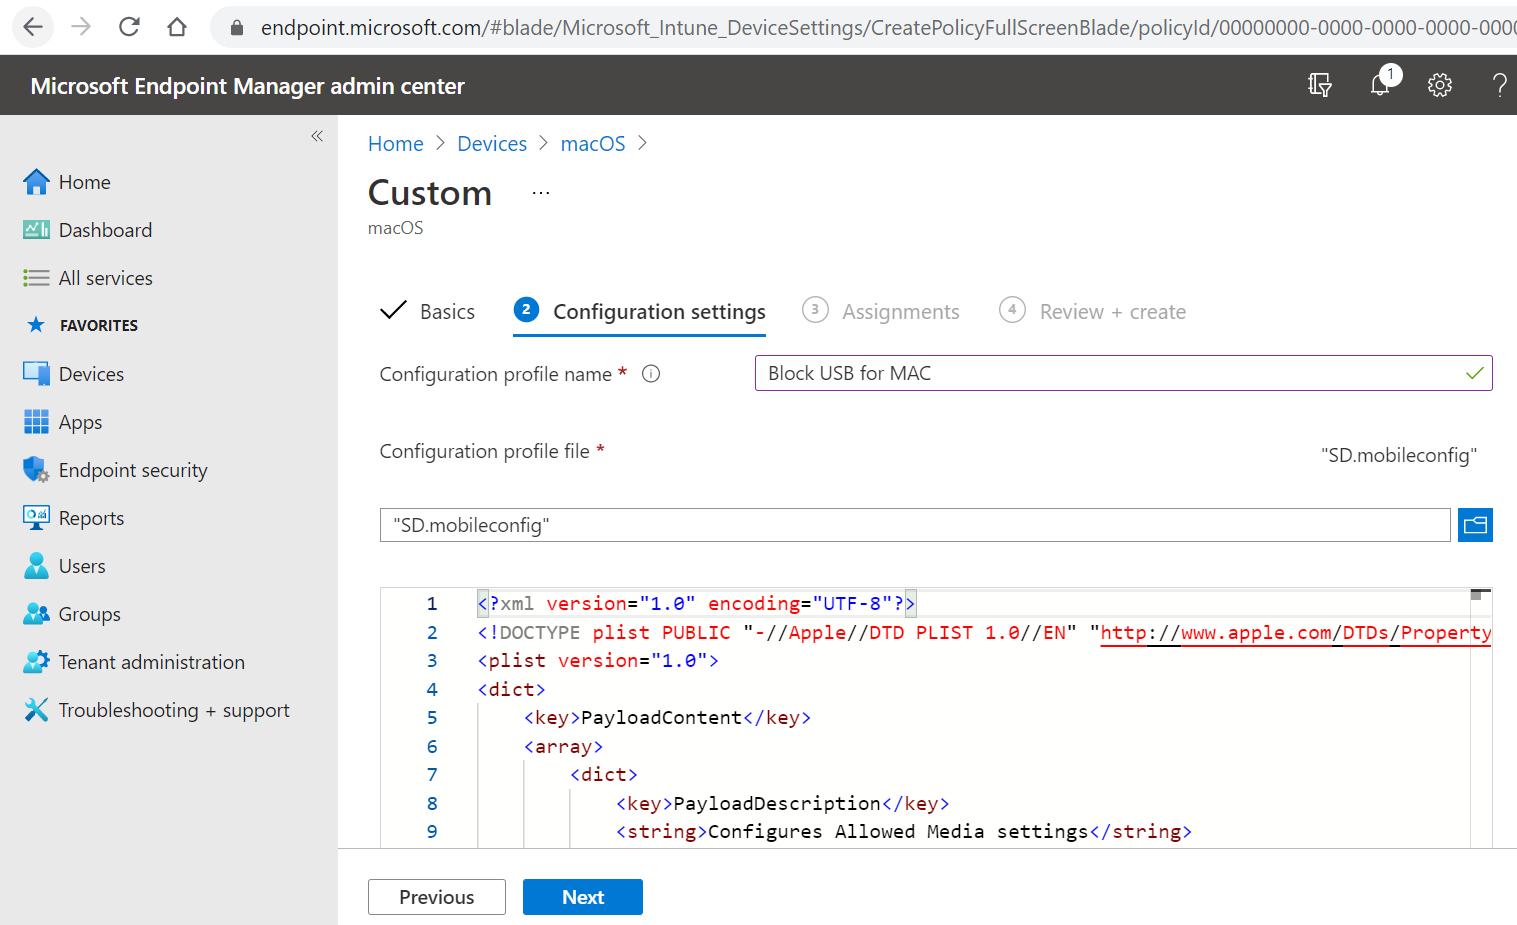
- In the next screen give it a name, description and click Next
- Fill in the form to give the new custom profile a name and upload the *.mobileconfig file saved in step #1 under ‘Configuration profile file’
- Sample from my lab below
- Click ‘Next’ and assign it to corresponding groups with mac clients to finish the wizard.
Windows Workstations:
Blocking USB/External mass storage on Windows Workstation using Microsoft Endpoint Manager is a straight-forward config and could be done using graphical interface.
/en-us/mem/intune/configuration/device-restrictions-windows-10
Breadcrumb here below --
-
Endpoint Manager home page (https://endpoint.microsoft.com/#blade/Microsoft_Intune_DeviceSettings/DevicesWindowsMenu/configProfiles )
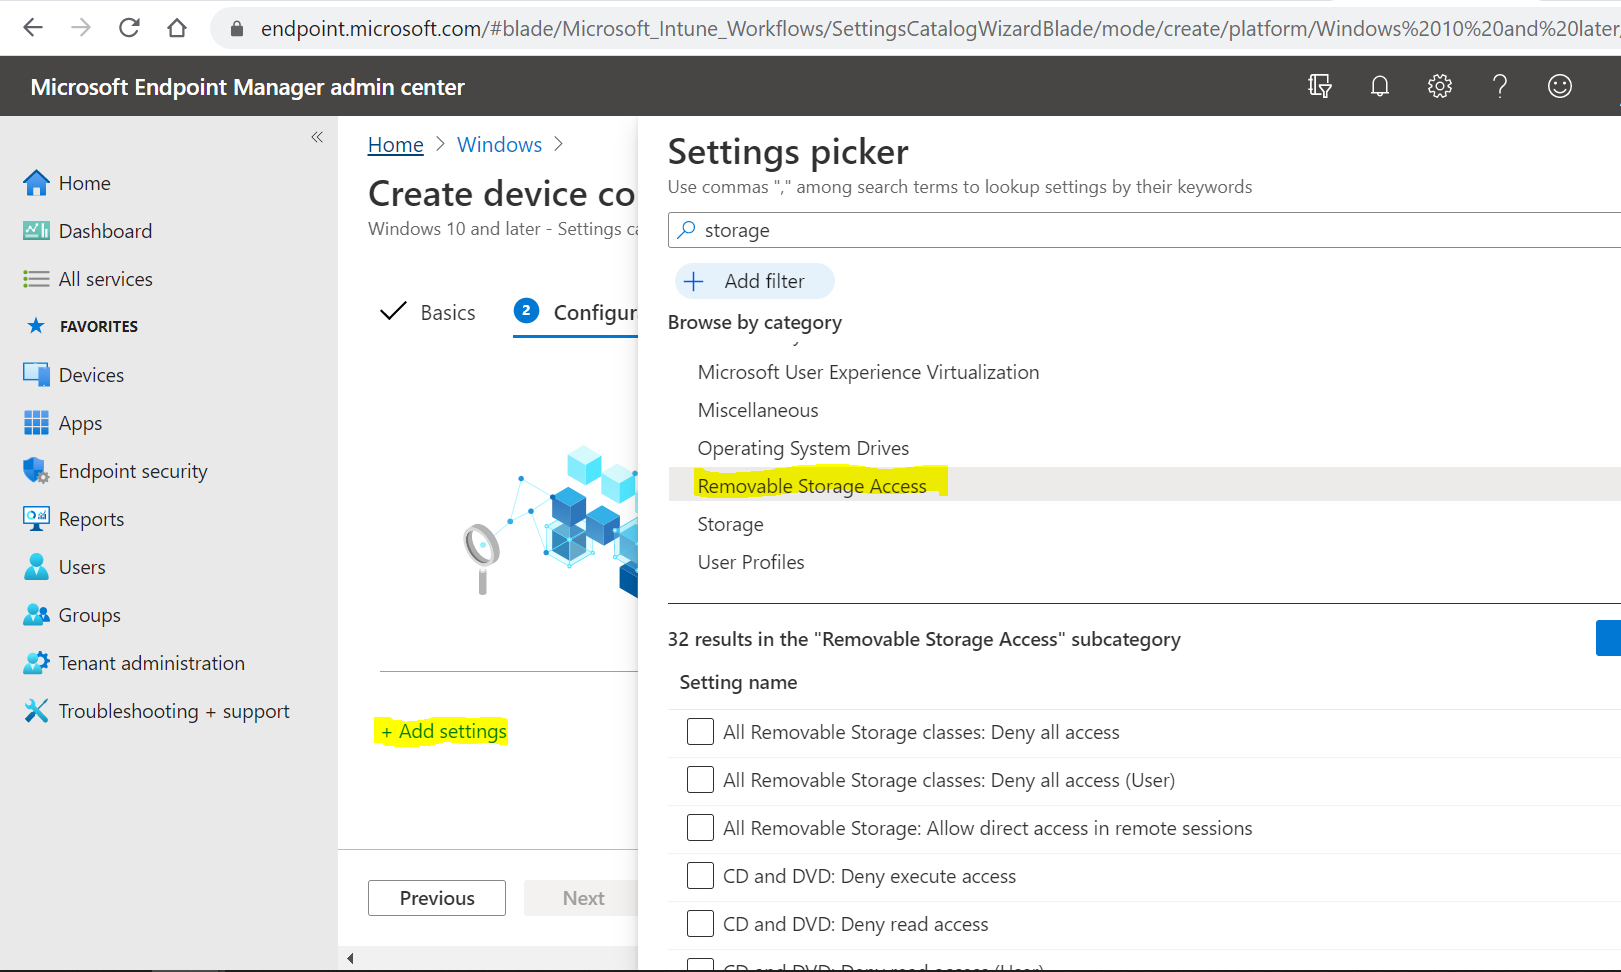
Click ‘Create Profile’ è Select ‘Windows 10 and Later’ as platform and ‘Settings Catalog (preview)’ as Profile type and click on ‘Create’
Screenshot from my lab here:
In the next screen give it a name, description and click Next
In the next screen under ‘Configuration settings’ click ‘+Add settings’ search for ‘Removable Storage Access’
Make check marks corresponding to the drive you’d like to block like ‘Removable storage’ or ‘CD and DVD’ or Tape Drives or ..
Click ‘Next’ and assign it to corresponding groups to finish the wizard