Monitoring and Modeling Shape Reference for Visio Management Pack Designer
Shapes in the VMPD are divided into the following categories:
- The Management Pack shape. This is the basic shape that appears in all management pack diagrams. It provides properties specific to the management pack. This shape is not found on any of the tabs in the Shapes pane, but is always found on the drawing surface.
- Modeling shapes. These shapes are used to draw a picture of the structure of your application. This category includes the shapes found on the MP Modeling and MP Modeling Computer Group tabs. You can automatically connect modeling shapes by dropping them on top of each other.
- Roll-up shapes. These are used to connect modeling shapes, and to aggregate the health status of groups of modeling shapes. They also define how health should roll up between modeling shapes in your application.
- Monitoring shapes. These are connected to modeling shapes. They define what kind of monitoring should be done (like monitoring a Windows service, or monitoring a Windows performance counter).
- Single Server Patterns. These are “quick start” scenarios based on commonly used application patterns. These have pre-defined components and monitoring (you will still need to define some configuration). After dropping these on the drawing surface, you can add and remove shapes as required.
- Distributed patterns. These are another set of scenarios based on commonly used distributed application patterns. Like the single-server pattern shapes, these provide a starting point for your drawing, and can be modified as necessary.
The modeling and monitoring shapes are covered in this article. The patterns are discussed in [[Pattern Reference for Visio Management Pack Designer]].
These shapes are located in separate tabs of the Shapes pane. However, if you select the Quick Shapes tab, all the shapes are available in one place. If you're not certain how to use a shape, hovering over the shape opens a Tooltip with some information about the shape.
The Management Pack Shape

This shape always appears on any drawing and represents the overall Management Pack. It has the following properties:
| Property | Description |
| Management Pack Name | The name of your Management Pack |
| Id | The id of your Management Pack. This is the Management Pack file name. By default this name is the same as the Management Pack with spaces removed from the name. |
| Description | A description of your Management Pack. Users will see this description when they import the Management Pack into the SCOM environment. |
| Version | The version of your Management Pack |
| Windows Version | If you are writing a Windows Management Pack (if using the Windows Server Role or Windows Role Service) and it is compatible only with a specific Windows version, you can specify the version here. This property supports the following settings:
All: The Management Pack works on all Windows versions Range: The Management Pack works on a specific range of Windows Versions Specific Version: The Management Pack only works on a specific Windows version Specific Version and Above: The Management Pack works on a specific Windows version and any version greater than this. |
| Connector Mode | If this is set to TRUE, the tool will generate a connector management pack that customers can optionally import. |
Modeling Shapes
Modeling shapes are used to describe the structure of your monitored application, and how the components of the application relate to each other. This section describes the different modeling shapes and their properties. Note that some shapes cannot be used standalone; they must be attached to other shapes. You can also include several standalone shapes in the same drawing. For example, you can put a Server Role and Server Computer Group in the same drawing; they do not need to be attached to each other.
Server Role shape

This shape represents a server role, such as a SQL Server Database Server Role. It could also represent a Windows Server Role, such as DNS Server or WINS server. This shape can be used standalone, or it could be attached to the roll-up container or Windows Application shape. The shape has the following properties:
| Property | Description |
| Name | The name of the Server Role |
| How to Find | The method Operations Manager can use to find this server role. This property can have one of the following four values: HKLM Registry Key, HKLM Registry Value, Windows Server Role, or WMI Query. |
| Affect Computer Health | Determines whether the Server Role should affect the health of the monitored computer as shown in the Operations Manager Console. |
Server Component shape

This shape represents a component, such as a SQL Server Database. This shape can be used standalone or attached to a Server Role, another Server Component, roll-up container or Windows Application shape. The shape has the following properties:
| Property | Description |
| Name | The name of the Server Component |
| How to Find | The method Operations Manager can use to find this component. This property can have one of the following four values: HKLM Registry Key, HKLM Registry Value, Windows Server Role, or WMI Query. |
| Affect Computer Health | Determines whether the Server Role should affect health of the monitored computer as shown in the Operations Manager Console. |
Roll-up Container

This shape is used to roll up health from Server Role, Server Component, or Server Computer Group shapes. This shape cannot be used standalone. A typical use of this shape would be to represent an Active Directory Site. The roll-up container can be attached to the Windows Application shape, but not to any other shape. The shape has the following properties:
| Property | Description |
| Name | The name of the Roll-up Container |
| Use Registry Value for Container Name | You can use this shape to dynamically discover instances of the server role or component being rolled up, based on a registry value. For each unique value found in a registry key, a unique instance will be created. If this setting is set to TRUE, you must enter the HKLM registry value to use for the container name. |
Windows Application

This shape is used to roll up health from Roll-up Container, Server Role, Server Component or Server Computer Group. This shape cannot be used standalone. A typical use of this shape would be to represent an installation of your product. The shape has the following properties:
| Property | Description |
| Name | The name of the Windows Application |
| Use Registry Value for Application Name | If you have multiple installations of your application, this setting will ensure that each application is monitored separately, based on a registry value. For each unique value found in a registry key, a unique instance will be created. |
Server Computer Group

This shape is used to create groups of computers in Operations Manager based on criteria you specify. You can attach monitors to a Server Computer Group, just like a Server Role or Server Component. The Computer Group can be used standalone; it can also be attached to a Roll-up Container or Windows Application shape. The shape has the following properties:
| Property | Description |
| Name | The name of the Server Computer Group |
| How to Find | The method Operations Manager can use to find this component. This property can have one of the following four values: HKLM Registry Key, HKLM Registry Value, Windows Server Role, or WMI Query. |
Monitoring Shapes
The monitoring shapes represent the monitors that gather data from the components of your application, and either raise an alert or record that data to the Operations Manager database, or both. Each monitoring shape needs to be attached to a modeling shape to be effective. A single modeling shape can have several monitoring shapes attached to it, of varying types, but a a monitoring shape can only be attached to one modeling shape. There are five different types of monitoring shapes; which one you use depends on what aspect of the component you want to monitor.
Windows Performance Counter Monitor shape
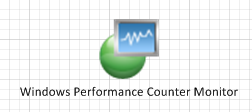
The purpose of the Windows Performance Counter Monitor is to track the value of a Windows Performance Counter on your application. You can record the value of the counter to the database at intervals, so that you can track performance over time and possibly report on it later. You can also configure the monitor to generate an alert if the counter exceeds a certain value, either once, or multiple times over a set period, or on average. This shape cannot be used standalone, because then it would have nothing to monitor; it must be attached to a Server Role or Server Component or Server Computer Group. This shape has the following properties
| Property | Description |
| Name | The name of the Performance Counter Monitor |
| Object | The Performance Monitor object to monitor. For more information about Performance Monitor, see Using Performance Monitor. |
| Counter | The Performance Monitor Counter to monitor |
| All Instances | A single component may have multiple instances of a counter (for example, a server with multiple logical disks would have multiple % idle time counters). This setting indicates whether the monitor should monitor all instances of the perf counter. Valid values are TRUE and FALSE. |
| Instance | If All Instances is set to FALSE, indicate the specific instance to monitor here. If All Instances is set to TRUE, this field will not appear. |
| Alerting Behavior | This field defines what the monitor does with the data it collects. There are three possible values, and the value you choose will affect what configuration options are displayed:
|
| Comparison Type | (Alert configuration) Indicates how the counter must exceed the threshold in order to generate an alert. All the possible values for this setting use the same configuration options. There are three possible values:
|
| Interval | (Alert configuration) Indicates how often to sample the counter, in seconds |
| Number of samples | (Alert configuration) Indicates how many consecutive samples to compare. What kind of comparison happens with the samples depends on the comparison type you chose. |
| Threshold | (Alert configuration) The threshold that you're comparing the sample value to. What value you choose here depends on the counter, and the particular monitoring needs of your system. |
| Operator | (Alert configuration) Indicates how to compare the sample to the threshold. The only possible values here are greater or less. There is no "equal to" option. |
| Collection Interval | (Collection configuration) Indicates how often the performance counter is collected, in seconds |
| Create Performance View | (Collection configuration) Indicates whether a performance view is created to display the data collected by this counter. |
| Create Report | (Collection configuration) Indicates whether a report is created to display the data collected by this counter. |
| Report Name | If Create Report is set to TRUE, this setting indicates the name for the report the customer should see in the Operations Console. If you want to show multiple performance counters in the same report, you can specify the same report name for each monitor. |
| Advanced Alert Settings | (Alert configuration) Indicates whether to show the following advanced alert settings:
|
| Health Category | Indicates the category that this monitor should affect in the operations console. Valid options are Availability, Performance, Configuration, and Security. |
Windows Event Monitor shape

The Windows Event Monitor monitors Windows event logs for specified events. You can configure the event monitor to either collect the events or generate an alert in response to the event. You will need to know something about the event log you want to monitor and the events that can be logged in order to configure this monitor correctly. This shape cannot be used standalone; it must be attached to a Server Role or Server Component or Server Computer Group.
Note: It isn't possible to monitor the absence of an event. For example, you might want an alert to be raised if a "server connection" event isn't received within 10 minutes. For that type of configuration, you need to use another authoring tool.
The shape has the following properties:
| Property | Description |
| Name | The name of the Windows Event Monitor |
| Log Name | The name of the event log that the monitor is watching for the event |
| Red Event ID | The event ID that causes the monitor to generate an alert. You will need to provide this information based on your familiarity with the event log being watched. |
| Red Event Source | The event source of the red event. Again, you will need some knowledge of the event log to provide this information. |
| Alerting Behavior | This field defines what the monitor does with the data it collects. There are three possible values, and the value you choose will affect what configuration options are displayed:
|
| Auto Reset | Indicates the condition that causes the monitor to reset to a healthy state. There are three possible values for this setting:
|
| Repeats N times. N= | For certain events, you may not want to generate an alert unless the event is repeated multiple times. This setting allows you to specify how many times the event needs to occur before the alert is generated. The default is 1, which you should keep if you want to generate an alert every time the event occurs.If you select a value greater than 1, then you will be prompted to specify a number of seconds that the events must occur within. |
| Advanced Alert Settings | (Alert configuration) Indicates whether to show the following advanced alert settings:
|
| Health Category | Indicates the category that this monitor should affect in the operations console. Valid options are Availability, Performance, Configuration, and Security. |
Windows Service Monitor shape

This shape is used to monitor a Windows Service. This monitor can only monitor processor usage or memory usage, and issues an alert if either passes the threshold. This shape cannot be used standalone; it must be attached to a Server Role or Server Component or Server Computer Group. The shape has the following properties:
| Property | Description |
| Name | The name of the Windows Service Monitor |
| Service Name | The name of the Windows service to monitor. This is the name in Service Manager, not the display name. |
| Monitor Auto Started Services Only | Indicates that the service will only be monitored it is configured to start automatically. This is to prevent a service from being monitored when it has been disabled or should not always be running. |
| Monitor CPU utilization | Can be set to TRUE or FALSE. Indicates whether you're monitoring and alerting on CPU utilization of the service. If this is set to TRUE, there are three additional settings:
|
| Monitor Memory Utilization | Can be set to TRUE or FALSE. Indicates whether you're monitoring and alerting on memory utilization of the service. If this is set to TRUE, there are three additional settings:
|
| Sample Rate | The frequency, in seconds, at which the monitor should take a sample. |
| Advanced Alert Settings | (Alert configuration) Indicates whether to show the following advanced alert settings:
|
| Health Category | Indicates the category that this monitor should affect in the operations console. Valid options are Availability, Performance, Configuration, and Security. |
Web Site Monitor shape
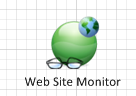
This shape is used to monitor the health of a URL via a simple ping; it doesn't do anything else. This shape cannot be used standalone; it must be attached to a Server Role or Server Component or Server Computer Group. The shape has the following properties:
| Property | Description |
| Name | The name of the Web Service Monitor |
| URL | The URL to monitor |
| Alerting Behavior | This field defines what the monitor does with the data it collects. There are three possible values, and the value you choose will affect what configuration options are displayed:
|
| Interval | (Alert Configuration) How often to ping the URL, in seconds. |
| Response Time Threshold | (Alert Configuration) How long monitor will wait for a response before generating an alert. |
| Create Performance View | (Collection Configuration) Creates a performance view tracking the response time of the URL. |
| Advanced Alert Settings | (Alert configuration) Indicates whether to show the following advanced alert settings:
|
| Health Category | Indicates the category that this monitor should affect in the operations console. Valid options are Availability, Performance, Configuration, and Security. |
Database Monitor shape

This shape is used to monitor a database via an OLE DB query. All it does is determine whether the database is responsive or not, and optionally collect the time that the database took to respond. This shape cannot be used standalone; it must be attached to a Server Role or Server Component or Server Computer Group. The shape has the following properties:
| Property | Description |
| Name | The name of the Database Monitor |
| Connection String | The connection string to use |
| Alerting Behavior | This field defines what the monitor does with the data it collects. There are three possible values, and the value you choose will affect what configuration options are displayed:
|
| Interval | (Alert Configuration) How often to run the query, in seconds. |
| Response Time Threshold | (Alert Configuration) How long monitor will wait for a response before generating an alert. |
| Create Performance View | (Collection Configuration) Creates a performance view tracking the response time of the database. |
| Advanced Alert Settings | (Alert configuration) Indicates whether to show the following advanced alert settings:
|
| Health Category | Indicates the category that this monitor should affect in the operations console. Valid options are Availability, Performance, Configuration, and Security. |
Connection Shapes
The connection shapes are shapes that associate one shape with another. That could be monitors associated with a server component or server role, or multiple components rolling up to a single container that represents their overall health. There are only two types of connection shape, which are found on the MP Roll-up tab.
Health Roll-up
This shape is used roll up the health of a server role or server component to another object. This aggregates the health state of the distributed server roles or components into a single entity for easier monitoring. This shape has the following properties:
| Property | Description |
| Roll-up | This property indicates the aspect of health that you're rolling up. The options are Availability, Configuration, Performance, Security, and All. |
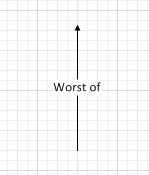
| Aggregation Method | There are two options for this property: Best of and Worst of. Worst of is the default, and the most often used. This setting indicates that the aggregate health for the components being rolled up is represented by the least healthy member. That is, if you're monitoring server availability among several distributed servers, and just one of them is offline, the roll-up container will show as unhealthy. If the property is set to Best of, a single healthy component is all that's needed for the roll-up to be healthy. |
Monitor Connector
This shape is used to connect a monitor to the shape that it's monitoring. It has no properties to set.