Note
Access to this page requires authorization. You can try signing in or changing directories.
Access to this page requires authorization. You can try changing directories.
Tip : Get the RSS feed or e-mail to this Wiki page to get automatic notification when it is updated!
This article was originally written in: http://social.technet.microsoft.com/wiki/contents/articles/5400.criando-uma-imagem-de-recuperacao-com-o-dart-7-0-pt-br.aspx
Goal
This article aims to demonstrate how to create a recovery image with DaRT 7.0 (Microsoft Diagnostics and Recovery Toolset) quickly and easily.
Applies to:
- Windows 7 32-Bit;
- Windows 7 64-Bit;
- Windows Server 2008 R2.
Overview
Microsoft Diagnostics and Recovery Toolset (DART) 7 includes DaRT Image Recovery Wizard in Windows that is used to create an ISO. The ISO image contains a recovery DaRT that allows you to boot a computer with boot problems. After starting the computer with the DaRT, you can run the various tools available in DaRT to try to diagnose and repair your computer.
Creating a Recovery Image with DaRT 7.0
1 - Click Start , All Programs , Microsoft DaRT 7 and select DaRT Recovery Image . Will load the window as shown in Figure 1.1.

Figure 1.1
2 - In the dialog box User Account Control click Yes to allow the program DaRT make the necessary changes on your computer. The window is loaded as shown in Figure 1.2.

Figure 1.2
3 - In the window Welcome to the DaRT Image Recovery Wizard click Next to continue. Window will be loaded as shown in Figure 1.3.

Figure 1.3
4 - In the window Select Image Boot enter the path of the installation files of Windows for which you are creating a recovery image and then click Next . In this article we will create a recovery image for Windows 7 64-bit. The window is loaded as shown in Figure 1.4.

Figure 1.4
5 - In the window Preparing Files click Next to continue. After expanding the boot image will be loaded into the window as shown in Figure 1.5.

Figure 1.5
6 - In the window Tool Selection , by default all the tools are enabled for use in image retrieval. If you want to disable some tool select the tool and click on Disable . In this article we will use all the tools. Click the Next button to continue. The window is loaded as shown in Figure 1.6.
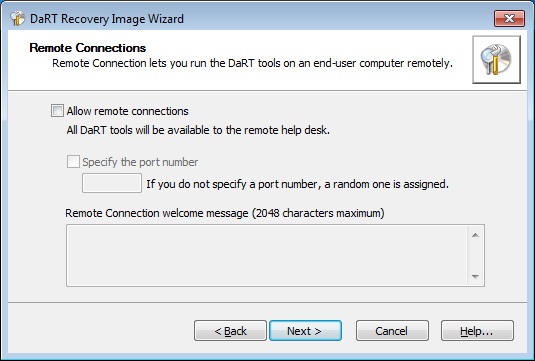
Figure 1.6
7 - In the window Remote Connections select the Allow remote connections and if you want to set a fixed port for connecting remote field Specify the port number enter the port number. If you do not enter the port number is used a random port. In the field Remote Connection welcome message you can type a welcome message to the user. In this article we will use a random port. Click Next to continue. The window is loaded as shown in Figure 1.7.
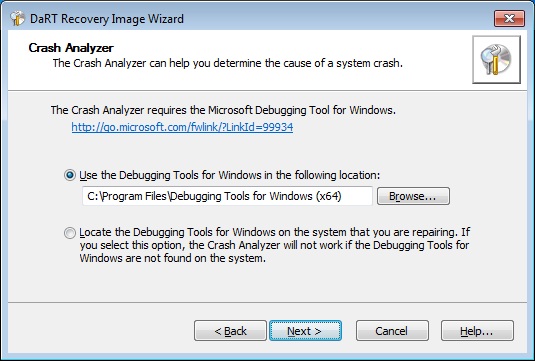
Figure 1.7
8 - In the window Crash Analyzer select the option Use the Tools for Windows Debbugging Following in the location to include Crash Analyzer in the recovery image. In this article we will not include Crash Analyzer. Select Locate the Debugging Tools for Windows on the system That you are repairing and click Next to continue. The window is loaded as shown in Figure 1.8.
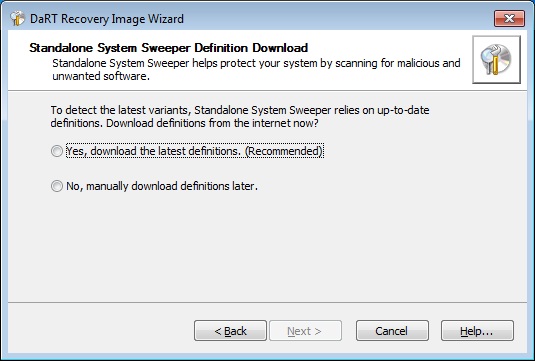
Figure 1.8
9 - In the window Standalone System Sweeper Definition Download select Yes, download the lastest definitions. (Recommended) to download the latest antimalware definition and then click Next to continue. The window is loaded as shown in Figure 1.9.

Figure 1.9
10 - In the window Standalone System Sweeper Download Definition wait until the download is complete the settings. The window is loaded as shown in Figure 1.10.

Figure 1.10
11 - In the window Additional Drivers Additional drivers you can include devices that are not present in Windows. If you want to add some driver that's the time. In this article we will not add any drivers.Click Next to continue. The window is loaded as shown in Figure 1.11.
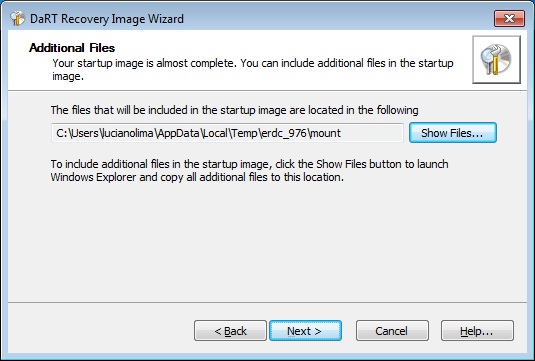
Figure 1.11
12 - In the window Additional Files you can include additional files in the recovery image. In this article we will not add any additional files. Click Next to continue. The window is loaded as shown in Figure 1.12.
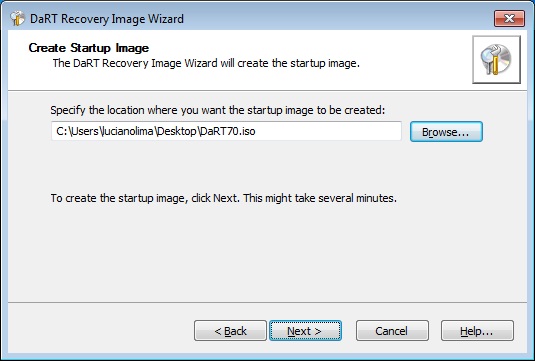
Figure 1.12
13 - In the window Create Startup Image for the location where you saved the image and then click Next . The window is loaded as shown in Figure 1.13.
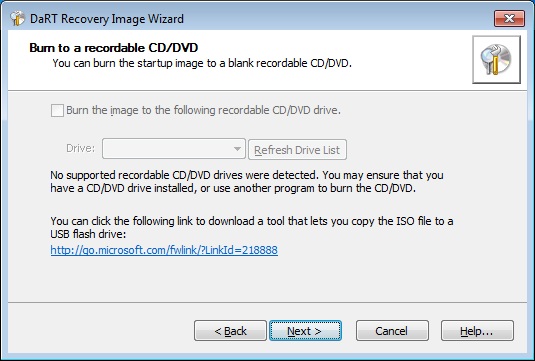
Figure 1.13
14 - In the window Burn to a recordable CD / DVD you can burn a CD / DVD drive if you have a CD burner / DVD. As I am using a virtual machine this option is not enabled, but if you are creating a recovery image from a computer that supports the drive for recording CD / DVD you can burn your ISO image to CD / DVD at the moment. Click Next to continue. The window is loaded as shown in Figure 1.14.

Figure 1.14
15 - In the window DaRT Image Recovery Wizard click Finish to finish creating the image.
References
Related Articles
- Installing DaRT 7.0 (en-US)
- Using the Locksmith DaRT 7.0 to Change the Local Administrator Password (en-US)
- Using Hotfix Uninstall DaRT 7.0 to Uninstall a Hotfix (en-US)
Other Languages
This article is also available the following languages:
This article was originally written by:
Luciano Lima [MVP Enterprise Security] - [MCSA Security] - [MCSE Security]
http://lucianolimamvp.wordpress.com/
http://twitter.com/LucianoLima_MVP