Note
Access to this page requires authorization. You can try signing in or changing directories.
Access to this page requires authorization. You can try changing directories.
Note
This isn't the latest version of this article. For the current release, see the .NET 10 version of this article.
Warning
This version of ASP.NET Core is no longer supported. For more information, see the .NET and .NET Core Support Policy. For the current release, see the .NET 9 version of this article.
Components can be shared in a Razor class library (RCL) across projects. Include components and static assets in an app from:
- Another project in the solution.
- A referenced .NET library.
- A NuGet package.
Just as components are regular .NET types, components provided by an RCL are normal .NET assemblies.
Create an RCL
- Create a new project.
- In the Create a new project dialog, select Razor Class Library from the list of ASP.NET Core project templates. Select Next.
- In the Configure your new project dialog, provide a project name in the Project name field. Examples in this topic use the project name
ComponentLibrary. Select Next. - In the Additional information dialog, don't select Support pages and views. Select Create.
- Add the RCL to a solution:
- Open the solution.
- Right-click the solution in Solution Explorer. Select Add > Existing Project.
- Navigate to the RCL's project file.
- Select the RCL's project file (
.csproj).
- Add a reference to the RCL from the app:
- Right-click the app project. Select Add > Project Reference.
- Select the RCL project. Select OK.
Consume a Razor component from an RCL
To consume components from an RCL in another project, use either of the following approaches:
- Use the full component type name, which includes the RCL's namespace.
- Individual components can be added by name without the RCL's namespace if Razor's
@usingdirective declares the RCL's namespace. Use the following approaches:- Add the
@usingdirective to individual components. - include the
@usingdirective in the top-level_Imports.razorfile to make the library's components available to an entire project. Add the directive to an_Imports.razorfile at any level to apply the namespace to a single component or set of components within a folder. When an_Imports.razorfile is used, individual components don't require an@usingdirective for the RCL's namespace.
- Add the
In the following examples, ComponentLibrary is an RCL containing the Component1 component. The Component1 component is an example component automatically added to an RCL created from the RCL project template that isn't created to support pages and views.
Component1.razor in the ComponentLibrary RCL:
<div class="my-component">
    This component is defined in the <strong>ComponentLibrary</strong> package.
</div>
In the app that consumes the RCL, reference the Component1 component using its namespace, as the following example shows.
ConsumeComponent1.razor:
@page "/consume-component-1"

<h1>Consume component (full namespace example)</h1>

<ComponentLibrary.Component1 />
Alternatively, add a @using directive and use the component without its namespace. The following @using directive can also appear in any _Imports.razor file in or above the current folder.
ConsumeComponent2.razor:
@page "/consume-component-2"
@using ComponentLibrary

<h1>Consume component (<code>@@using</code> example)</h1>

<Component1 />
For library components that use CSS isolation, the component styles are automatically made available to the consuming app. There's no need to manually link or import the library's individual component stylesheets or its bundled CSS file in the app that consumes the library. The app uses CSS imports to reference the RCL's bundled styles. The bundled styles aren't published as a static web asset of the app that consumes the library. For a class library named ClassLib and a Blazor app with a BlazorSample.styles.css stylesheet, the RCL's stylesheet is imported at the top of the app's stylesheet automatically at build time:
@import '_content/ClassLib/ClassLib.bundle.scp.css';
For the preceding examples, Component1's stylesheet (Component1.razor.css) is bundled automatically.
Component1.razor.css in the ComponentLibrary RCL:
.my-component {
    border: 2px dashed red;
    padding: 1em;
    margin: 1em 0;
    background-image: url('background.png');
}
The background image is also included from the RCL project template and resides in the wwwroot folder of the RCL.
wwwroot/background.png in the ComponentLibrary RCL:

To provide additional library component styles from stylesheets in the library's wwwroot folder, add stylesheet <link> tags to the RCL's consumer, as the next example demonstrates.
Important
Generally, library components use CSS isolation to bundle and provide component styles. Component styles that rely upon CSS isolation are automatically made available to the app that uses the RCL. There's no need to manually link or import the library's individual component stylesheets or its bundled CSS file in the app that consumes the library. The following example is for providing global stylesheets outside of CSS isolation, which usually isn't a requirement for typical apps that consume RCLs.
The following background image is used in the next example. If you implement the example shown in this section, right-click the image to save it locally.
wwwroot/extra-background.png in the ComponentLibrary RCL:

Add a new stylesheet to the RCL with an extra-style class.
wwwroot/additionalStyles.css in the ComponentLibrary RCL:
.extra-style {
    border: 2px dashed blue;
    padding: 1em;
    margin: 1em 0;
    background-image: url('extra-background.png');
}
Add a component to the RCL that uses the extra-style class.
ExtraStyles.razor in the ComponentLibrary RCL:
<div class="extra-style">
    <p>
        This component is defined in the <strong>ComponentLibrary</strong> package.
    </p>
</div>
Add a page to the app that uses the ExtraStyles component from the RCL.
ConsumeComponent3.razor:
@page "/consume-component-3"
@using ComponentLibrary

<h1>Consume component (<code>additionalStyles.css</code> example)</h1>

<ExtraStyles />
Link to the library's stylesheet in the app's <head> markup (location of <head> content):
Blazor Web Apps:
<link href="@Assets["_content/ComponentLibrary/additionalStyles.css"]" rel="stylesheet">
Standalone Blazor WebAssembly apps:
<link href="_content/ComponentLibrary/additionalStyles.css" rel="stylesheet">
<link href="_content/ComponentLibrary/additionalStyles.css" rel="stylesheet">
For library components that use CSS isolation, the component styles are automatically made available to the consuming app. There's no need to manually link or import the library's individual component stylesheets or its bundled CSS file in the app that consumes the library. The app uses CSS imports to reference the RCL's bundled styles. The bundled styles aren't published as a static web asset of the app that consumes the library. For a class library named ClassLib and a Blazor app with a BlazorSample.styles.css stylesheet, the RCL's stylesheet is imported at the top of the app's stylesheet automatically at build time:
@import '_content/ClassLib/ClassLib.bundle.scp.css';
For the preceding examples, Component1's stylesheet (Component1.razor.css) is bundled automatically.
Component1.razor.css in the ComponentLibrary RCL:
.my-component {
    border: 2px dashed red;
    padding: 1em;
    margin: 1em 0;
    background-image: url('background.png');
}
The background image is also included from the RCL project template and resides in the wwwroot folder of the RCL.
wwwroot/background.png in the ComponentLibrary RCL:
The following background image and stylesheet are used by the RCL's Component1 example component. There's no need to add these static assets to a new RCL created from the RCL project template, as they're added automatically by the project template.
wwwroot/background.png in the ComponentLibrary RCL:
wwwroot/styles.css in the ComponentLibrary RCL:
.my-component {
    border: 2px dashed red;
    padding: 1em;
    margin: 1em 0;
    background-image: url('background.png');
}
To provide Component1's my-component CSS class, link to the library's stylesheet in the app's <head> markup (location of <head> content):
<link href="_content/ComponentLibrary/styles.css" rel="stylesheet" />
Make routable components available from the RCL
To make routable components in the RCL available for direct requests, the RCL's assembly must be disclosed to the app's router.
Open the app's App component (App.razor). Assign an Assembly collection to the AdditionalAssemblies parameter of the Router component to include the RCL's assembly. In the following example, the ComponentLibrary.Component1 component is used to discover the RCL's assembly.
AdditionalAssemblies="new[] { typeof(ComponentLibrary.Component1).Assembly }"
For more information, see ASP.NET Core Blazor routing and navigation.
Create an RCL with static assets in the wwwroot folder
An RCL's static assets are available to any app that consumes the library.
Place static assets in the wwwroot folder of the RCL and reference the static assets with the following path in the app: _content/{PACKAGE ID}/{PATH AND FILE NAME}. The {PACKAGE ID} placeholder is the library's package ID. The package ID defaults to the project's assembly name if <PackageId> isn't specified in the project file. The {PATH AND FILE NAME} placeholder is path and file name under wwwroot. This path format is also used in the app for static assets supplied by NuGet packages added to the RCL.
The following example demonstrates the use of RCL static assets with an RCL named ComponentLibrary and a Blazor app that consumes the RCL. The app has a project reference for the ComponentLibrary RCL.
The following Jeep® image is used in this section's example. If you implement the example shown in this section, right-click the image to save it locally.
wwwroot/jeep-yj.png in the ComponentLibrary RCL:

Add the following JeepYJ component to the RCL.
JeepYJ.razor in the ComponentLibrary RCL:
<h3>ComponentLibrary.JeepYJ</h3>
<p>
<img alt="Jeep YJ®" src="_content/ComponentLibrary/jeep-yj.png" />
</p>
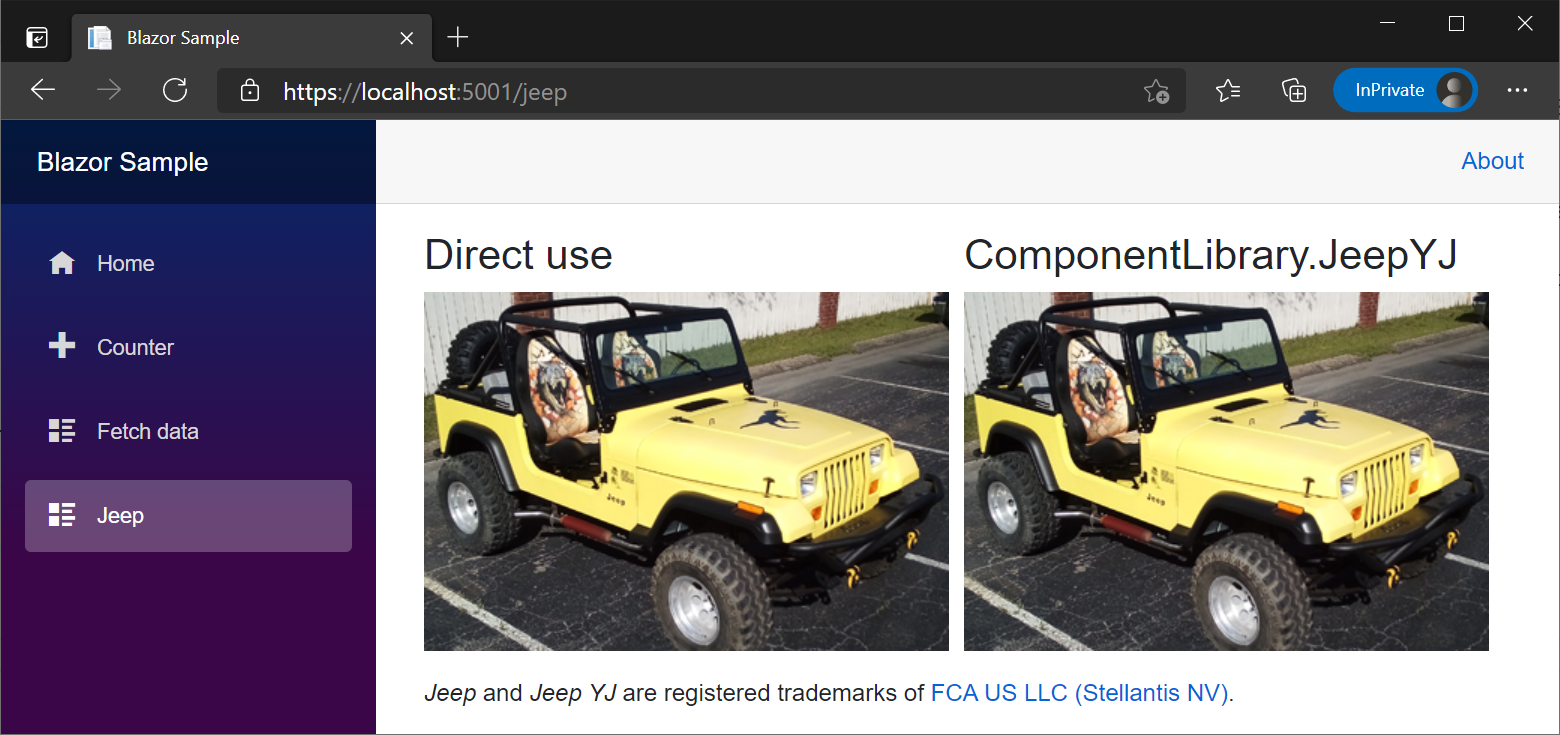
Add the following Jeep component to the app that consumes the ComponentLibrary RCL. The Jeep component uses:
- The Jeep YJ® image from the
ComponentLibraryRCL'swwwrootfolder. - The
JeepYJcomponent from the RCL.
Jeep.razor:
@page "/jeep"
@using ComponentLibrary
<div style="float:left;margin-right:10px">
<h3>Direct use</h3>
<p>
<img alt="Jeep YJ®" src="_content/ComponentLibrary/jeep-yj.png" />
</p>
</div>
<JeepYJ />
<p>
<em>Jeep</em> and <em>Jeep YJ</em> are registered trademarks of
<a href="https://www.stellantis.com">FCA US LLC (Stellantis NV)</a>.
</p>
Rendered Jeep component:
For more information, see Reusable Razor UI in class libraries with ASP.NET Core.
Create an RCL with JavaScript files collocated with components
Collocation of JavaScript (JS) files for Razor components is a convenient way to organize scripts in an app.
Razor components of Blazor apps collocate JS files using the .razor.js extension and are publicly addressable using the path to the file in the project:
{PATH}/{COMPONENT}.razor.js
- The
{PATH}placeholder is the path to the component. - The
{COMPONENT}placeholder is the component.
When the app is published, the framework automatically moves the script to the web root. Scripts are moved to bin/Release/{TARGET FRAMEWORK MONIKER}/publish/wwwroot/{PATH}/{COMPONENT}.razor.js, where the placeholders are:
{TARGET FRAMEWORK MONIKER}is the Target Framework Moniker (TFM).{PATH}is the path to the component.{COMPONENT}is the component name.
No change is required to the script's relative URL, as Blazor takes care of placing the JS file in published static assets for you.
This section and the following examples are primarily focused on explaining JS file collocation. The first example demonstrates a collocated JS file with an ordinary JS function. The second example demonstrates the use of a module to load a function, which is the recommended approach for most production apps. Calling JS from .NET is fully covered in Call JavaScript functions from .NET methods in ASP.NET Core Blazor, where there are further explanations of the Blazor JS API with additional examples. Component disposal, which is present in the second example, is covered in ASP.NET Core Razor component disposal.
The following JsCollocation1 component loads a script via a HeadContent component and calls a JS function with IJSRuntime.InvokeAsync. The {PATH} placeholder is the path to the component.
Important
If you use the following code for a demonstration in a test app, change the {PATH} placeholder to the path of the component (example: Components/Pages in .NET 8 or later or Pages in .NET 7 or earlier). In a Blazor Web App (.NET 8 or later), the component requires an interactive render mode applied either globally to the app or to the component definition.
Add the following script after the Blazor script (location of the Blazor start script):
<script src="{PATH}/JsCollocation1.razor.js"></script>
JsCollocation1 component ({PATH}/JsCollocation1.razor):
@page "/js-collocation-1"
@inject IJSRuntime JS

<PageTitle>JS Collocation 1</PageTitle>

<h1>JS Collocation Example 1</h1>

<button @onclick="ShowPrompt">Call showPrompt1</button>

@if (!string.IsNullOrEmpty(result))
{
    <p>
        Hello @result!
    </p>
}

@code {
    private string? result;

    public async Task ShowPrompt()
    {
        result = await JS.InvokeAsync<string>(
            "showPrompt1", "What's your name?");
        StateHasChanged();
    }
}
The collocated JS file is placed next to the JsCollocation1 component file with the file name JsCollocation1.razor.js. In the JsCollocation1 component, the script is referenced at the path of the collocated file. In the following example, the showPrompt1 function accepts the user's name from a Window prompt() and returns it to the JsCollocation1 component for display.
{PATH}/JsCollocation1.razor.js:
function showPrompt1(message) {
  return prompt(message, 'Type your name here');
}
The preceding approach isn't recommended for general use in production apps because the approach pollutes the client with global functions. A better approach for production apps is to use JS modules. The same general principles apply to loading a JS module from a collocated JS file, as the next example demonstrates.
The following JsCollocation2 component's OnAfterRenderAsync method loads a JS module into module, which is an IJSObjectReference of the component class. module is used to call the showPrompt2 function. The {PATH} placeholder is the path to the component.
Important
If you use the following code for a demonstration in a test app, change the {PATH} placeholder to the path of the component. In a Blazor Web App (.NET 8 or later), the component requires an interactive render mode applied either globally to the app or to the component definition.
JsCollocation2 component ({PATH}/JsCollocation2.razor):
@page "/js-collocation-2"
@implements IAsyncDisposable
@inject IJSRuntime JS

<PageTitle>JS Collocation 2</PageTitle>

<h1>JS Collocation Example 2</h1>

<button @onclick="ShowPrompt">Call showPrompt2</button>

@if (!string.IsNullOrEmpty(result))
{
    <p>
        Hello @result!
    </p>
}

@code {
    private IJSObjectReference? module;
    private string? result;

    protected async override Task OnAfterRenderAsync(bool firstRender)
    {
        if (firstRender)
        {
            /*
                Change the {PATH} placeholder in the next line to the path of
                the collocated JS file in the app. Examples:

                ./Components/Pages/JsCollocation2.razor.js (.NET 8 or later)
                ./Pages/JsCollocation2.razor.js (.NET 7 or earlier)
            */
            module = await JS.InvokeAsync<IJSObjectReference>("import",
                "./{PATH}/JsCollocation2.razor.js");
        }
    }

    public async Task ShowPrompt()
    {
        if (module is not null)
        {
            result = await module.InvokeAsync<string>(
                "showPrompt2", "What's your name?");
            StateHasChanged();
        }
    }

    async ValueTask IAsyncDisposable.DisposeAsync()
    {
        if (module is not null)
        {
            try
            {
                await module.DisposeAsync();
            }
            catch (JSDisconnectedException)
            {
            }
        }
    }
}
In the preceding example, JSDisconnectedException is trapped during module disposal in case Blazor's SignalR circuit is lost. If the preceding code is used in a Blazor WebAssembly app, there's no SignalR connection to lose, so you can remove the try-catch block and leave the line that disposes the module (await module.DisposeAsync();). For more information, see ASP.NET Core Blazor JavaScript interoperability (JS interop).
{PATH}/JsCollocation2.razor.js:
export function showPrompt2(message) {
  return prompt(message, 'Type your name here');
}
Important
Don't place a <script> tag for JsCollocation2.razor.js after the Blazor script because the module is loaded and cached automatically when the dynamic import() is invoked.
Use of scripts and modules for collocated JS in a Razor class library (RCL) is only supported for Blazor's JS interop mechanism based on the IJSRuntime interface. If you're implementing JavaScript [JSImport]/[JSExport] interop, see JavaScript JSImport/JSExport interop with ASP.NET Core Blazor.
For scripts or modules provided by a Razor class library (RCL) using IJSRuntime-based JS interop, the following path is used:
./_content/{PACKAGE ID}/{PATH}/{COMPONENT}.{EXTENSION}.js
- The path segment for the current directory (
./) is required in order to create the correct static asset path to the JS file. - The
{PACKAGE ID}placeholder is the RCL's package identifier (or library name for a class library referenced by the app). - The
{PATH}placeholder is the path to the component. If a Razor component is located at the root of the RCL, the path segment isn't included. - The
{COMPONENT}placeholder is the component name. - The
{EXTENSION}placeholder matches the extension of component, eitherrazororcshtml.
In the following Blazor app example:
- The RCL's package identifier is
AppJS. - A module's scripts are loaded for the
JsCollocation3component (JsCollocation3.razor). - The
JsCollocation3component is in theComponents/Pagesfolder of the RCL.
module = await JS.InvokeAsync<IJSObjectReference>("import",
    "./_content/AppJS/Components/Pages/JsCollocation3.razor.js");
Supply components and static assets to multiple hosted Blazor apps
For more information, see Multiple hosted ASP.NET Core Blazor WebAssembly apps.
Client-side browser compatibility analyzer
Client-side apps target the full .NET API surface area, but not all .NET APIs are supported on WebAssembly due to browser sandbox constraints. Unsupported APIs throw PlatformNotSupportedException when running on WebAssembly. A platform compatibility analyzer warns the developer when the app uses APIs that aren't supported by the app's target platforms. For client-side apps, this means checking that APIs are supported in browsers. Annotating .NET framework APIs for the compatibility analyzer is an on-going process, so not all .NET framework API is currently annotated.
Blazor Web Apps that enable Interactive WebAssembly components, Blazor WebAssembly apps, and RCL projects automatically enable browser compatibility checks by adding browser as a supported platform with the SupportedPlatform MSBuild item. Library developers can manually add the SupportedPlatform item to a library's project file to enable the feature:
<ItemGroup>
  <SupportedPlatform Include="browser" />
</ItemGroup>
When authoring a library, indicate that a particular API isn't supported in browsers by specifying browser to UnsupportedOSPlatformAttribute:
using System.Runtime.Versioning;

...

[UnsupportedOSPlatform("browser")]
private static string GetLoggingDirectory()
{
    ...
}
For more information, see Annotating APIs as unsupported on specific platforms (dotnet/designs GitHub repository.
JavaScript isolation in JavaScript modules
Blazor enables JavaScript isolation in standard JavaScript modules. JavaScript isolation provides the following benefits:
- Imported JavaScript no longer pollutes the global namespace.
- Consumers of the library and components aren't required to manually import the related JavaScript.
For more information, see Call JavaScript functions from .NET methods in ASP.NET Core Blazor.
Avoid trimming JavaScript-invokable .NET methods
Runtime relinking trims class instance JavaScript-invokable .NET methods unless they're explicitly preserved. For more information, see Call .NET methods from JavaScript functions in ASP.NET Core Blazor.
Build, pack, and ship to NuGet
Because Razor class libraries that contain Razor components are standard .NET libraries, packing and shipping them to NuGet is no different from packing and shipping any library to NuGet. Packing is performed using the dotnet pack command in a command shell:
dotnet pack
Upload the package to NuGet using the dotnet nuget push command in a command shell.
Trademarks
Jeep and Jeep YJ are registered trademarks of FCA US LLC (Stellantis NV).
Additional resources
Collaborate with us on GitHub
The source for this content can be found on GitHub, where you can also create and review issues and pull requests. For more information, see our contributor guide.
ASP.NET Core