Migrate from ASP.NET Core in .NET 7 to .NET 8
This article explains how to update an existing ASP.NET Core 7.0 project to ASP.NET Core 8.0.
Prerequisites
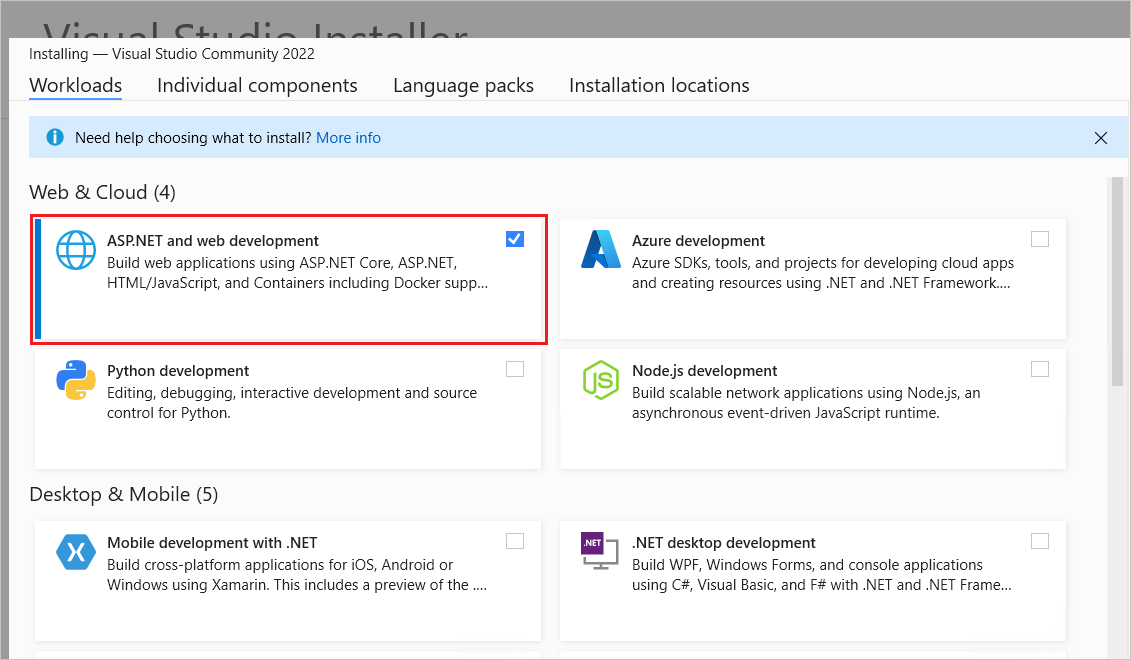
Visual Studio 2022 with the ASP.NET and web development workload.
Update the .NET SDK version in global.json
If you rely on a global.json file to target a specific .NET Core SDK version, update the version property to the .NET 8.0 SDK version that's installed. For example:
{
  "sdk": {
-    "version": "7.0.100"
+    "version": "8.0.100"
  }
}
Update the target framework
Update the project file's Target Framework Moniker (TFM) to net8.0:
<Project Sdk="Microsoft.NET.Sdk.Web">

  <PropertyGroup>
-    <TargetFramework>net7.0</TargetFramework>
+    <TargetFramework>net8.0</TargetFramework>
  </PropertyGroup>

</Project>
Update package references
In the project file, update each Microsoft.AspNetCore.*, Microsoft.EntityFrameworkCore.*, Microsoft.Extensions.*, and System.Net.Http.Json package reference's Version attribute to 8.00 or later. For example:
<ItemGroup>
-   <PackageReference Include="Microsoft.AspNetCore.JsonPatch" Version="7.0.12" />
-   <PackageReference Include="Microsoft.EntityFrameworkCore.Tools" Version="7.0.12" />
-   <PackageReference Include="Microsoft.Extensions.Caching.Abstractions" Version="7.0.0" />
-   <PackageReference Include="System.Net.Http.Json" Version="7.0.1" />
+   <PackageReference Include="Microsoft.AspNetCore.JsonPatch" Version="8.0.0" />
+   <PackageReference Include="Microsoft.EntityFrameworkCore.Tools" Version="8.0.0" />
+   <PackageReference Include="Microsoft.Extensions.Caching.Abstractions" Version="8.0.0" />
+   <PackageReference Include="System.Net.Http.Json" Version="8.0.0" />
</ItemGroup>
Blazor
The following migration scenarios are covered:
- Update a Blazor Server app
- Adopt all Blazor Web App conventions
- Convert a Blazor Server app into a Blazor Web App
- Update a Blazor WebAssembly app
- Convert a hosted Blazor WebAssembly app into a Blazor Web App
- Update service and endpoint option configuration
- Drop Blazor Server with Yarp routing workaround
- Migrate
CascadingValuecomponents in layout components - Migrate the
BlazorEnableCompressionMSBuild property - Migrate the
<CascadingAuthenticationState>component to cascading authentication state services - New article: HTTP caching issues during migration
- New article: New article on class libraries with static server-side rendering (static SSR)
- Discover components from additional assemblies
- Drop
[Parameter]attribute when the parameter is supplied from a query string - Blazor Server script fallback policy authorization
For guidance on adding Blazor support to an ASP.NET Core app, see Integrate ASP.NET Core Razor components into ASP.NET Core apps.
Update a Blazor Server app
We recommend using Blazor Web Apps in .NET 8, but Blazor Server is supported. To continue using Blazor Server with .NET 8, follow the guidance in the first three sections of this article:
New Blazor features introduced for Blazor Web Apps aren't available to a Blazor Server app updated to run under .NET 8. If you wish to adopt the new .NET 8 Blazor features, follow the guidance in either of the following sections:
Adopt all Blazor Web App conventions
To optionally adopt all of the new Blazor Web App conventions, we recommend the following process:
- Create a new app from the Blazor Web App project template. For more information, see Tooling for ASP.NET Core Blazor.
- Move the your app's components and code to the new Blazor Web App app, making modifications to adopt new features.
- Update the layout and styles of the Blazor Web App.
New .NET 8 features are covered in What's new in ASP.NET Core 8.0. When updating an app from .NET 6 or earlier, see the migration and release notes (What's new articles) for intervening releases.
Convert a Blazor Server app into a Blazor Web App
Blazor Server apps are supported in .NET 8 without any code changes. Use the following guidance to convert a Blazor Server app into an equivalent .NET 8 Blazor Web App, which makes all of the new .NET 8 features available.
Important
This section focuses on the minimal changes required to convert a .NET 7 Blazor Server app into a .NET 8 Blazor Web App. To adopt all of the new Blazor Web App conventions, follow the guidance in the Adopt all Blazor Web App conventions section.
Follow the guidance in the first three sections of this article:
Move the contents of the
Appcomponent (App.razor) to a newRoutescomponent file (Routes.razor) added to the project's root folder. Leave the emptyApp.razorfile in the app in the project's root folder.Add an entry to the
_Imports.razorfile to make shorthand render modes available to the app:@using static Microsoft.AspNetCore.Components.Web.RenderModeMove the content in the
_Hostpage (Pages/_Host.cshtml) to the emptyApp.razorfile. Proceed to make the following changes to theAppcomponent.Note
In the following example, the project's namespace is
BlazorServerApp. Adjust the namespace to match your project.Remove the following lines from the top of the file:
- @page "/"
- @using Microsoft.AspNetCore.Components.Web
- @namespace BlazorServerApp.Pages
- @addTagHelper *, Microsoft.AspNetCore.Mvc.TagHelpers
Replace the preceding lines with a line that injects an IHostEnvironment instance:
@inject IHostEnvironment EnvRemove the tilde (
~) from thehrefof the<base>tag and replace with the base path for your app:- <base href="~/" /> + <base href="/" />Remove the Component Tag Helper for the
HeadOutletcomponent and replace it with theHeadOutletcomponent.Remove the following line:
- <component type="typeof(HeadOutlet)" render-mode="ServerPrerendered" />Replace the preceding line with the following:
<HeadOutlet @rendermode="InteractiveServer" />Remove the Component Tag Helper for the
Appcomponent and replace it with theRoutescomponent.Remove the following line:
- <component type="typeof(App)" render-mode="ServerPrerendered" />Replace the preceding line with the following:
<Routes @rendermode="InteractiveServer" />Note
The preceding configuration assumes that the app's components adopt interactive server rendering. For more information, including how to adopt static server-side rendering (SSR), see ASP.NET Core Blazor render modes.
Remove the Environment Tag Helpers for error UI and replace them with the following Razor markup.
Remove the following lines:
- <environment include="Staging,Production">
-     An error has occurred. This application may no longer respond until reloaded.
- </environment>
- <environment include="Development">
-     An unhandled exception has occurred. See browser dev tools for details.
- </environment>
Replace the preceding lines with the following:
@if (Env.IsDevelopment())
{
    <text>
        An unhandled exception has occurred. See browser dev tools for details.
    </text>
}
else
{
    <text>
        An error has occurred. This app may no longer respond until reloaded.
    </text>
}
Change the Blazor script from
blazor.server.jstoblazor.web.js:- <script src="_framework/blazor.server.js"></script> + <script src="_framework/blazor.web.js"></script>Delete the
Pages/_Host.cshtmlfile.Update
Program.cs:Note
In the following example, the project's namespace is
BlazorServerApp. Adjust the namespace to match your project.Add a
usingstatement to the top of the file for the project's namespace:using BlazorServerApp;Replace
AddServerSideBlazorwithAddRazorComponentsand a chained call toAddInteractiveServerComponents.Remove the following line:
- builder.Services.AddServerSideBlazor();Replace the preceding line with Razor component and interactive server component services. Calling
AddRazorComponentsadds antiforgery services (AddAntiforgery) by default.builder.Services.AddRazorComponents() .AddInteractiveServerComponents();Remove the following line:
- app.MapBlazorHub();Replace the preceding line with a call to
MapRazorComponents, supplying theAppcomponent as the root component type, and add a chained call toAddInteractiveServerRenderMode:app.MapRazorComponents<App>() .AddInteractiveServerRenderMode();Remove the following line:
- app.MapFallbackToPage("/_Host");Add Antiforgery Middleware to the request processing pipeline after the call to
app.UseRouting. If there are calls toapp.UseRoutingandapp.UseEndpoints, the call toapp.UseAntiforgerymust go between them. A call toapp.UseAntiforgerymust be placed after calls toapp.UseAuthenticationandapp.UseAuthorization. There's no need to add antiforgery services (builder.Services.AddAntiforgery()), as they're added automatically byAddRazorComponents, which was covered earlier.app.UseAntiforgery();If the Blazor Server app was configured to disable prerendering, you can continue to disable prerendering for the updated app. In the
Appcomponent, change the value assigned to the@rendermodeRazor directive attributes for theHeadOutletandRoutescomponents.Change the value of the
@rendermodedirective attribute for both theHeadOutletandRoutescomponents to disable prerendering:- @rendermode="InteractiveServer" + @rendermode="new InteractiveServerRenderMode(prerender: false)"For more information, see ASP.NET Core Blazor render modes.
Update a Blazor WebAssembly app
Follow the guidance in the first three sections of this article:
Convert a hosted Blazor WebAssembly app into a Blazor Web App
Blazor WebAssembly apps are supported in .NET 8 without any code changes. Use the following guidance to convert an ASP.NET Core hosted Blazor WebAssembly app into an equivalent .NET 8 Blazor Web App, which makes all of the new .NET 8 features available.
Important
This section focuses on the minimal changes required to convert a .NET 7 ASP.NET Core hosted Blazor WebAssembly app into a .NET 8 Blazor Web App. To adopt all of the new Blazor Web App conventions, follow the guidance in the Adopt all Blazor Web App conventions section.
Follow the guidance in the first three sections of this article:
Important
Using the preceding guidance, update the
Client,Server, andSharedprojects of the solution.In the
.Clientproject file (.csproj), add the following MS Build properties:<NoDefaultLaunchSettingsFile>true</NoDefaultLaunchSettingsFile> <StaticWebAssetProjectMode>Default</StaticWebAssetProjectMode>Also in the
.Clientproject file, remove theMicrosoft.AspNetCore.Components.WebAssembly.DevServerpackage reference:- <PackageReference Include="Microsoft.AspNetCore.Components.WebAssembly.DevServer"... />Move the file content from the
Client/wwwroot/index.htmlfile to a newAppcomponent file (App.razor) created at the root of theServerproject. After you move the file's contents, delete theindex.htmlfile.Rename
App.razorin the.Clientproject toRoutes.razor.In
Routes.razor, update the value of theAppAssemblyattribute totypeof(Program).Assembly.Add an entry to the
_Imports.razorfile to make shorthand render modes available to the app:@using static Microsoft.AspNetCore.Components.Web.RenderModeMake a copy of the
_Imports.razorfile and add it to theServerproject.Make the following changes to the
App.razorfile:Replace the
<title>tag withHeadOutletandPageTitlecomponents. Start by removing the<title>tag. Note the title for use later before removing the tag:- <title>...</title>Change the CSS style bundle:
- <link href="{CLIENT PROJECT ASSEMBLY NAME}.styles.css" rel="stylesheet">
+ <link href="{SERVER PROJECT ASSEMBLY NAME}.styles.css" rel="stylesheet">
Placeholders in the preceding code:
{CLIENT PROJECT ASSEMBLY NAME}: Client project assembly name. Example:BlazorSample.Client{SERVER PROJECT ASSEMBLY NAME}: Server project assembly name. Example:BlazorSample
Add the
HeadOutletcomponent at the end of the<head>content with the Interactive WebAssembly render mode (prerendering disabled). Also, add thePageTitlecomponent with the app's title:<HeadOutlet @rendermode="new InteractiveWebAssemblyRenderMode(prerender: false)" /> <PageTitle>...</PageTitle>For more information, see Control head content in ASP.NET Core Blazor apps.
Locate following
<div>...</div>HTML markup:- <div id="app"> - ... - </div>Replace the preceding
<div>...</div>HTML markup with theRoutescomponent using the Interactive WebAssembly render mode (prerendering disabled):<Routes @rendermode="new InteractiveWebAssemblyRenderMode(prerender: false)" />Update the
blazor.webassembly.jsscript toblazor.web.js:- <script src="_framework/blazor.webassembly.js"></script> + <script src="_framework/blazor.web.js"></script>Remove the following lines from
Client/Program.cs:- builder.RootComponents.Add<App>("#app"); - builder.RootComponents.Add<HeadOutlet>("head::after");Update
Server/Program.cs:Add Razor component and interactive WebAssembly component services to the project. Call
AddRazorComponentswith a chained call toAddInteractiveWebAssemblyComponents. CallingAddRazorComponentsadds antiforgery services (AddAntiforgery) by default.builder.Services.AddRazorComponents() .AddInteractiveWebAssemblyComponents();Add Antiforgery Middleware to the request processing pipeline.
Place the following code:
- After the call to
app.UseRouting. - If there are calls to
app.UseRoutingandapp.UseEndpoints, the call toapp.UseAntiforgerymust go between them. - The call to
app.UseAntiforgerymust be placed after a call toapp.UseAuthorization, if present. - There's no need to add antiforgery services (
builder.Services.AddAntiforgery()), as they're added automatically byAddRazorComponents, which was covered earlier.
app.UseAntiforgery();Remove the following line:
- app.UseBlazorFrameworkFiles();Remove the following line:
- app.MapFallbackToFile("index.html");Replace the preceding line with a call to
MapRazorComponents, supplying theAppcomponent as the root component type, and add chained calls toAddInteractiveWebAssemblyRenderModeandAddAdditionalAssemblies:app.MapRazorComponents<App>() .AddInteractiveWebAssemblyRenderMode() .AddAdditionalAssemblies(typeof({CLIENT APP NAMESPACE}._Imports).Assembly);In the preceding example, the
{CLIENT APP NAMESPACE}placeholder is the namespace of the.Clientproject (for example,HostedBlazorApp.Client). Replace the placeholder with the.Clientproject's namespace.- After the call to
Run the solution from the
Serverproject:For Visual Studio, confirm that the
Serverproject is selected in Solution Explorer when running the app.If using the .NET CLI, run the project from the
Serverproject's folder.
Update service and endpoint option configuration
With the release of Blazor Web Apps in .NET 8, Blazor service and endpoint option configuration is updated with the introduction of new API for interactive component services and component endpoint configuration.
Updated configuration guidance appears in the following locations:
- Setting and reading the app's environment: Contains updated guidance, especially in the section titled Read the environment client-side in a Blazor Web App.
- Server-side circuit handler options: Covers new Blazor-SignalR circuit and hub options configuration.
- Render Razor components from JavaScript: Covers dynamic component registration with RegisterForJavaScript.
- Blazor custom elements: Blazor Web App registration: Covers root component custom element registration with
RegisterCustomElement. - Prefix for Blazor WebAssembly assets: Covers control of the path string that indicates the prefix for Blazor WebAssembly assets.
- Temporary redirection URL validity duration: Covers control of the lifetime of data protection validity for temporary redirection URLs emitted by Blazor server-side rendering.
- Detailed errors: Covers enabling detailed errors for Razor component server-side rendering.
- Prerendering configuration: Prerendering is enabled by default for Blazor Web Apps. Follow this link for guidance on how to disable prerendering if you have special circumstances that require an app to disable prerendering.
- Form binding options: Covers form binding options configuration.
Drop Blazor Server with Yarp routing workaround
If you previously followed the guidance in Enable ASP.NET Core Blazor Server support with Yarp in incremental migration for migrating a Blazor Server app with Yarp to .NET 6 or .NET 7, you can reverse the workaround steps that you took when following the article's guidance. Routing and deep linking for Blazor Server with Yarp work correctly in .NET 8.
Migrate CascadingValue components in layout components
Cascading parameters don't pass data across render mode boundaries, and layouts are statically rendered in otherwise interactive apps. Therefore, apps that seek to use cascading parameters in interactively rendered components won't be able to cascade the values from a layout.
The two approaches for migration are:
- (Recommended) Pass the state as a root-level cascading value. For more information, see Root-level cascading values.
- Wrap the router in the
Routescomponent with theCascadingValuecomponent and make theRoutescomponent interactively rendered. For an example, seeCascadingValuecomponent.
For more information, see Cascading values/parameters and render mode boundaries.
Migrate the BlazorEnableCompression MSBuild property
For Blazor WebAssembly apps that disable compression and target .NET 7 or earlier but are built with the .NET 8 SDK, the BlazorEnableCompression MSBuild property has changed to CompressionEnabled:
<PropertyGroup>
-   <BlazorEnableCompression>false</BlazorEnableCompression>
+   <CompressionEnabled>false</CompressionEnabled>
</PropertyGroup>
When using the .NET CLI publish command, use the new property:
dotnet publish -p:CompressionEnabled=false
For more information, see the following resources:
- Static Web Assets Compression Flag Breaking Change (dotnet/announcements #283)
- Host and deploy ASP.NET Core Blazor WebAssembly
Migrate the <CascadingAuthenticationState> component to cascading authentication state services
In .NET 7 or earlier, the CascadingAuthenticationState component is wrapped around some part of the UI tree, for example around the Blazor router, to provide cascading authentication state:
<CascadingAuthenticationState>
    <Router ...>
        ...
    </Router>
</CascadingAuthenticationState>
In .NET 8, don't use the CascadingAuthenticationState component:
- <CascadingAuthenticationState>
      <Router ...>
          ...
      </Router>
- </CascadingAuthenticationState>
Instead, add cascading authentication state services to the service collection by calling AddCascadingAuthenticationState in the Program file:
builder.Services.AddCascadingAuthenticationState();
For more information, see the following resources:
- ASP.NET Core Blazor authentication and authorization article
- Secure ASP.NET Core server-side Blazor apps
New article on HTTP caching issues
We've added a new article that discusses some of the common HTTP caching issues that can occur when upgrading Blazor apps across major versions and how to address HTTP caching issues.
For more information, see Avoid HTTP caching issues when upgrading ASP.NET Core Blazor apps.
New article on class libraries with static server-side rendering (static SSR)
We've added a new article that discusses component library authorship in Razor class libraries (RCLs) with static server-side rendering (static SSR).
For more information, see ASP.NET Core Razor class libraries (RCLs) with static server-side rendering (static SSR).
Discover components from additional assemblies
When migrating from a Blazor Server app to a Blazor Web App, access the guidance in ASP.NET Core Blazor routing and navigation if the app uses routable components from additional assemblies, such as component class libraries.
Drop [Parameter] attribute when the parameter is supplied from a query string
The [Parameter] attribute is no longer required when supplying a parameter from the query string:
- [Parameter]
  [SupplyParameterFromQuery]
Blazor Server script fallback policy authorization
In .NET 7, the Blazor Server script (blazor.server.js) is served by Static Files Middleware. Placing the call for Static Files Middleware (UseStaticFiles) in the request processing pipeline before the call to Authorization Middleware (UseAuthorization) is sufficient in .NET 7 apps to serve the Blazor script to anonymous users.
In .NET 8, the Blazor Server script is served by its own endpoint, using endpoint routing. This change is introduced by Fixed bug - Passing options to UseStaticFiles breaks Blazor Server (dotnet/aspnetcore #45897).
Consider a multi-tenant scenario where:
- Both the default and fallback policies are set identically.
- The tenant is resolved using the first segment in the request path (for example,
tld.com/tenant-name/...). - The requests to tenant endpoints are authenticated by an additional authentication scheme, which adds an additional identity to the request principal.
- The fallback authorization policy has requirements that check claims via the additional identity.
Requests for the Blazor script file (blazor.server.js) are served at /_framework/blazor.server.js, which is hardcoded in the framework. Requests for the file aren't authenticated by the additional authentication scheme for tenants but are still challenged by the fallback policy, which results in returning an unauthorized result.
This problem is under evaluation for a new framework feature in MapRazorComponents broken with FallbackPolicy RequireAuthenticatedUser (dotnet/aspnetcore 51836), which is currently scheduled for .NET 9's release in November, 2024. Until then, you can work around this problem using any of the following three approaches:
Don't use a fallback policy. Apply the
[Authorize]attribute in the_Imports.razorfile to apply it to all of the components of the app. For non-blazor endpoints, explicitly use[Authorize]orRequireAuthorization.Add
[AllowAnonymous]to the/_framework/blazor.server.jsendpoint in theProgramfile:app.MapBlazorHub().Add(endpointBuilder => { if (endpointBuilder is RouteEndpointBuilder { RoutePattern: { RawText: "/_framework/blazor.server.js" } }) { endpointBuilder.Metadata.Add(new AllowAnonymousAttribute()); } });Register a custom
AuthorizationHandlerthat checks theHttpContextto allow the/_framework/blazor.server.jsfile through.
Docker
Update Docker images
For apps using Docker, update the Dockerfile FROM statements and scripts. Use a base image that includes the ASP.NET Core 8.0 runtime. Consider the following docker pull command difference between ASP.NET Core 7.0 and 8.0:
- docker pull mcr.microsoft.com/dotnet/aspnet:7.0
+ docker pull mcr.microsoft.com/dotnet/aspnet:8.0
Update Docker port
The default ASP.NET Core port configured in .NET container images has been updated from port 80 to 8080.
The new ASPNETCORE_HTTP_PORTS environment variable was added as a simpler alternative to ASPNETCORE_URLS.
For more information, see:
Review breaking changes
For breaking changes from .NET Core .NET 7.0 to 8.0, see Breaking changes in .NET 8, which includes ASP.NET Core and Entity Framework Core sections.
ASP.NET Core
Feedback
Coming soon: Throughout 2024 we will be phasing out GitHub Issues as the feedback mechanism for content and replacing it with a new feedback system. For more information see: https://aka.ms/ContentUserFeedback.
Submit and view feedback for