Events
Power BI DataViz World Championships
Feb 14, 4 PM - Mar 31, 4 PM
With 4 chances to enter, you could win a conference package and make it to the LIVE Grand Finale in Las Vegas
Learn moreThis browser is no longer supported.
Upgrade to Microsoft Edge to take advantage of the latest features, security updates, and technical support.
By Valeriy Novytskyy and Rick Anderson
This tutorial with code examples shows how to enable your users to sign in with their Facebook account using a sample ASP.NET Core project created on the previous page. We start by creating a Facebook App ID by following the official steps.
Add the Microsoft.AspNetCore.Authentication.Facebook NuGet package to the project.
Navigate to the Facebook Developers app page and sign in. If you don't already have a Facebook account, use the Sign up for Facebook link on the login page to create one. Once you have a Facebook account, follow the instructions to register as a Facebook Developer.
From the My Apps menu select Create App. The Create an app form appears.

Select an app type that best fits your project. For this project, select Consumer, and then Next. A new App ID is created.
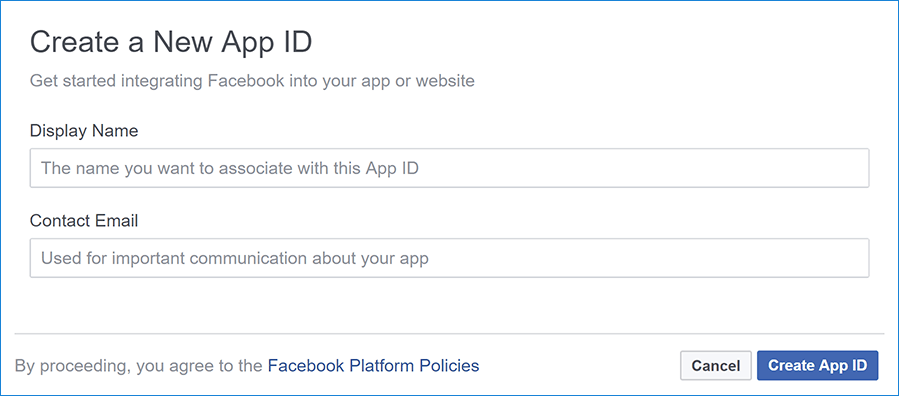
Fill out the form and tap the Create App button.
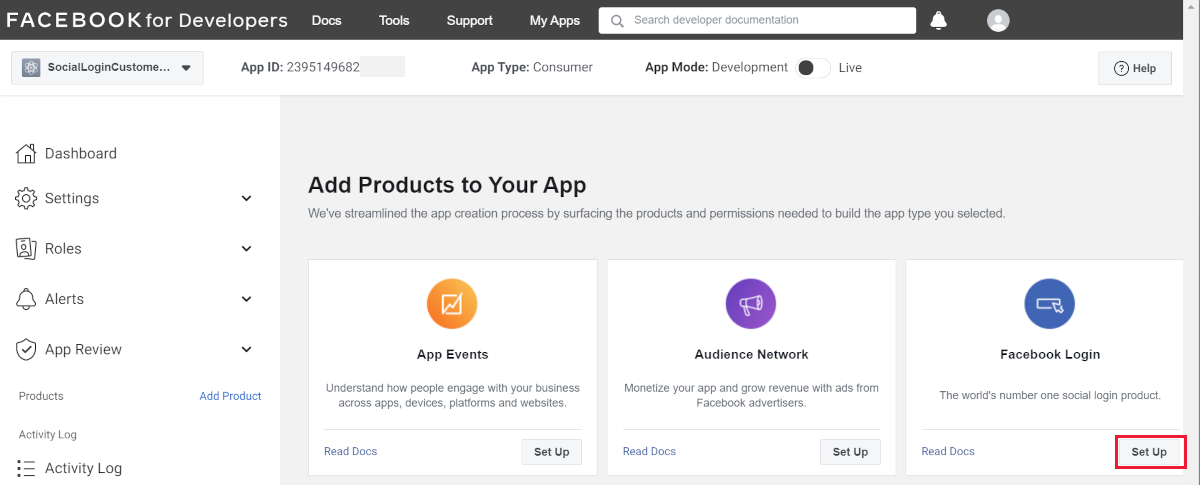
On the Add Products to Your App page, select Set Up on the Facebook Login card.
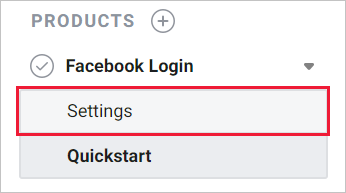
The Quickstart wizard launches with Choose a Platform as the first page. Bypass the wizard for now by clicking the FaceBook Login Settings link in the menu on the lower left:
The Client OAuth Settings page is presented:
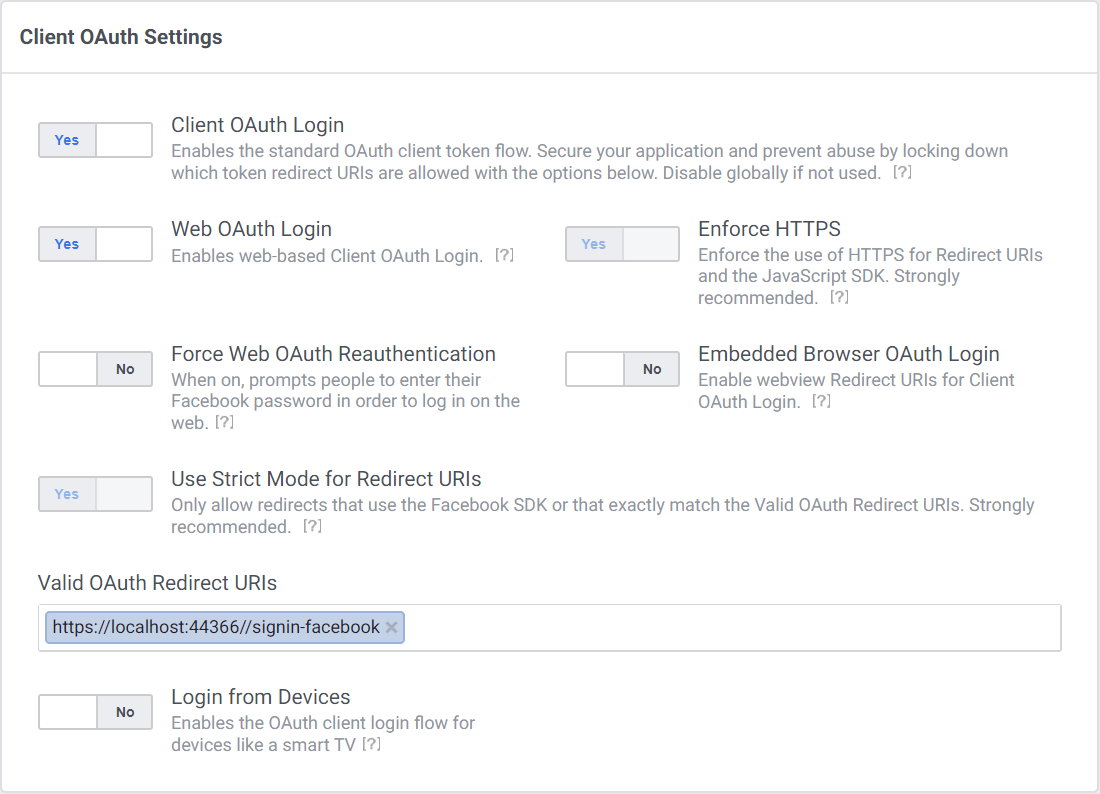
Enter your development URI with /signin-facebook appended into the Valid OAuth Redirect URIs field (for example: https://localhost:44320/signin-facebook). The Facebook authentication configured later in this tutorial will automatically handle requests at /signin-facebook route to implement the OAuth flow.
Note
The URI /signin-facebook is set as the default callback of the Facebook authentication provider. You can change the default callback URI while configuring the Facebook authentication middleware via the inherited RemoteAuthenticationOptions.CallbackPath property of the FacebookOptions class.
Select Save Changes.
Select Settings > Basic link in the left navigation.
Make a note of your App ID and your App Secret. You will add both into your ASP.NET Core application in the next section:
When deploying the site you need to revisit the Facebook Login setup page, and register a new public URI.
Store sensitive settings such as the Facebook app ID and secret values with Secret Manager. For this sample, use the following steps:
Initialize the project for secret storage per the instructions at Enable secret storage.
Store the sensitive settings in the local secret store with the secret keys Authentication:Facebook:AppId and Authentication:Facebook:AppSecret:
dotnet user-secrets set "Authentication:Facebook:AppId" "<app-id>"
dotnet user-secrets set "Authentication:Facebook:AppSecret" "<app-secret>"
The : separator doesn't work with environment variable hierarchical keys on all platforms. For example, the : separator is not supported by Bash. The double underscore, __, is:
:.Add the Authentication service to the Startup.ConfigureServices:
services.AddAuthentication().AddFacebook(facebookOptions =>
{
    facebookOptions.AppId = Configuration["Authentication:Facebook:AppId"];
    facebookOptions.AppSecret = Configuration["Authentication:Facebook:AppSecret"];
});
Add the Authentication service to the Program:
var builder = WebApplication.CreateBuilder(args);
var services = builder.Services;
var configuration = builder.Configuration;

services.AddAuthentication().AddFacebook(facebookOptions =>
    {
        facebookOptions.AppId = configuration["Authentication:Facebook:AppId"];
        facebookOptions.AppSecret = configuration["Authentication:Facebook:AppSecret"];
    });
The AddAuthentication(IServiceCollection, String) overload sets the DefaultScheme property. The AddAuthentication(IServiceCollection, Action<AuthenticationOptions>) overload allows configuring authentication options, which can be used to set up default authentication schemes for different purposes. Subsequent calls to AddAuthentication override previously configured AuthenticationOptions properties.
AuthenticationBuilder extension methods that register an authentication handler may only be called once per authentication scheme. Overloads exist that allow configuring the scheme properties, scheme name, and display name.
You are now logged in using your Facebook credentials:
AccessDeniedPath can provide a redirect path to the user agent when the user doesn't approve the requested authorization demand.
The following code sets the AccessDeniedPath to "/AccessDeniedPathInfo":
services.AddAuthentication().AddFacebook(options =>
{
    options.AppId = Configuration["Authentication:Facebook:AppId"];
    options.AppSecret = Configuration["Authentication:Facebook:AppSecret"];
    options.AccessDeniedPath = "/AccessDeniedPathInfo";
});
We recommend the AccessDeniedPath page contains the following information:
AccessDeniedPath page.If the app is deployed behind a proxy server or load balancer, some of the original request information might be forwarded to the app in request headers. This information usually includes the secure request scheme (https), host, and client IP address. Apps don't automatically read these request headers to discover and use the original request information.
The scheme is used in link generation that affects the authentication flow with external providers. Losing the secure scheme (https) results in the app generating incorrect insecure redirect URLs.
Use Forwarded Headers Middleware to make the original request information available to the app for request processing.
For more information, see Configure ASP.NET Core to work with proxy servers and load balancers.
When the app requires multiple providers, chain the provider extension methods behind AddAuthentication:
services.AddAuthentication()
    .AddMicrosoftAccount(microsoftOptions => { ... })
    .AddGoogle(googleOptions => { ... })
    .AddTwitter(twitterOptions => { ... })
    .AddFacebook(facebookOptions => { ... });
For more information on configuration options supported by Facebook authentication, see the FacebookOptions API reference. Configuration options can be used to:
services.AddIdentity in ConfigureServices, attempting to authenticate will result in ArgumentException: The 'SignInScheme' option must be provided. The project template used in this tutorial ensures that this is done.This article showed how you can authenticate with Facebook. You can follow a similar approach to authenticate with other providers listed on the previous page.
Once you publish your web site to Azure web app, you should reset the AppSecret in the Facebook developer portal.
Set the Authentication:Facebook:AppId and Authentication:Facebook:AppSecret as application settings in the Azure portal. The configuration system is set up to read keys from environment variables.
ASP.NET Core feedback
ASP.NET Core is an open source project. Select a link to provide feedback:
Events
Power BI DataViz World Championships
Feb 14, 4 PM - Mar 31, 4 PM
With 4 chances to enter, you could win a conference package and make it to the LIVE Grand Finale in Las Vegas
Learn more