Note
Access to this page requires authorization. You can try signing in or changing directories.
Access to this page requires authorization. You can try changing directories.
The Backbone SPA Template was written by Kazi Manzur Rashid
The Backbone.js SPA template is designed to get you started quickly building interactive client-side web apps using Backbone.js.
The template provides an initial skeleton for developing a Backbone.js application in ASP.NET MVC. Out of the box it provides basic user login functionality, including user sign-up, sign-in, password reset, and user confirmation with basic email templates.
Requirements:
Create a Backbone Template Project
Download and install the template by clicking the Download button above. The template is packaged as a Visual Studio Extension (VSIX) file. You might need to restart Visual Studio.
In the Templates pane, select Installed Templates and expand the Visual C# node. Under Visual C#, select Web. In the list of project templates, select ASP.NET MVC 4 Web Application. Name the project and click OK.
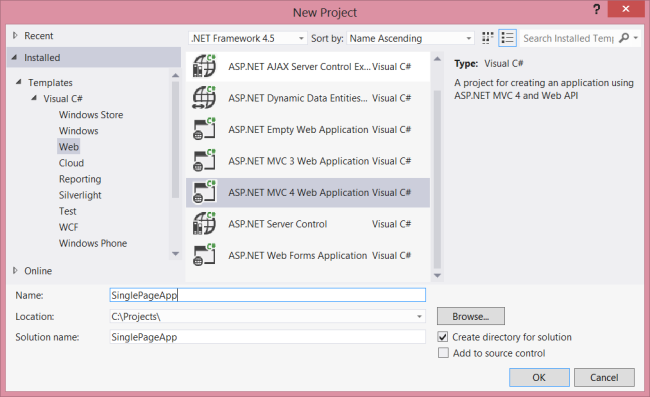
In the New Project wizard, select Backbone.js SPA Project.

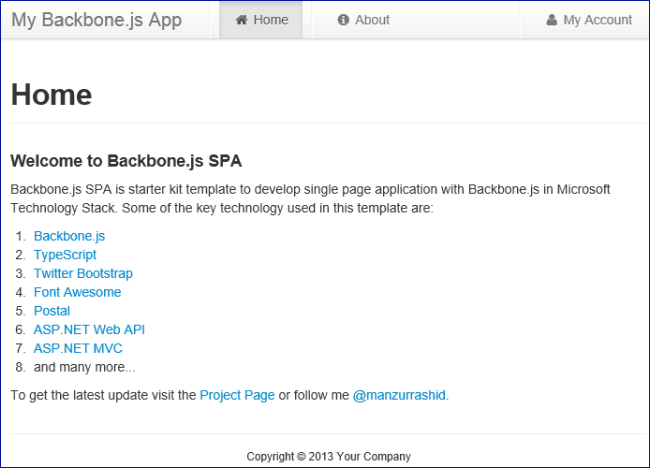
Press Ctrl-F5 to build and run the application without debugging, or press F5 to run with debugging.
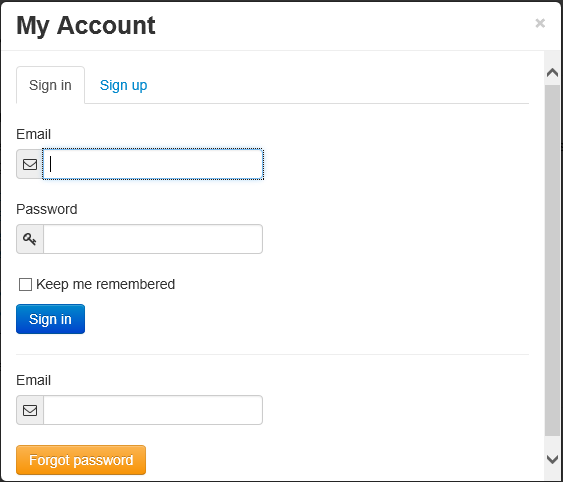
Clicking "My Account" brings up the login page:
Walkthrough: Client Code
Let's starts with the client side. The client application scripts are located in the ~/Scripts/application folder. The application is written in TypeScript (.ts files) which are compiled into JavaScript (.js files).
Application
Application is defined in application.ts. This object initializes the application and acts as the root namespace. It maintains configuration and state information that is shared across the application, such as whether the user is signed in.
The application.start method creates the modal views and attaches event handlers for application-level events, such as user sign-in. Next, it creates the default router and checks whether any client-side URL is specified. If not, it redirects to the default url (#!/).
Events
Events are always important when developing loosely coupled components. Applications often perform multiple operations in response to a user action. Backbone provides built-in events with components such as Model, Collection, and View. Instead of creating inter-dependencies among these components, the template uses a "pub/sub" model: The events object, defined in events.ts, acts as an event hub for publishing and subscribing to application events. The events object is a singleton. The following code shows how to subscribe to an event and then trigger the event:
events.on('myEvent', (e: MyEventArg) => {
    // Do your work
});

// Later in the code
events.trigger('myEvent', { arg: 'myValue' });
Router
In Backbone.js, a router provides methods for routing client-side pages and connecting them to actions and events. The template defines a single router, in router.ts. The router creates the activable views and maintains the state when switching views. (Activable views are described in the next section.) Initially, the project has two dummy views, Home and About. It also has a NotFound view, which is displayed if the route is not known.
Views
The views are defined in ~/Scripts/application/views. There are two kinds of views, activable views and modal dialog views. Activable views are invoked by the router. When an activable view is shown, all other activable views become inactive. To create an activable view, extend the view with the Activable object:
export class MyView extends Backbone.View {
    // Other implementation details
}

// Extending with Activable
_.extend(MyView.prototype, Activable);
Extending with Activable adds two new methods to the view, activate and deactivate. The router calls these methods to activate and deactive the view.
Modal views are implemented as Twitter Bootstrap modal dialogs. The Membership and Profile views are modal views. Model views can be invoked by any application events. For example, in the Navigation view, clicking the "My Account" link shows either the Membership view or the Profile view, depending on whether the user is logged in. The Navigation attaches click event handlers to any child elements that have the data-command attribute. Here is the HTML markup:
<li>
  <a href="#" data-command="myAccount">
    <i class="icon-user"></i> My Account
  </a>
</li>
Here is the code in navigation.ts to hook up the events:
export class Navigation extends Backbone.View {
    // Other implementation details
    handleCommand(e: JQueryEventObject) {
        var command = $(e.currentTarget).attr('data-command');
        if (command) {
            events.trigger(command);
        }
    }
}
Navigation.prototype.events = () => {
    return {
        'click [data-command]': 'handleCommand'
    };
};
Models
The models are defined in ~/Scripts/application/models. The models all have three basic things: default attributes, validation rules, and a server-side end point. Here is a typical example:
export class Session extends Backbone.Model {
    urlRoot() {
        return serverUrlPrefix + '/sessions'
    }

    defaults(): ISessionAttributes {
        return {
          email: null,
          password: null,
          rememberMe: false
        }
    }

    validate(attributes: ISessionAttributes): IValidationResult {
        var errors = {};

        if (!attributes.email) {
            Validation.addError(errors, 'email', 'Email is required.');
        }

        if (!attributes.password) {
            Validation.addError(errors, 'password', 'Password is required.');
        }

        if (!_.isEmpty(errors)) {
            return { errors: errors };
        }
    }
}
Plug-ins
The ~/Scripts/application/lib folder contains a few handy jQuery plug-ins. The form.ts file defines a plug-in for working with form data. Often you need to serialize or deserialize form data and show any model validation errors. The form.ts plug-in has methods such as serializeFields, deserializeFields, and showFieldErrors. The following example shows how to serialize a form to a model.
// Here $el is the form element
// Hide existing errors if there is any
this.$el.hideSummaryError().hideFieldErrors();

// Subscribe invalid event which
// is fired when validation fails
model.on('invalid', () =>
    this.$el.showFieldErrors{(
        errors: model.validationError.errors;
    )}
);

model.save(this.$el.serializeFields(), {
    success: () => { }, // lets do something good
    error: (m, jqxhr: JQueryXHR) => {
        if (jqxhr.status === 400) { // bad request
            // Handle server side field errors
            var response = <any>$.parseJSON(jqxhr.responseText);
            if (response && _.has(response, 'ModelState')) {
                return this.$el.showFieldErrors({
                    errors: response.ModelState
                });
            }
        }

        // All other server errors
        this.$el.showSummaryError({
            message: 'An unexpected error has occurred while performing ' +
                'operation.'
        });
    }
});
The flashbar.ts plug-in gives various kinds of feedback messages to the user. The methods are $.showSuccessbar, $.showErrorbar and $.showInfobar. Behind the scenes, it uses Twitter Bootstrap alerts to show nicely animated messages.
The confirm.ts plug-in replaces the browser's confirm dialog, although the API is somewhat different:
$.confirm({
    prompt: 'Are you sure you want to do it?',
    ok: => { //Do something useful },
    cancel: => { // Do something else }
)};
Walkthrough: Server Code
Now let's look at the server side.
Controllers
In a single page application, the server plays only a small role in the user interface. Typically, the server renders the initial page and then sends and receives JSON data.
The template has two MVC controllers: HomeController renders the initial page, and SupportsController is used to confirm new user accounts and reset passwords. All other controllers in the template are ASP.NET Web API controllers, which send and receive JSON data. By default, the controllers use the new WebSecurity class to perform user-related tasks. However, they also have optional constructors that let you pass in delegates for these tasks. This makes testing easier, and lets you replace WebSecurity with something else, by using an IoC Container. Here is an example:
public class SessionsController : ApiController
{
    private readonly Func<string, string, bool, bool> signIn;
    private readonly Action signOut;

    public SessionsController() : this(WebSecurity.Login, WebSecurity.Logout)
    {
    }

    public SessionsController(
        Func<string, string, bool, bool> signIn,
        Action signOut)
    {
      this.signIn = signIn;
      this.signOut = signOut;
    }

    // Rest of the code
}
Views
The views are designed to be modular: Each section of a page has its own dedicated view. In a single page application, it is common to include views that do not have any corresponding controller. You can include a view by calling @Html.Partial('myView'), but this gets tedious. To make this easier, the template defines a helper method, IncludeClientViews, that renders all of the views in a specified folder:
@Html.IncludeClientViews('yourViewFolder')
If the folder name is not specified, the default folder name is "ClientViews". If your client view also uses partial views, name the partial view with an underscore character (for example, _SignUp). The IncludeClientViews method excludes any views whose name starts with an underscore. To include a partial view in the client view, call Html.ClientView('SignUp') instead of Html.Partial('_SignUp').
Sending Email
To send email, the template uses Postal. However, Postal is abstracted from the rest of the code with the IMailer interface, so you can easily replace it with another implementation. The email templates are located in the Views/Emails folder. The sender's email address is specified in the web.config file, in the sender.email key of the appSettings section. Also, when debug="true" in web.config, the application does not require user email confirmation, to speed up development.
GitHub
You can also find the Backbone.js SPA template on GitHub.