Note
Access to this page requires authorization. You can try signing in or changing directories.
Access to this page requires authorization. You can try changing directories.
Download Web Camps Training Kit
ASP.NET is a framework for building Web sites, apps and services using specialized technologies such as MVC, Web API and others. With the expansion ASP.NET has seen since its creation and the expressed need to have these technologies integrated, there have been recent efforts in working towards One ASP.NET.
Visual Studio 2013 introduces a new unified project system which lets you build an application and use all the ASP.NET technologies in one project. This feature eliminates the need to pick one technology at the start of a project and stick with it, and instead encourages the use of multiple ASP.NET frameworks within one project.
All sample code and snippets are included in the Web Camps Training Kit, available at https://aka.ms/webcamps-training-kit.
Overview
Objectives
In this hands-on lab, you will learn how to:
- Create a Web site based on the One ASP.NET project type
- Use different ASP.NET frameworks like MVC and Web API in the same project
- Identify the main components of an ASP.NET application
- Take advantage of the ASP.NET Scaffolding framework to automatically create Controllers and Views to perform CRUD operations based on your model classes
- Expose the same set of information in machine- and human-readable formats using the right tool for each job
Prerequisites
The following is required to complete this hands-on lab:
Setup
In order to run the exercises in this hands-on lab, you will need to set up your environment first.
- Open Windows Explorer and browse to the lab's Source folder.
- Right-click on Setup.cmd and select Run as administrator to launch the setup process that will configure your environment and install the Visual Studio code snippets for this lab.
- If the User Account Control dialog box is shown, confirm the action to proceed.
Note
Make sure you have checked all the dependencies for this lab before running the setup.
Using the Code Snippets
Throughout the lab document, you will be instructed to insert code blocks. For your convenience, most of this code is provided as Visual Studio Code Snippets, which you can access from within Visual Studio 2013 to avoid having to add it manually.
Note
Each exercise is accompanied by a starting solution located in the Begin folder of the exercise that allows you to follow each exercise independently of the others. Please be aware that the code snippets that are added during an exercise are missing from these starting solutions and may not work until you have completed the exercise. Inside the source code for an exercise, you will also find an End folder containing a Visual Studio solution with the code that results from completing the steps in the corresponding exercise. You can use these solutions as guidance if you need additional help as you work through this hands-on lab.
Exercises
This hands-on lab includes the following exercises:
- Creating a New Web Forms Project
- Creating an MVC Controller Using Scaffolding
- Creating a Web API Controller Using Scaffolding
Estimated time to complete this lab: 60 minutes
Note
When you first start Visual Studio, you must select one of the predefined settings collections. Each predefined collection is designed to match a particular development style and determines window layouts, editor behavior, IntelliSense code snippets, and dialog box options. The procedures in this lab describe the actions necessary to accomplish a given task in Visual Studio when using the General Development Settings collection. If you choose a different settings collection for your development environment, there may be differences in the steps that you should take into account.
Exercise 1: Creating a New Web Forms Project
In this exercise you will create a new Web Forms site in Visual Studio 2013 using the One ASP.NET unified project experience, which will allow you to easily integrate Web Forms, MVC and Web API components in the same application. You will then explore the generated solution and identify its parts, and finally you will see the Web site in action.
Task 1 – Creating a New Site Using the One ASP.NET Experience
In this task you will start creating a new Web site in Visual Studio based on the One ASP.NET project type. One ASP.NET unifies all ASP.NET technologies and gives you the option to mix and match them as desired. You will then recognize the different components of Web Forms, MVC and Web API that live side by side within your application.
Open Visual Studio Express 2013 for Web and select File | New Project... to start a new solution.
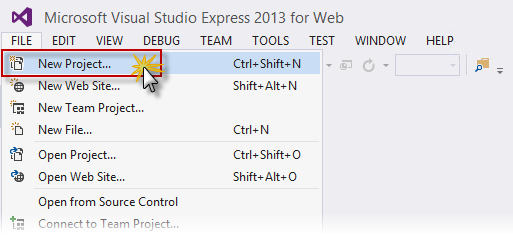
Creating a New Project
In the New Project dialog box, select ASP.NET Web Application under the Visual C# | Web tab, and make sure .NET Framework 4.5 is selected. Name the project MyHybridSite, choose a Location and click OK.
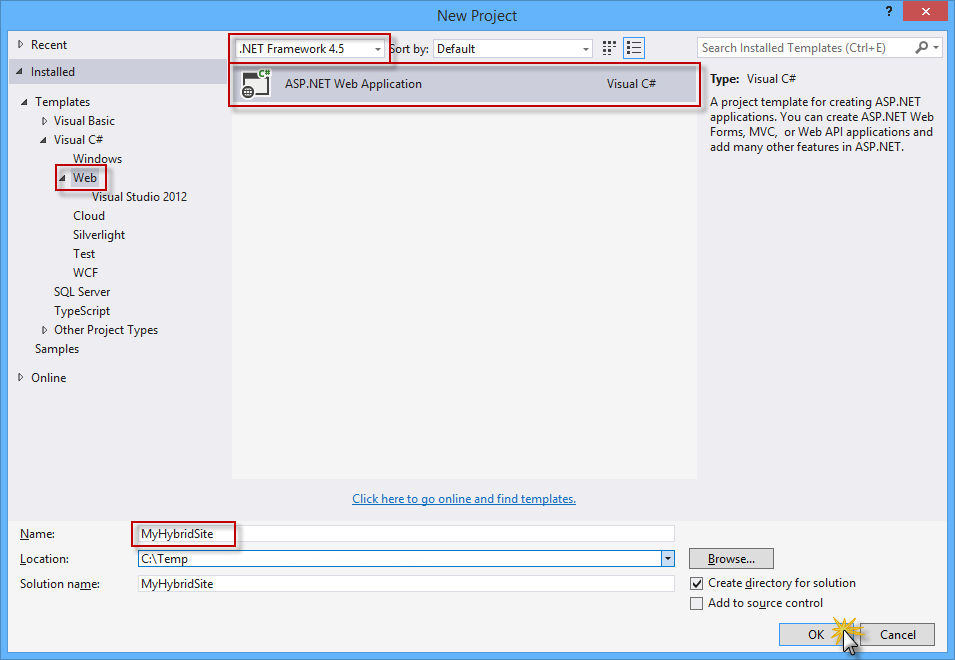
Creating a new ASP.NET Web Application project
In the New ASP.NET Project dialog box, select the Web Forms template and select the MVC and Web API options. Also, make sure that the Authentication option is set to Individual User Accounts. Click OK to continue.
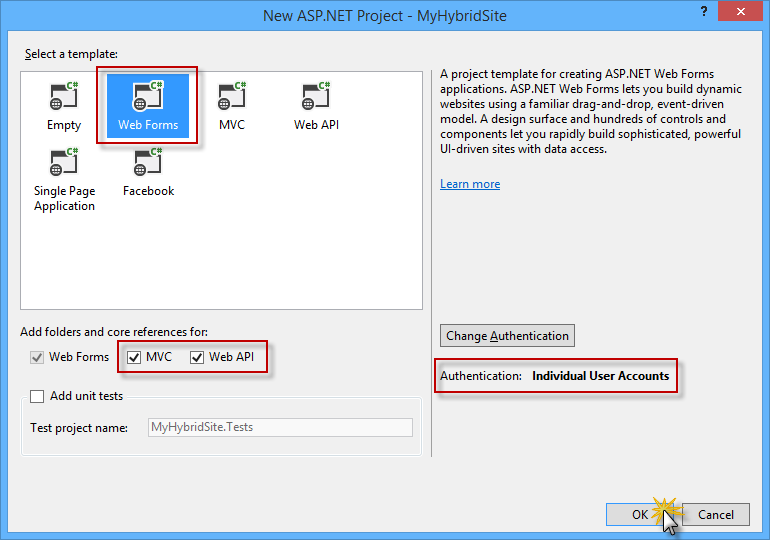
Creating a new project with the Web Forms template, including Web API and MVC components
You can now explore the structure of the generated solution.
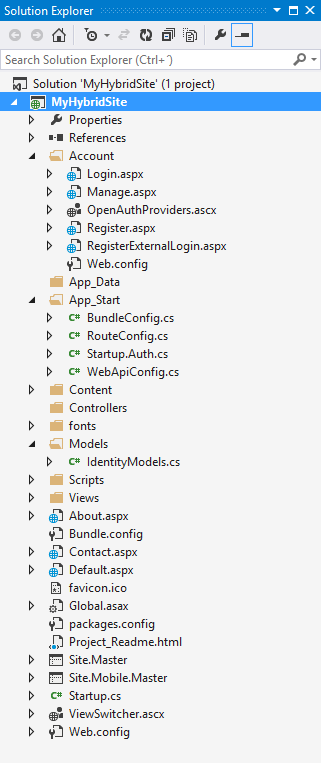
Exploring the generated solution
- Account: This folder contains the Web Form pages to register, log in to and manage the application's user accounts. This folder is added when the Individual User Accounts authentication option is selected during the configuration of the Web Forms project template.
- Models: This folder will contain the classes that represent your application data.
- Controllers and Views: These folders are required for the ASP.NET MVC and ASP.NET Web API components. You will explore the MVC and Web API technologies in the next exercises.
- The Default.aspx, Contact.aspx and About.aspx files are pre-defined Web Form pages that you can use as starting points to build the pages specific to your application. The programming logic of those files resides in a separate file referred to as the "code-behind" file, which has an ".aspx.vb" or ".aspx.cs" extension (depending on the language used). The code-behind logic runs on the server and dynamically produces the HTML output for your page.
- The Site.Master and Site.Mobile.Master pages define the look and feel and the standard behavior of all the pages in the application.
Double-click the Default.aspx file to explore the content of the page.
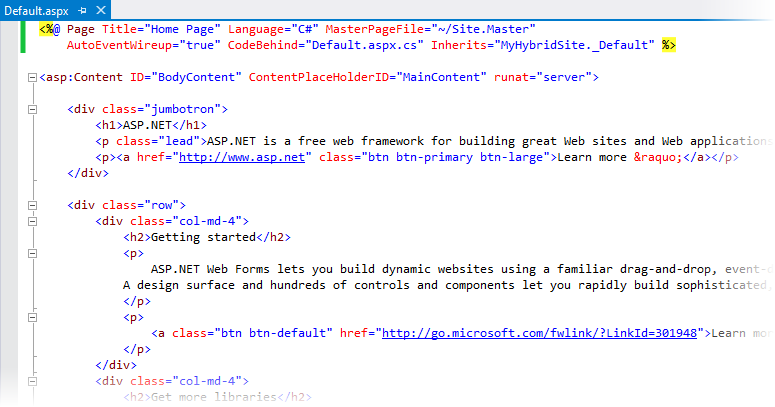
Exploring the Default.aspx page
Note
The Page directive at the top of the file defines the attributes of the Web Forms page. For example, the MasterPageFile attribute specifies the path to the master page -in this case, the Site.Master page- and the Inherits attribute defines the code-behind class for the page to inherit. This class is located in the file determined by the CodeBehind attribute.
The asp:Content control holds the actual content of the page (text, markup and controls) and is mapped to a asp:ContentPlaceHolder control on the master page. In this case, the page content will be rendered inside the MainContent control defined in the Site.Master page.
Expand the App_Start folder and notice the WebApiConfig.cs file. Visual Studio included that file in the generated solution because you included Web API when configuring your project with the One ASP.NET template.
Open the WebApiConfig.cs file. In the WebApiConfig class you will find the configuration associated with Web API, which maps HTTP routes to Web API controllers.
public static void Register(HttpConfiguration config)
{
    // Web API configuration and services

    // Web API routes
    config.MapHttpAttributeRoutes();

    config.Routes.MapHttpRoute(
            name: "DefaultApi",
            routeTemplate: "api/{controller}/{id}",
            defaults: new { id = RouteParameter.Optional }
        );
}
Open the RouteConfig.cs file. Inside the RegisterRoutes method you will find the configuration associated with MVC, which maps HTTP routes to MVC controllers.
public static void RegisterRoutes(RouteCollection routes)
{
    var settings = new FriendlyUrlSettings();
    settings.AutoRedirectMode = RedirectMode.Permanent;
    routes.EnableFriendlyUrls(settings);

    routes.IgnoreRoute("{resource}.axd/{*pathInfo}");

    routes.MapRoute(
            name: "Default",
            url: "{controller}/{action}/{id}",
            defaults: new { action = "Index", id = UrlParameter.Optional }
        );
}
Task 2 – Running the Solution
In this task you will run the generated solution, explore the app and some of its features, like URL rewriting and built-in authentication.
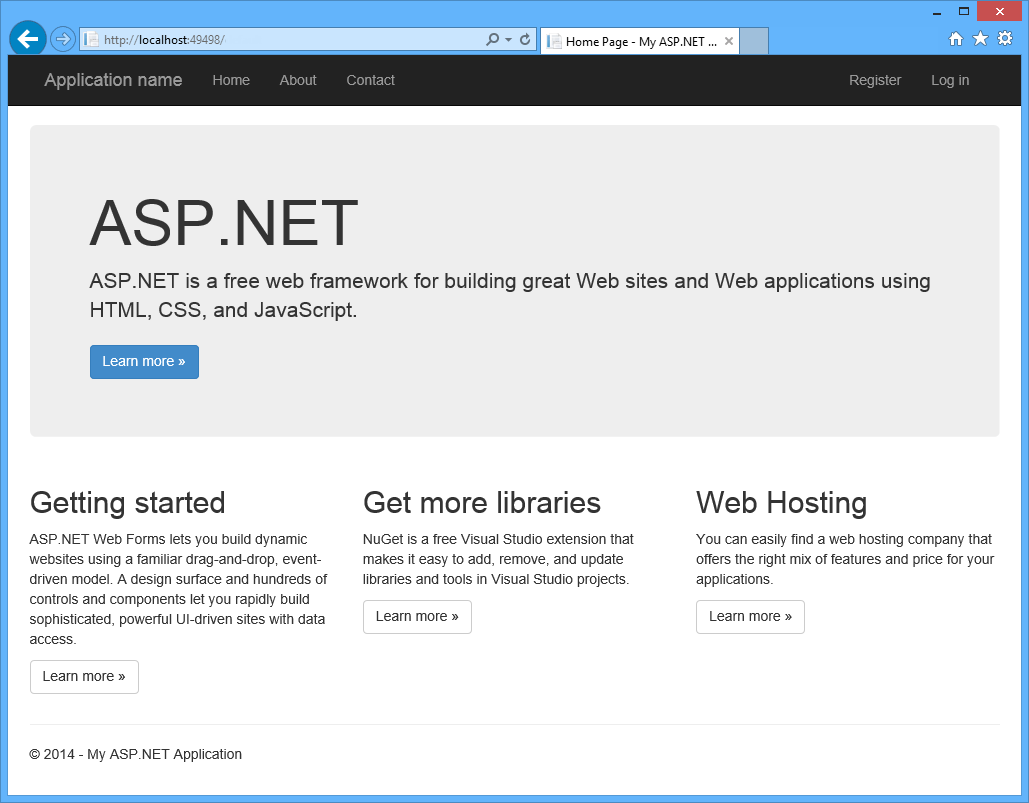
To run the solution, press F5 or click the Start button located on the toolbar. The application home page should open in the browser.
Verify that the Web Forms pages are being invoked. To do this, append /contact.aspx to the URL in the address bar and press Enter.
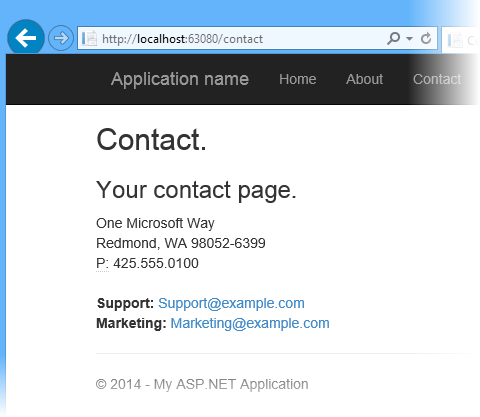
Friendly URLs
Note
As you can see, the URL changes to /contact. Starting from ASP.NET 4, URL routing capabilities were added to Web Forms, so you can write URLs like
http://www.mysite.com/products/softwareinstead ofhttp://www.mysite.com/products.aspx?category=software. For more information refer to URL Routing.You will now explore the authentication flow integrated into the application. To do this, click Register in the upper-right corner of the page.

Registering a new user
In the Register page, enter a User name and Password, and then click Register.
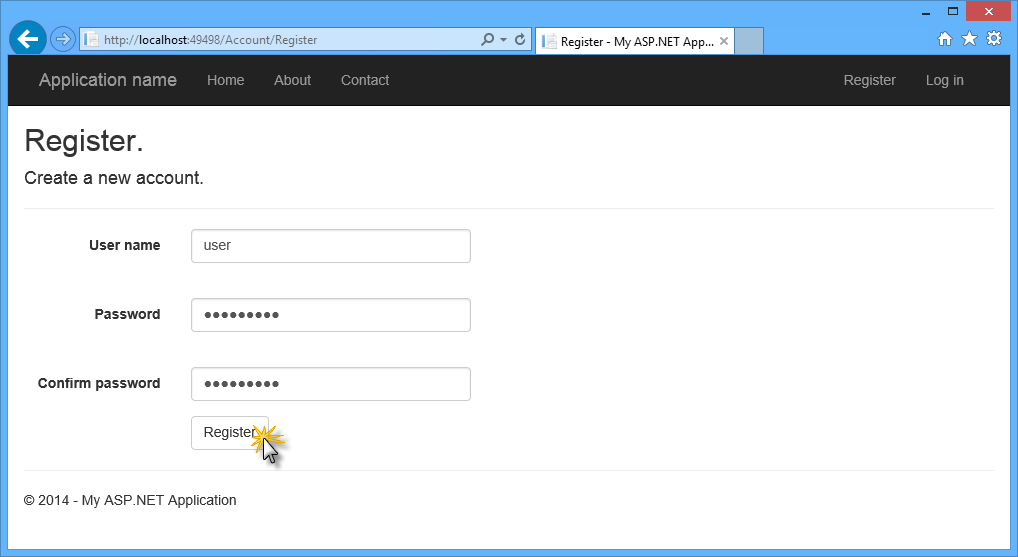
Register page
The application registers the new account, and the user is authenticated.
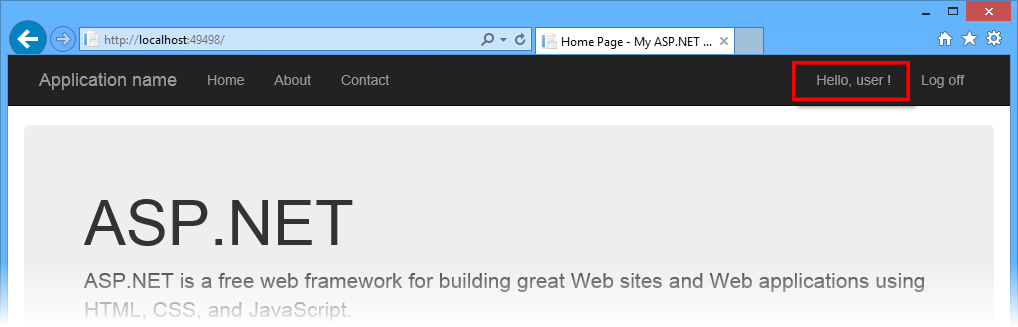
User authenticated
Go back to Visual Studio and press SHIFT + F5 to stop debugging.
Exercise 2: Creating an MVC Controller Using Scaffolding
In this exercise you will take advantage of the ASP.NET Scaffolding framework provided by Visual Studio to create an ASP.NET MVC 5 controller with actions and Razor views to perform CRUD operations, without writing a single line of code. The scaffolding process will use Entity Framework Code First to generate the data context and the database schema in the SQL database.
About Entity Framework Code First
Entity Framework (EF) is an object-relational mapper (ORM) that enables you to create data access applications by programming with a conceptual application model instead of programming directly using a relational storage schema.
The Entity Framework Code First modeling workflow allows you to use your own domain classes to represent the model that EF relies on when performing querying, change-tracking and updating functions. Using the Code First development workflow, you do not need to begin your application by creating a database or specifying a schema. Instead, you can write standard .NET classes that define the most appropriate domain model objects for your application, and Entity Framework will create the database for you.
Note
You can learn more about Entity Framework here.
Task 1 – Creating a New Model
You will now define a Person class, which will be the model used by the scaffolding process to create the MVC controller and the views. You will start by creating a Person model class, and the CRUD operations in the controller will be automatically created using scaffolding features.
Open Visual Studio Express 2013 for Web and the MyHybridSite.sln solution located in the Source/Ex2-MvcScaffolding/Begin folder. Alternatively, you can continue with the solution that you obtained in the previous exercise.
In Solution Explorer, right-click the Models folder of the MyHybridSite project and select Add | Class....
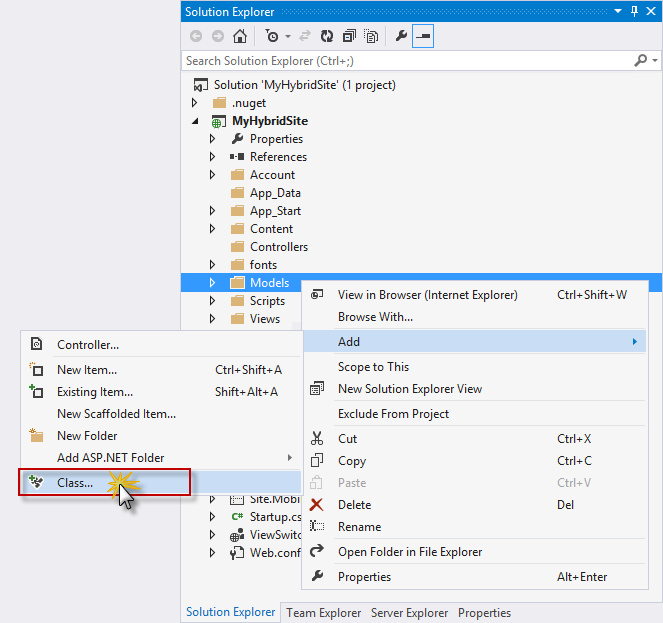
Adding the Person model class
In the Add New Item dialog box, name the file Person.cs and click Add.
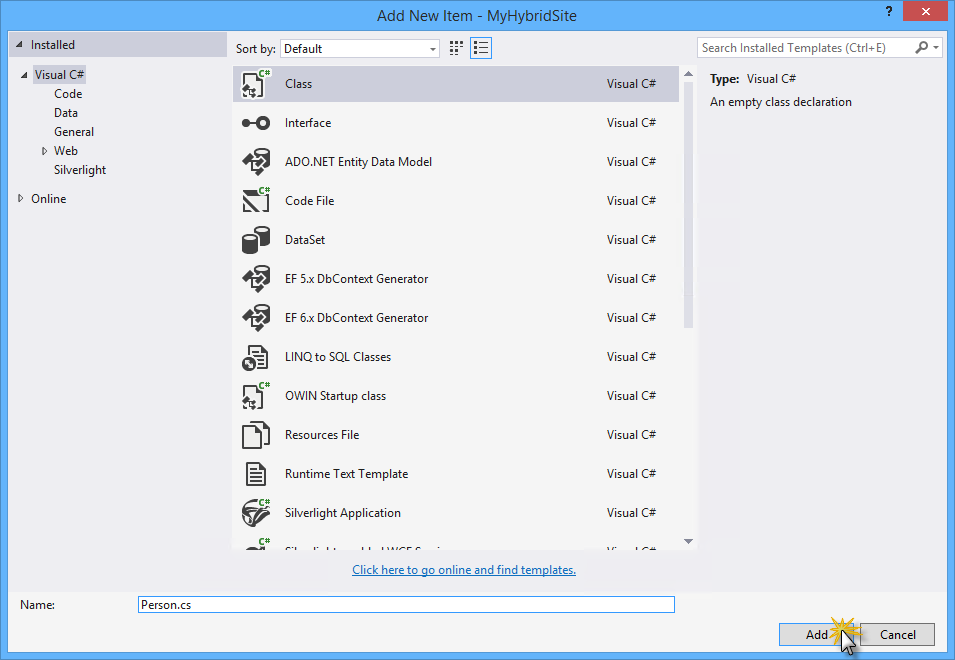
Creating the Person model class
Replace the content of the Person.cs file with the following code. Press CTRL + S to save the changes.
(Code Snippet - BringingTogetherOneAspNet - Ex2 - PersonClass)
namespace MyHybridSite.Models
{
    public class Person
    {
        public int Id { get; set; }

        public string Name { get; set; }

        public int Age { get; set; }
    }
}
In Solution Explorer, right-click the MyHybridSite project and select Build, or press CTRL + SHIFT + B to build the project.
Task 2 – Creating an MVC Controller
Now that the Person model is created, you will use ASP.NET MVC scaffolding with Entity Framework to create the CRUD controller actions and views for Person.
In Solution Explorer, right-click the Controllers folder of the MyHybridSite project and select Add | New Scaffolded Item....
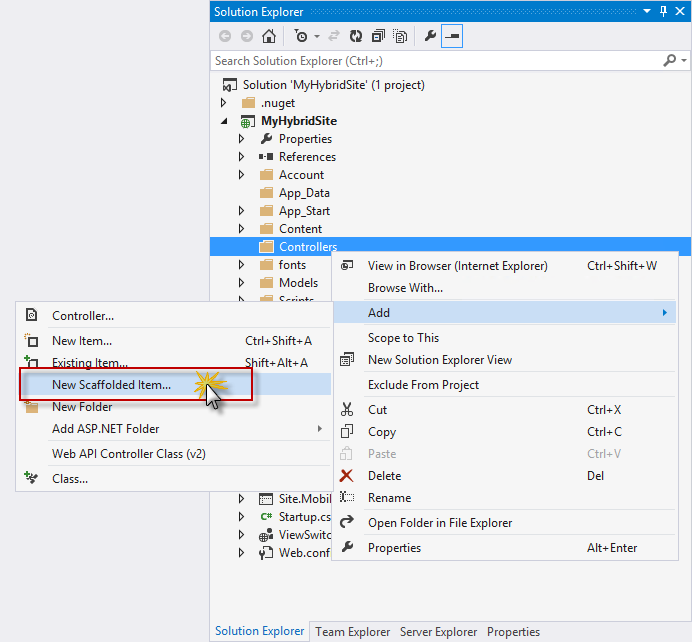
Creating a new Scaffolded Controller
In the Add Scaffold dialog box, select MVC 5 Controller with views, using Entity Framework and then click Add.
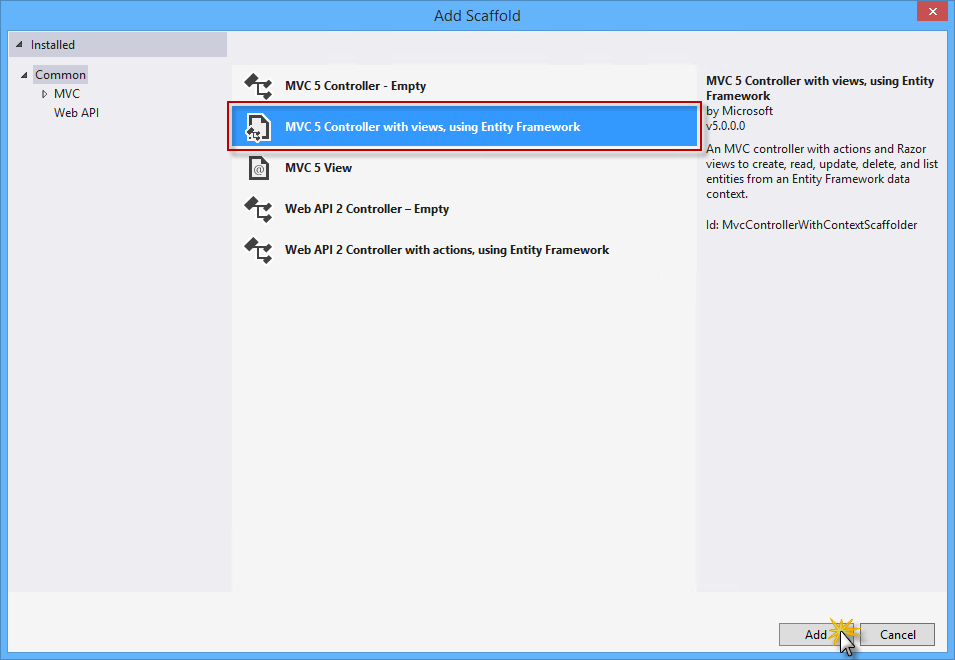
Selecting MVC 5 Controller with views and Entity Framework
Set MvcPersonController as the Controller name, select the Use async controller actions option and select Person (MyHybridSite.Models) as the Model class.
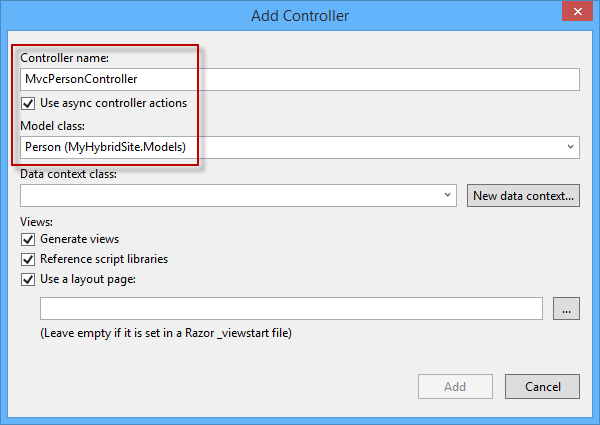
Adding an MVC controller with scaffolding
Under Data context class, click New data context....
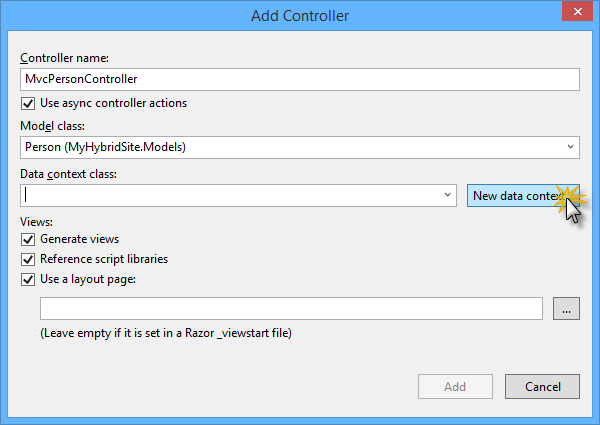
Creating a new data context
In the New Data Context dialog box, name the new data context PersonContext and click Add.
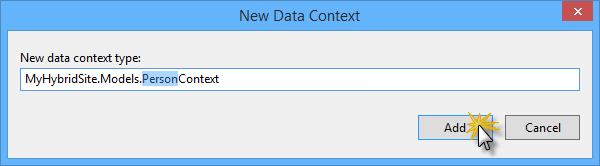
Creating the new PersonContext type
Click Add to create the new controller for Person with scaffolding. Visual Studio will then generate the controller actions, the Person data context and the Razor views.
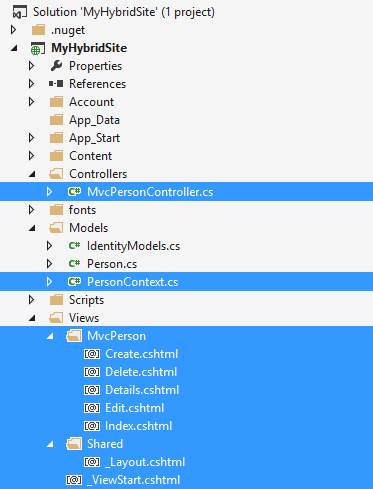
After creating the MVC controller with scaffolding
Open the MvcPersonController.cs file in the Controllers folder. Notice that the CRUD action methods have been generated automatically.
...

// POST: /MvcPerson/Create
// To protect from overposting attacks, please enable the specific properties you want to bind to, for
// more details see https://go.microsoft.com/fwlink/?LinkId=317598.
[HttpPost]
[ValidateAntiForgeryToken]
public async Task<ActionResult> Create([Bind(Include="Id,Name,Age")] Person person)
{
     if (ModelState.IsValid)
     {
          db.People.Add(person);
          await db.SaveChangesAsync();
          return RedirectToAction("Index");
     }

     return View(person);
}

// GET: /MvcPerson/Edit/5
public async Task<ActionResult> Edit(int? id)
{
     if (id == null)
     {
          return new HttpStatusCodeResult(HttpStatusCode.BadRequest);
     }
     Person person = await db.People.FindAsync(id);
     if (person == null)
     {
          return HttpNotFound();
     }
     return View(person);
}

...
Note
By selecting the Use async controller actions check box from the scaffolding options in the previous steps, Visual Studio generates asynchronous action methods for all actions that involve access to the Person data context. It is recommended that you use asynchronous action methods for long-running, non-CPU bound requests to avoid blocking the Web server from performing work while the request is being processed.
Task 3 – Running the Solution
In this task, you will run the solution again to verify that the views for Person are working as expected. You will add a new person to verify that it is successfully saved to the database.
Press F5 to run the solution.
Navigate to /MvcPerson. The scaffolded view that shows the list of people should appear.
Click Create New to add a new person.
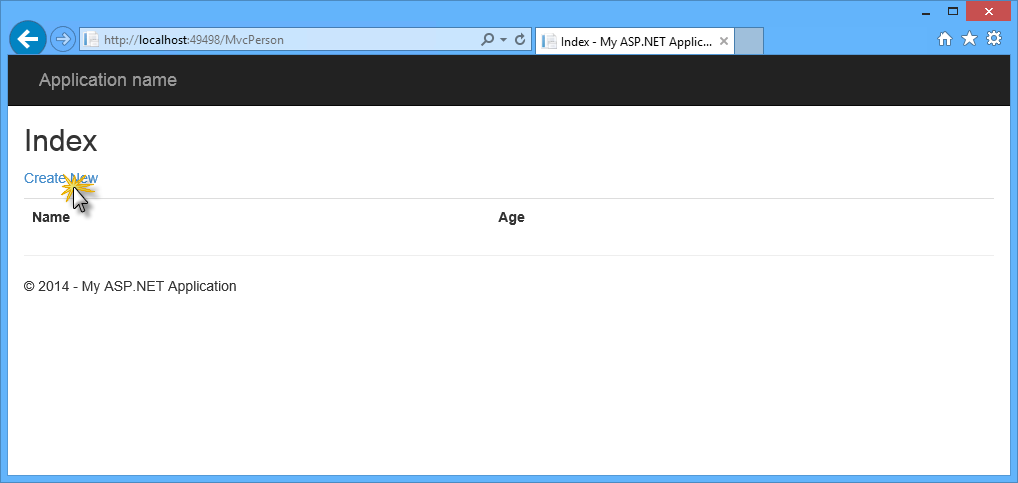
Navigating to the scaffolded MVC views
In the Create view, provide a Name and an Age for the person, and click Create.
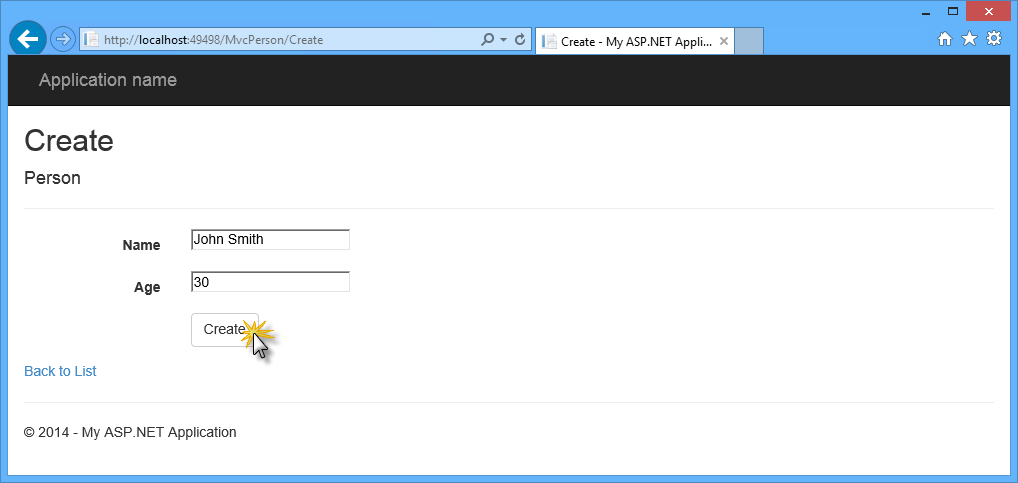
Adding a new person
The new person is added to the list. In the element list, click Details to display the person's details view. Then, in the Details view, click Back to List to go back to the list view.
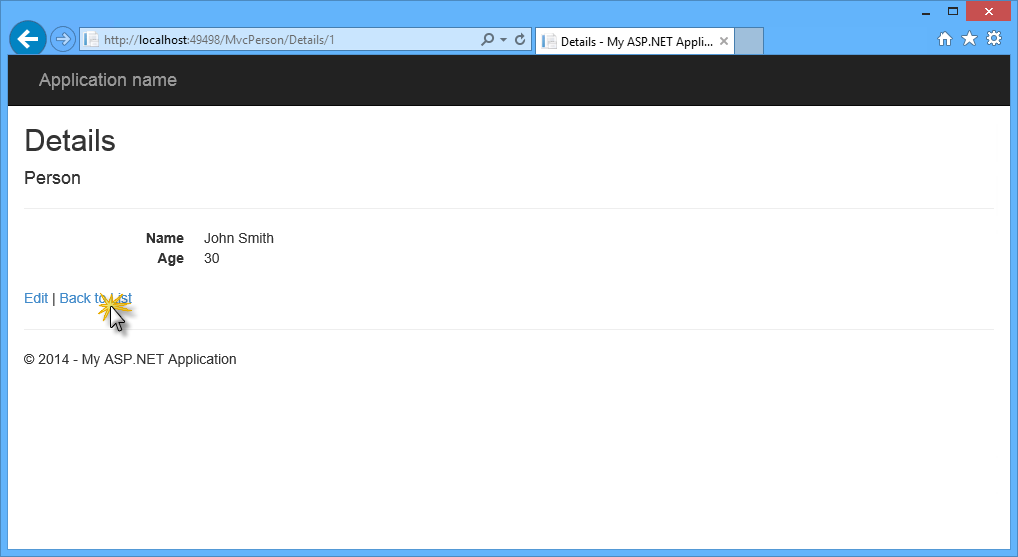
Person's details view
Click the Delete link to delete the person. In the Delete view, click Delete to confirm the operation.
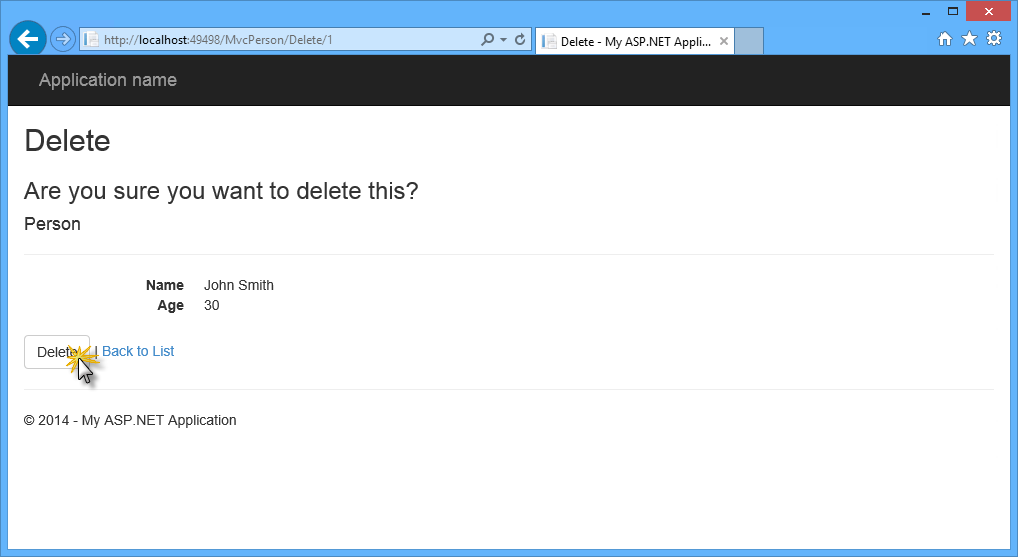
Deleting a person
Go back to Visual Studio and press SHIFT + F5 to stop debugging.
Exercise 3: Creating a Web API Controller Using Scaffolding
The Web API framework is part of the ASP.NET Stack and designed to make implementing HTTP services easier, generally sending and receiving JSON- or XML-formatted data through a RESTful API.
In this exercise, you will use ASP.NET Scaffolding again to generate a Web API controller. You will use the same Person and PersonContext classes from the previous exercise to provide the same person data in JSON format. You will see how you can expose the same resources in different ways within the same ASP.NET application.
Task 1 – Creating a Web API Controller
In this task you will create a new Web API Controller that will expose the person data in a machine-consumable format like JSON.
If not already opened, open Visual Studio Express 2013 for Web and open the MyHybridSite.sln solution located in the Source/Ex3-WebAPI/Begin folder. Alternatively, you can continue with the solution that you obtained in the previous exercise.
Note
If you start with the Begin solution from Exercise 3, press CTRL + SHIFT + B to build the solution.
In Solution Explorer, right-click the Controllers folder of the MyHybridSite project and select Add | New Scaffolded Item....

Creating a new scaffolded Controller
In the Add Scaffold dialog box, select Web API in the left pane, then Web API 2 Controller with actions, using Entity Framework in the middle pane and then click Add.

Selecting Web API 2 Controller with actions and Entity Framework
Set ApiPersonController as the Controller name, select the Use async controller actions option and select Person (MyHybridSite.Models) and PersonContext (MyHybridSite.Models) as the Model and Data context classes respectively. Then click Add.

Adding a Web API controller with scaffolding
Visual Studio will then generate the ApiPersonController class with the four CRUD actions to work with your data.

After creating the Web API controller with scaffolding
Open the ApiPersonController.cs file and inspect the GetPeople action method. This method queries the db field of PersonContext type in order to get the people data.
// GET api/ApiPerson
public IQueryable<Person> GetPeople()
{
    return db.People;
}
Now notice the comment above the method definition. It provides the URI that exposes this action which you will use in the next task.
// GET api/ApiPerson
public IQueryable<Person> GetPeople()
{
    return db.People;
}
Note
By default, Web API is configured to catch the queries to the /api path to avoid collisions with MVC controllers. If you need to change this setting, refer to Routing in ASP.NET Web API.
Task 2 – Running the Solution
In this task you will use the Internet Explorer F12 developer tools to inspect the full response from the Web API controller. You will see how you can capture network traffic to get more insight into your application data.
Note
Make sure that Internet Explorer is selected in the Start button located on the Visual Studio toolbar.

The F12 developer tools have a wide set of functionality that is not covered in this hands-on-lab. If you want to learn more about it, refer to Using the F12 developer tools.
Press F5 to run the solution.
Note
In order to follow this task correctly, your application needs to have data. If your database is empty, you can go back to Task 3 in Exercise 2 and follow the steps on how to create a new person using the MVC views.
In the browser, press F12 to open the Developer Tools panel. Press CTRL + 4 or click the Network icon, and then click the green arrow button to begin capturing network traffic.

Initiating Web API network capture
Append api/ApiPerson to the URL in the browser's address bar. You will now inspect the details of the response from the ApiPersonController.

Retrieving person data through Web API
Note
Once the download finishes, you will be prompted to make an action with the downloaded file. Leave the dialog box open in order to be able to watch the response content through the Developers Tool window.
Now you will inspect the body of the response. To do this, click the Details tab and then click Response body. You can check that the downloaded data is a list of objects with the properties Id, Name and Age that correspond to the Person class.

Viewing Web API Response Body
Task 3 – Adding Web API Help Pages
When you create a Web API, it is useful to create a help page so that other developers will know how to call your API. You could create and update the documentation pages manually, but it is better to auto-generate them to avoid having to do maintenance work. In this task you will use a Nuget package to automatically generate Web API help pages to the solution.
From the Tools menu in Visual Studio, select NuGet Package Manager, and then click Package Manager Console.
In the Package Manager Console window, execute the following command:
Install-Package Microsoft.AspNet.WebApi.HelpPageNote
The Microsoft.AspNet.WebApi.HelpPage package installs the necessary assemblies and adds MVC Views for the help pages under the Areas/HelpPage folder.

HelpPage Area
By default, the help pages have placeholder strings for documentation. You can use XML documentation comments to create the documentation. To enable this feature, open the HelpPageConfig.cs file located in the Areas/HelpPage/App_Start folder and uncomment the following line:
config.SetDocumentationProvider(new XmlDocumentationProvider(HttpContext.Current.Server.MapPath("~/App_Data/XmlDocument.xml")));In Solution Explorer, right-click the project MyHybridSite, select Properties and click the Build tab.

Build tab
Under Output, select XML documentation file. In the edit box, type App_Data/XmlDocument.xml.

Output section in Build tab
Press CTRL + S to save the changes.
Open the ApiPersonController.cs file from the Controllers folder.
Enter a new line between the GetPeople method signature and the // GET api/ApiPerson comment, and then type three forward slashes.
Note
Visual Studio automatically inserts the XML elements which define the method documentation.
Add a summary text and the return value for the GetPeople method. It should look like the following.
// GET api/ApiPerson
/// <summary>
/// Documentation for 'GET' method
/// </summary>
/// <returns>Returns a list of people in the requested format</returns>
public IQueryable<Person> GetPeople()
{
    return db.People;
}
Press F5 to run the solution.
Append /help to the URL in the address bar to browse to the help page.

ASP.NET Web API Help Page
Note
The main content of the page is a table of APIs, grouped by controller. The table entries are generated dynamically, using the IApiExplorer interface. If you add or update an API controller, the table will be automatically updated the next time you build the application.
The API column lists the HTTP method and relative URI. The Description column contains information that has been extracted from the method's documentation.
Note that the description you added above the method definition is displayed in the description column.

API method description
Click one of the API methods to navigate to a page with more detailed information, including sample response bodies.

Detailed information page
Summary
By completing this hands-on lab you have learned how to:
- Create a new Web application using the One ASP.NET Experience in Visual Studio 2013
- Integrate multiple ASP.NET technologies into one single project
- Generate MVC controllers and views from your model classes using ASP.NET Scaffolding
- Generate Web API controllers, which use features such as Async Programming and data access through Entity Framework
- Automatically generate Web API Help Pages for your controllers