Note
Access to this page requires authorization. You can try signing in or changing directories.
Access to this page requires authorization. You can try changing directories.
by Mike Wasson
This tutorial shows how to host ASP.NET Web API in an Azure Worker Role, using OWIN to self-host the Web API framework.
Open Web Interface for .NET (OWIN) defines an abstraction between .NET web servers and web applications. OWIN decouples the web application from the server, which makes OWIN ideal for self-hosting a web application in your own process, outside of IIS–for example, inside an Azure worker role.
In this tutorial, you'll use the Microsoft.Owin.Host.HttpListener package, which provides an HTTP server that be used to self-host OWIN applications.
Software versions used in the tutorial
- Visual Studio 2013
- Web API 2
- Azure SDK for .NET 2.3
Create a Microsoft Azure Project
Start Visual Studio with administrator privileges. Administrator privileges are needed to debug the application locally, using the Azure Compute Emulator.
On the File menu, click New, then click Project. From Installed Templates, under Visual C#, click Cloud and then click Windows Azure Cloud Service. Name the project "AzureApp" and click OK.

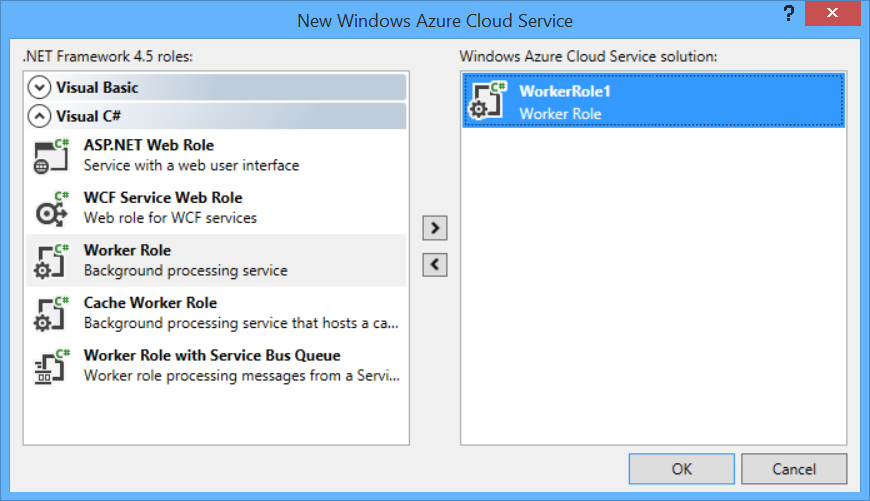
In the New Windows Azure Cloud Service dialog, double-click Worker Role. Leave the default name ("WorkerRole1"). This step adds a worker role to the solution. Click OK.
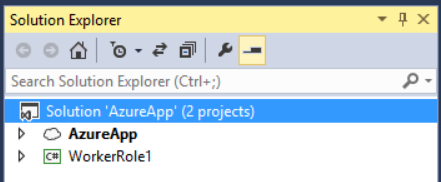
The Visual Studio solution that is created contains two projects:
- "AzureApp" defines the roles and configuration for the Azure application.
- "WorkerRole1" contains the code for the worker role.
In general, an Azure application can contain multiple roles, although this tutorial uses a single role.
Add the Web API and OWIN Packages
From the Tools menu, click NuGet Package Manager, then click Package Manager Console.
In the Package Manager Console window, enter the following command:
Install-Package Microsoft.AspNet.WebApi.OwinSelfHost
Add an HTTP Endpoint
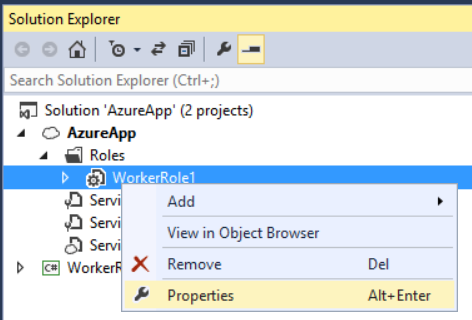
In Solution Explorer, expand the AzureApp project. Expand the Roles node, right-click WorkerRole1, and select Properties.
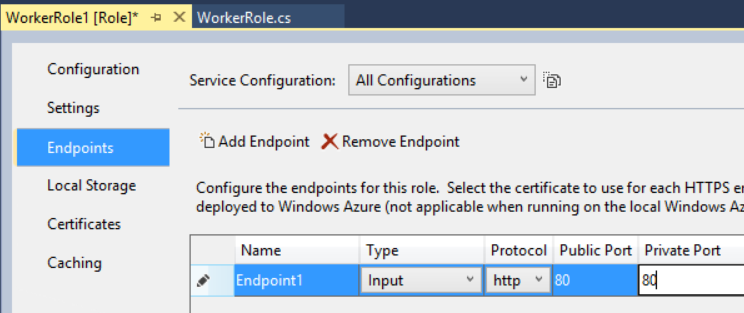
Click Endpoints, and then click Add Endpoint.
In the Protocol dropdown list, select "http". In Public Port and Private Port, type 80. These port numbers can be different. The public port is what clients use when they send a request to the role.
Configure Web API for Self-Host
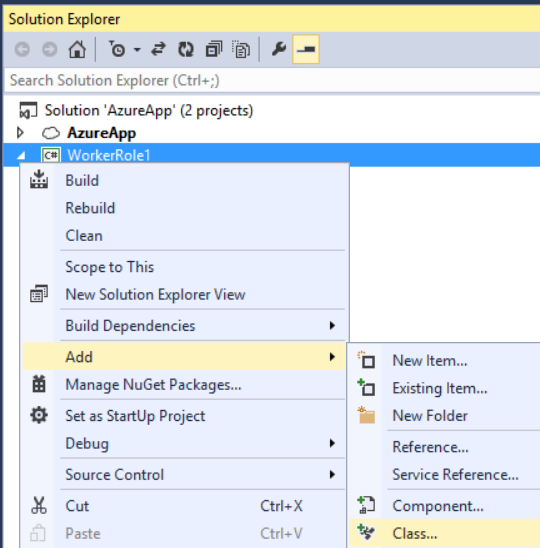
In Solution Explorer, right click the WorkerRole1 project and select Add / Class to add a new class. Name the class Startup.
Replace all of the boilerplate code in this file with the following:
using Owin;
using System.Web.Http;

namespace WorkerRole1
{
    class Startup
    {
        public void Configuration(IAppBuilder app)
        {
            HttpConfiguration config = new HttpConfiguration();
            config.Routes.MapHttpRoute(
                "Default",
                "{controller}/{id}",
                new { id = RouteParameter.Optional });

            app.UseWebApi(config);
        }
    }
}
Add a Web API Controller
Next, add a Web API controller class. Right-click the WorkerRole1 project and select Add / Class. Name the class TestController. Replace all of the boilerplate code in this file with the following:
using System;
using System.Net.Http;
using System.Web.Http;

namespace WorkerRole1
{
    public class TestController : ApiController
    {
        public HttpResponseMessage Get()
        {
            return new HttpResponseMessage()
            {
                Content = new StringContent("Hello from OWIN!")
            };
        }

        public HttpResponseMessage Get(int id)
        {
            string msg = String.Format("Hello from OWIN (id = {0})", id);
            return new HttpResponseMessage()
            {
                Content = new StringContent(msg)
            };
        }
    }
}
For simplicity, this controller just defines two GET methods that return plain text.
Start the OWIN Host
Open the WorkerRole.cs file. This class defines the code that runs when the worker role is started and stopped.
Add the following using statement:
using Microsoft.Owin.Hosting;
Add an IDisposable member to the WorkerRole class:
public class WorkerRole : RoleEntryPoint
{
    private IDisposable _app = null;

    // ....
}
In the OnStart method, add the following code to start the host:
public override bool OnStart()
{
    ServicePointManager.DefaultConnectionLimit = 12;

    // New code:
    var endpoint = RoleEnvironment.CurrentRoleInstance.InstanceEndpoints["Endpoint1"];
    string baseUri = String.Format("{0}://{1}",
        endpoint.Protocol, endpoint.IPEndpoint);

    Trace.TraceInformation(String.Format("Starting OWIN at {0}", baseUri),
        "Information");

    _app = WebApp.Start<Startup>(new StartOptions(url: baseUri));
    return base.OnStart();
}
The WebApp.Start method starts the OWIN host. The name of the Startup class is a type parameter to the method. By convention, the host will call the Configure method of this class.
Override the OnStop to dispose of the _app instance:
public override void OnStop()
{
    if (_app != null)
    {
        _app.Dispose();
    }
    base.OnStop();
}
Here is the complete code for WorkerRole.cs:
using Microsoft.Owin.Hosting;
using Microsoft.WindowsAzure.ServiceRuntime;
using System;
using System.Diagnostics;
using System.Net;
using System.Threading;

namespace WorkerRole1
{
    public class WorkerRole : RoleEntryPoint
    {
        private IDisposable _app = null;

        public override void Run()
        {
            Trace.TraceInformation("WebApiRole entry point called", "Information");

            while (true)
            {
                Thread.Sleep(10000);
                Trace.TraceInformation("Working", "Information");
            }
        }

        public override bool OnStart()
        {
            ServicePointManager.DefaultConnectionLimit = 12;

            var endpoint = RoleEnvironment.CurrentRoleInstance.InstanceEndpoints["Endpoint1"];
            string baseUri = String.Format("{0}://{1}",
                endpoint.Protocol, endpoint.IPEndpoint);

            Trace.TraceInformation(String.Format("Starting OWIN at {0}", baseUri),
                "Information");

            _app = WebApp.Start<Startup>(new StartOptions(url: baseUri));
           return base.OnStart();
        }

        public override void OnStop()
        {
            if (_app != null)
            {
                _app.Dispose();
            }
            base.OnStop();
        }
    }
}
Build the solution, and press F5 to run the application locally in the Azure Compute Emulator. Depending on your firewall settings, you might need to allow the emulator through your firewall.
Note
If you get an exception like the following, please see this blog post for a workaround. "Could not load file or assembly 'Microsoft.Owin, Version=2.0.2.0, Culture=neutral, PublicKeyToken=31bf3856ad364e35' or one of its dependencies. The located assembly's manifest definition does not match the assembly reference. (Exception from HRESULT: 0x80131040)"
The compute emulator assigns a local IP address to the endpoint. You can find the IP address by viewing the Compute Emulator UI. Right-click the emulator icon in the task bar notification area, and select Show Compute Emulator UI.
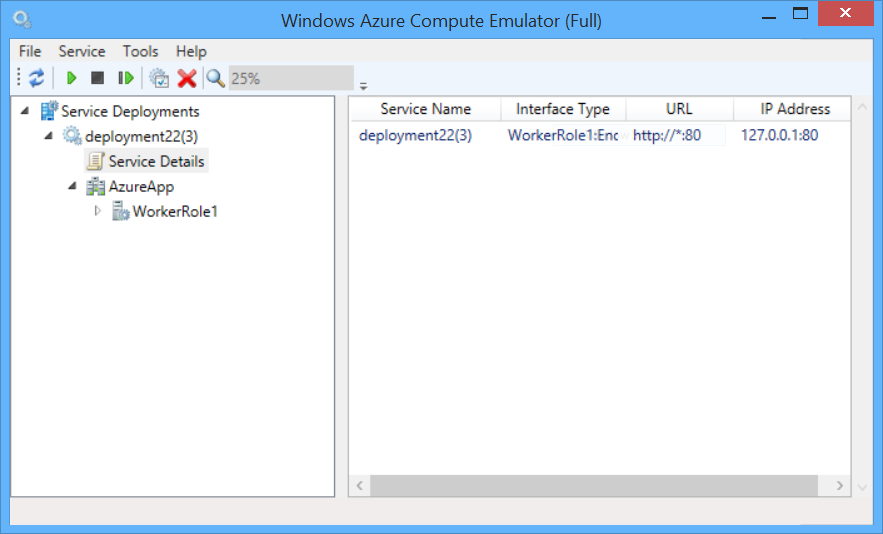
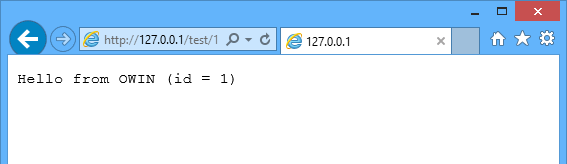
Find the IP address under Service Deployments, deployment [id], Service Details. Open a web browser and navigate to http://address/test/1, where address is the IP address assigned by the compute emulator; for example, http://127.0.0.1:80/test/1. You should see the response from the Web API controller:
Deploy to Azure
For this step, you must have an Azure account. If you don't already have one, you can create a free trial account in just a couple of minutes. For details, see Microsoft Azure Free Trial.
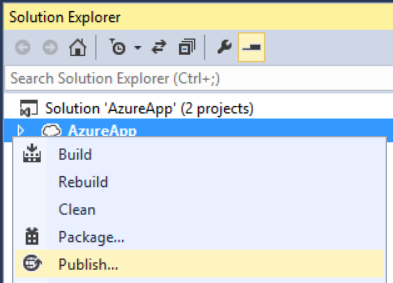
In Solution Explorer, right-click the AzureApp project. Select Publish.
If you are not signed in to your Azure account, click Sign In.

After you are signed in, choose a subscription and click Next.

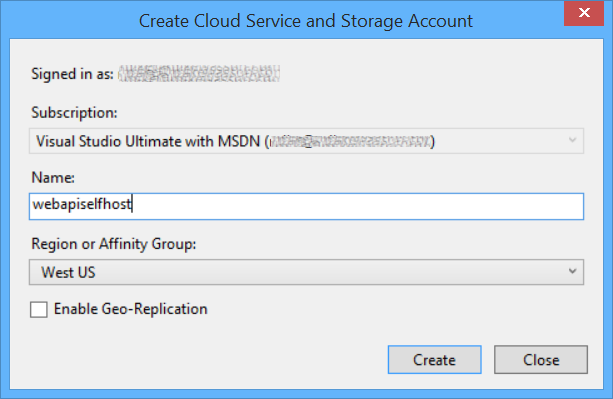
Enter a name for the cloud service and choose a region. Click Create.
Click Publish.

Configuring a custom domain name for an Azure cloud service (classic)