Note
Access to this page requires authorization. You can try signing in or changing directories.
Access to this page requires authorization. You can try changing directories.
Important
Azure Data Studio is retiring on February 28, 2026. We recommend that you use Visual Studio Code. For more information about migrating to Visual Studio Code, visit What's happening to Azure Data Studio?
Applies to: ![]() SQL Server
SQL Server ![]() Azure SQL Database
Azure SQL Database ![]() Azure SQL Managed Instance
Azure SQL Managed Instance
The Table Designer in Azure Data Studio provides a visual editor experience alongside the Transact-SQL Editor for creating and editing table structure, including table-specific programming objects, for SQL Server databases.
Why Table Designer?
The Table Designer in Azure Data Studio provides users an easy way to configure and manage database tables, primary and foreign keys, indexes, and constraints directly on the graphical user interface (GUI) without needing to write Transact-SQL statements.
Overview of the Table Designer
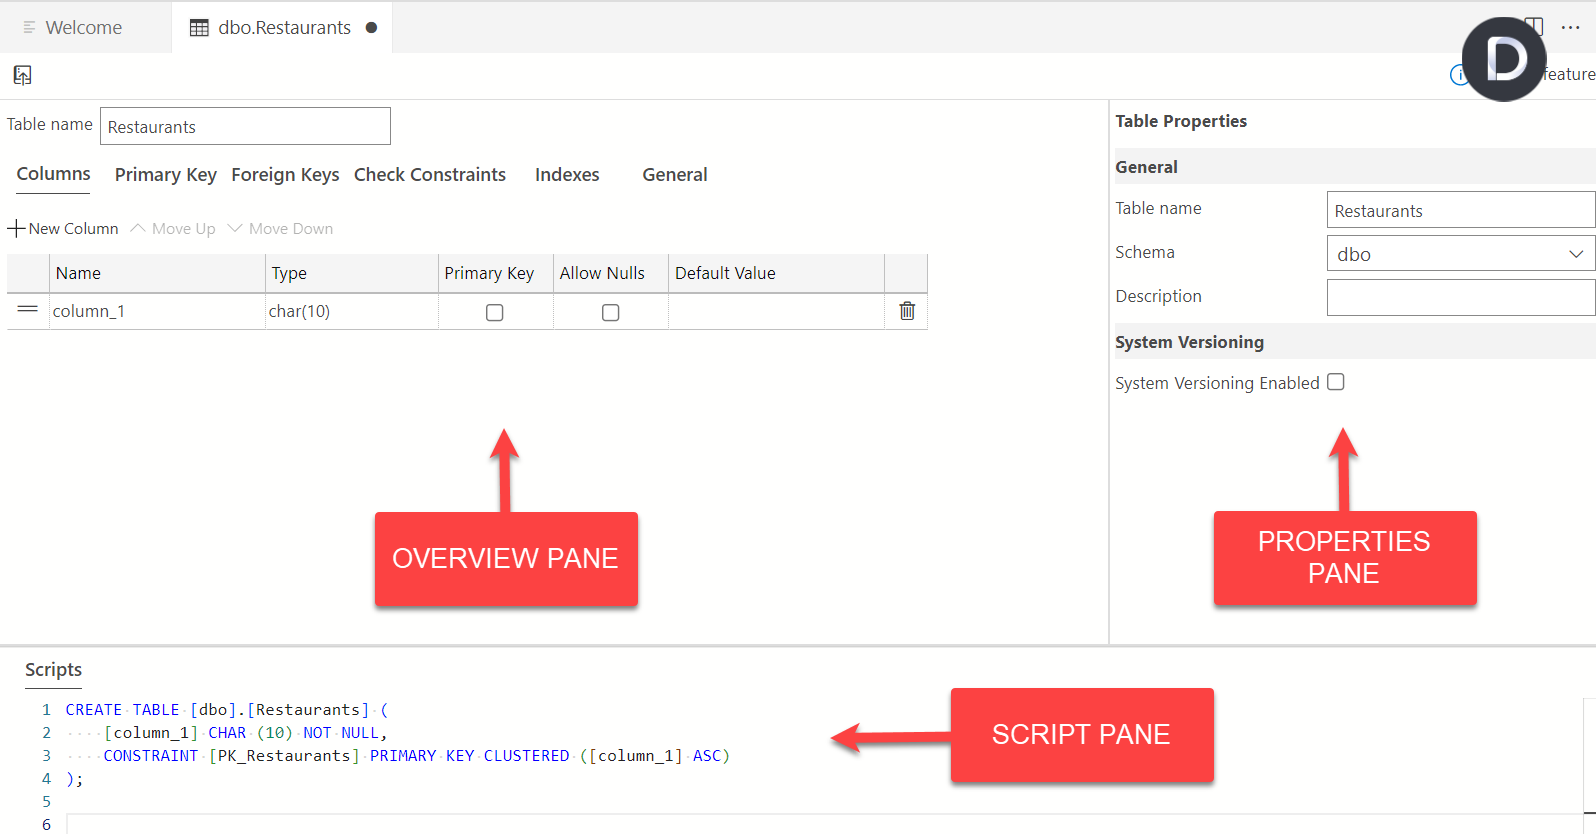
The Table Designer consists of a window split into three separate panes. The first pane is the Overview/General pane of the table design. This consists of tabs for the columns, primary and foreign keys, check constraints, indexes, and a general tab. The second pane is used for defining the properties of your table. Lastly, the third pane is the script pane for the read-only T-SQL script that shows actions performed on the table designer GUI in real time as well as any success or error messages associated with actions performed on the table designer. The size of these panes can be adjusted to preference by mouse dragging.
Create and update database tables using the Table Designer
The SQL Server connection in which your database resides needs to be active in order to create tables. This is indicated by the green dot at the bottom right corner of the server connection icon in the object explorer (below). If red (this means the connection is inactive), select the server connection name in the object explorer to activate the connection. For a tutorial on connecting to SQL Server, check out the Use Azure Data Studio to connect and query SQL Server tutorial article.
This article requires the AdventureWorks2022 sample database, which you can download from the Microsoft SQL Server Samples and Community Projects home page.
Create a table
Right-click the Tables folder in the
AdventureWorks2022database drop-down and select New Table: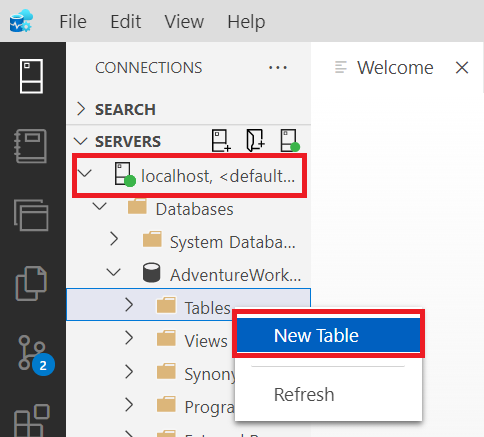
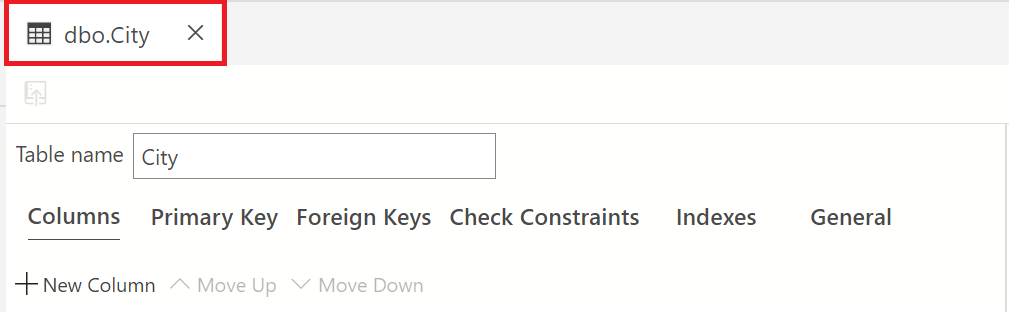
Change the value in the Table Name field from its' default, NewTable to City. In the Table Properties field, feel free to add a description for this table.
In the Name Column grid, change the provided default value from column_1 to ID. Select the checkbox in the primary key column to make this the primary key for the table. To read more on primary keys, see this SQL Server documentation on Primary Keys.
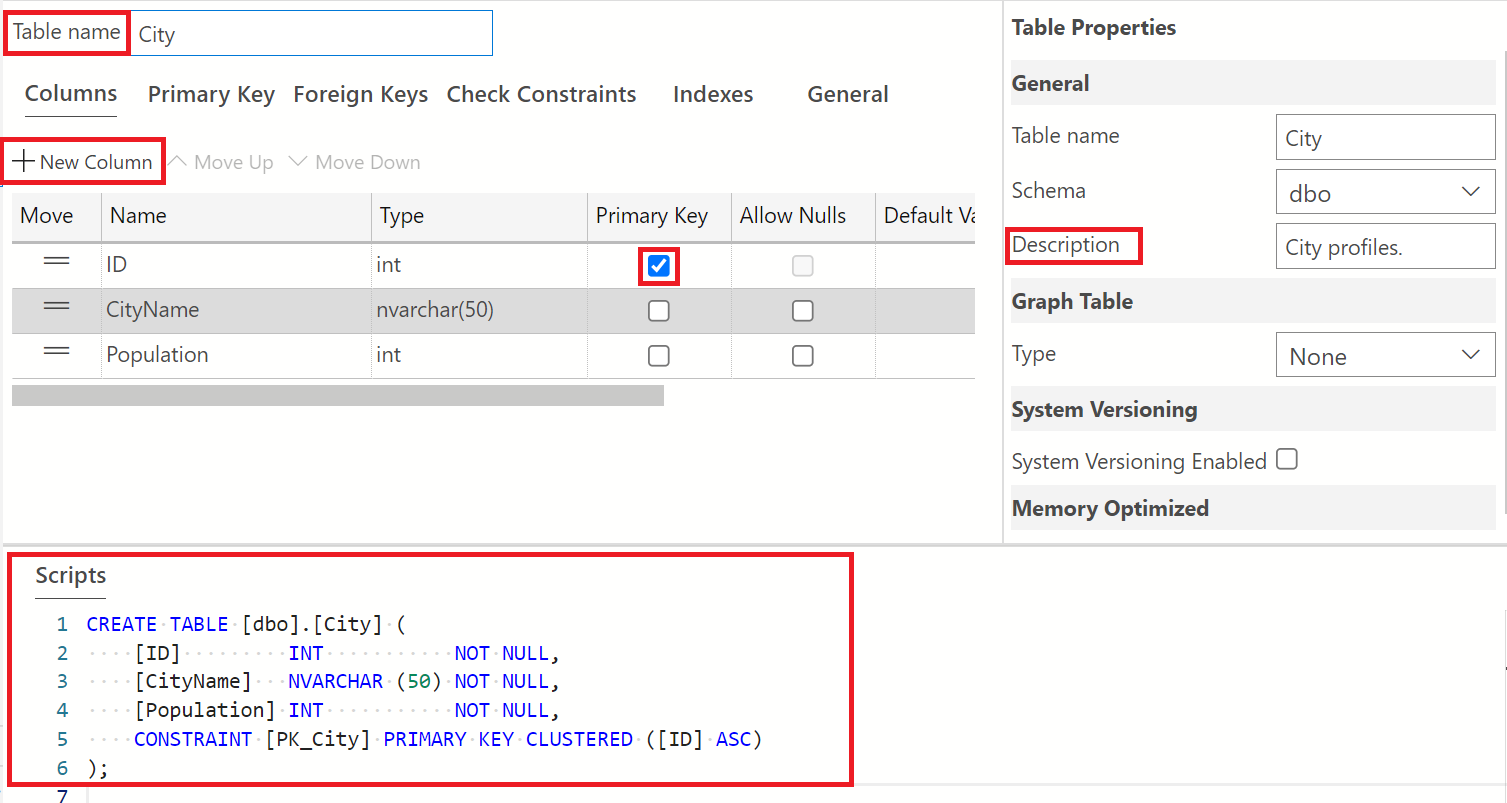
Repeat step 3 to add two new columns, CityName and Population. Uncheck the Primary Key and Allow Nulls checkboxes for these two new columns. Please note that Columns can be re-arranged to user preference by placing the cursor in the Move column and mouse dragging.
Note
Pay attention to the changes in the read-only Transact-SQL code generated as changes are made to the default table.
Now that we have finished the design for our new table, we need to publish this change to the
AdventureWorks2022database. To do this, select the "Publish" icon as seen below. Publishing can also be done by using the save command shortcut on your local device.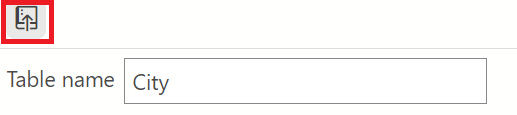
Once this icon is selected, a preview dialog window appears showing you all the actions performed in creating a table. It also provides the option to publish the changes directly to the
AdventureWorks2022database or generate the editable SQL script in a query editor that can be saved as a file locally or executed to publish this script to the database.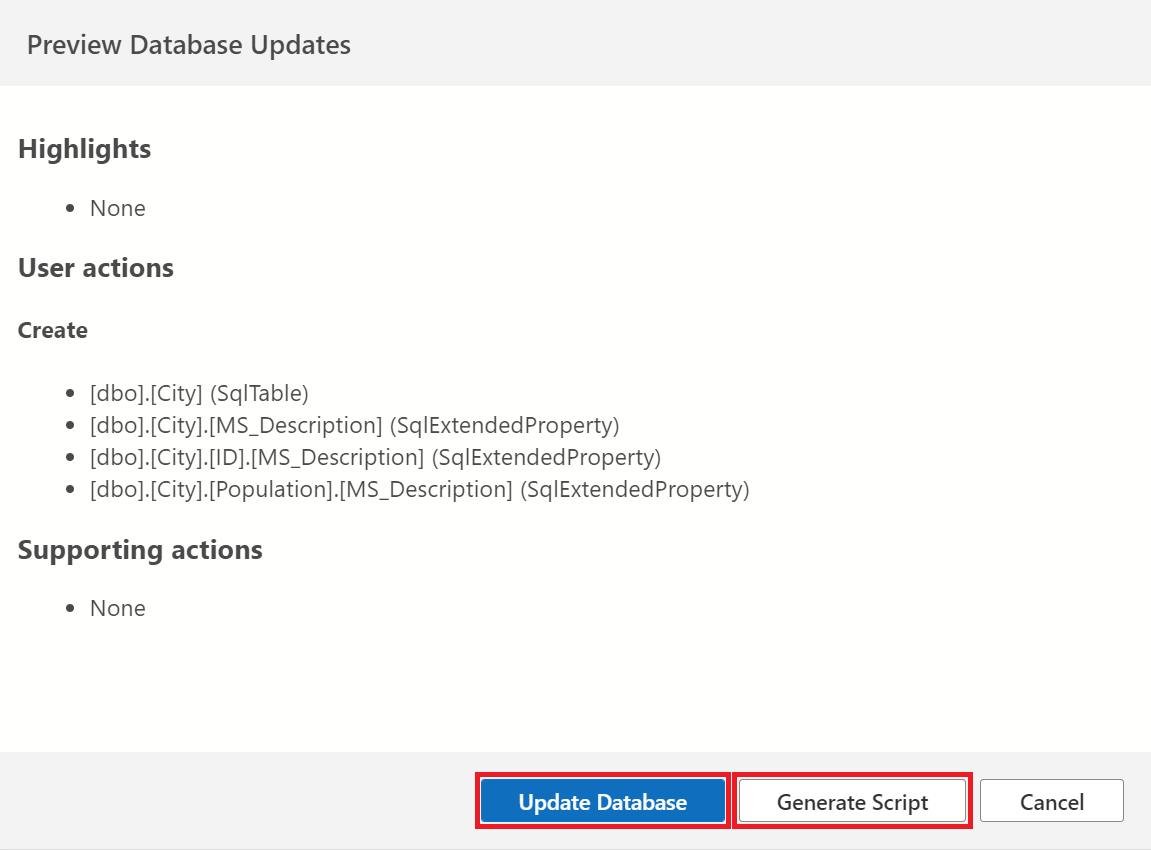
Running the T-SQL script in the query editor is done by selecting the Run button as shown below:
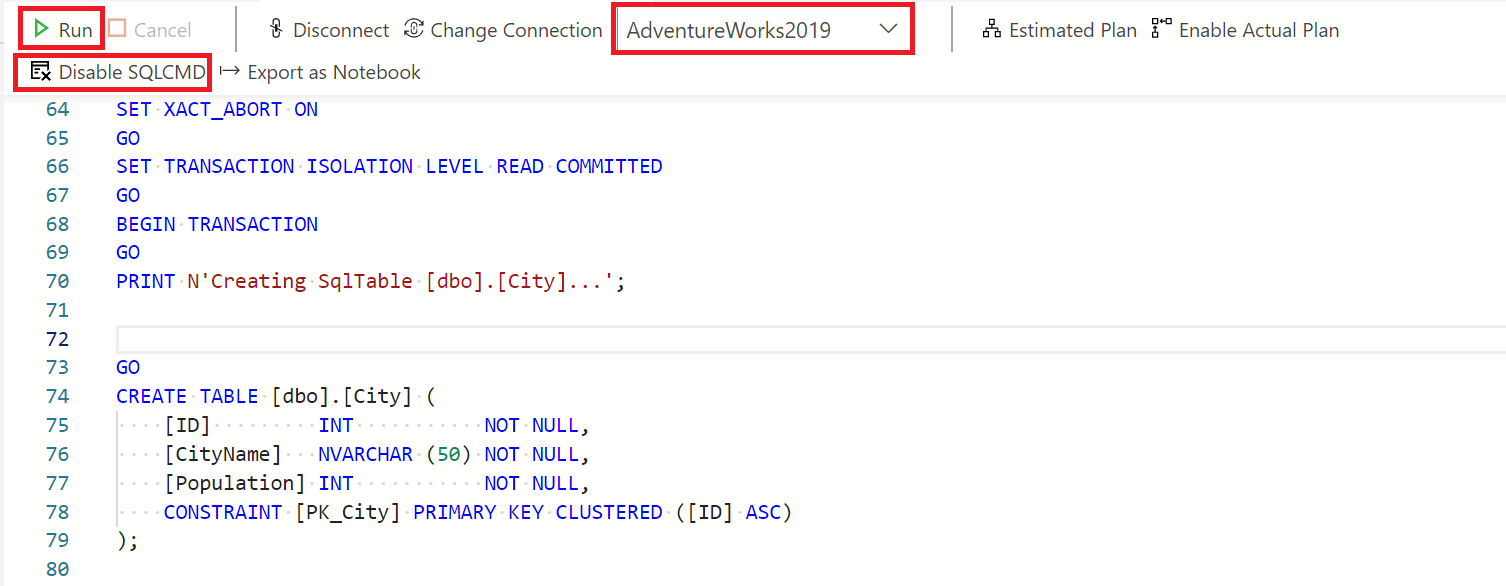
Ensure that the query editor is connected to the database on which the script is to be ran. This is done by selecting the Connect button in the query editor window. This will pull up the connection dialog box where you can enter in the credentials for the server you are running your database script on.
Note
Please note that changes to the table design can be made manually in the query editor by editing the T-SQL script. SQLCMD mode must be enabled to successfully execute Transact-SQL scripts. This is done by toggling this button as shown in the image above (already enabled, which is why it shows Disable SQLCMD). To learn more about this, please refer to the SQLCMD utility documentation.
Remember to save changes made on the table designer. Unsaved changes are indicated by the black shaded dot as shown below:
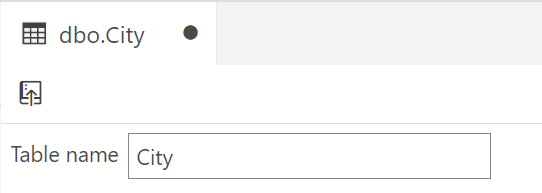
This image below shows work that has been saved as indicated by the absence of the black dot.
Note
Please pay attention to any provided warnings in the publish dialog as it relates to table creation and migrations. These are provided to guide against potential data loss or system downtime especially when working with larger data sets.
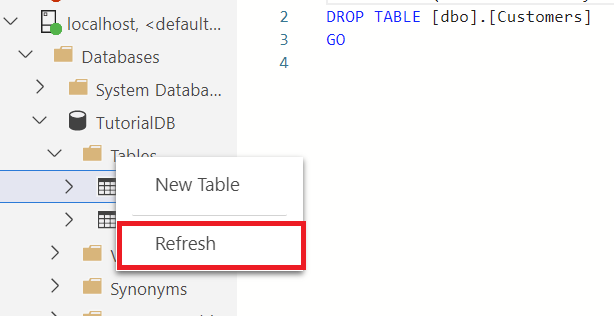
Once the table is published, right-click" the Tables* folder and select Refresh. This re-repopulates the folder with the new table.
Editing an existing table
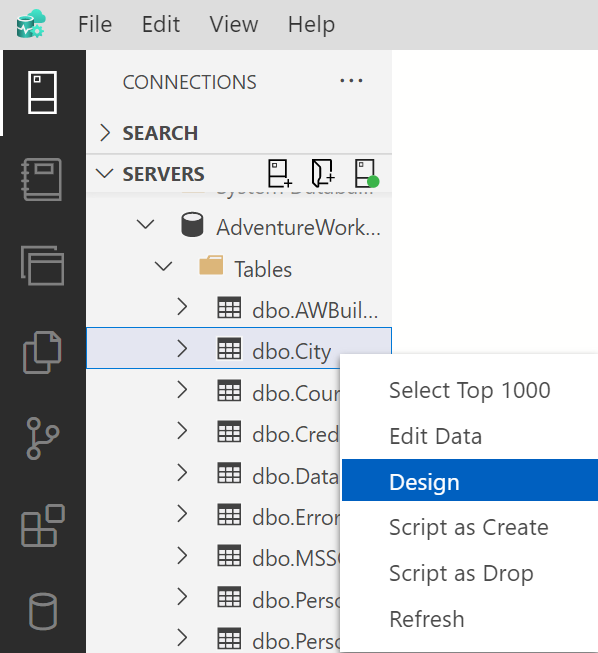
To edit an existing table in the Table Designer, right-click on the table in the object explorer and select "Design" from the menu. This opens up the table designer view, which then allows you to make edits where necessary. See below:
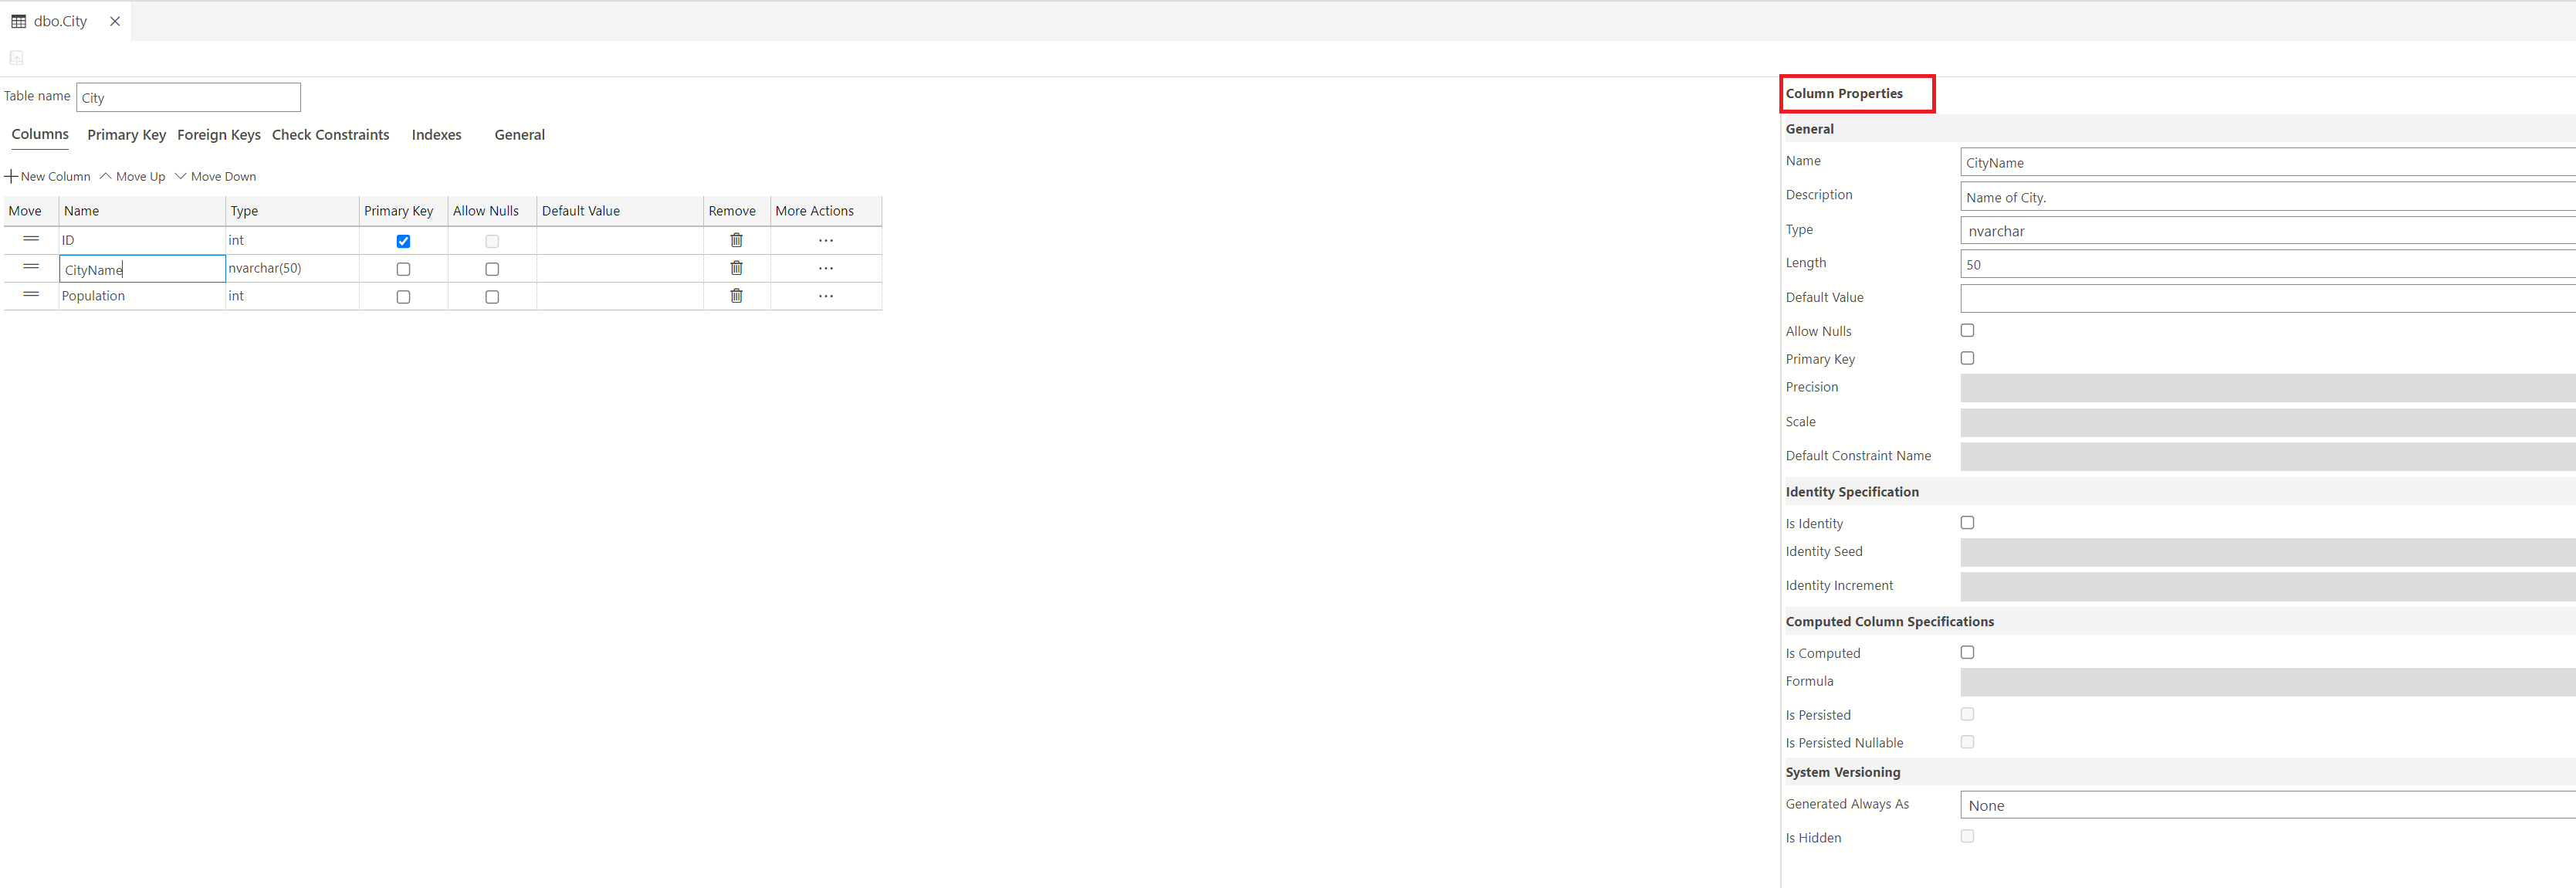
You can change column properties in the main pane as shown above or in the properties pane. To view the properties pane for a column, select the column (CityName, for example) as shown below. The properties pane will then show the properties specific to the CityName column. Remember to save and publish your changes.
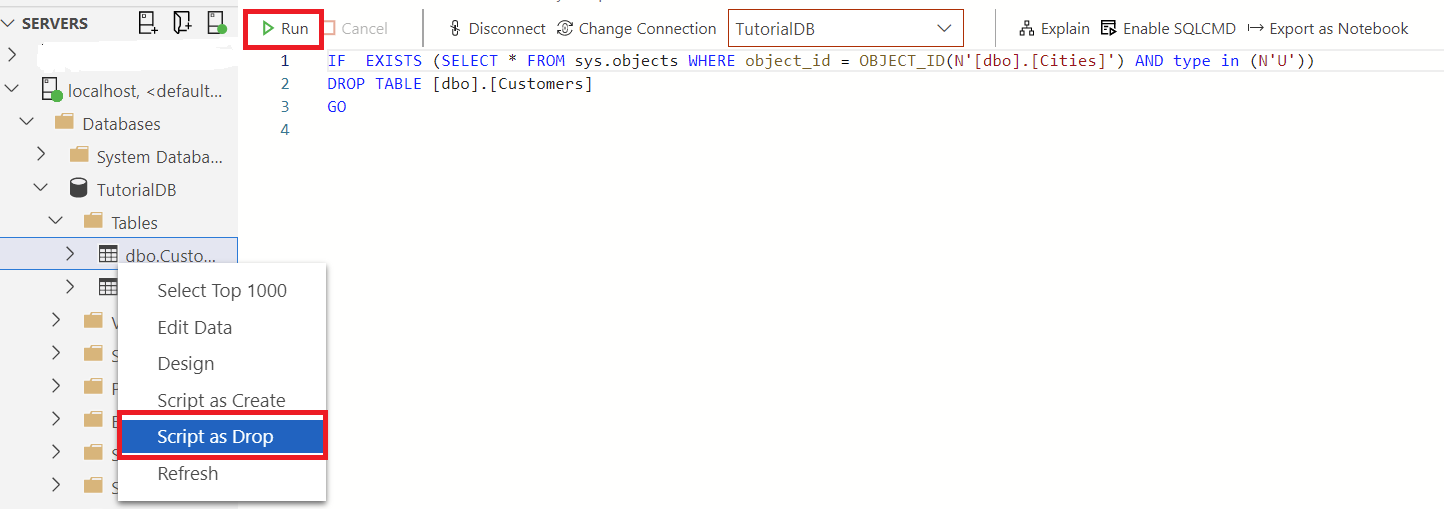
Deleting a table
To delete a table, right-click on the tables folder in the object explorer. When your table is located, right-click on the table and select Script as Drop. This then opens the query editor window containing the script that will drop the table when ran. Select Run to drop the table.
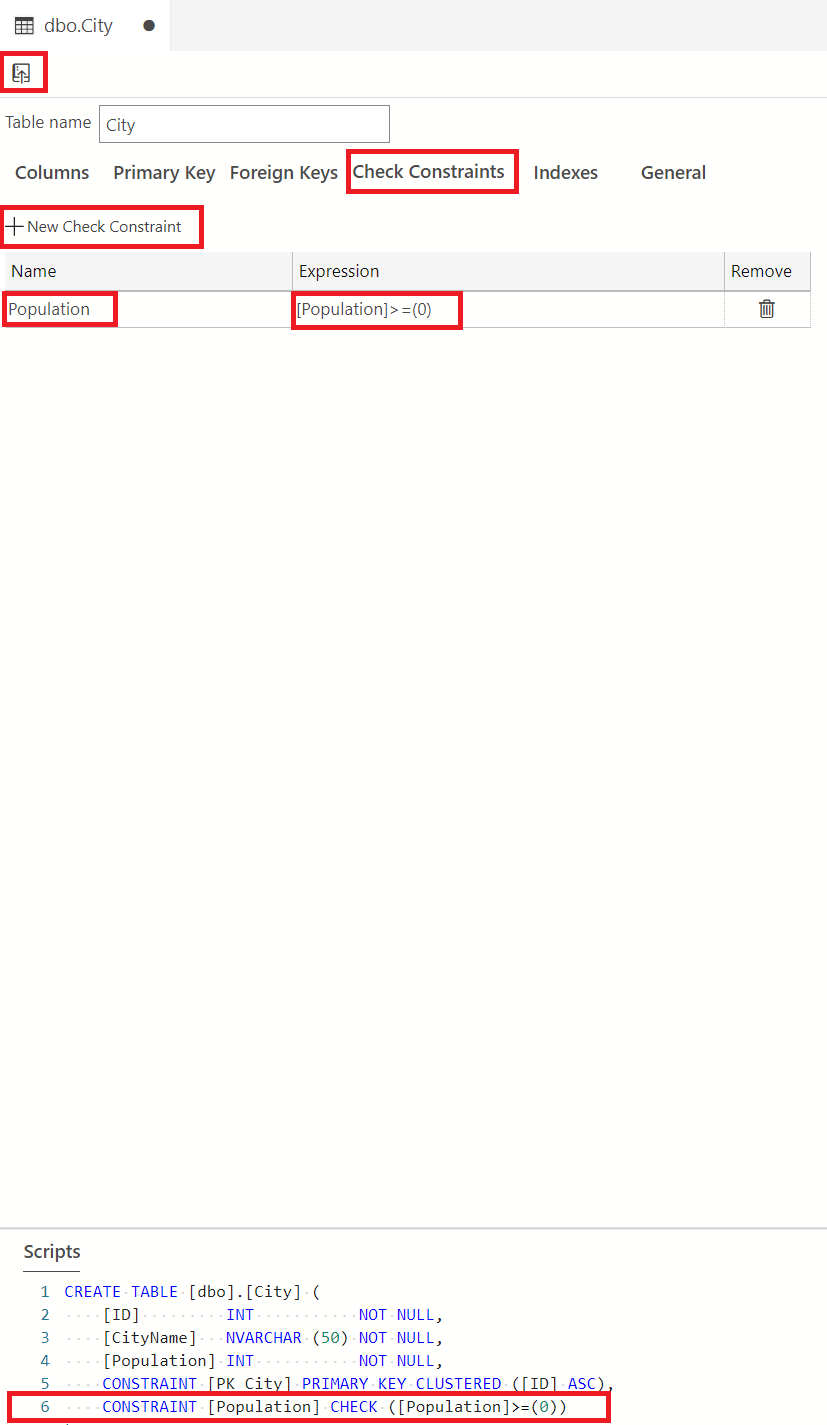
Check Constraints
Check constraints are used to limit the value range that can be placed in a column. If you define a check constraint on a column, it will allow only certain values for this column. In this example, we will show how to add a check constraint to the Population column such that entries less than 0 are disallowed.
In the City table, select the Check Constraints tab and select +New Check Constraint.
This populates a table where you can define the Name and Expression for the constraint you want to add. Default names and expressions are provided. In the Name field, clear out this default name and type Population. In the Expression field, clear out the default expression and type the expression [Population]>=(0). Remember to publish this check constraint to your database.
You can add as few or as many constraints as needed depending on the nature of the table(s) in your database. To learn more about check constraints, please refer to the check constraints documentation.
Note
Remember to refresh the object explorer at the table level to confirm the table deletion.
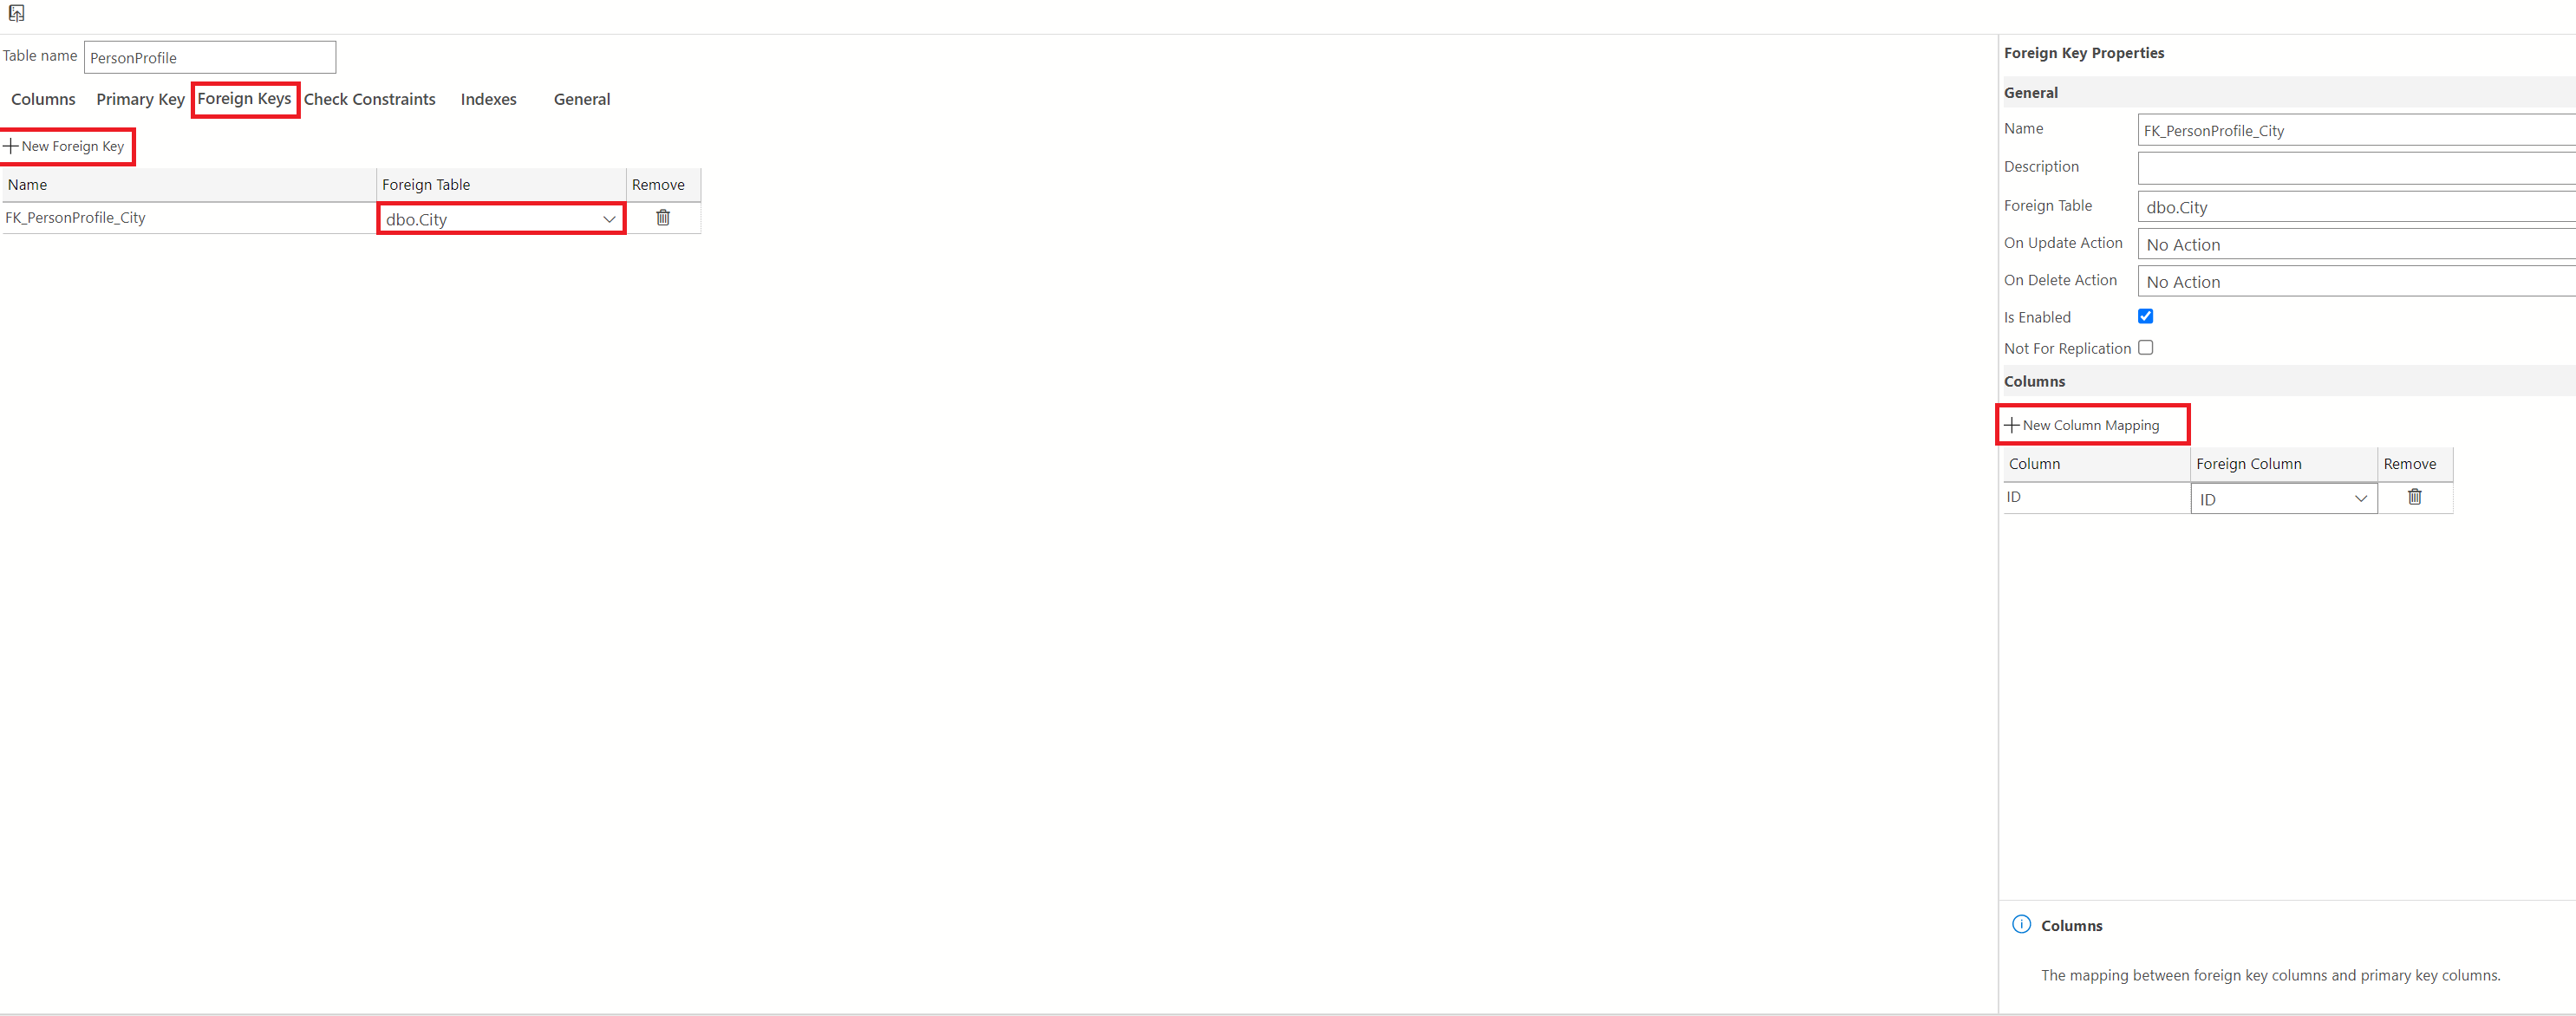
Foreign Keys
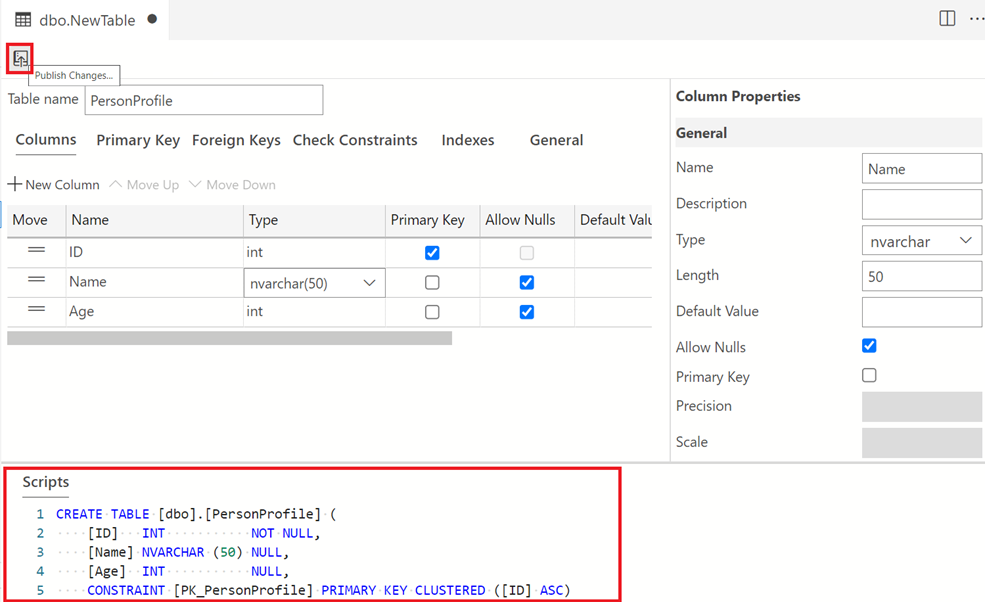
Foreign keys are used to establish and enforce a link between data in tables. To learn more about foreign keys, check out this documentation on primary and foreign key constraints. In this example, we will create another table called PersonProfile and map this table to the City table using a foreign key.
Create a table named PersonProfile with three columns, ID(int, primary key), Name(nvarchar(50)), and Age(int). Set the Name and Age column such that they are non-nullable.
Select the Foreign Key tab and select +New Foreign Key. Since we are mapping the PersonProfile table to the City table using their IDs, select the Foreign table drop down and select dbo.City. Next, in the Foreign Key Properties window, under +New Column Mapping, select the Foreign Column drop-down, and select ID. This is the ID of the City table. Don't forget to publish to your database.