Replace a scale unit node on an Azure Stack Hub integrated system
This article describes the general process to replace a physical computer (also referred to as a scale unit node) on an Azure Stack Hub integrated system. Actual scale unit node replacement steps will vary based on your original equipment manufacturer (OEM) hardware vendor. See your vendor's field replaceable unit (FRU) documentation for detailed steps that are specific to your system.
Caution
Firmware leveling is critical for the success of the operation described in this article. Missing this step can lead to system instability, performance decrease, security threads, or prevent Azure Stack Hub automation from deploying the operating system. Always consult your hardware partner's documentation when replacing hardware to ensure the applied firmware matches the OEM Version displayed in the Azure Stack Hub administrator portal. For more information and links to partner documentation, see Replace a hardware component.
The following flow diagram shows the general FRU process to replace an entire scale unit node.
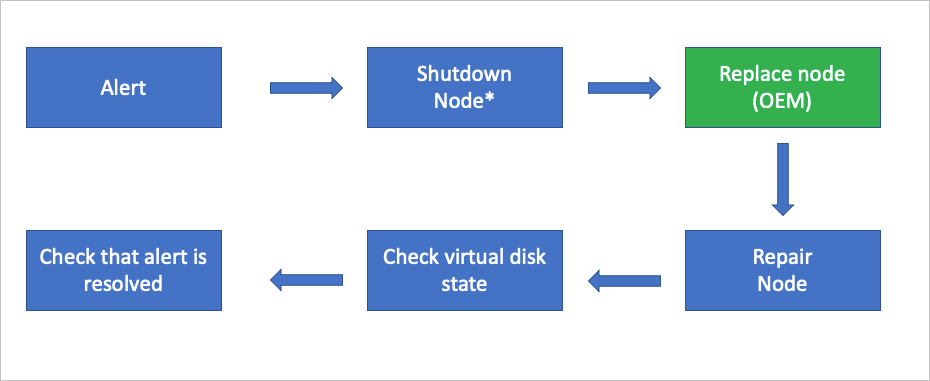
*This action may not be required based on the physical condition of the hardware.
Note
If the shutdown operation does fail, it's recommended to use the drain operation followed by the stop operation. For more information, see Scale unit node actions in Azure Stack Hub.
Review alert information
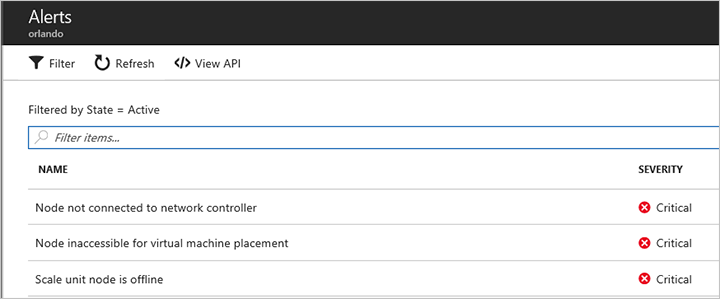
If a scale unit node is down, you'll receive the following critical alerts:
- Node not connected to network controller
- Node inaccessible for virtual machine placement
- Scale unit node is offline
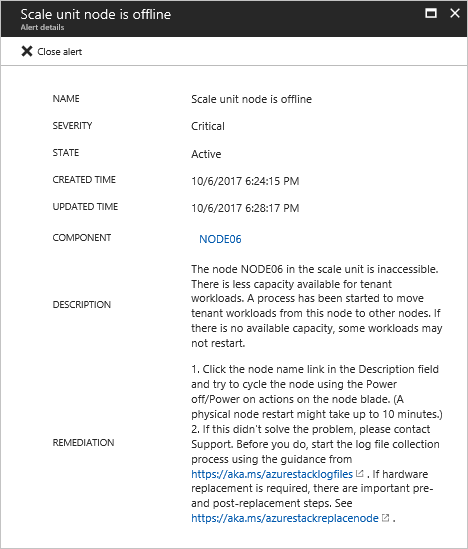
If you open the Scale unit node is offline alert, the alert description contains the scale unit node that's inaccessible. You may also receive additional alerts in the OEM-specific monitoring solution that's running on the hardware lifecycle host.
Scale unit node replacement process
The following steps are provided as a high-level overview of the scale unit node replacement process. See your OEM hardware vendor's FRU documentation for detailed steps that are specific to your system. Don't follow these steps without referring to your OEM-provided documentation.
Use the Shutdown action to gracefully shut down the scale unit node. This action may not be required based on the physical condition of the hardware.
In the unlikely case the shutdown action fails, use the Drain action to put the scale unit node into maintenance mode. This action may not be required based on the physical condition of the hardware.
Note
In any case, only one node can be disabled and powered off at the same time without breaking the S2D (Storage Spaces Direct).
After the scale unit node is in maintenance mode, use the Stop action. This action may not be required based on the physical condition of the hardware.
Note
In the unlikely case that the Power off action doesn't work, use the baseboard management controller (BMC) web interface instead.
Replace the physical computer. Typically, this replacement is done by your OEM hardware vendor.
Use the Repair action to add the new physical computer to the scale unit.
Use the privileged endpoint to check the status of virtual disk repair. With new data drives, a full storage repair job can take multiple hours depending on system load and consumed space.
After the repair action has finished, validate that all active alerts have been automatically closed.
Next steps
- For information about replacing a physical disk while the system is powered on, see Replace a disk.
- For information about replacing a hardware component that requires the system to be powered off, see Replace a hardware component.
Feedback
Coming soon: Throughout 2024 we will be phasing out GitHub Issues as the feedback mechanism for content and replacing it with a new feedback system. For more information see: https://aka.ms/ContentUserFeedback.
Submit and view feedback for