Note
Access to this page requires authorization. You can try signing in or changing directories.
Access to this page requires authorization. You can try changing directories.
This article describes how to create virtual machine (VM) disk storage by using the Azure Stack Hub portal or by using PowerShell.
Overview
Azure Stack Hub supports the use of managed disks and unmanaged disks in VMs, as both an operating system (OS) and a data disk.
Managed disks simplify disk management for Azure IaaS VMs by managing the storage accounts associated with the VM disks. You only have to specify the size of disk you need, and Azure Stack Hub creates and manages the disk for you.
Unmanaged disks require that you create a storage account to store the disks. The disks you create are referred to as VM disks, and are stored in containers in the storage account.
Best practice guidelines
It's recommended that you use managed disks for VMs for easier management and capacity balance. You don't have to prepare a storage account and containers before using managed disks. When you create multiple managed disks, the disks are distributed into multiple volumes, which helps to balance the capacity of volumes.
For unmanaged disks, to improve performance and reduce the overall costs, we recommend that you place each unmanaged disk in a separate container. Although you can put both OS disks and data disks in the same container, the best practice is that one container should hold either an OS disk or a data disk, but not both at the same time.
If you add one or more data disks to a VM, use additional containers as a location to store these disks. The OS disk for additional VMs should also be in their own containers.
When you create VMs, you can reuse the same storage account for each new virtual machine. Only the containers you create should be unique.
Adding new disks
The following table summarizes how to add disks by using the portal, and by using PowerShell:
| Method | Options |
|---|---|
| User portal | - Add new data disks to an existing VM. New disks are created by Azure Stack Hub. - Add an existing disk (.vhd) file to a previously created VM. To do so, you must prepare the .vhd and then upload the file to Azure Stack Hub. |
| PowerShell | - Create a new VM with an OS disk, and at the same time add one or more data disks to that VM. |
Use the portal to add disks to a VM
By default, when you use the portal to create a VM for most marketplace items, only the OS disk is created.
After you create a VM, you can use the portal to:
- Create a new data disk and attach it to the VM.
- Upload an existing data disk and attach it to the VM.
Put each unmanaged disk you add into a separate container.
Use the portal to create and attach a new data disk
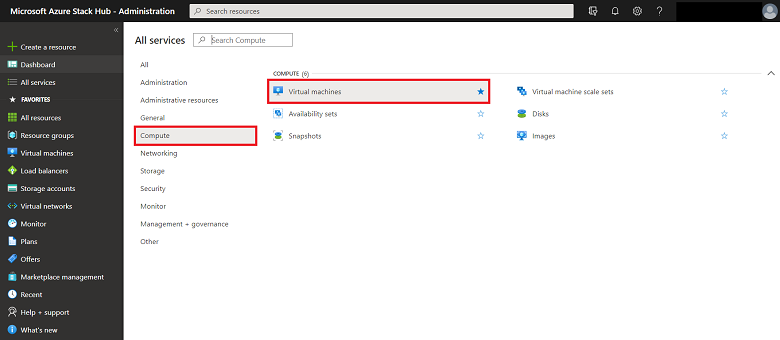
In the portal, select All services, then Compute, then Virtual machines.
Select a VM that has previously been created from the list.
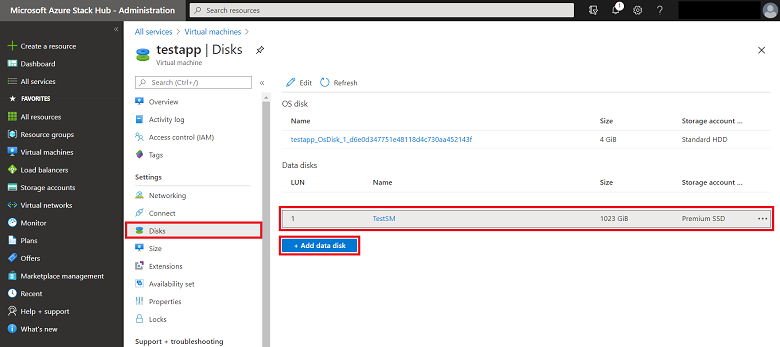
For the VM, select Disks, then Add data disk.

For the data disk:
- Enter the LUN. The LUN must be a valid number.
- Select Create disk.

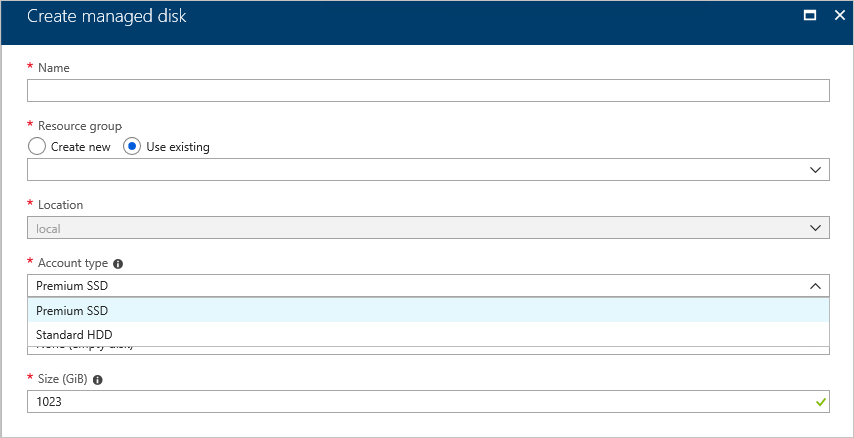
In the Create managed disk blade:
Enter the Name of the disk.
Select an existing Resource group or create a new one.
Select the Location. By default, the location is set to the same container that holds the OS disk.
Select the Account type.
Note
Premium disks (SSD) and standard disks (HDD) are backed by the same storage infrastructure in Azure Stack Hub. They provide the same performance.
Select the Source type.
Create a disk from a snapshot of another disk, a blob in a storage account, or create an empty disk.
Snapshot: Select a snapshot, if it's available. The snapshot must be in available in the VM's subscription and location.
Storage blob:
- Add the URI of the storage blob that contains the disk image.
- Select Browse to open the storage accounts blade. For instructions, see Add a data disk from a storage account.
- Select the OS type of the image: Windows, Linux, or None (data disk).
Select the Size (GiB).
Disk costs increase based on the size of the disk.
Select Create. Azure Stack Hub creates and validates the managed disk.
After Azure Stack Hub creates the disk and attaches it to the VM, the new disk is listed in the VM disk settings under Data disks.


Add a data disk from a storage account
For more information about working with storage accounts in Azure Stack Hub, see Introduction to Azure Stack Hub storage.
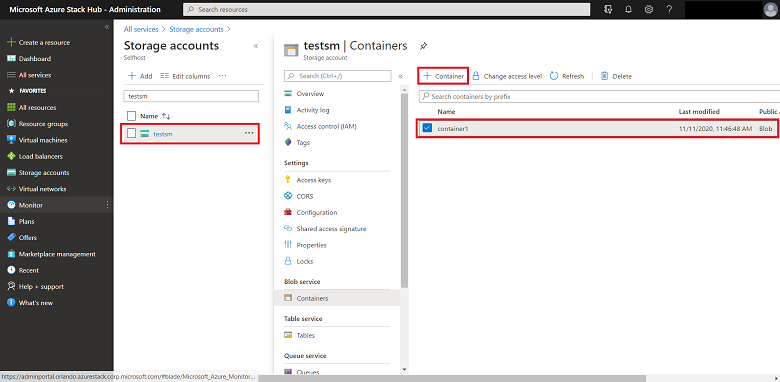
Select the Storage account to use.
Select the Container where you want to put the data disk. From the Containers blade, you can create a new container if you want. You can then change the location for the new disk to its own container. When you use a separate container for each disk, you distribute the placement of the data disk which improves performance.
Choose Select to save the selection.

Attach an existing data disk to a VM
Prepare a .vhd file for use as data disk for a VM. Upload that .vhd file to a storage account that you use with the VM to which you want to attach the .vhd file.
- Plan to use a different container to hold the .vhd file than the container that holds the OS disk.
- Before uploading any VHD to Azure, you should follow Prepare a Windows VHD or VHDX to upload to Azure.
- Review Plan for the migration to Managed Disks before starting your migration to Managed Disks.
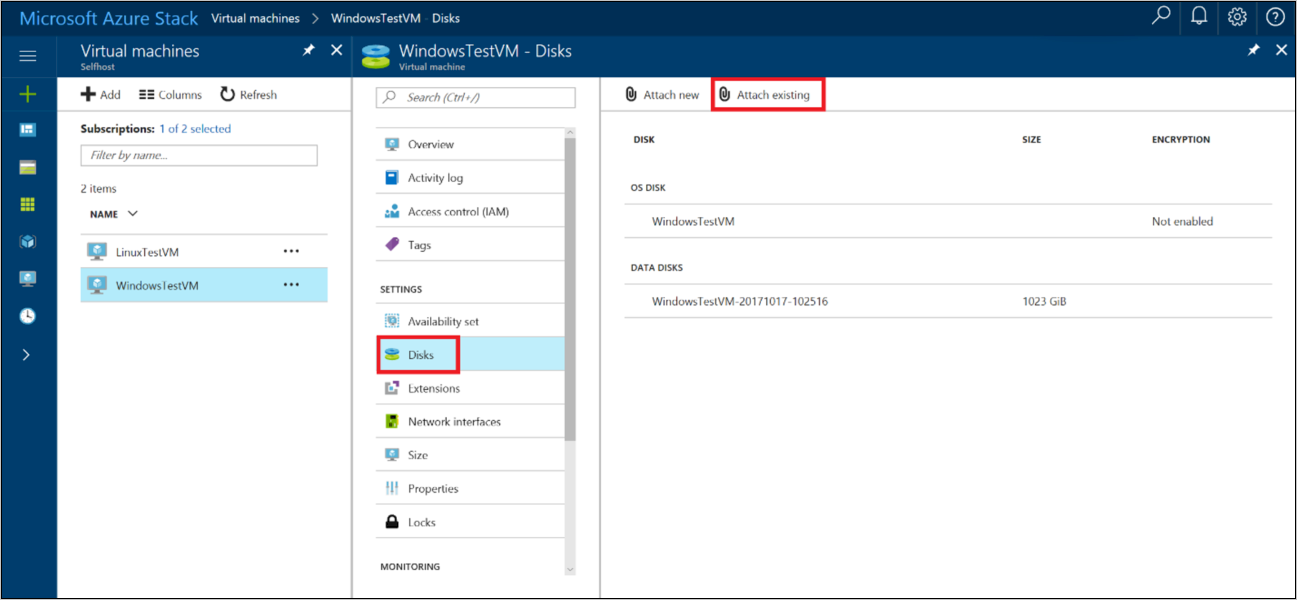
After the .vhd file is uploaded, you're ready to attach the VHD to a VM. In the menu on the left, select Virtual machines.

Choose the VM from the list.
On the page for the VM, select Disks, then select Attach existing.
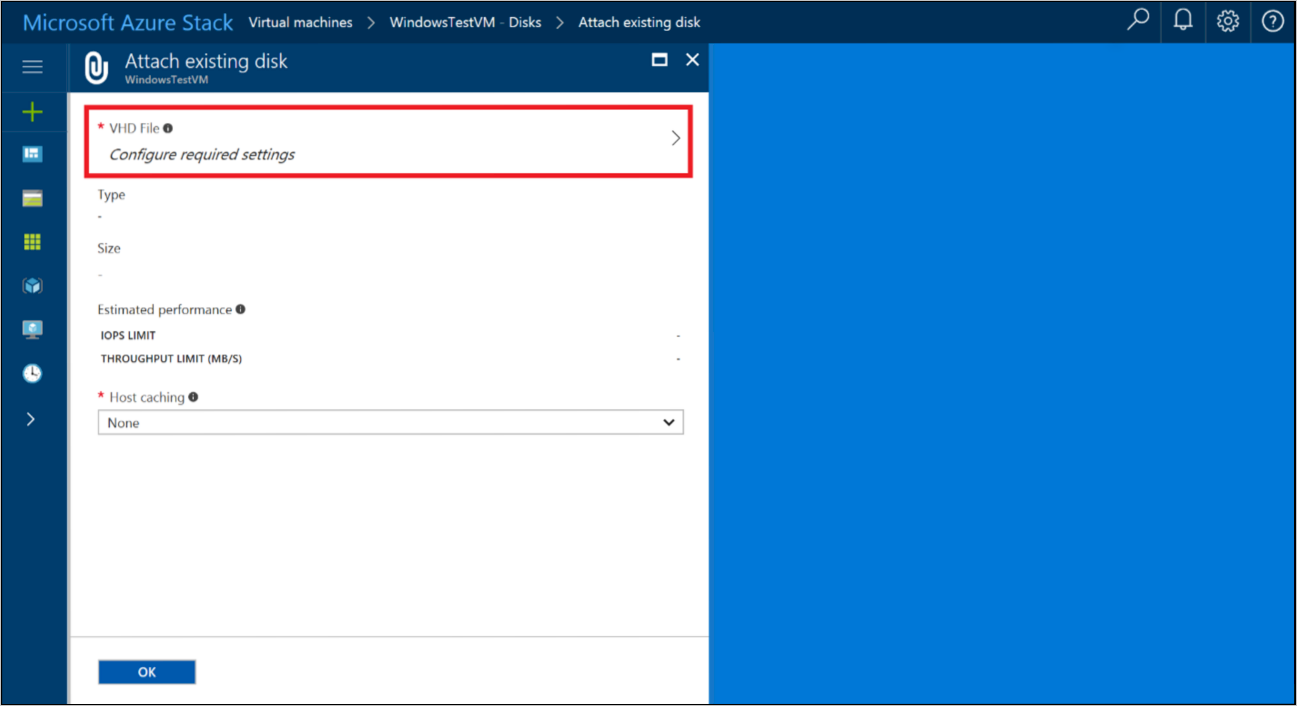
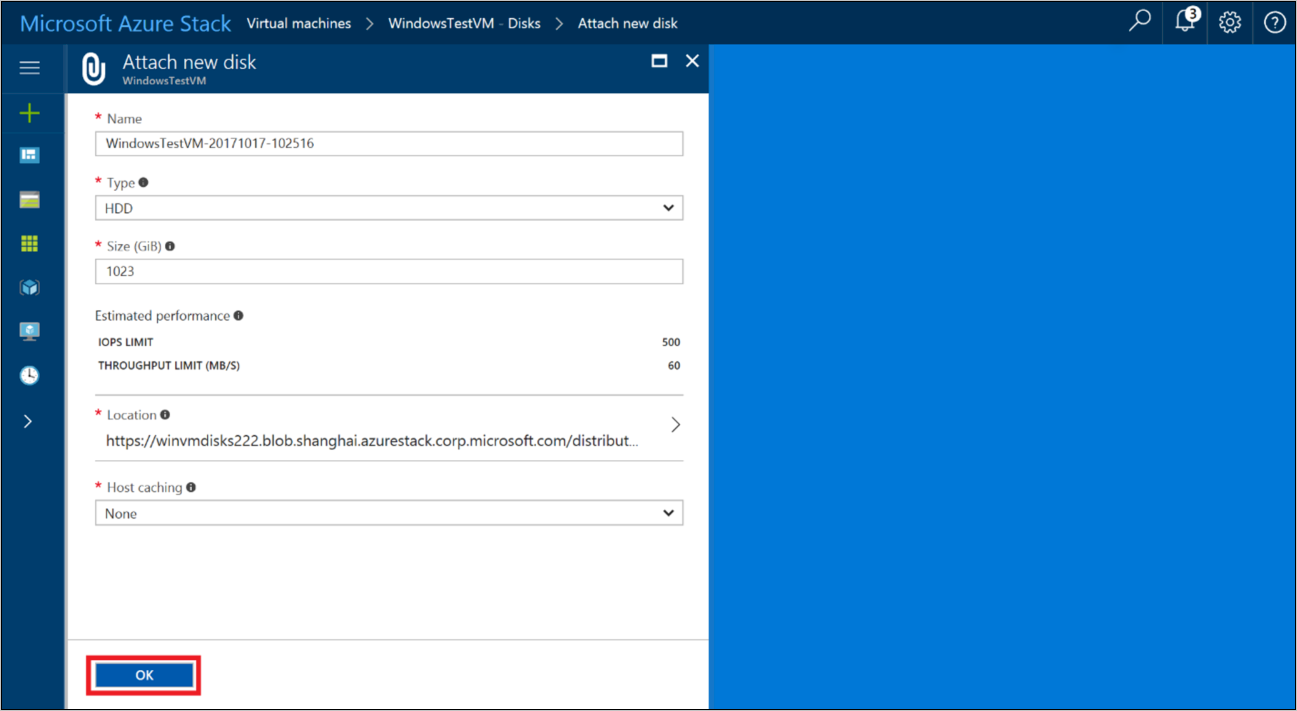
In the Attach existing disk page, select VHD File. The Storage accounts page opens.
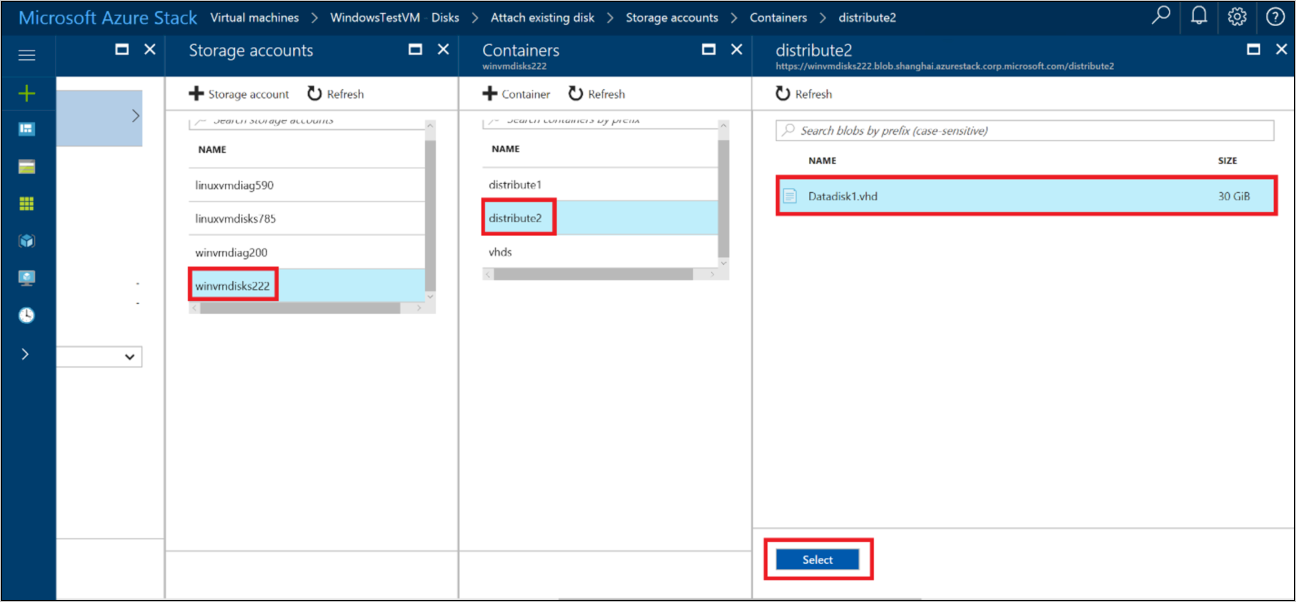
Under Storage accounts, select the account to use, and then choose a container that holds the .vhd file you previously uploaded. Select the .vhd file, and then choose Select to save the selection.
Under Attach existing disk, the file you selected is listed under VHD File. Update the Host caching setting of the disk, and then select OK to save the new disk configuration for the VM.
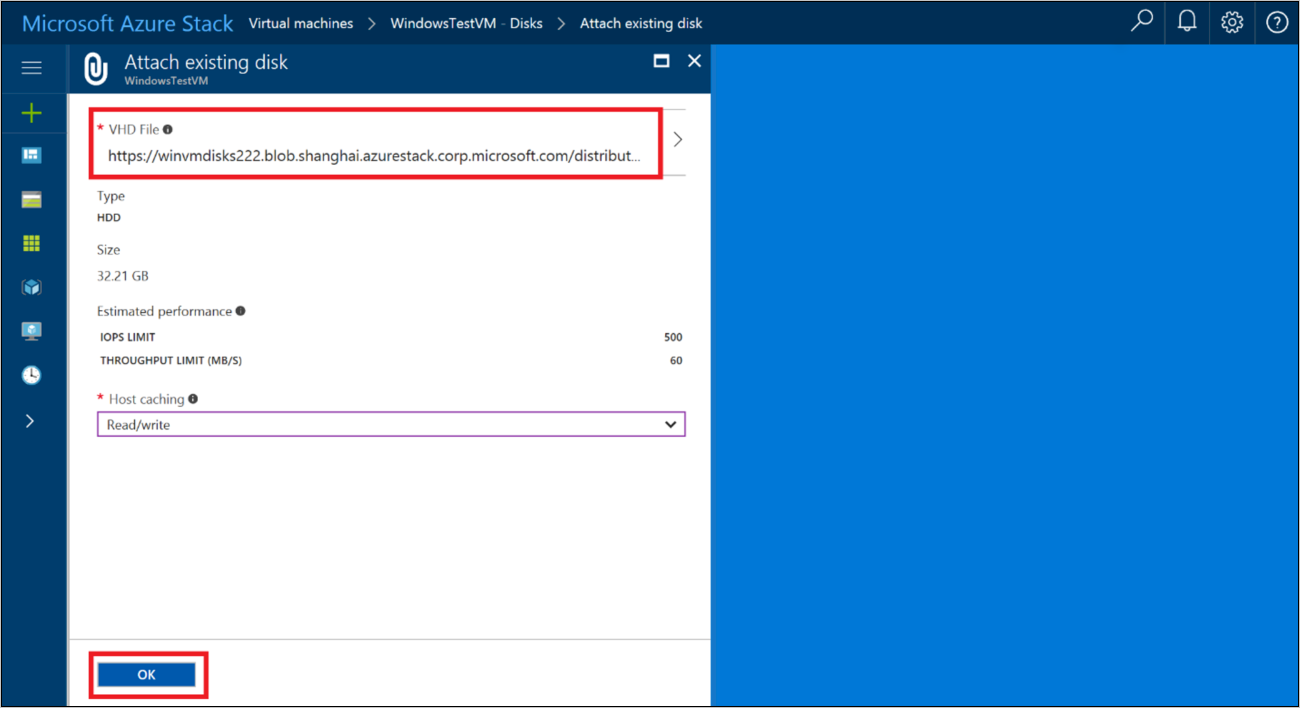
After Azure Stack Hub creates the disk and attaches it to the VM, the new disk is listed in the VM's disk settings under Data Disks.
Use PowerShell to add multiple disks to a VM
You can use PowerShell to provision a VM and add new data disks, or attach a pre-existing managed disk or .vhd file as a data disk.
The Add-AzVMDataDisk cmdlet adds a data disk to a VM. You can add a data disk when you create a VM, or you can add a data disk to an existing VM. For an unmanaged disk, specify the VhdUri parameter to distribute the disks to different containers.
Add data disks to a new VM
The following examples use PowerShell commands to create a VM with three data disks. The commands are provided with several parts due to the minor differences when using managed disks or unmanaged disks.
Create virtual machine configuration and network resources
The following script creates a VM object, and then stores it in the $VirtualMachine variable. The commands assign a name and size to the VM, then create the network resources (virtual network, subnet, virtual network adapter, NSG, and public IP address) for the VM.
# Create new virtual machine configuration
$VirtualMachine = New-AzVMConfig -VMName "VirtualMachine" `
                                      -VMSize "Standard_A2"

# Set variables
$rgName = "myResourceGroup"
$location = "local"

# Create a subnet configuration
$subnetName = "mySubNet"
$singleSubnet = New-AzVirtualNetworkSubnetConfig -Name $subnetName -AddressPrefix 10.0.0.0/24

# Create a vnet configuration
$vnetName = "myVnetName"
$vnet = New-AzVirtualNetwork -Name $vnetName -ResourceGroupName $rgName -Location $location `
                                  -AddressPrefix 10.0.0.0/16 -Subnet $singleSubnet

# Create a public IP
$ipName = "myIP"
$pip = New-AzPublicIpAddress -Name $ipName -ResourceGroupName $rgName -Location $location `
                                  -AllocationMethod Dynamic

# Create a network security group configuration
$nsgName = "myNsg"
$rdpRule = New-AzNetworkSecurityRuleConfig -Name myRdpRule -Description "Allow RDP" `
                                                -Access Allow -Protocol Tcp -Direction Inbound -Priority 110 `
                                                -SourceAddressPrefix Internet -SourcePortRange * `
                                                -DestinationAddressPrefix * -DestinationPortRange 3389
$nsg = New-AzNetworkSecurityGroup -ResourceGroupName $rgName -Location $location `
                                       -Name $nsgName -SecurityRules $rdpRule

# Create a NIC configuration
$nicName = "myNicName"
$nic = New-AzNetworkInterface -Name $nicName -ResourceGroupName $rgName `
                                   -Location $location -SubnetId $vnet.Subnets[0].Id `
                                   -NetworkSecurityGroupId $nsg.Id -PublicIpAddressId $pip.Id
Add managed disks
The following three commands add managed data disks to the virtual machine stored in $VirtualMachine. Each command specifies the name and additional properties of the disk.
$VirtualMachine = Add-AzVMDataDisk -VM $VirtualMachine -Name 'DataDisk1' `
                                        -Caching 'ReadOnly' -DiskSizeInGB 10 -Lun 0 `
                                        -CreateOption Empty
$VirtualMachine = Add-AzVMDataDisk -VM $VirtualMachine -Name 'DataDisk2' `
                                        -Caching 'ReadOnly' -DiskSizeInGB 11 -Lun 1 `
                                        -CreateOption Empty
$VirtualMachine = Add-AzVMDataDisk -VM $VirtualMachine -Name 'DataDisk3' `
                                        -Caching 'ReadOnly' -DiskSizeInGB 12 -Lun 2 `
                                        -CreateOption Empty
The following command adds an OS disk as a managed disk to the virtual machine stored in $VirtualMachine.
# Set OS Disk
$osDiskName = "osDisk"
$VirtualMachine = Set-AzVMOSDisk -VM $VirtualMachine -Name $osDiskName  `
                                      -CreateOption FromImage -Windows
Add unmanaged disks
The next three commands assign paths of three unmanaged data disks to the $DataDiskVhdUri01, $DataDiskVhdUri02, and $DataDiskVhdUri03 variables. Define a different path name in the URL to distribute the disks to different containers:
$DataDiskVhdUri01 = "https://contoso.blob.local.azurestack.external/test1/data1.vhd"
$DataDiskVhdUri02 = "https://contoso.blob.local.azurestack.external/test2/data2.vhd"
$DataDiskVhdUri03 = "https://contoso.blob.local.azurestack.external/test3/data3.vhd"
The following three commands add data disks to the virtual machine stored in $VirtualMachine. Each command specifies the name, and additional properties of the disk. The URI of each disk is stored in $DataDiskVhdUri01, $DataDiskVhdUri02, and $DataDiskVhdUri03.
$VirtualMachine = Add-AzVMDataDisk -VM $VirtualMachine -Name 'DataDisk1' `
                                        -Caching 'ReadOnly' -DiskSizeInGB 10 -Lun 0 `
                                        -VhdUri $DataDiskVhdUri01 -CreateOption Empty
$VirtualMachine = Add-AzVMDataDisk -VM $VirtualMachine -Name 'DataDisk2' `
                                        -Caching 'ReadOnly' -DiskSizeInGB 11 -Lun 1 `
                                        -VhdUri $DataDiskVhdUri02 -CreateOption Empty
$VirtualMachine = Add-AzVMDataDisk -VM $VirtualMachine -Name 'DataDisk3' `
                                        -Caching 'ReadOnly' -DiskSizeInGB 12 -Lun 2 `
                                        -VhdUri $DataDiskVhdUri03 -CreateOption Empty
The following commands add an unmanaged OS disk to the virtual machine stored in $VirtualMachine.
# Set OS Disk
$osDiskUri = "https://contoso.blob.local.azurestack.external/vhds/osDisk.vhd"
$osDiskName = "osDisk"
$VirtualMachine = Set-AzVMOSDisk -VM $VirtualMachine -Name $osDiskName -VhdUri $osDiskUri `
                                      -CreateOption FromImage -Windows
Create new virtual machine
Use the following PowerShell commands to set OS image, add network configuration to the VM, and then start the new VM.
#Create the new VM
$VirtualMachine = Set-AzVMOperatingSystem -VM $VirtualMachine -Windows -ComputerName VirtualMachine -ProvisionVMAgent | `
                  Set-AzVMSourceImage -PublisherName MicrosoftWindowsServer -Offer WindowsServer `
                  -Skus 2016-Datacenter -Version latest | Add-AzVMNetworkInterface -Id $nic.Id

New-AzVM -ResourceGroupName $rgName -Location $location -VM $VirtualMachine
Add data disks to an existing VM
The following examples use PowerShell commands to add three data disks to an existing VM:
Get virtual machine
The first command gets the VM named VirtualMachine by using the Get-AzVM cmdlet. The command stores the VM in the $VirtualMachine variable:
$VirtualMachine = Get-AzVM -ResourceGroupName "myResourceGroup" `
                                -Name "VirtualMachine"
Add managed disk
The next three commands add the managed data disks to the VM stored in the $VirtualMachine variable. Each command specifies the name and additional properties of the disk.
Add-AzVMDataDisk -VM $VirtualMachine -Name "DataDisk1" -Lun 0 `
                      -Caching ReadOnly -DiskSizeinGB 10 -CreateOption Empty
Add-AzVMDataDisk -VM $VirtualMachine -Name "DataDisk2" -Lun 1 `
                      -Caching ReadOnly -DiskSizeinGB 11 -CreateOption Empty
Add-AzVMDataDisk -VM $VirtualMachine -Name "DataDisk3" -Lun 2 `
                      -Caching ReadOnly -DiskSizeinGB 12 -CreateOption Empty
Add unmanaged disk
The next three commands assign paths for three data disks to the $DataDiskVhdUri01, $DataDiskVhdUri02, and $DataDiskVhdUri03 variables. The different path names in the VHD URIs indicate different containers for the disk placement:
$DataDiskVhdUri01 = "https://contoso.blob.local.azurestack.external/test1/data1.vhd"
$DataDiskVhdUri02 = "https://contoso.blob.local.azurestack.external/test2/data2.vhd"
$DataDiskVhdUri03 = "https://contoso.blob.local.azurestack.external/test3/data3.vhd"
The next three commands add the data disks to the VM stored in the $VirtualMachine variable. Each command specifies the name, location, and additional properties of the disk. The URI of each disk is stored in $DataDiskVhdUri01, $DataDiskVhdUri02, and $DataDiskVhdUri03.
Add-AzVMDataDisk -VM $VirtualMachine -Name "DataDisk1" `
                      -VhdUri $DataDiskVhdUri01 -LUN 0 `
                      -Caching ReadOnly -DiskSizeinGB 10 -CreateOption Empty
Add-AzVMDataDisk -VM $VirtualMachine -Name "DataDisk2" `
                      -VhdUri $DataDiskVhdUri02 -LUN 1 `
                      -Caching ReadOnly -DiskSizeinGB 11 -CreateOption Empty
Add-AzVMDataDisk -VM $VirtualMachine -Name "DataDisk3" `
                      -VhdUri $DataDiskVhdUri03 -LUN 2 `
                      -Caching ReadOnly -DiskSizeinGB 12 -CreateOption Empty
Update virtual machine state
This command updates the state of the VM stored in $VirtualMachine in -ResourceGroupName:
Update-AzVM -ResourceGroupName "myResourceGroup" -VM $VirtualMachine
Next steps
To learn more about Azure Stack Hub VMs, see Considerations for Virtual Machines in Azure Stack Hub.