Note
Access to this page requires authorization. You can try signing in or changing directories.
Access to this page requires authorization. You can try changing directories.
This article describes how to connect to your Azure Stack Hub subscriptions and storage accounts using Azure Storage Explorer. Storage Explorer is a standalone app that enables you to easily work with Azure Stack Hub storage data on Windows, macOS, and Linux.
- If you are looking for information about using Azure Storage Explorer with global Azure rather than Azure Stack Hub, see Get started with Storage Explorer.
- There are several tools available to move data to and from Azure Stack Hub storage. For more information, see Data transfer tools for Azure Stack Hub storage.
- If not yet installed, download Storage Explorer and install it.
After you connect to an Azure Stack Hub subscription or storage account, see the Azure Storage Explorer articles to work with your Azure Stack Hub data.
Prepare for connecting to Azure Stack Hub
You need direct access to Azure Stack Hub or a VPN connection for Storage Explorer to access the Azure Stack Hub subscription. For integrated systems that are disconnected, the recommendation is to use an internal enterprise Certificate Authority to export the root certificate in a Base-64 format and then import it into Azure Storage Explorer.
Note
Azure Storage Explorer relies on the Node.js networking stack to determine which default certificate signers to trust. Learn more.
Export and then import the Azure Stack Hub certificate
Export and then import Azure Stack Hub certificate for disconnected integrated systems. For connected integrated systems, the certificate is publicly signed and this step isn't necessary.
Open
mmc.exeon an Azure Stack Hub host machine, or a local machine with a VPN connection to Azure Stack Hub.In File, select Add/Remove Snap-in. Select Certificates in Available snap-ins.
Select Computer account, and then select Next. Select Local computer, and then select Finish.
Under Console Root\Certificated (Local Computer)\Trusted Root Certification Authorities\Certificates find AzureStackSelfSignedRootCert.
Right-click the certificate, select All Tasks > Export, and then follow the instructions to export the certificate with Base-64 encoded X.509 (.CER).
The exported certificate is used in the next step.
Start Storage Explorer. If you see the Connect to Azure Storage dialog box, cancel it.
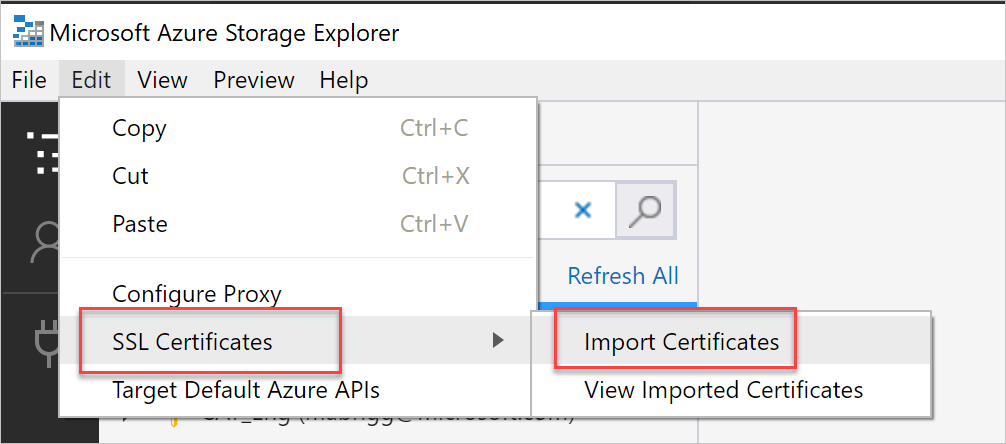
On the Edit menu, select SSL Certificates, and then select Import Certificates. Use the file chooser dialog box to find and open the certificate that you exported in the previous step.
After you import the certificate, you're prompted to restart Storage Explorer.
After Storage Explorer restarts, select the Edit menu, and check to see if Target Azure Stack Hub APIs is selected. If it isn't, select Target Azure Stack Hub, and then restart Storage Explorer for the change to take effect. This configuration is required for compatibility with your Azure Stack Hub environment.

Connect to an Azure Stack Hub subscription with Microsoft Entra ID
Use the following steps to connect Storage Explorer to an Azure Stack Hub subscription, which belongs to a Microsoft Entra account.
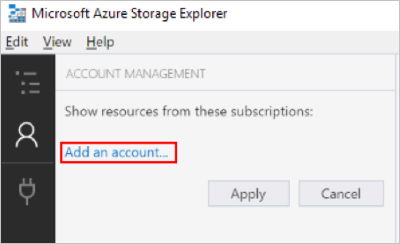
In the left pane of Storage Explorer, select Manage Accounts. All the Microsoft subscription for which you are signed in are displayed.
To connect to the Azure Stack Hub subscription, select Add an account.

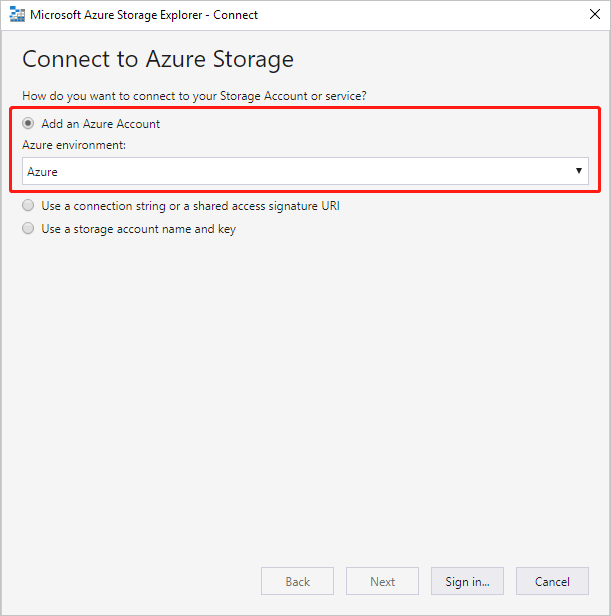
In the Connect to Azure Storage dialog box, under Azure environment, select Azure, Azure China 21Vianet, Azure Germany, Azure US Government, or Add New Environment. This depends on the Azure Stack Hub account being used. Select Sign in to sign in with the Azure Stack Hub account associated with at least one active Azure Stack Hub subscription.
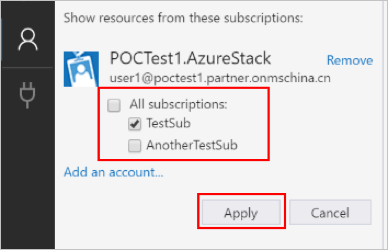
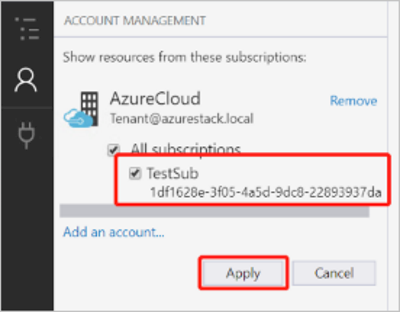
After you successfully sign in with an Azure Stack Hub account, the left pane is populated with the Azure Stack Hub subscriptions associated with that account. Select the Azure Stack Hub subscriptions that you want to work with, and then select Apply. Selecting or clearing the All subscriptions check box toggles selecting all or none of the listed Azure Stack Hub subscriptions.
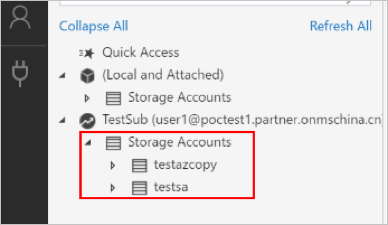
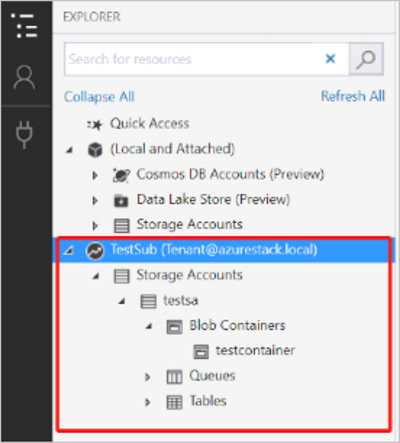
The left pane displays the storage accounts associated with the selected Azure Stack Hub subscriptions.
Connect to an Azure Stack Hub subscription with AD FS account
Note
The Azure Federated Service (AD FS) sign-in experience supports Storage Explorer 1.2.0 or newer versions with Azure Stack Hub 1804 or newer update.
Use the following steps to connect Storage Explorer to an Azure Stack Hub subscription, which belongs to an AD FS account:
Select Manage Accounts. The explorer lists the Microsoft subscriptions that you signed in to.
Select Add an account to connect to the Azure Stack Hub subscription.
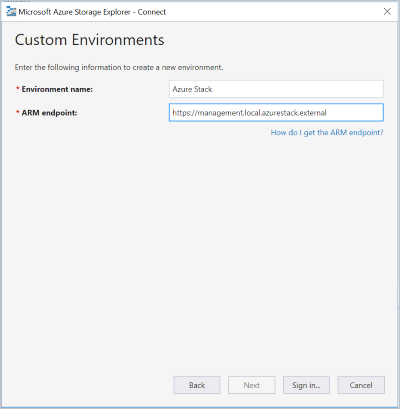
Select Next. In the Connect to Azure Storage dialog box, under Azure environment, select Use Custom Environment, then select Next.

Enter the required information of Azure Stack Hub custom environment.
Field Notes Environment name The field can be customized. Azure Resource Manager endpoint The samples of Azure Resource Manager resource endpoints.
For operators:https://adminmanagement.local.azurestack.external
For users:https://management.local.azurestack.externalIf you're working on Azure Stack Hub integrated system and don't know your management endpoint, contact your operator.
Select Sign in to connect to the Azure Stack Hub account that's associated with at least one active Azure Stack Hub subscription.
Select the Azure Stack Hub subscriptions that you want to work with, then select Apply.
The left pane displays the storage accounts associated with the selected Azure Stack Hub subscriptions.
Connect to an Azure Stack Hub storage account
You can also connect to an Azure Stack Hub storage account using storage account name and key pair.
In the left pane of Storage Explorer, select Manage Accounts. All the Microsoft accounts that you signed into are displayed.

To connect to the Azure Stack Hub subscription, select Add an account.
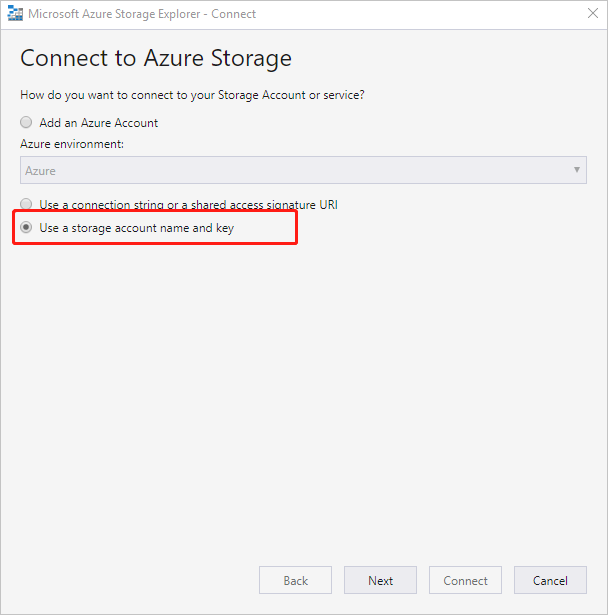
In the Connect to Azure Storage dialog box, select Use a storage account name and key.
Input your account name in Account name, and paste the account key into the Account key text box. Then, select Other (enter below) in Storage endpoints domain and input the Azure Stack Hub endpoint.
An Azure Stack Hub endpoint includes two parts: the name of a region and the Azure Stack Hub domain. Contact your cloud admin if you're not sure about your endpoint.

Select Connect.
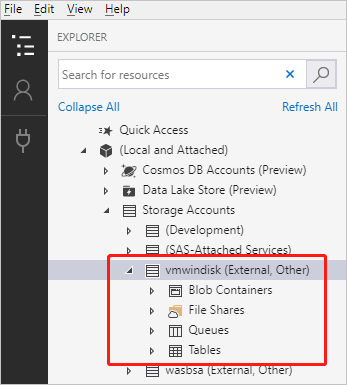
After the storage account is successfully attached, it's displayed with External, Other appended to its name.
Next steps
- Get started with Storage Explorer
- Azure Stack Hub storage: differences and considerations
- For more information about Azure storage, see Introduction to Microsoft Azure storage.