Note
Access to this page requires authorization. You can try signing in or changing directories.
Access to this page requires authorization. You can try changing directories.
Important
Effective May 1, 2025, Azure AD B2C will no longer be available to purchase for new customers. Learn more in our FAQ.
In this article, you can learn how to configure the Cloudflare Web Application Firewall (WAF) solution for Azure Active Directory B2C (Azure AD B2C) tenant with custom domain. Use Cloudflare WAF to help protect organizations from malicious attacks that can exploit vulnerabilities such as SQL Injection, and cross-site scripting (XSS).
Prerequisites
To get started, you need:
- An Azure subscription. If you don't have one, you can get an Azure free account.
- An Azure AD B2C tenant linked to your Azure subscription.
- A Cloudflare account.
Scenario description
Cloudflare WAF integration includes the following components:
- Azure AD B2C tenant – The authorization server that verifies user credentials using the custom policies defined in the tenant, known as the identity provider.
- Azure Front Door – Enables custom domains for Azure B2C tenant. Traffic from Cloudflare WAF is routed to Azure Front Door before arriving at Azure AD B2C tenant.
- Cloudflare – The web application firewall that manages traffic sent to the authorization server.
Integrate with Azure AD B2C
For custom domains in Azure AD B2C, use the custom domain feature in Azure Front Door. Learn how to enable Azure AD B2C custom domains.
After a custom domain for Azure AD B2C is configured using Azure Front Door, test the custom domain before proceeding.
Create a Cloudflare account
On cloudflare.com, you can create an account. To enable WAF, on Application Services, select Pro, which is required.
Configure DNS
To enable WAF for a domain, in the DNS console for the CNAME entry, turn on the proxy setting from the DNS console for the CNAME entry as shown.

Under the DNS pane, toggle the Proxy status option to Proxied. It turns orange.
The settings appear in the following image.

Note
Azure Front Door-managed certificates aren't automatically renewed if your custom domain’s CNAME record points to a DNS record other than the Azure Front Door endpoint’s domain (for example, when using a third-party DNS service like Cloudflare). To renew the certificate in such cases, follow the instructions in the Renew Azure Front Door-managed certificates article.
Configure the Web Application Firewall
Go to your Cloudflare settings, and use the Cloudflare content to configure the WAF and learn about other security tools.
Configure firewall rule
In the top pane of the console, use the firewall option to add, update, or remove firewall rules. For example, the following firewall setting enables CAPTCHA for incoming requests to contosobank.co.uk domain before the request goes to Azure Front Door.
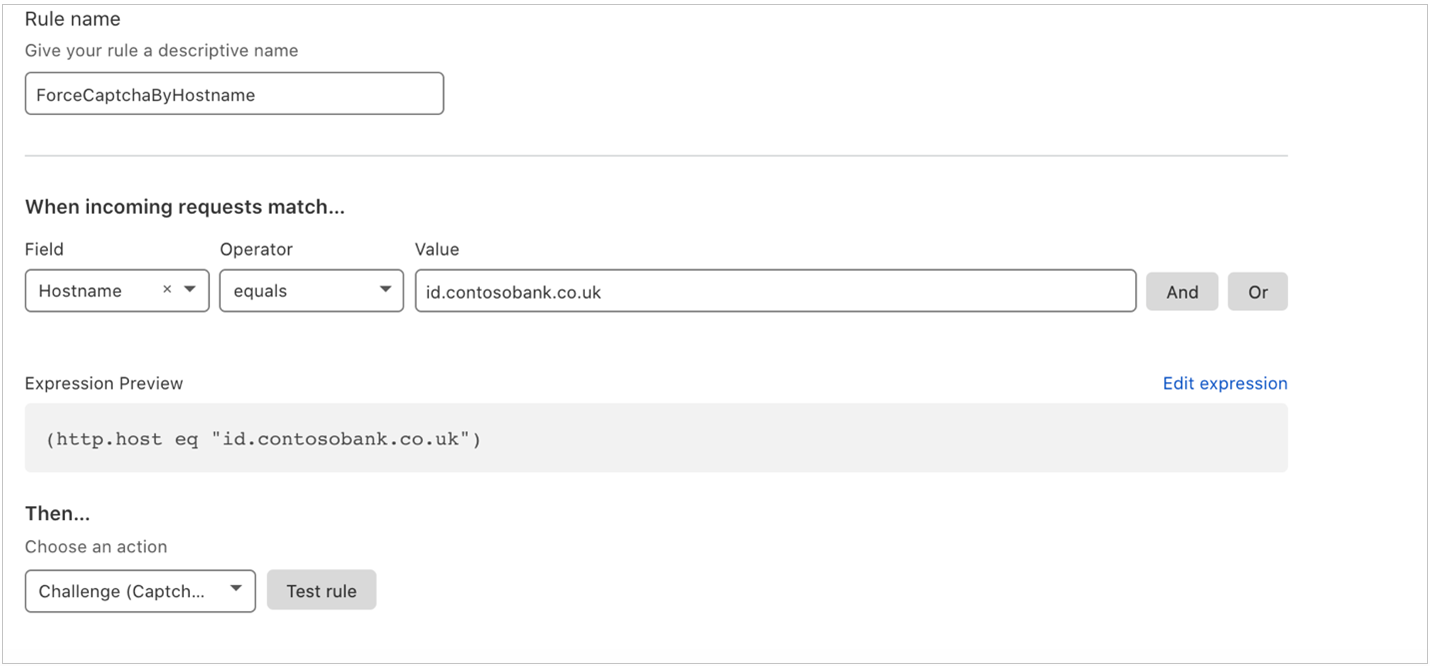
Learn more: Cloudflare Firewall Rules
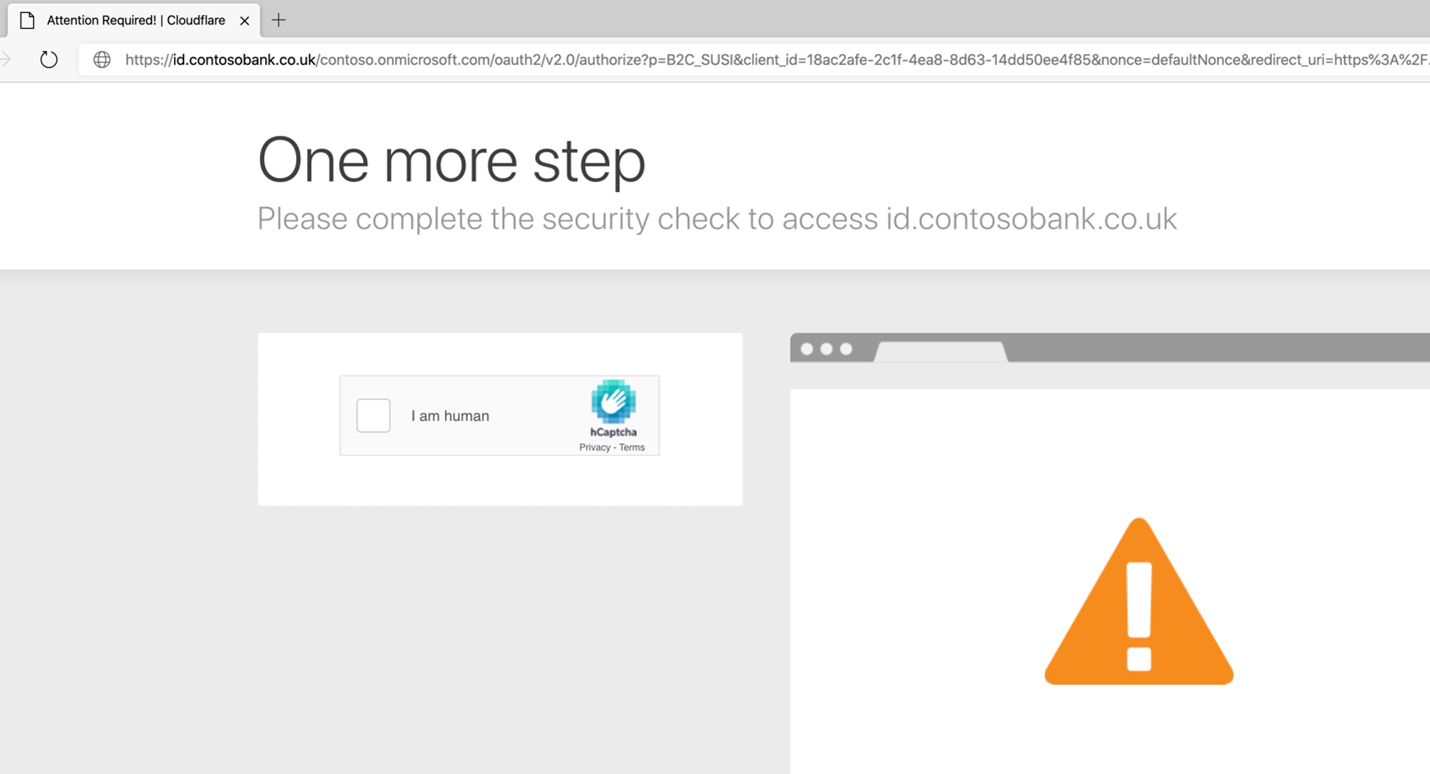
Test the settings
Complete CAPTCHA when access to the custom domain is requested.
Note
Cloudflare has functionality to customize block pages. See, Configuring Custom Pages (Error and Challenge).
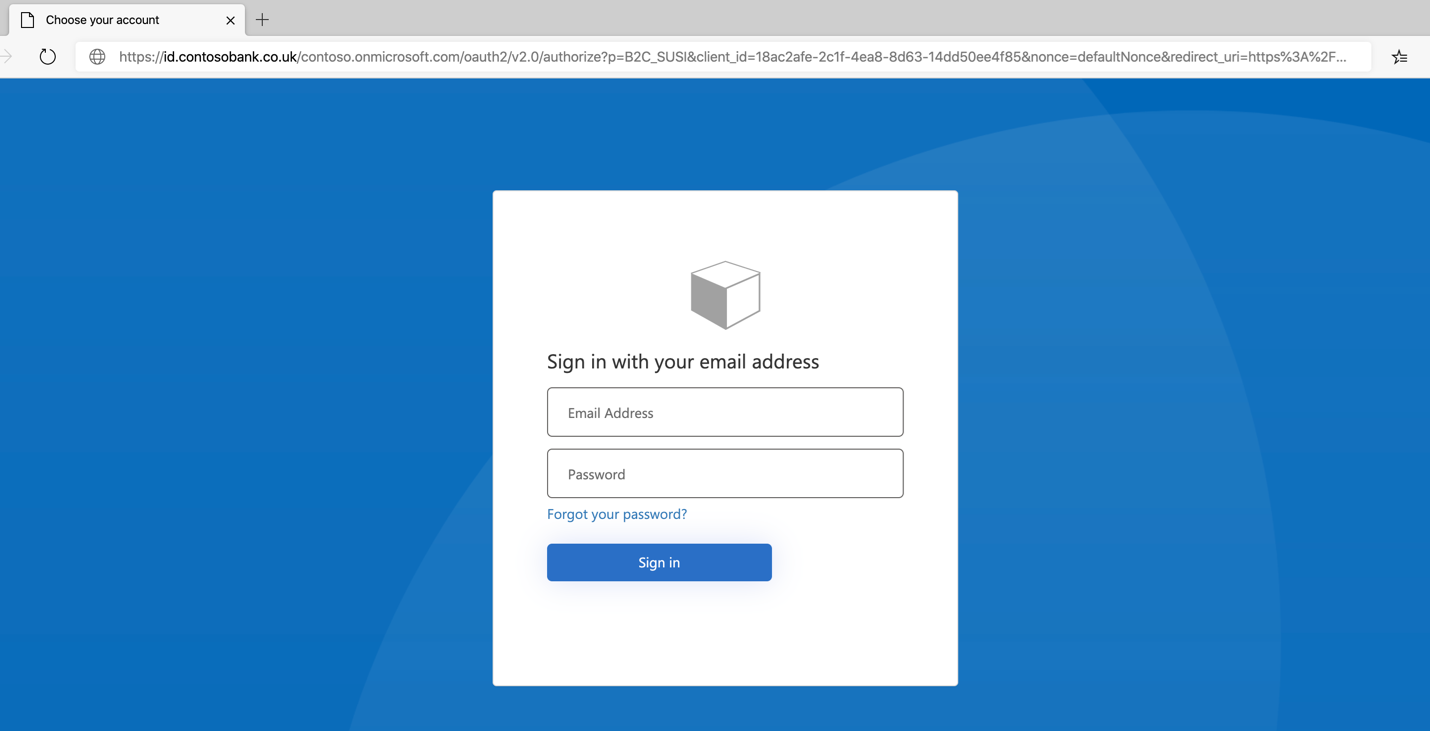
The Azure AD B2C policy sign-in dialog appears.
Resources
- Cloudflare: Troubleshoot common custom pages issues
- Get started with custom policies in Azure AD B2C