Note
Access to this page requires authorization. You can try signing in or changing directories.
Access to this page requires authorization. You can try changing directories.
This article describes the general steps for managing automatic user account provisioning and deprovisioning for applications that support it. User account provisioning is the act of creating, updating, and/or disabling user account records in an application’s local user profile store. Most cloud and SaaS applications, as well many on-premises applications store the role and permissions in the application's own local user profile store. The presence of such a user record in the application's local store is required for single sign-on and access to work. To learn more about automatic user account provisioning, see Automate User Provisioning and Deprovisioning to SaaS Applications with Microsoft Entra ID.
Important
Microsoft Entra ID has a gallery that contains thousands of pre-integrated applications that are enabled for automatic provisioning with Microsoft Entra ID. You should start by finding the provisioning setup tutorial specific to your application in the List of tutorials on how to integrate SaaS apps with Microsoft Entra ID. You'll likely find step-by-step guidance for configuring both the app and Microsoft Entra ID to create the provisioning connection.
Finding your apps in the portal
Use the Microsoft Entra admin center to view and manage all applications that are configured for single sign-on in a directory. Enterprise apps are apps that are deployed and used within your organization. Follow these steps to view and manage your enterprise applications:
Sign in to the Microsoft Entra admin center as at least an Application Administrator.
Browse to Entra ID > Enterprise apps.
A list of all configured apps is shown, including apps that were added from the gallery.
Select any app to load its resource pane, where you can view reports and manage app settings.
Select Provisioning to manage user account provisioning settings for the selected app.
Provisioning modes
The Provisioning pane begins with a Mode menu, which shows the provisioning modes supported for an enterprise application, and lets you configure them. The available options include:
Automatic - This option is shown if Microsoft Entra ID supports automatic API-based provisioning or deprovisioning of user accounts to this application. Select this mode to display an interface that helps administrators:
- Configure Microsoft Entra ID to connect to the application's user management API
- Create account mappings and workflows that define how user account data should flow between Microsoft Entra ID and the app
- Manage the Microsoft Entra provisioning service
Manual - This option is shown if Microsoft Entra ID doesn't support automatic provisioning of user accounts to this application. In this case, user account records stored in the application must be managed using an external process, based on the user management and provisioning capabilities provided by that application (which can include SAML Just-In-Time provisioning).
Configuring automatic user account provisioning
Select the Automatic option to specify settings for admin credentials, mappings, starting and stopping, and synchronization.
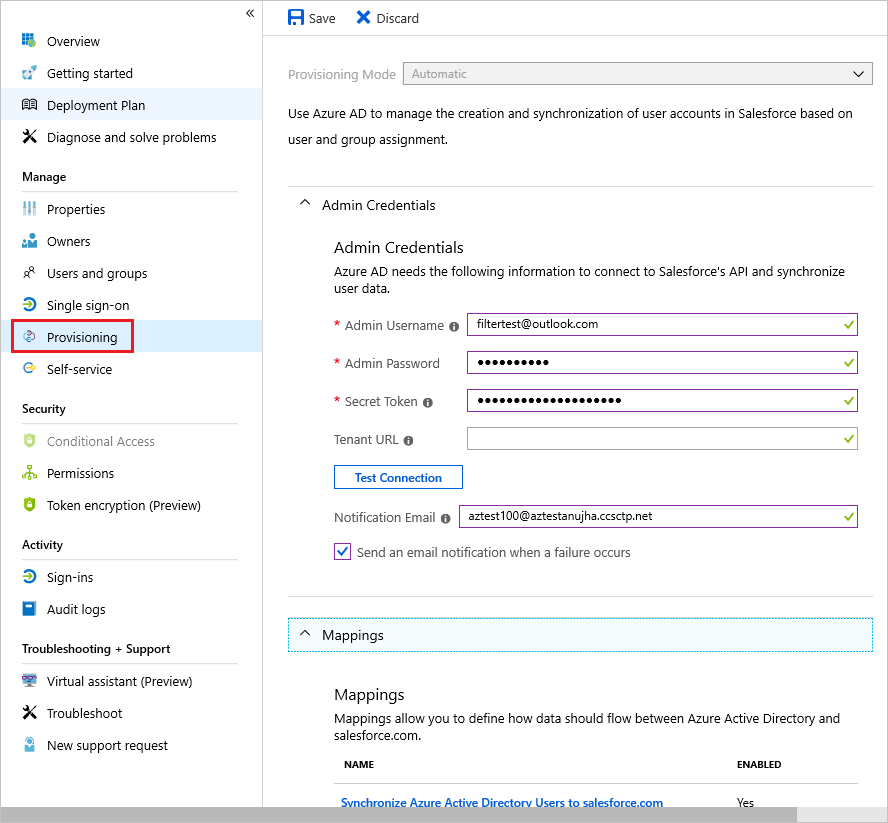
Admin Credentials
Expand Admin Credentials to enter the credentials required for Microsoft Entra ID to connect to the application's user management API. The input required varies depending on the application. To learn about the credential types and requirements for specific applications, see the configuration tutorial for that specific application.
Select Test Connection to test the credentials by having Microsoft Entra ID attempt to connect to the app's provisioning app using the supplied credentials.
Mappings
Expand Mappings to view and edit the user attributes that flow between Microsoft Entra ID and the target application when user accounts are provisioned or updated.
There's a preconfigured set of mappings between Microsoft Entra user objects and each SaaS app’s user objects. Some apps also manage group objects. Select a mapping in the table to open the mapping editor, where you can view and customize them.
Supported customizations include:
Enabling and disabling mappings for specific objects, such as the Microsoft Entra user object to the SaaS app's user object.
Editing the attributes that flow from the Microsoft Entra user object to the app's user object. For more information on attribute mapping, see Understanding attribute mapping types.
Filtering the provisioning actions that Microsoft Entra ID runs on the targeted application. Instead of having Microsoft Entra ID fully synchronize objects, you can limit the actions run.
For example, only select Update and Microsoft Entra-only updates existing user accounts in an application but doesn't create new ones. Only select Create and Azure only creates new user accounts but doesn't update existing ones. This feature lets admins create different mappings for account creation and update workflows.
Adding a new attribute mapping. Select Add New Mapping at the bottom of the Attribute Mapping pane. Fill out the Edit Attribute form and select Ok to add the new mapping to the list.
Settings
Expand Settings to set an email address to receive notifications and whether to receive alerts on errors. Also select the scope of users to sync. Choose to sync all users and groups or only users that are assigned.
Provisioning Status
If provisioning is being enabled for the first time for an application, turn on the service by changing the Provisioning Status to On. This change causes the Microsoft Entra provisioning service to run an initial cycle. It reads the users assigned in the Users and groups section, queries the target application for them, and then runs the provisioning actions defined in the Microsoft Entra ID Mappings section. During this process, the provisioning service stores cached data about what user accounts it's managing. The service stores cached data so nonmanaged accounts inside the target applications that were never in scope for assignment aren't affected in deprovisioning operations. After the initial cycle, the provisioning service automatically synchronizes user and group objects on a forty-minute interval.
Change the Provisioning Status to Off to pause the provisioning service. In this state, Azure doesn't create, update, or remove any user or group objects in the app. Change the state back to On and the service picks up where it left off.