Note
Access to this page requires authorization. You can try signing in or changing directories.
Access to this page requires authorization. You can try changing directories.
Overview
Business logic often lives in a private Application Programming Interface (API). The API runs on premises or in a private cloud. Your native Android, iOS, Mac, or Windows apps need to interact with the API endpoints to use data or provide user interaction. Microsoft Entra application proxy and the Microsoft Authentication Library (MSAL) let your native apps securely access your private cloud APIs. Microsoft Entra application proxy is a faster and more secure solution than opening firewall ports and controlling authentication and authorization at the app layer.
Tip
The term "on premises" is a legacy term dating back to the time when physical servers were located on the premises of the corporate office. Today, many self-hosted workloads run on a virtual machine in a datacenter. The terms on premises and private cloud are used interchangeably.
This article walks you through setting up a Microsoft Entra application proxy solution for hosting a web API service that native apps can access.
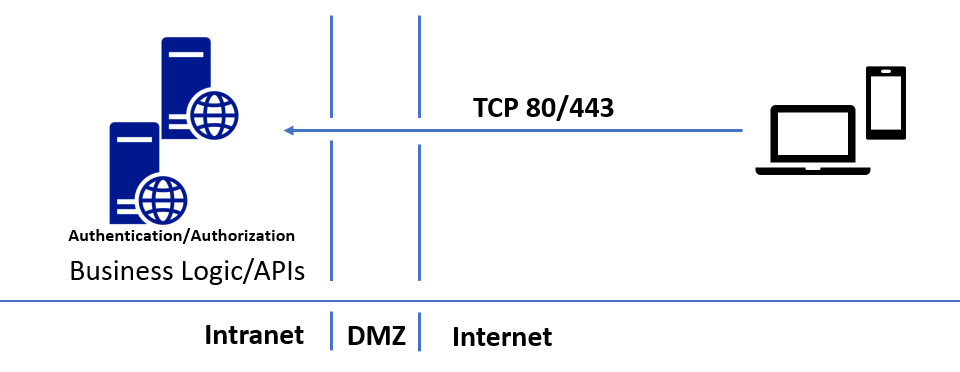
The following diagram shows a traditional way to publish on-premises APIs. This approach requires opening incoming ports 80 and 443.
The following diagram shows how you can use Microsoft Entra application proxy to securely publish APIs without opening any incoming ports:
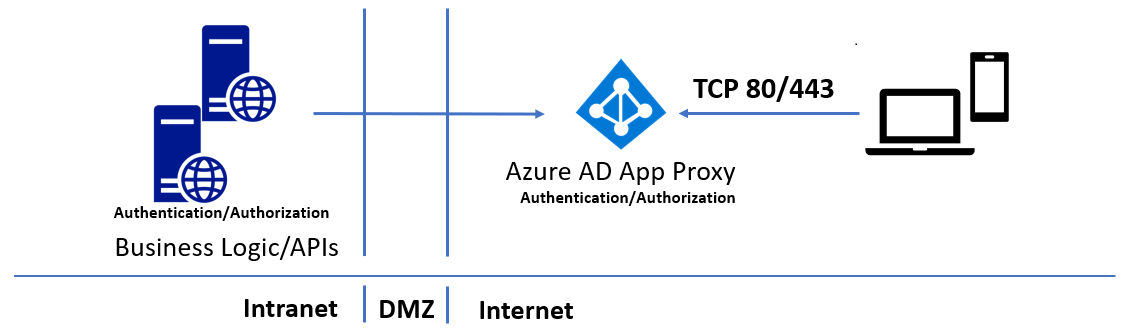
The Microsoft Entra application proxy forms the backbone of the solution, working as a public endpoint for API access, and providing authentication and authorization. You can access your APIs from a vast array of platforms by using the Microsoft Authentication Library (MSAL) libraries.
Because Microsoft Entra application proxy authentication and authorization are built on top of Microsoft Entra ID, you can use Microsoft Entra Conditional Access to ensure only trusted devices can access APIs published through application proxy. Use Microsoft Entra join or Microsoft Entra hybrid joined for desktops, and Intune Managed for devices. You can also take advantage of Microsoft Entra ID P1 or P2 features like Microsoft Entra multifactor authentication, and the machine learning-backed security of Microsoft Entra ID Protection.
Prerequisites
To follow this walkthrough, you need:
- Admin access to an Azure directory, with an account that can create and register apps
- The sample web API and native client apps from the Microsoft Authentication Library (MSAL)
Publish the API through application proxy
To publish an API outside of your intranet through application proxy, you follow the same pattern as for publishing web apps. For more information, see Tutorial: Add an on-premises application for remote access through application proxy in Microsoft Entra ID.
To publish the SecretAPI web API through application proxy:
Build and publish the sample SecretAPI project as an ASP.NET web app on your local computer or intranet. Make sure you can access the web app locally.
Sign in to the Microsoft Entra admin center as at least an Application Administrator.
Browse to Entra ID > Enterprise apps.
At the top of the Enterprise applications - All applications page, select New application.
On the Browse Microsoft Entra Gallery page, locate section On-premises applications and select Add an on-premises application. The Add your own on-premises application page appears.
If you don't have a private network connector installed, you're prompted to install it. Select Download private network connector to download and install the connector.
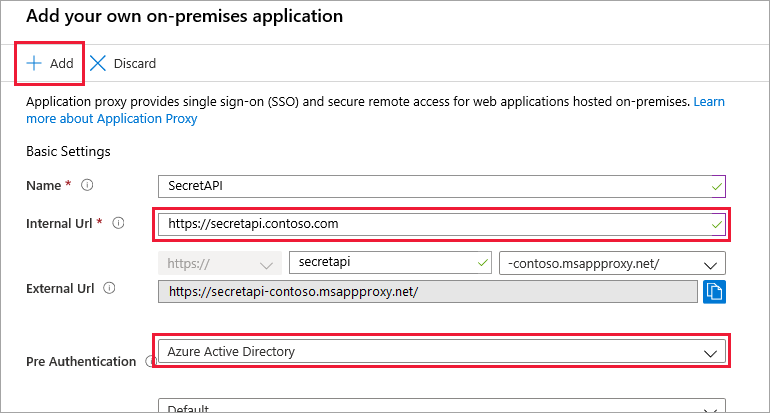
Add information on the Add your own on-premises application page.
Next to Name, enter SecretAPI.
Next to Internal Url, enter the URL you use to access the API from within your intranet.
Make sure Pre-Authentication is set to Microsoft Entra ID.
Select Create, and wait for the app to be created.
On the Enterprise applications - All applications page, select the SecretAPI app.
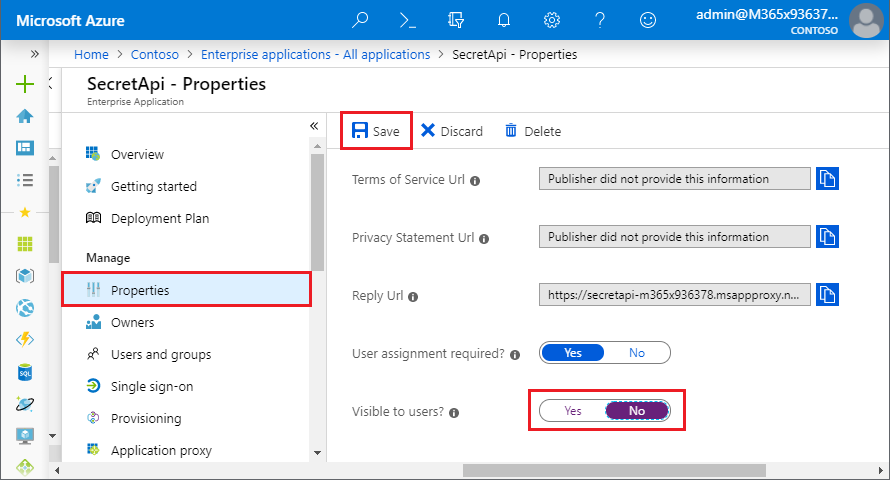
On the SecretAPI - Overview page, select Properties in the left navigation.
You don't want APIs to be available to end users in the MyApps panel, so set Visible to users to No at the bottom of the Properties page, and then select Save.
The web API is now published through Microsoft Entra application proxy. Next, add users who can access the app.
On the SecretAPI - Overview page, select Users and groups in the left navigation.
On the Users and groups page, select Add user/group.
On the Add assignment page, select Users and groups.
On the Users and groups page, search for and select users who can access the app, including at least yourself. After selecting all users, select Select.

On the Add Assignment page, select Assign.
Note
APIs that use integrated Windows authentication might require Kerberos Constrained Delegation configuration.
Register the native app and grant access to the API
Native apps are programs developed to use on a particular platform or device. Before your native app can connect and access an API, you must register it in Microsoft Entra ID. The following steps show how to register a native app and give it access to the web API you published through application proxy.
To register the AppProxyNativeAppSample native app:
Sign in to the Microsoft Entra admin center as at least an Application Administrator.
Browse to Entra ID > App registrations.
Select New registration.
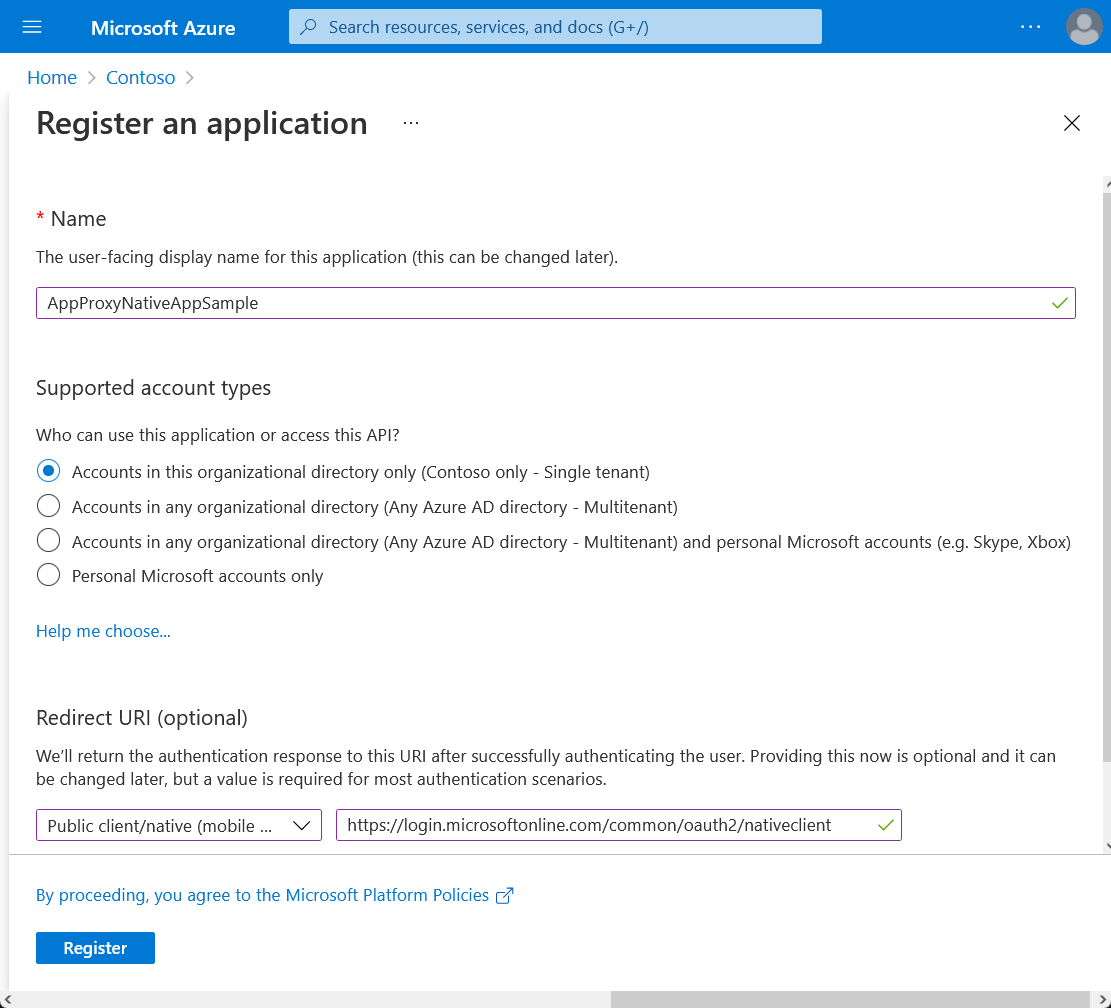
Enter information on the Register an application page.
Under Name, enter AppProxyNativeAppSample.
Under Supported account types, select Accounts in this organizational directory only (Contoso only - Single tenant).
Under Redirect URL, drop down and select Public client/native (mobile & desktop), and then enter
https://login.microsoftonline.com/common/oauth2/nativeclient.Select Register, and wait for the app to be successfully registered.
The AppProxyNativeAppSample app is now registered in Microsoft Entra ID. Give your native app access to the SecretAPI web API:
On the App registrations page, select the AppProxyNativeAppSample app.
On the AppProxyNativeAppSample page, select API permissions in the left navigation.
On the API permissions page, select Add a permission.
On the first Request API permissions page, select the APIs my organization uses tab, and then search for and select SecretAPI.
On the next Request API permissions page, select the check box next to user_impersonation, and then select Add permissions.
Back on the API permissions page, you can select Grant admin consent for Contoso to prevent other users from having to individually consent to the app.
Configure the native app code
The last step is to configure the native app. The code must be added to the Form1.cs file in the NativeClient sample app. The code uses the MSAL library to acquire the token. The token requests the API call and attaches it to the header in the request. The token is attached as a bearer certificate. For more information about MSAL, see Add MSAL to your project and Add the reference to MSAL.
In Form1.cs, add the namespace
using Microsoft.Identity.Client;to the code.Edit the native application code in the authentication context of the Microsoft Authentication Library (MSAL) to include this customized code sample.
Configure the native app to connect to Microsoft Entra ID and call the API using application proxy. Then, update the placeholder values in the App.config file of the NativeClient sample app with values from Microsoft Entra ID.
Paste the Directory (tenant) ID in the
<add key="ida:Tenant" value="" />field. You can find and copy this value (a GUID) from the Overview page of either of your apps.Paste the AppProxyNativeAppSample Application (client) ID in the
<add key="ida:ClientId" value="" />field. You can find and copy this value (a GUID) from the AppProxyNativeAppSample's Overview page, in the left navigation under Manage.Paste the AppProxyNativeAppSample Redirect URI in the
<add key="ida:RedirectUri" value="" />field. You can find and copy this value (a URI) from the AppProxyNativeAppSample's Authentication page, in the left navigation under Manage. This step is optional as MSAL uses the methodPublicClientApplicationBuilder.WithDefaultRedirectUri()to insert the recommended reply Uniform Resource Identifier (URI).Paste the SecretAPI Application ID URI in the
<add key="todo:TodoListResourceId" value="" />field. The value is the same astodo:TodoListBaseAddress. The URI value is located on the Expose an API page of theSecretAPIapplication. Look in the left navigation under Manage.Paste the SecretAPI Home Page URL in the
<add key="todo:TodoListBaseAddress" value="" />field. You can find and copy this value (a URL) from the SecretAPI Branding & properties page, in the left navigation under Manage.
Note
If the solution doesn't build and reports the error invalid Resx file, in Solution Explorer, expand Properties, right-click Resources.resx, and then select View Code. Comment lines 121 to 123.
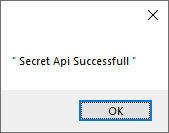
After you configure the parameters, build and run the native app. When you select the Sign In button, the app lets you sign in, and then displays a success screen to confirm that it successfully connected to the SecretAPI.