How to: Reactivate disabled Access Control Service namespaces
Warning
This content is for the older Azure AD v1.0 endpoint. Use the Microsoft identity platform for new projects.
On November 2017, we announced that Microsoft Azure Access Control Service (ACS), a service of Azure Active Directory (Azure AD), is being retired on November 7, 2018.
Since then, we've sent emails to the ACS subscriptions' admin email about the ACS retirement 12 months, 9 months, 6 months, 3 months, 1 month, 2 weeks, 1 week, and 1 day before the retirement date of November 7, 2018.
On October 3, 2018, we announced (through email and a blog post) an extension offer to customers who can't finish their migration before November 7, 2018. The announcement also had instructions for requesting the extension.
Why your namespace is disabled
If you haven't opted in for the extension, we'll start to disable ACS namespaces starting November 7, 2018. You must have requested the extension to February 4, 2019 already; otherwise, you will not be able to enable the namespaces through PowerShell.
Note
You must be a service administrator or co-administrator of the subscription to run the PowerShell commands and request an extension.
Find and enable your ACS namespaces
You can use ACS PowerShell to list all your ACS namespaces and reactivate ones that have been disabled.
Download and install ACS PowerShell:
Go to the PowerShell Gallery and download Acs.Namespaces.
Install the module:
Install-Module -Name Acs.NamespacesGet a list of all possible commands:
Get-Command -Module Acs.NamespacesTo get help on a specific command, run:
Get-Help [Command-Name] -Fullwhere
[Command-Name]is the name of the ACS command.
Connect to ACS using the Connect-AcsAccount cmdlet.
You may need to change your execution policy by running Set-ExecutionPolicy before you can run the command.
List your available Azure subscriptions using the Get-AcsSubscription cmdlet.
List your ACS namespaces using the Get-AcsNamespace cmdlet.
Confirm that the namespaces are disabled by confirming that
StateisDisabled.
You can also use
nslookup {your-namespace}.accesscontrol.windows.netto confirm if the domain is still active.Enable your ACS namespace(s) using the Enable-AcsNamespace cmdlet.
Once you've enabled your namespace(s), you can request an extension so that the namespace(s) won't be disabled again before February 4, 2019. After that date, all requests to ACS will fail.

Request an extension
We are taking new extension requests starting on January 21, 2019.
We will start disabling namespaces for customers who have requested extensions to February 4, 2019. You can still re-enable namespaces through PowerShell, but the namespaces will be disabled again after 48 hours.
After March 4, 2019, customers will no longer be able to re-enable any namespaces through PowerShell.
Further extensions will no longer be automatically approved. If you need additional time to migrate, contact Azure support to provide a detailed migration timeline.
To request an extension
Tip
Steps in this article may vary slightly based on the portal you start from.
Sign in to the Azure portal and create a new support request.
Fill in the new support request form as shown in the following example.
Support request field Value Issue type TechnicalSubscription Set to your subscription Service All servicesResource General question/Resource not availableProblem type ACS to SAS MigrationSubject Describe the issue 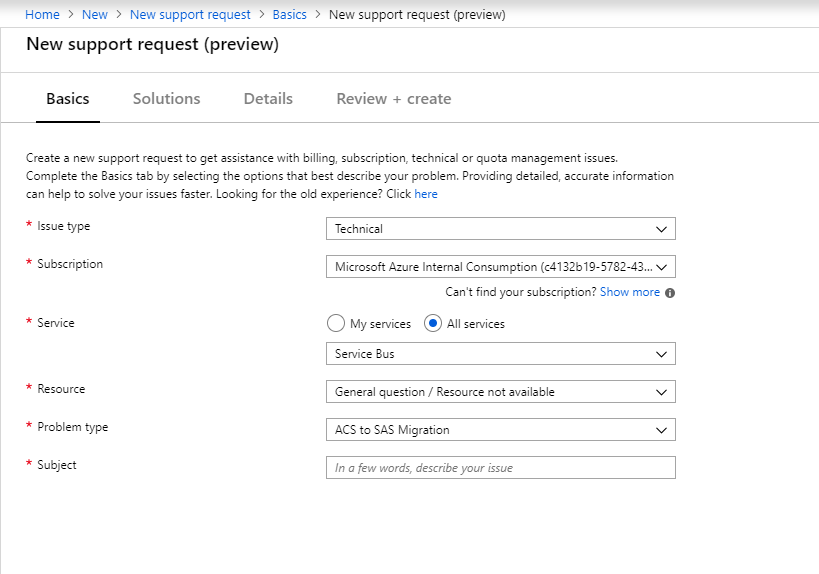
Help and support
- If you run into any issues after following this how-to, contact Azure support.
- If you have questions or feedback about ACS retirement, contact us at acsfeedback@microsoft.com.
Next steps
- Review the information about ACS retirement in How to: Migrate from the Azure Access Control Service.