Deploy a web app in a pipeline and configure App Service authentication
This article describes how to set up a pipeline in Azure Pipelines to build and deploy a web app to Azure and enable the Azure App Service built-in authentication.
You'll learn how to:
- Configure Azure resources using scripts in Azure Pipelines
- Build a web application and deploy to App Service using Azure Pipelines
- Create a Microsoft Entra app registration in Azure Pipelines
- Configure App Service built-in authentication in Azure Pipelines.
Prerequisites
- An Azure account with an active subscription. Create an account for free.
- An Azure DevOps organization. Create one for free.
- To use Microsoft-hosted agents, your Azure DevOps organization must have access to Microsoft-hosted parallel jobs. Check your parallel jobs and request a free grant.
- A Microsoft Entra tenant.
- A GitHub account and Git setup locally.
- A minimum requirement of .NET 6.0 SDK.
Create a sample ASP.NET Core web app
Create a sample app and push it to your GitHub repo.
Create and clone a repo in GitHub
Create a new repo in GitHub, specify a name like "PipelinesTest". Set it to Private and add a .gitignore file with .getignore template: VisualStudio.
Open a terminal window and change the current working directory to the location where you want the cloned directory:
cd c:\temp\
Enter the following command to clone the repo:
git clone https://github.com/YOUR-USERNAME/PipelinesTest
cd PipelinesTest
Create an ASP.NET Core web app
Open a terminal window on your machine to a working directory. Create a new ASP.NET Core web app using the dotnet new webapp command, and then change directories into the newly created app.
dotnet new webapp -n PipelinesTest --framework net7.0
cd PipelinesTest
dotnet new sln
dotnet sln add .
From the same terminal session, run the application locally using the dotnet run command.
dotnet run --urls=https://localhost:5001/To verify the web app is running, open a web browser and navigate to the app at
https://localhost:5001.
You see the template ASP.NET Core web app displayed in the page.
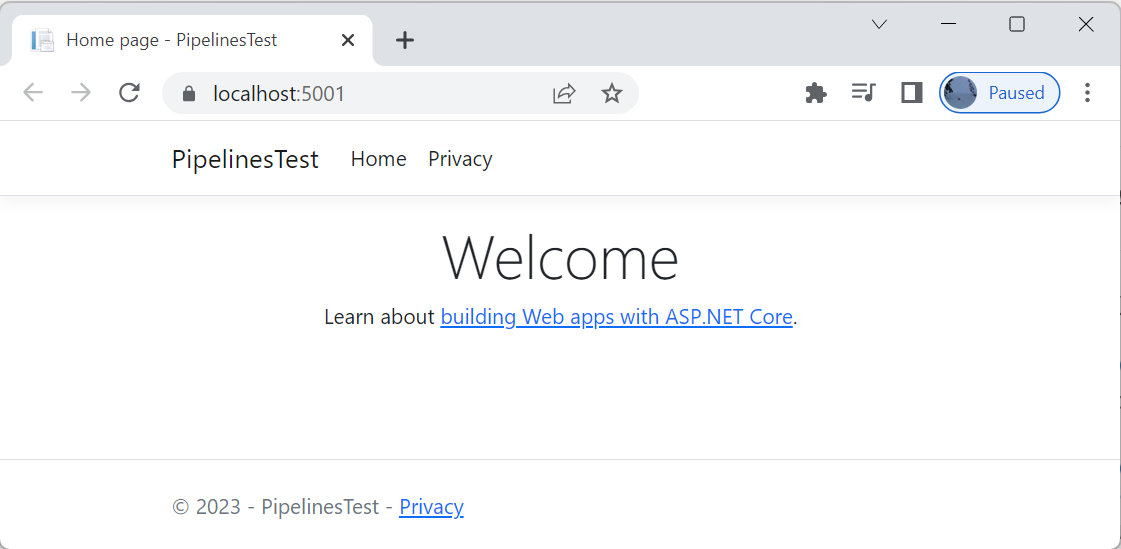
Enter CTRL-C at the command line to stop running the web app.
Push the sample to GitHub
Commit your changes and push to GitHub:
git add .
git commit -m "Initial check-in"
git push origin main
Set up your Azure DevOps environment
Sign in to your Azure DevOps organization (https://dev.azure.com/{yourorganization}).
Create a new project:
- Select New project.
- Enter a Project name, such as "PipelinesTest".
- Select Private visibility.
- Select Create.
Create a new pipeline
After the project is created, add a pipeline:
- In the left navigation pane, select Pipelines->Pipelines, and then select Create Pipeline.
- Select GitHub YAML.
- On the Connect tab, select GitHub YAML. When prompted, enter your GitHub credentials.
- When the list of repositories appears, select your
PipelinesTestrepository. - You might be redirected to GitHub to install the Azure Pipelines app. If so, select Approve & install.
- In Configure your pipeline, select the Starter pipeline.
- A new pipeline with a basic configuration appears. The default configuration uses a Microsoft-hosted agent.
- When you're ready, select Save and run. To commit your changes to GitHub and start the pipeline, choose Commit directly to the main branch and select Save and run a second time. If prompted to grant permission with a message like This pipeline needs permission to access a resource before this run can continue, choose View and follow the prompts to permit access.
Add a build stage and build tasks to your pipeline
Now that you have a working pipeline, you can add a build stage and build tasks in order to build the web app.
Update azure-pipelines.yml and replace the basic pipeline configuration with the following:
trigger:
- main

stages:
- stage: Build
  jobs:
  - job: Build

    pool:
      vmImage: 'windows-latest'

    variables:
      solution: '**/*.sln'
      buildPlatform: 'Any CPU'
      buildConfiguration: 'Release'

    steps:
    - task: NuGetToolInstaller@1

    - task: NuGetCommand@2
      inputs:
        restoreSolution: '$(solution)'

    - task: VSBuild@1
      inputs:
        solution: '$(solution)'
        msbuildArgs: '/p:DeployOnBuild=true /p:WebPublishMethod=Package /p:PackageAsSingleFile=true /p:SkipInvalidConfigurations=true /p:DesktopBuildPackageLocation="$(build.artifactStagingDirectory)\WebApp.zip" /p:DeployIisAppPath="Default Web Site"'
        platform: '$(buildPlatform)'
        configuration: '$(buildConfiguration)'

    - task: PublishBuildArtifacts@1
      inputs:
        PathtoPublish: '$(Build.ArtifactStagingDirectory)'
        ArtifactName: 'drop'
        publishLocation: 'Container'
Save your changes and run the pipeline.
A stage Build is defined to build the web app. Under the steps section, you see various tasks to build the web app and publish artifacts to the pipeline.
- NuGetToolInstaller@1 acquires NuGet and adds it to the PATH.
- NuGetCommand@2 restores NuGet packages in the solution.
- VSBuild@1 builds the solution with MSBuild and packages the app's build results (including its dependencies) as a .zip file into a folder.
- PublishBuildArtifacts@1 publishes the .zip file to Azure Pipelines.
Create a service connection
Add a service connection so your pipeline can connect and deploy resources to Azure:
- Select Project settings.
- In the left navigation pane, select Service connections and then Create service connection.
- Select Azure Resource Manager and then Next.
- Select Service principal (automatic) and then Next.
- Select Subscription for scope level and select your Azure subscription. Enter a service connection name such as "PipelinesTestServiceConnection" and select Next. The service connection name is used in the following steps.
An application is also created in your Microsoft Entra tenant that provides an identity for the pipeline. You need the display name of the app registration in later steps. To find the display name:
- Sign in to the Microsoft Entra admin center as at least an Application Developer.
- Browse to Identity > Applications > App registrations > All applications.
- Find the display name of the app registration, which is of the form
{organization}-{project}-{guid}.
Grant the service connection permission to access the pipeline:
- In the left navigation pane, select Project settings and then Service connections.
- Select the PipelinesTestServiceConnection service connection, then the Ellipsis, and then Security from the drop-down menu.
- In the Pipeline permissions section, select Add pipeline and select the PipelinesTest service connection from the list.
Add a variable group
The DeployAzureResources stage that you create in the next section uses several values to create and deploy resources to Azure:
- The Microsoft Entra tenant ID (find in the Microsoft Entra admin center).
- The region, or location, where the resources are deployed.
- A resource group name.
- The App Service service plan name.
- The name of the web app.
- The name of the service connection used to connect the pipeline to Azure. In the pipeline, this value is used for the Azure subscription.
Create a variable group and add values to use as variables in the pipeline.
Select Library in the left navigation pane and create a new Variable group. Give it the name "AzureResourcesVariableGroup".
Add the following variables and values:
| Variable name | Example value |
|---|---|
| LOCATION | centralus |
| TENANTID | {tenant-id} |
| RESOURCEGROUPNAME | pipelinetestgroup |
| SVCPLANNAME | pipelinetestplan |
| WEBAPPNAMETEST | pipelinetestwebapp |
| AZURESUBSCRIPTION | PipelinesTestServiceConnection |
Select Save.
Give the pipeline permissions to access the variable group. In the variable group page, select Pipeline permissions, add your pipeline, and then close the window.
Update azure-pipelines.yml and add the variable group to the pipeline.
variables:
- group: AzureResourcesVariableGroup

trigger:
- main

stages:
- stage: Build
  jobs:
  - job: Build

    pool:
      vmImage: 'windows-latest'
Save your changes and run the pipeline.
Deploy Azure resources
Next, add a stage to the pipeline that deploys Azure resources. The pipeline uses an inline script to create the App Service instance. In a later step, the inline script creates a Microsoft Entra app registration for App Service authentication. An Azure CLI bash script is used because Azure Resource Manager (and Azure Pipelines tasks) can't create an app registration.
The inline script runs in the context of the pipeline, assign the Application.Administrator role to the app so the script can create app registrations:
- Sign in to the Microsoft Entra admin center.
- Browse to Identity > Roles & admins > Roles & admins.
- Select Application Administrator from the list of built-in roles and then Add assignment.
- Search for the pipeline app registration by display name.
- Select the app registration from the list and select Add.
Update azure-pipelines.yml to add the inline script, which creates a resource group in Azure, creates an App Service plan, and creates an App Service instance.
variables:
- group: AzureResourcesVariableGroup

trigger:
- main

stages:
- stage: Build
  jobs:
  - job: Build

    pool:
      vmImage: 'windows-latest'

    variables:
      solution: '**/*.sln'
      buildPlatform: 'Any CPU'
      buildConfiguration: 'Release'

    steps:
    - task: NuGetToolInstaller@1

    - task: NuGetCommand@2
      inputs:
        restoreSolution: '$(solution)'

    - task: VSBuild@1
      inputs:
        solution: '$(solution)'
        msbuildArgs: '/p:DeployOnBuild=true /p:WebPublishMethod=Package /p:PackageAsSingleFile=true /p:SkipInvalidConfigurations=true /p:DesktopBuildPackageLocation="$(build.artifactStagingDirectory)\WebApp.zip" /p:DeployIisAppPath="Default Web Site"'
        platform: '$(buildPlatform)'
        configuration: '$(buildConfiguration)'

    - task: PublishBuildArtifacts@1
      inputs:
        PathtoPublish: '$(Build.ArtifactStagingDirectory)'
        ArtifactName: 'drop'
        publishLocation: 'Container'

- stage: DeployAzureResources
  displayName: 'Deploy resources to Azure'
  dependsOn: Build
  condition: |
    succeeded()
  jobs:
  - job: DeployAzureResources
    pool:
      vmImage: 'windows-latest'
    steps:
      - task: AzureCLI@2
        inputs:
          azureSubscription: $(AZURESUBSCRIPTION)
          scriptType: 'bash'
          scriptLocation: 'inlineScript'
          inlineScript: |
            # Create a resource group
            az group create --location $LOCATION --name $RESOURCEGROUPNAME
            echo "Created resource group $RESOURCEGROUPNAME"

            # Create App Service plan
            az appservice plan create -g $RESOURCEGROUPNAME -n $SVCPLANNAME --sku FREE
            echo "Created App Service plan $SVCPLANNAME"

            ### Create Test resources
            # create and configure an Azure App Service web app
            az webapp create -g $RESOURCEGROUPNAME -p $SVCPLANNAME -n $WEBAPPNAMETEST -r "dotnet:7"

        name: DeploymentScript
Save your changes and run the pipeline. In the Azure portal, navigate to Resource groups and verify that a new resource group and App Service instance are created.
Deploy the web app to App Service
Now that your pipeline is creating resources in Azure, a deployment stage to deploy the web app to App Service.
Update azure-pipelines.yml to add the deployment stage.
variables:
- group: AzureResourcesVariableGroup

trigger:
- main

stages:
- stage: Build
  jobs:
  - job: Build

    pool:
      vmImage: 'windows-latest'

    variables:
      solution: '**/*.sln'
      buildPlatform: 'Any CPU'
      buildConfiguration: 'Release'

    steps:
    - task: NuGetToolInstaller@1

    - task: NuGetCommand@2
      inputs:
        restoreSolution: '$(solution)'

    - task: VSBuild@1
      inputs:
        solution: '$(solution)'
        msbuildArgs: '/p:DeployOnBuild=true /p:WebPublishMethod=Package /p:PackageAsSingleFile=true /p:SkipInvalidConfigurations=true /p:DesktopBuildPackageLocation="$(build.artifactStagingDirectory)\WebApp.zip" /p:DeployIisAppPath="Default Web Site"'
        platform: '$(buildPlatform)'
        configuration: '$(buildConfiguration)'

    - task: PublishBuildArtifacts@1
      inputs:
        PathtoPublish: '$(Build.ArtifactStagingDirectory)'
        ArtifactName: 'drop'
        publishLocation: 'Container'

- stage: DeployAzureResources
  displayName: 'Deploy resources to Azure'
  dependsOn: Build
  condition: |
    succeeded()
  jobs:
  - job: DeployAzureResources
    pool:
      vmImage: 'windows-latest'
    steps:
      - task: AzureCLI@2
        inputs:
          azureSubscription: $(AZURESUBSCRIPTION)
          scriptType: 'bash'
          scriptLocation: 'inlineScript'
          inlineScript: |
            # Create a resource group
            az group create --location $LOCATION --name $RESOURCEGROUPNAME
            echo "Created resource group $RESOURCEGROUPNAME"

            # Create App Service plan
            az appservice plan create -g $RESOURCEGROUPNAME -n $SVCPLANNAME --sku FREE
            echo "Created App Service plan $SVCPLANNAME"

            ### Create Test resources
            # create and configure an Azure App Service web app
            az webapp create -g $RESOURCEGROUPNAME -p $SVCPLANNAME -n $WEBAPPNAMETEST -r "dotnet:7"

        name: DeploymentScript

- stage: DeployWebApp
  displayName: 'Deploy the web app'
  dependsOn: DeployAzureResources
  condition: |
    succeeded()

  jobs:
  - job: DeployWebApp
    displayName: 'Deploy Web App'
    pool:
      vmImage: 'windows-latest'

    steps:

    - task: DownloadBuildArtifacts@0
      inputs:
        buildType: 'current'
        downloadType: 'single'
        artifactName: 'drop'
        downloadPath: '$(System.DefaultWorkingDirectory)'
    - task: AzureRmWebAppDeployment@4
      inputs:
        ConnectionType: 'AzureRM'
        azureSubscription: $(AZURESUBSCRIPTION)
        appType: 'webApp'
        WebAppName: '$(WEBAPPNAMETEST)'
        packageForLinux: '$(System.DefaultWorkingDirectory)/**/*.zip'
Save your changes and run the pipeline.
A DeployWebApp stage is defined with several tasks:
- DownloadBuildArtifacts@1 downloads the build artifacts that were published to the pipeline in a previous stage.
- AzureRmWebAppDeployment@4 deploys the web app to App Service.
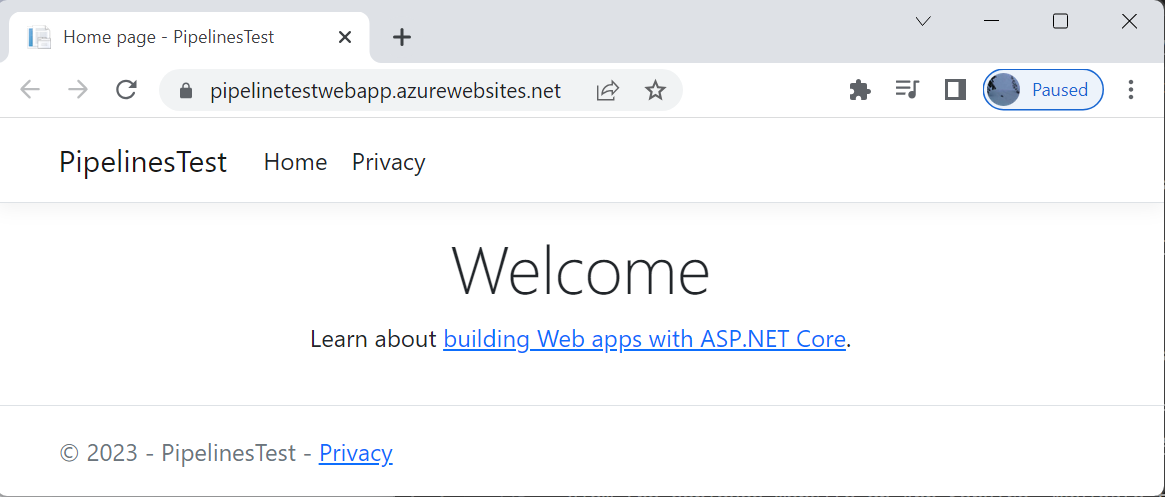
View the deployed website on App Service. Navigate to your App Service and select the instance's Default domain: https://pipelinetestwebapp.azurewebsites.net.

The pipelinetestwebapp has been successfully deployed to App Service.
Configure App Service authentication
Now that the pipeline is deploying the web app to App Service, you can configure the App Service built-in authentication. Modify the inline script in the DeployAzureResources to:
- Create a Microsoft Entra app registration as an identity for your web app. To create an app registration, the service principal for running the pipeline needs Application Administrator role in the directory.
- Get a secret from the app.
- Configure the secret setting for the App Service web app.
- Configure the redirect URI, home page URI, and issuer settings for the App Service web app.
- Configure other settings on the web app.
variables:
- group: AzureResourcesVariableGroup

trigger:
- main

stages:
- stage: Build
  jobs:
  - job: Build

    pool:
      vmImage: 'windows-latest'

    variables:
      solution: '**/*.sln'
      buildPlatform: 'Any CPU'
      buildConfiguration: 'Release'

    steps:
    - task: NuGetToolInstaller@1

    - task: NuGetCommand@2
      inputs:
        restoreSolution: '$(solution)'

    - task: VSBuild@1
      inputs:
        solution: '$(solution)'
        msbuildArgs: '/p:DeployOnBuild=true /p:WebPublishMethod=Package /p:PackageAsSingleFile=true /p:SkipInvalidConfigurations=true /p:DesktopBuildPackageLocation="$(build.artifactStagingDirectory)\WebApp.zip" /p:DeployIisAppPath="Default Web Site"'
        platform: '$(buildPlatform)'
        configuration: '$(buildConfiguration)'

    - task: PublishBuildArtifacts@1
      inputs:
        PathtoPublish: '$(Build.ArtifactStagingDirectory)'
        ArtifactName: 'drop'
        publishLocation: 'Container'

- stage: DeployAzureResources
  displayName: 'Deploy resources to Azure'
  dependsOn: Build
  condition: |
    succeeded()
  jobs:
  - job: DeployAzureResources
    pool:
      vmImage: 'windows-latest'
    steps:
      - task: AzureCLI@2
        inputs:
          azureSubscription: $(AZURESUBSCRIPTION)
          scriptType: 'bash'
          scriptLocation: 'inlineScript'
          inlineScript: |
            # Create a resource group
            az group create --location $LOCATION --name $RESOURCEGROUPNAME
            echo "Created resource group $RESOURCEGROUPNAME"

            # Create App Service plan
            az appservice plan create -g $RESOURCEGROUPNAME -n $SVCPLANNAME --sku FREE
            echo "Created App Service plan $SVCPLANNAME"

            ### Create Test resources
            # create and configure an Azure App Service web app
            az webapp create -g $RESOURCEGROUPNAME -p $SVCPLANNAME -n $WEBAPPNAMETEST -r "dotnet:7"

            redirectUriTest="https://$WEBAPPNAMETEST.azurewebsites.net/.auth/login/aad/callback"
            homePageUrlTest="https://$WEBAPPNAMETEST.azurewebsites.net"
            issuerTest="https://sts.windows.net/$TENANTID"

            # Required resource access.  Access Microsoft Graph with delegated User.Read permissions.
            cat > manifest.json << EOF
            [
                {
                    "resourceAppId": "00000003-0000-0000-c000-000000000000",
                    "resourceAccess": [
                        {
                            "id": "e1fe6dd8-ba31-4d61-89e7-88639da4683d",
                            "type": "Scope"
                        }
                    ]
                }
            ]
            EOF

            # Create app registration for App Service authentication
            appIdTest=$(az ad app create --display-name $WEBAPPNAMETEST --sign-in-audience AzureADMyOrg --enable-id-token-issuance true --query appId --output tsv)
            echo "Created app registration $appIdTest"

            # Set identifier URI, homepage, redirect URI, and resource access
            az ad app update --id $appIdTest --identifier-uris api://$appIdTest --web-redirect-uris $redirectUriTest  --web-home-page-url $homePageUrlTest --required-resource-accesses @manifest.json
            echo "Updated app $appIdTest"

            # Get secret from the app for App Service authentication
            secretTest=$(az ad app credential reset --id $appIdTest --query password --output tsv)
            echo "Added secret to app $appIdTest"

            az config set extension.use_dynamic_install=yes_without_prompt
            az extension add --name authV2

            az webapp config appsettings set --name $WEBAPPNAMETEST --resource-group $RESOURCEGROUPNAME --slot-settings MICROSOFT_PROVIDER_AUTHENTICATION_SECRET=$secretTest
            echo "Updated settings for web app $WEBAPPNAMETEST"

            az webapp auth microsoft update --name $WEBAPPNAMETEST --resource-group $RESOURCEGROUPNAME --client-id $appIdTest --secret-setting MICROSOFT_PROVIDER_AUTHENTICATION_SECRET --allowed-audiences $redirectUriTest  --issuer $issuerTest
            echo "Updated authentication settings for $WEBAPPNAMETEST"

        name: DeploymentScript

- stage: DeployWebApp
  displayName: 'Deploy the web app'
  dependsOn: DeployAzureResources
  condition: |
    succeeded()

  jobs:
  - job: DeployWebApp
    displayName: 'Depoy Web App'
    pool:
      vmImage: 'windows-latest'

    steps:

    - task: DownloadBuildArtifacts@0
      inputs:
        buildType: 'current'
        downloadType: 'single'
        artifactName: 'drop'
        downloadPath: '$(System.DefaultWorkingDirectory)'
    - task: AzureRmWebAppDeployment@4
      inputs:
        ConnectionType: 'AzureRM'
        azureSubscription: $(AZURESUBSCRIPTION)
        appType: 'webApp'
        WebAppName: '$(WEBAPPNAMETEST)'
        packageForLinux: '$(System.DefaultWorkingDirectory)/**/*.zip'
Save your changes and run the pipeline.
Verify limited access to the web app
To verify that access to your app is limited to users in your organization, navigate to your App Service and select the instance's Default domain: https://pipelinetestwebapp.azurewebsites.net.
You should be directed to a secured sign-in page, verifying that unauthenticated users aren't allowed access to the site. Sign in as a user in your organization to gain access to the site.
You can also start up a new browser and try to sign in by using a personal account to verify that users outside the organization don't have access.
Clean up resources
Clean up your Azure resources and Azure DevOps environment so you're not charged for resources after you're done.
Delete the resource group
Select Resource groups from the menu and select the resource group that contains your deployed web app.
Select Delete resource group to delete the resource group and all the resources.
Disable the pipeline or delete the Azure DevOps project
You created a project that points to a GitHub repository. The pipeline is triggered to run every time you push a change to your GitHub repository, consuming free build minutes or your resources.
Option 1: Disable your pipeline
Choose this option if you want to keep your project and your build pipeline for future reference. You can re-enable your pipeline later if you need to.
- In your Azure DevOps project, select Pipelines and then select your pipeline.
- Select the ellipsis button at the far right, and then select Settings.
- Select Disabled, and then select Save. Your pipeline will no longer process new run requests.
Option 2: Delete your project
Choose this option if you don't need your DevOps project for future reference. This deletes your Azure DevOps project.
- Navigate to your Azure DevOps project.
- Select Project settings in the lower-left corner.
- Under Overview, scroll down to the bottom of the page and then select Delete.
- Type your project name in the text box, and then select Delete.
Delete app registrations in Microsoft Entra ID
In the Microsoft Entra admin center, select Identity > Applications > App registrations > All applications.
Select the application for the pipeline, the display name has the form {organization}-{project}-{guid}, and delete it.
Select the application for the web app, pipelinetestwebapp, and delete it.
Next steps
Learn more about:
Feedback
Coming soon: Throughout 2024 we will be phasing out GitHub Issues as the feedback mechanism for content and replacing it with a new feedback system. For more information see: https://aka.ms/ContentUserFeedback.
Submit and view feedback for