Add user attributes to token claims
User attributes are values collected from the user during self-service sign-up. In addition to built-in user attributes, you can create custom attributes when you need to collect additional information. Because your application might rely on certain user attributes to function as designed, you can add any of these attributes to the token that is sent from Microsoft Entra ID to your application.
You can specify which built-in or custom attributes you want to include as claims in the token that Microsoft Entra ID sends to your application.
Tip

To try out this feature, go to the Woodgrove Groceries demo and start the “Add claims to security tokens from a REST API” use case.
Prerequisites
- Register the application with Microsoft Entra ID.
- Create a sign-up and sign-in user flow and selected the attributes you want to collect during sign-up.
- Create the custom attributes you want to include.
Add built-in or custom attributes to the token
Sign in to the Microsoft Entra admin center.
Browse to Identity > Applications > App registrations.
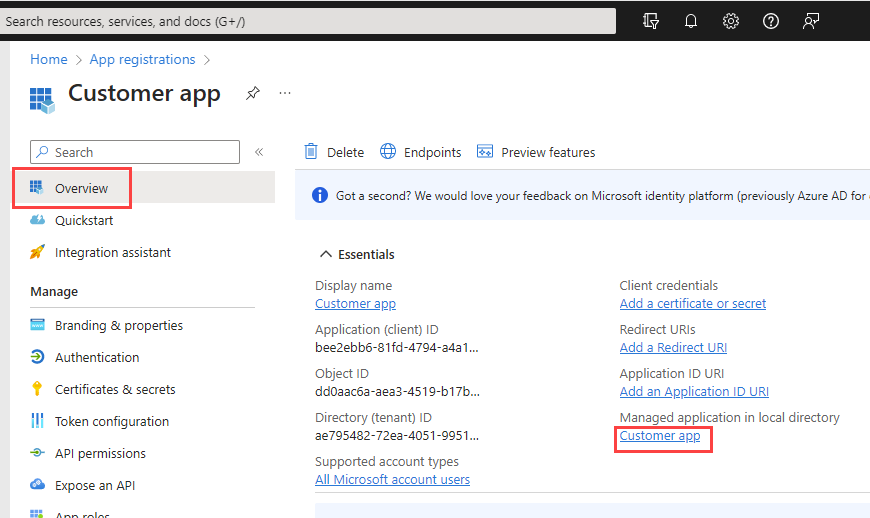
Select your application in the list to open the application's Overview page.

In the Essentials section, under Managed application in local directory, select the link showing the name of your application.
Under Manage, select Single Sign-on.
In the Attributes & Claims section, select the Edit icon.

To add a built-in attribute to the token as a claim
On the Attributes & Claims page, select Add new claim.
Enter a Name.
Next to Source, select Attribute. Then use the drop down list to select the built-in attribute.
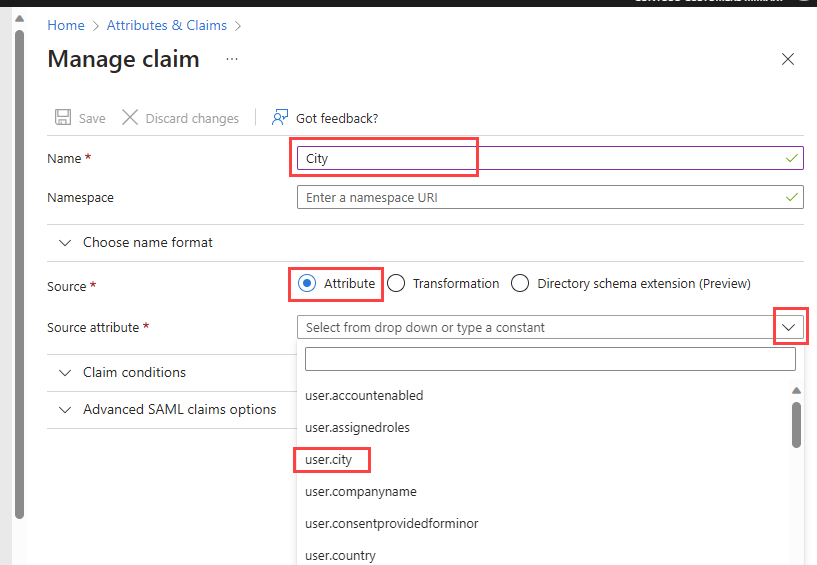
Select Save. Repeat for all built-in attributes you want to add.
To add a custom attribute to the token as a claim
On the Attributes & Claims page, select Add new claim.
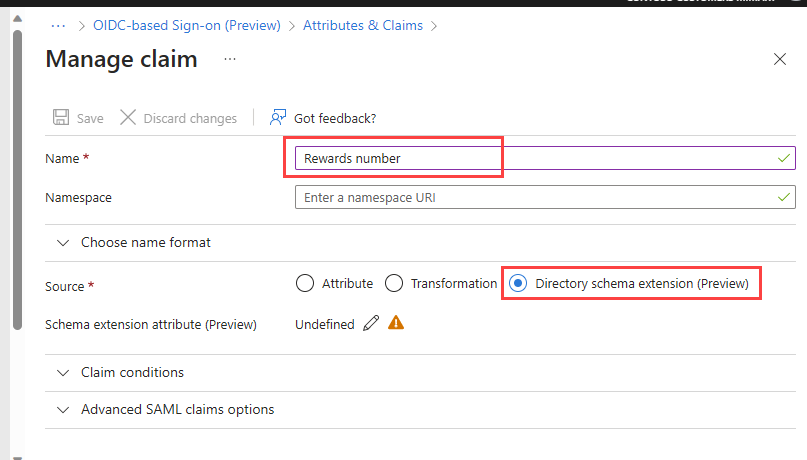
Enter a Name.
Next to Source, select Directory schema extension.
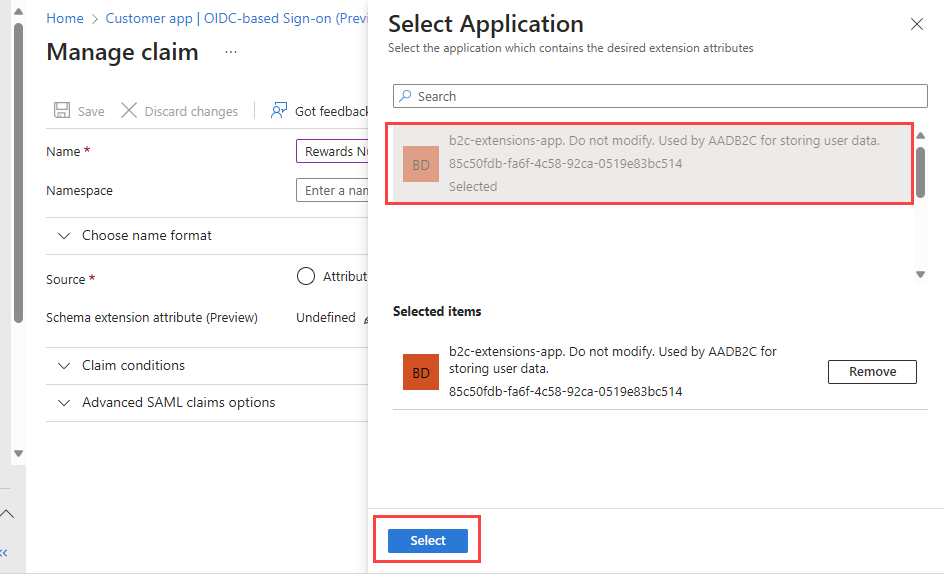
In the Select Application pane, select b2c-extensions-app (the app that contains all extension attributes for your external tenant), and then choose Select.
In the Add Extension Attributes pane, find the custom attribute you want to add as a claim to the token, and then select it.
Select Add.
Select Save. Repeat for each custom attribute you want to add.
Update the application manifest to accept mapped claims
- Sign in to the Microsoft Entra admin center.
- Browse to Identity > Applications > App registrations.
- Select your application in the list to open the application's Overview page.
- In the left menu, under Manage, select Manifest to open the application manifest.
- Find the acceptMappedClaims key and set its value to true.
- Find the allowPublicClient key and set its value to true.
- Select Save.
See also
Feedback
Coming soon: Throughout 2024 we will be phasing out GitHub Issues as the feedback mechanism for content and replacing it with a new feedback system. For more information see: https://aka.ms/ContentUserFeedback.
Submit and view feedback for