Note
Access to this page requires authorization. You can try signing in or changing directories.
Access to this page requires authorization. You can try changing directories.
When setting up an access package policy, admins can specify whether it’s for users in the directory, connected organizations, or any external user. Entitlement Management determines if the person requesting the access package is within the scope of the policy.
Sometimes you might want users to present extra identity proofs during the request process such as a training certification, work authorization, or citizenship status. As an access package manager, you can require that requestors present a verified ID containing those credentials from a trusted issuer. Approvers can then quickly view if a user’s verifiable credentials were validated at the time that the user presented their credentials and submitted the access package request.
As an access package manager, you can include verified ID requirements for an access package at any time by editing an existing policy or adding a new policy for requesting access.
This article describes how to configure the verified ID requirement settings for an access package.
Prerequisites
Before you begin, you must set up your tenant to use the Microsoft Entra Verified ID service. You can find detailed instructions on how to do that here: Configure your tenant for Microsoft Entra Verified ID.
License requirements
Using this feature requires Microsoft Entra ID Governance or Microsoft Entra Suite licenses. To find the right license for your requirements, see Microsoft Entra ID Governance licensing fundamentals.
Create an access package with verified ID requirements
To add a verified ID requirement to an access package, you must start from the access package’s requests tab. Follow these steps to add a verified ID requirement to a new access package.
Prerequisite role: Global Administrator
Note
Identity Governance Administrator, User Administrator, Catalog owner, or Access package manager will be able to add verified ID requirements to access packages soon.
Sign in to the Microsoft Entra admin center as a Global Administrator.
Browse to ID Governance > Entitlement management > Access package.
On the Access packages page, select + New access package.
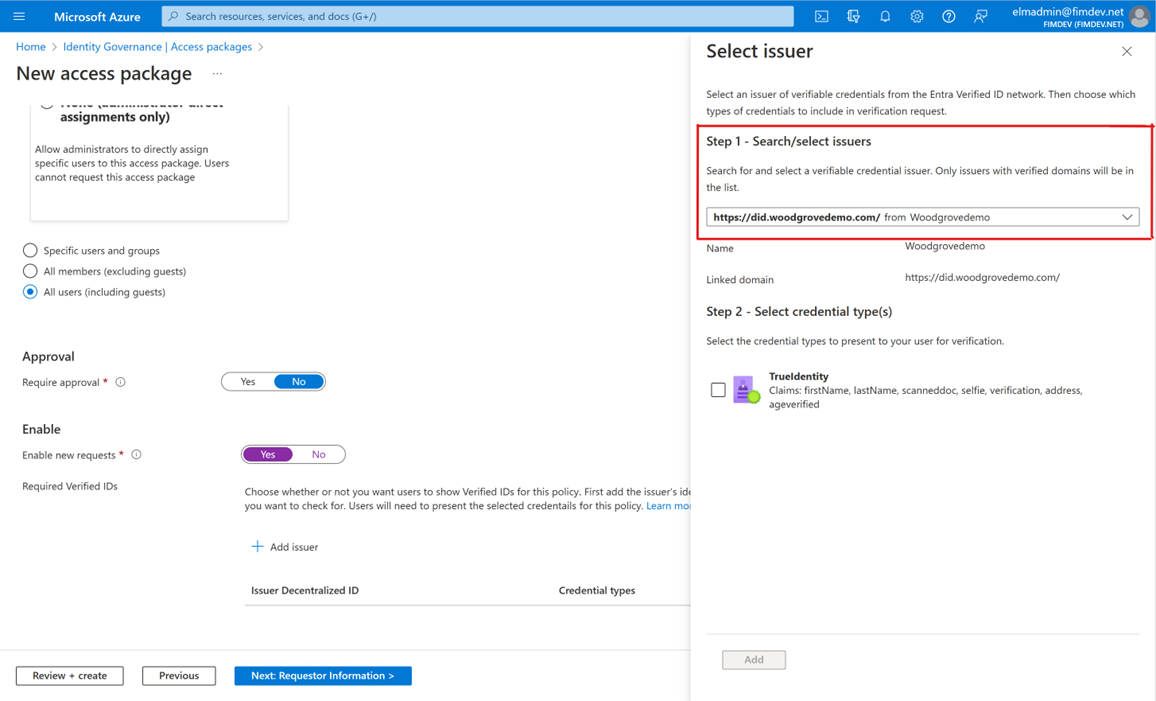
On the Requests tab, scroll to the Required Verified Ids section.
Select + Add issuer and choose an issuer from the Microsoft Entra Verified ID network. If you want to issue your own credentials to users, see: Issue Microsoft Entra Verified ID credentials from an application.
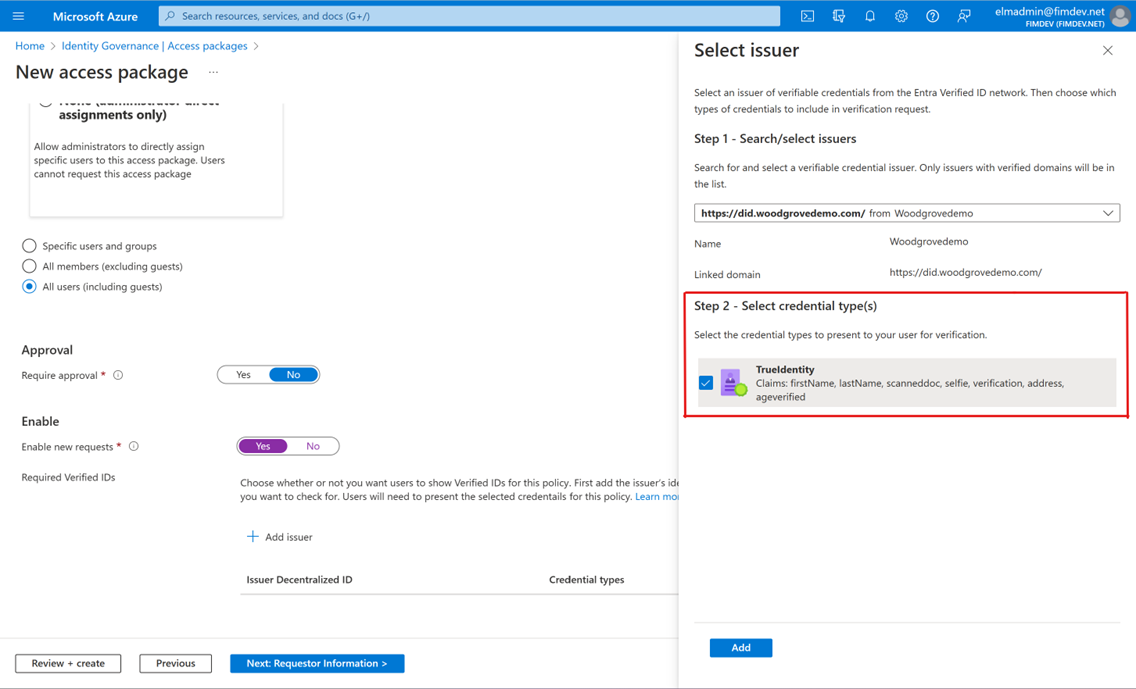
Select the credential type(s) you want users to present during the request process.
Note
If you select multiple credential types from one issuer, users will be required to present credentials of all selected types. Similarly, if you include multiple issuers, users will be required to present credentials from each of the issuers you include in the policy. To give users the option of presenting different credentials from various issuers, configure separate policies for each issuer/credential type you’ll accept.
Select Add to add the verified ID requirement to the access package policy.
If you want users to complete a Face Check, select Require Face Check. This will ask users requesting the access package to perform a real-time, privacy compliant selfie check against the photo that is stored on their Verified ID. Once you select the checkbox, it will ask you to select the claim name that maps to the photo on the ID. For more information on Face Check, see Use Face Check with Microsoft Entra Verified ID.
If you want users to complete a Face Check, select Require Face Check. This will ask users requesting the access package to perform a real-time, privacy compliant selfie check against the photo that is stored on their Verified ID. Once you select the checkbox, it will ask you to select the claim name that maps to the photo on the ID. For more information on Face Check, see Use Face Check with Microsoft Entra Verified ID.

Once you finish configuring the rest of the settings, you can review your selections on the Review + create tab. You can see all verified ID requirements for this access package policy in the Verified IDs section.

Request an access package with verified ID requirements
Once an access package is configured with a verified ID requirement, end-users who are within the scope of the policy are able to request access using the My Access portal. Similarly, approvers are able to see the claims of the VCs presented by requestors when reviewing requests for approval.
The requestor steps are as follows:
Go to
myaccess.microsoft.comand sign in.Search for the access package you want to request access to (you can browse the listed packages or use the search bar at the top of the page) and select Request.
If the access package requires you to present a verified ID, you should see a grey information banner as shown here:
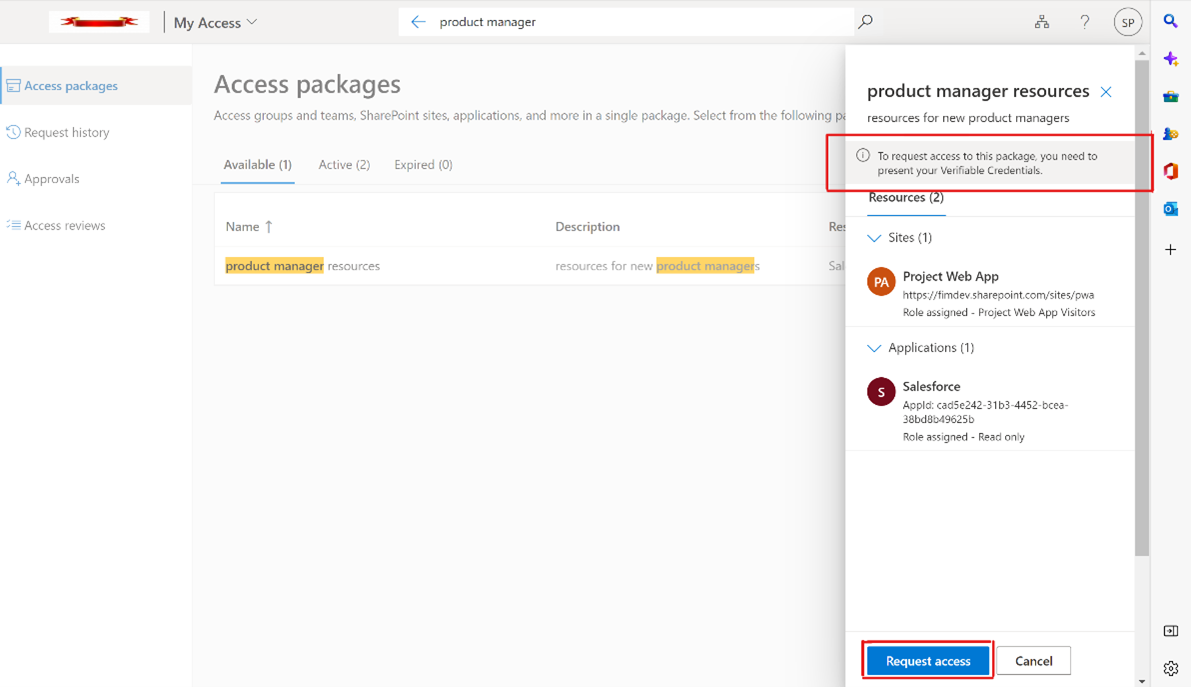
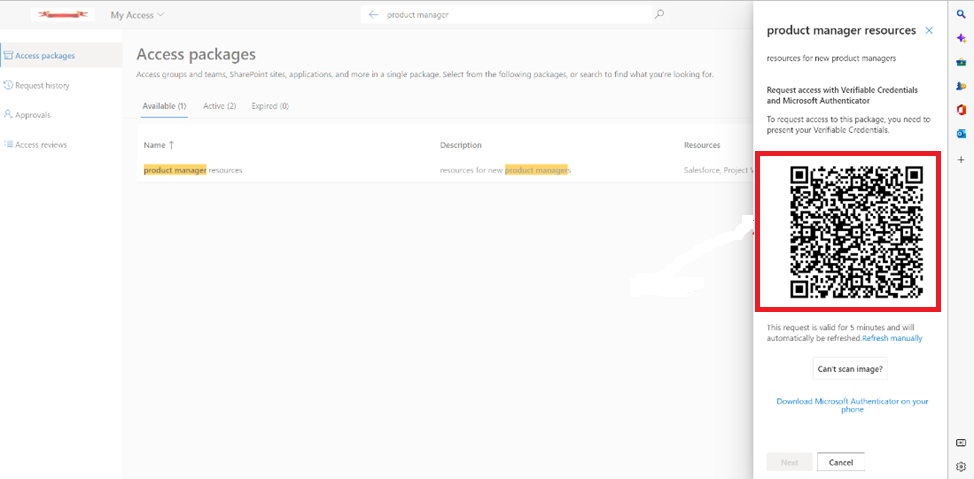
Select Request Access. You should now see a QR code. Use your phone to scan the QR code. This launches Microsoft Authenticator, where you're prompted to share your credentials.
If Face Check is required for the access package, the requesting user will need to perform a real-time selfie check against the photo stored on their Verified ID. Face Check protects user privacy by sharing only the match results and not any sensitive identity data.
After you share your credentials, My Access will automatically take you to the next step of the request process.